How to reduce photo file size mac—how to reduce photo file size mac tips
Knowing how to reduce photo file size on a Mac is pretty straightforward. You've got built-in tools like Preview and Photos right at your fingertips, plus more advanced options like Automator and dedicated apps if you need more power. The trick is simply to export or save your images with tweaked quality settings or dimensions, shrinking them down without any obvious drop in clarity. This one move can free up gigabytes of disk space and give your Mac a noticeable speed boost.
Why Smaller Photo Files on Your Mac Are a Big Deal
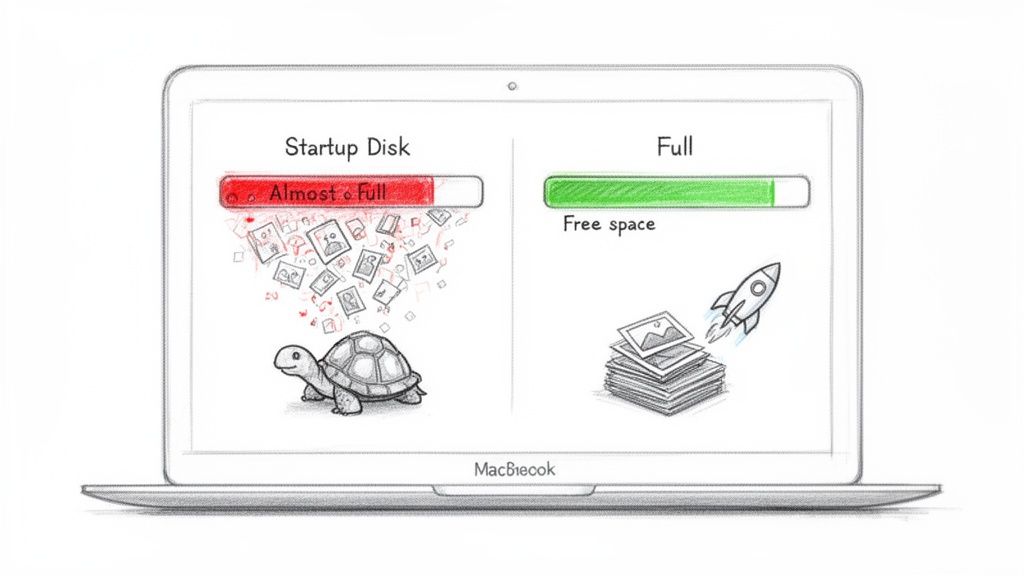
Have you ever been hit with that dreaded "Your startup disk is almost full" warning? It’s a classic Mac problem. For photographers, designers, or really anyone with an ever-expanding iPhone photo library, those massive image files are usually the main culprit. A single photoshoot can easily gobble up 50 GB or more, slowing your Mac to a frustrating crawl and killing your creative momentum.
But the perks of shrinking those files go way beyond just getting storage space back.
Smaller images mean faster uploads, quicker deliveries to clients, and a much snappier website. Think about sending a client gallery in minutes instead of an hour, or having your online portfolio load instantly for visitors. This isn't just about convenience; it’s about looking professional and working efficiently. If you want to go deeper on this, especially for websites, you can find great info on the importance of image compression for SEO and speed.
The Real-World Impact of Compression
There's an old myth that smaller files automatically mean blurry, useless pictures. That’s just not true anymore. Modern compression tools are incredibly smart, capable of massive reductions in file size while keeping the visual quality looking fantastic. The difference is often impossible to spot with the naked eye, but your hard drive will definitely feel it.
Plenty of creative pros fight this storage battle daily. Apple's Photos app is notorious for syncing high-res files that can easily bloat a library to 260 GB or more. But by strategically compressing your JPEGs, you can slash their sizes by up to 80% without even changing the dimensions. That bulky 50 GB library? It could become a much more manageable 10 GB archive.
This isn't just about a one-time digital spring cleaning. It’s about building a faster, more efficient workflow that saves you time, money on cloud storage, and the headache of a sluggish computer.
By learning a few tricks to reduce photo file sizes, you’re not just solving a storage problem—you’re setting yourself up for a more organized and productive digital life. This guide will walk you through the best methods on your Mac, from simple built-in options to powerful, automated workflows.
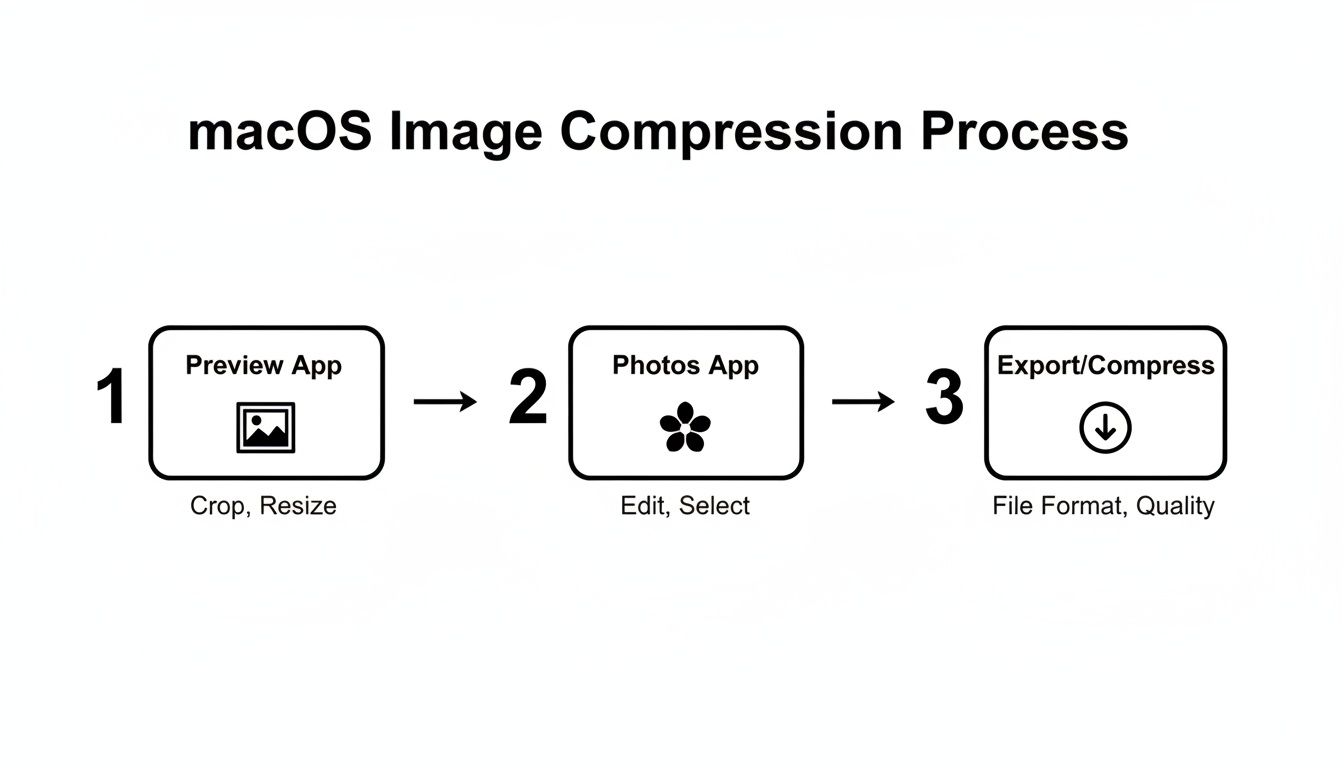
Choosing Your Mac Image Compression Method
Not sure where to start? This table gives a quick look at the different methods in this guide to help you pick the right one for your specific needs.
| Method | Best For | Ease of Use | Batch Processing |
|---|---|---|---|
| Preview | Quick, single-image adjustments and format changes. | Very Easy | No |
| Photos App | Exporting a few images from your library at a smaller size. | Very Easy | Yes (for export) |
| Automator | Creating repeatable, custom workflows for batches of images. | Moderate | Yes |
| Shortcuts | Quick Actions for compressing files right from the Finder. | Easy | Yes |
| Third-Party Apps | High-volume compression, advanced features, and best results. | Easy to Moderate | Yes |
Each tool has its place, from a quick one-off edit in Preview to a fully automated system for your entire photo library. We'll dive into how to use each one next.
Quick Wins with macOS Built-in Tools
You don't always need to download special software to make a real difference. Your Mac comes loaded with powerful, free tools that are perfect for quick, one-off compressions, making it easy to learn how to reduce photo file size on a Mac without spending a dime.
These built-in utilities are often the fastest and simplest way to shrink just a few images.
Using Preview to Adjust Image Size
Let's start with the most obvious but overlooked tool for the job: Preview. It's far more than just a simple image viewer; it's a surprisingly capable editor that can quickly shrink your photos. Once you pop an image open in Preview, you get access to a few key controls that can dramatically cut down its file size.
The main feature you’ll want is "Adjust Size," found under the Tools menu. This little dialog box gives you direct control over the image's dimensions (width and height) and its resolution. For example, a photo snapped with a new iPhone can easily be over 4000 pixels wide—that’s way more than you need for an email or blog post.
Simply reducing the dimensions to something more sensible, like 1920 pixels for a full-screen web image or 1200 pixels for a standard blog graphic, will slash the file size instantly. The "Resulting Size" estimate at the bottom of the window is your best friend here, showing you the impact of your changes in real-time.
Pro Tip: Whatever you do, make sure the "Scale proportionally" box is checked. This locks the original aspect ratio, preventing your photo from looking weirdly stretched or squashed. Unchecking it is a recipe for distorted, unprofessional results.
You can also drop the Resolution from the print-standard 300 pixels/inch to a much more web-friendly 72 pixels/inch. This simple change tells the file it needs less data per inch, further trimming its size without any noticeable quality loss on a screen.
Leveraging the Photos App Export Options
If you keep your pictures organized in the Photos app, you're sitting on another powerful compression tool. The trick is to use the export function rather than just dragging photos from the library to your desktop. Exporting gives you fine-tuned control over the final output.
When you go to export images (File > Export > Export [Number] Photos...), a window pops up with several crucial settings. This is your command center for making significant reductions in file size.
Here are the key settings to zero in on:
- Photo Kind: Stick with JPEG. For photos, it hits the sweet spot between quality and file size.
- JPEG Quality: This is your most powerful lever. High is great for most uses, but switching to Medium can often cut file sizes by 50% or more with very little visible difference.
- Size: Just like in Preview, you can export at a smaller dimension. The "Custom" option gives you pixel-perfect control.
It's easy to let a Photos library get out of hand. Some users report that a fresh sync of 70 GB of iPhone photos can fill up a drive practically overnight. And it's not always the photos themselves; things like TIFF previews, which can be 30 MB each, are huge space hogs. This is why compressing images before archiving them is so critical.
By getting comfortable with these native macOS tools, you can manage your image files quickly and effectively. Whether it's a quick resize in Preview or a smart export from Photos, you have everything you need to reclaim disk space and speed up your day—without installing a single new app.
Automating Compression for Large Photo Batches
Compressing photos one by one is a soul-crushing task. If you're dealing with hundreds of images from a photoshoot or a big project, you need a smarter, faster way to work. This is where your Mac’s own automation tools, Automator and Shortcuts, can be a game-changer.
You can actually build a custom 'Quick Action' that lives right in your right-click menu. Imagine this: you select a folder packed with high-res images, right-click, and compress them all in one go. This isn't just a trick for developers; anyone can create this kind of time-saving workflow.
Building Your First Automation Workflow
The trick is to create a process that takes your original files, makes copies, and then resizes or recompresses those copies, leaving your precious originals untouched. In Automator, you do this by simply dragging and dropping actions into a sequence. The two main actions you'll rely on are Scale Images and Change Type of Images.
This core process is fundamental for managing large batches of photos on a Mac, whether you’re using built-in apps or more advanced automation.
As you can see, your Mac offers several straightforward paths for compression, from quick manual tweaks in Preview to more structured exports from the Photos app.
First up, you'll want an action that copies your selected files to a new spot, maybe a desktop folder called "Compressed." This is your safety net, ensuring your original high-quality photos are never at risk. Next, you'll add the Scale Images action. Here, you can set a new dimension—a common move is setting the width to 1920 pixels for web-ready images, which is a classic way to reduce photo file size on a Mac.
The most important step is to make sure your workflow creates copies. When you add the 'Scale Images' action, Automator will helpfully ask if you want to add a 'Copy Finder Items' step first. Always say yes. This prevents you from accidentally overwriting your originals.
After resizing, the Change Type of Images action lets you switch the files to a more efficient format. You can convert everything to JPEG and play with the quality slider to find that sweet spot between file size and visual clarity. Once you save this sequence as a Quick Action, it’s ready to use anywhere in your system.
Advanced Automation and Folder Monitoring
While a Quick Action is a huge leap in efficiency, you can push automation even further. For a completely hands-off approach, you can set up a system that automatically compresses any image you drop into a specific folder. This is perfect for recurring workflows, like prepping images for a weekly blog post.
To pull this off, you can dive into more advanced setups or look at dedicated tools. If you’re intrigued by this "set-it-and-forget-it" idea, you can learn more about a Mac app to monitor a folder for automatic compression, which handles the whole process for you.
This kind of setup is the pinnacle of efficiency. It lets your Mac handle the grunt work in the background, freeing you up to focus on the more creative parts of your job. By automating these repetitive tasks, you reclaim hours of your time and ensure every image is processed consistently.
Using Dedicated Apps for Unmatched Speed and Control
While the built-in macOS tools are handy for a one-off image resize, they really start to show their limits when you're working with photos in bulk. If you’re a professional, a content creator, or just anyone who values their time, the real magic happens inside dedicated compression apps.
These tools are built for one job and one job only: to shrink your photo file sizes as fast as possible without wrecking the quality. It's the difference between resizing photos one by one and processing an entire photoshoot with a single drag-and-drop. You're not just saving megabytes; you're reclaiming hours.
Why a Dedicated App Is a Workflow Upgrade
The biggest win with a specialized tool is its laser focus on batch processing. Instead of the tedious open-adjust-save-close routine for every single image, you can line up hundreds of photos and let the app do all the heavy lifting. This is a massive leap from what Preview or the Photos app can handle on their own.
On top of that, these apps pack features designed for real-world use that you just won't find in the standard macOS toolkit.
- Presets and Consistency: You can create and save your own compression settings for different jobs. Maybe you need one preset for web-ready blog images, another for sending client previews, and a third for archival. This guarantees every single image is processed with the exact same specs, keeping your projects consistent.
- Offline Privacy: Your photos are your business. Many dedicated apps, including Compresto, do all their work locally on your Mac. Nothing ever gets uploaded to a server, giving you total privacy and security.
- Performance Optimization: These tools are often fine-tuned to squeeze every drop of performance out of modern hardware.
This is where Apple Silicon really shines. A tool like Compresto, built specifically for the M1, M2, and M3 chips, makes batch compression feel almost instant. Benchmarks show these native apps can be up to 3x faster than older software, letting you chew through a huge queue of files without draining your battery. To see how this changes the game, check out our deep dive on the best image compression software for Mac.
A Look at a Modern Compression Workflow
Working inside a dedicated app is refreshingly simple. Most are designed around a clean drag-and-drop area, cutting out all the clutter and unnecessary steps.
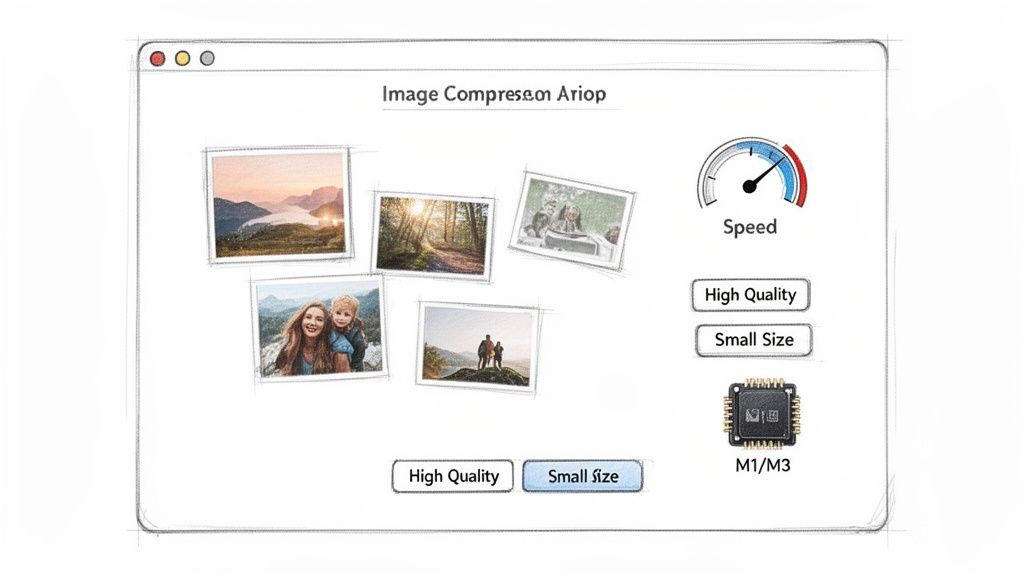
The image above shows a perfect example of this—a clean, intuitive interface where you can add files, pick a compression level, and immediately see the results. The entire design is built for speed, letting you get your work done in a few clicks.
You just drag a folder of images onto the app, pick a preset like "Web Optimized JPEG," and hit the compress button. The app then churns through the queue, often giving you a live report on how much space you've saved. That immediate feedback is not only satisfying but also helps you dial in your settings for the next batch.
A dedicated app isn't just another utility; it's a fundamental upgrade to your creative process. It transforms a tedious, time-consuming task into a fast, automated, and reliable part of your workflow, freeing you to focus on what actually matters—your creative work.
Smart Habits for a Leaner Photo Library
Compression is a great way to deal with a bloated photo library, but the best long-term strategy is prevention. Building smarter habits for managing your photos will keep your Mac’s storage lean and responsive, making sure you always have room for your next big project. This isn't about one-time fixes; it's about creating a sustainable workflow.
It all starts with choosing the right file format from the get-go. Not all formats are created equal, and your choice has a massive impact on file size.
- JPEG: This is the universal standard for photos for a reason. It offers excellent compression with minimal quality loss, making it perfect for most everyday uses.
- PNG: Best suited for graphics, logos, or any image that needs a transparent background. Its lossless compression keeps lines sharp but results in much larger files for photos.
- HEIC: Apple’s high-efficiency format is a game-changer for archiving. It can store images at roughly half the size of a JPEG with comparable quality.
Establish a Regular Cleanup Routine
Just like any other digital space, your photo library needs regular tidying. Set aside a little time each month to review and purge your collection before the clutter gets out of hand.
Look for the obvious candidates for deletion: duplicates, blurry shots, or those series of near-identical bursts where you really only need to keep the best one.
Part of this routine also involves managing the data embedded in your images. If you want to dive deeper, this is a great resource for understanding photo metadata on your Mac. Over time, a consistent cleanup schedule becomes a quick and surprisingly satisfying task.
Think of it as digital gardening. By regularly weeding out the unnecessary files, you give your best photos the space they need to shine and keep your system healthy and fast. A little maintenance goes a long way.
Use Cloud Storage Intelligently
If you use iCloud Photos, one of the most effective habits you can build is enabling Optimize Mac Storage. This feature is an absolute lifesaver for anyone with a large library and limited local drive space. It cleverly stores your full-resolution originals in the cloud while keeping smaller, lightweight versions on your Mac.
This approach gives you the best of both worlds—instant access to your entire library without sacrificing precious gigabytes. For professionals, this directly impacts the bottom line. For instance, in markets like the US and Europe where iCloud storage averages $0.02/GB monthly, smart compression can lead to annual savings of over $100 per user just by shrinking a library’s footprint. You can explore more about the financial benefits on compresto.app.
Common Questions About Photo Compression on Mac
Even with the right tools in hand, diving into photo compression can bring up a few nagging questions. It's totally normal. Let's clear up some of the most common concerns so you can move forward with confidence and keep your precious memories safe.
The biggest fear is always about quality. Will shrinking a photo's file size ruin it? The short answer is no—not if you do it right. The trick is to understand the difference between lossy and lossless compression.
-
Lossless compression is like a perfect zip file for your image. It shrinks the file by cleverly reorganizing the data without throwing any of it away. When you open it back up, every single pixel is exactly as it was.
-
Lossy compression, which is what formats like JPEG use, is a bit smarter. It selectively removes tiny bits of data that your eyes are very unlikely to notice. Modern algorithms are so good at this that you can slash a file size by 70-80% without seeing any obvious difference.
Choosing the Right Format
Another sticking point is often which file format to use. While there are a ton of options out there, a few stand out for specific jobs. HEIC, for instance, is fantastic for personal storage on Apple devices because it's incredibly efficient.
But when you're working with the web, JPEG is still king for photographs. Why? Universal compatibility and great compression. For graphics with sharp lines or transparency (like logos), PNG is your best bet. A newer format, WebP, offers even better compression than JPEG but isn't quite supported everywhere just yet.
My number one rule: always work on copies. Never, ever compress your original, high-resolution photos directly. Duplicate the images first, then apply your size reductions to the copies. This leaves your master files untouched in case you ever need them again.
Can You Compress Photos Inside the Photos App?
Finally, people often ask if they can compress images directly within their Apple Photos library. The answer is a hard no—you can't alter the original files stored in the library itself, and that's a good thing for safety.
The correct way to do it is to select the photos you need, use the File > Export function, and then apply your compression settings as you create the new files. This keeps your library pristine.
For pros and businesses, having a repeatable, reliable process is absolutely essential. That's why over 13,000 users, including teams at Fortune 500 companies, turn to advanced tools. They provide clear reports that quantify every megabyte recovered, helping teams standardize deliverables and cut down on bandwidth costs, as detailed in these insights on professional compression workflows.
Ready to take control of your photo library? Compresto offers a powerful, private, and incredibly fast way to compress your images, videos, and PDFs with a simple drag-and-drop. Reclaim your disk space and speed up your workflow by downloading it from the Mac App Store at https://compresto.app.