Reduce Photo File Size Mac: 7 Proven Tips
Why Reducing Photo File Sizes on Mac Is Non-Negotiable
Our photos capture life's moments, from everyday snapshots to cherished memories. But these digital keepsakes come with a cost: storage space. The average Mac user manages thousands of photos, quickly filling up hard drives, especially on MacBooks with limited SSD storage.
Reducing photo file sizes isn't just about reclaiming disk space; it significantly improves your entire digital experience. Smaller files mean faster sharing speeds. Uploading to cloud services like iCloud or Dropbox becomes quicker, and emailing photos won't overwhelm inboxes. Your photo library becomes more responsive, and backups take less time. These benefits apply to everyone, from casual photographers to professional creatives.
This need for storage efficiency has made reducing photo file sizes crucial. As digital libraries grow, the strain on our devices increases. One user reported a 600 GB Photos library on their MacBook Pro, a common issue for large collections. Find more detailed statistics here This highlights the need for efficient photo file management. This guide will help you take control of your photo library size. You might also be interested in: How to master file compression
The Impact of File Size on User Experience
Photo file size directly affects your workflow and overall user experience. Large, unoptimized images can create problems in these areas:
-
Storage Capacity: Large image files consume storage space, leaving less room for other files and applications.
-
Sharing and Uploads: Sharing large photos can be slow and cumbersome. Cloud uploads can become time-consuming.
-
Website Performance: Large images on websites slow down loading times, negatively affecting user experience and SEO.
-
Backup Times: Backing up a large photo library can take hours, disrupting your workflow.
Beyond Photos: A Holistic Approach to File Size
Reducing file size is important, and several strategies exist. Consider compressing video files along with your photos. This comprehensive approach maximizes storage savings and streamlines your digital workflow. Optimizing all media types creates a more efficient user experience, enhancing productivity and freeing up valuable resources.
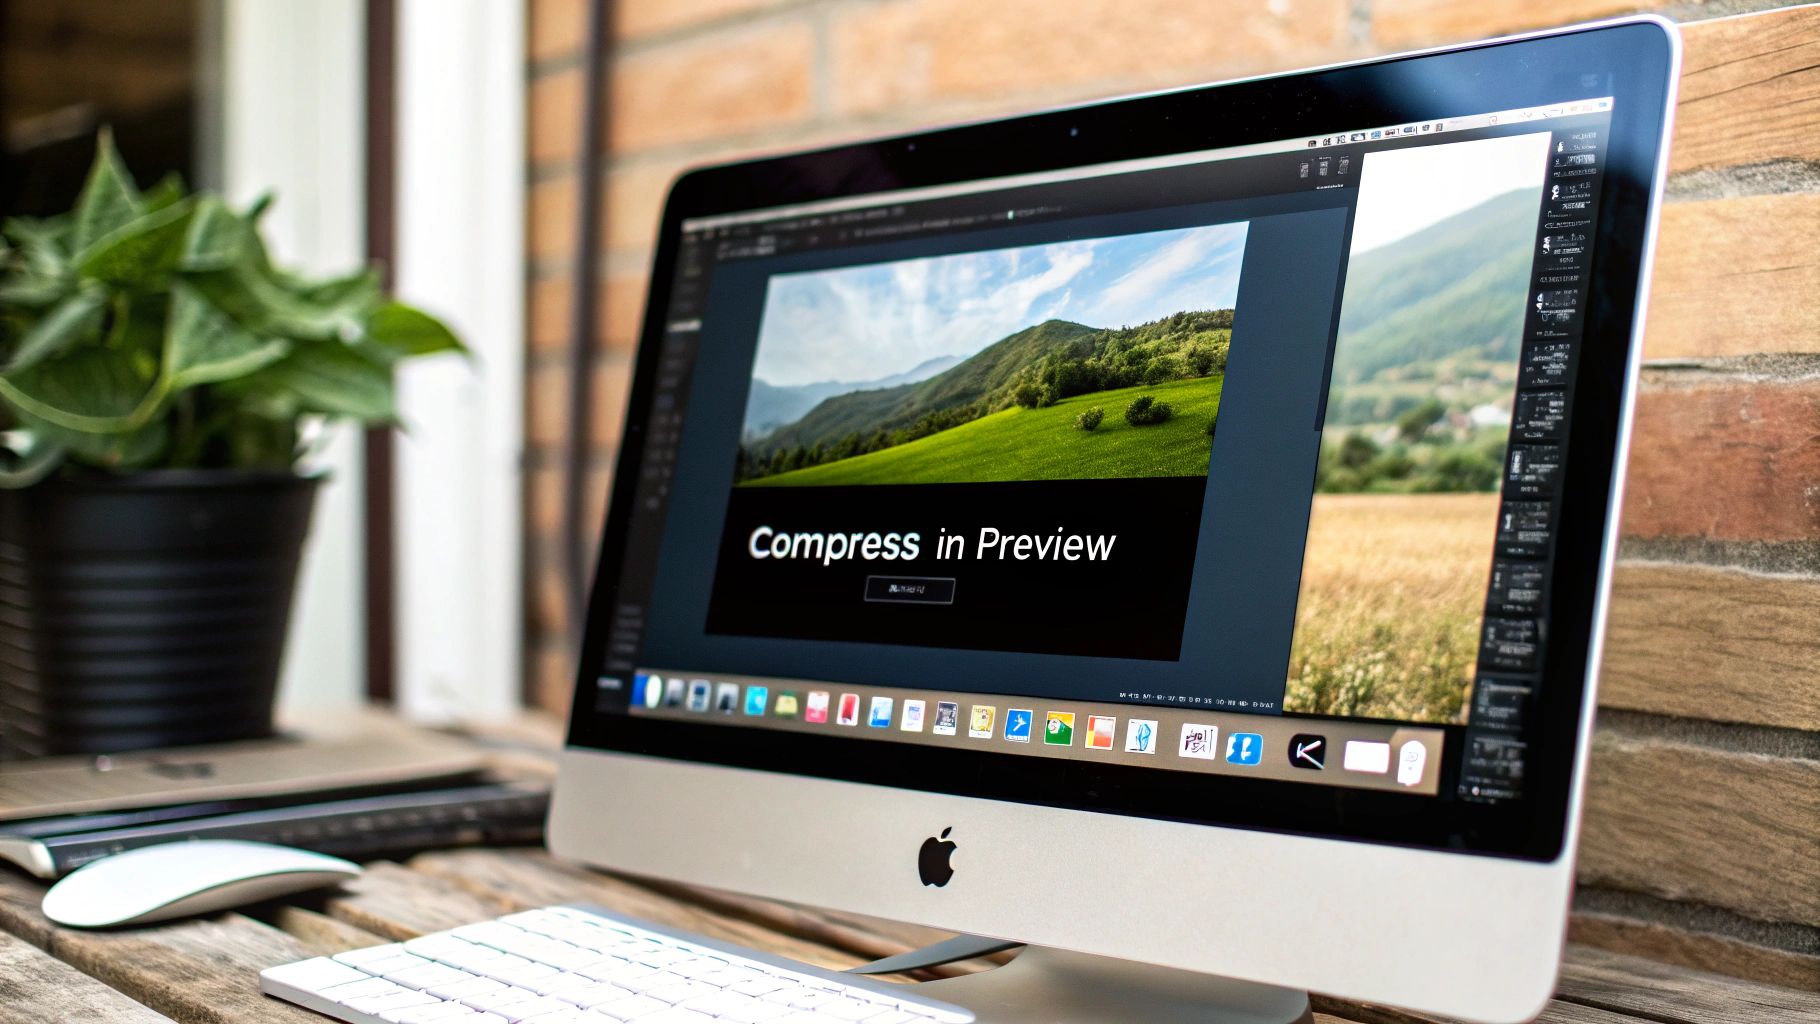
Preview App: Your Mac's Hidden Compression Powerhouse
Your Mac comes pre-loaded with a surprisingly robust image compression tool that often goes unnoticed: Preview. This seemingly simple application can significantly shrink image file sizes without requiring any additional software. Let's delve into how Preview can help you optimize images for sharing, archiving, and more.
Compressing Images With Preview: A Step-by-Step Guide
Reducing image file sizes on your Mac with Preview is a breeze. Follow these steps:
-
Open the Image: Launch Preview and open the image you'd like to compress. Preview allows you to open multiple images at once for batch processing.
-
Access the Export Feature: Navigate to the File menu and select "Export."
-
Choose JPEG or HEIC: Select either JPEG or HEIC from the Format dropdown menu. JPEG is generally recommended for broader compatibility.
-
Adjust the Quality Slider: This slider is the key to finding the right balance between file size and image quality. Moving the slider to the left decreases file size, but also impacts the image quality. Experiment to find the optimal setting that meets your specific requirements.
-
Save Your Compressed Image: Select a new filename to avoid overwriting your original image. Click "Save" to complete the compression process.
Fine-Tuning for Optimal Results
Preview offers a few key settings to further refine your image compression:
-
Resolution: Lowering the resolution can dramatically decrease file size. Consider the intended use of the image. If you’re sharing online, a resolution of 72 dpi is typically sufficient.
-
File Format: Choose between JPEG, PNG, and HEIC. While HEIC offers impressive compression while preserving image quality, it isn't as widely supported as JPEG. PNG is generally best for images with sharp lines and text, while JPEG is better suited for photographs.
To help you choose the best compression settings, let's take a look at a comparison table:
Preview App Compression Settings Compared This table reveals how different Preview compression settings impact your images, helping you make informed decisions about quality vs. file size.
| Compression Setting | File Size Reduction | Quality Impact | Best Use Case |
|---|---|---|---|
| JPEG - High Quality | Lower (around 20-30%) | Minimal | Preserving image detail for printing or archival |
| JPEG - Medium Quality | Moderate (around 40-50%) | Noticeable, but generally acceptable for online use | Sharing images online, general web use |
| JPEG - Low Quality | High (around 60-70%) | Significant quality loss, noticeable artifacts | Situations where small file size is paramount, previews |
| HEIC - High Quality | Moderate (around 30-40%) | Minimal | Modern devices, preserving quality while reducing size |
| HEIC - Medium Quality | High (around 50-60%) | Noticeable, but generally acceptable | Balancing file size and quality on newer devices |
| PNG | Low (around 10-20%) | Minimal | Images with sharp lines, text, and transparency |
Key Insights: JPEG offers the most dramatic file size reduction, but HEIC provides a good balance between size and quality on compatible devices. PNG is less effective for photo compression but ideal for images with text or transparency.
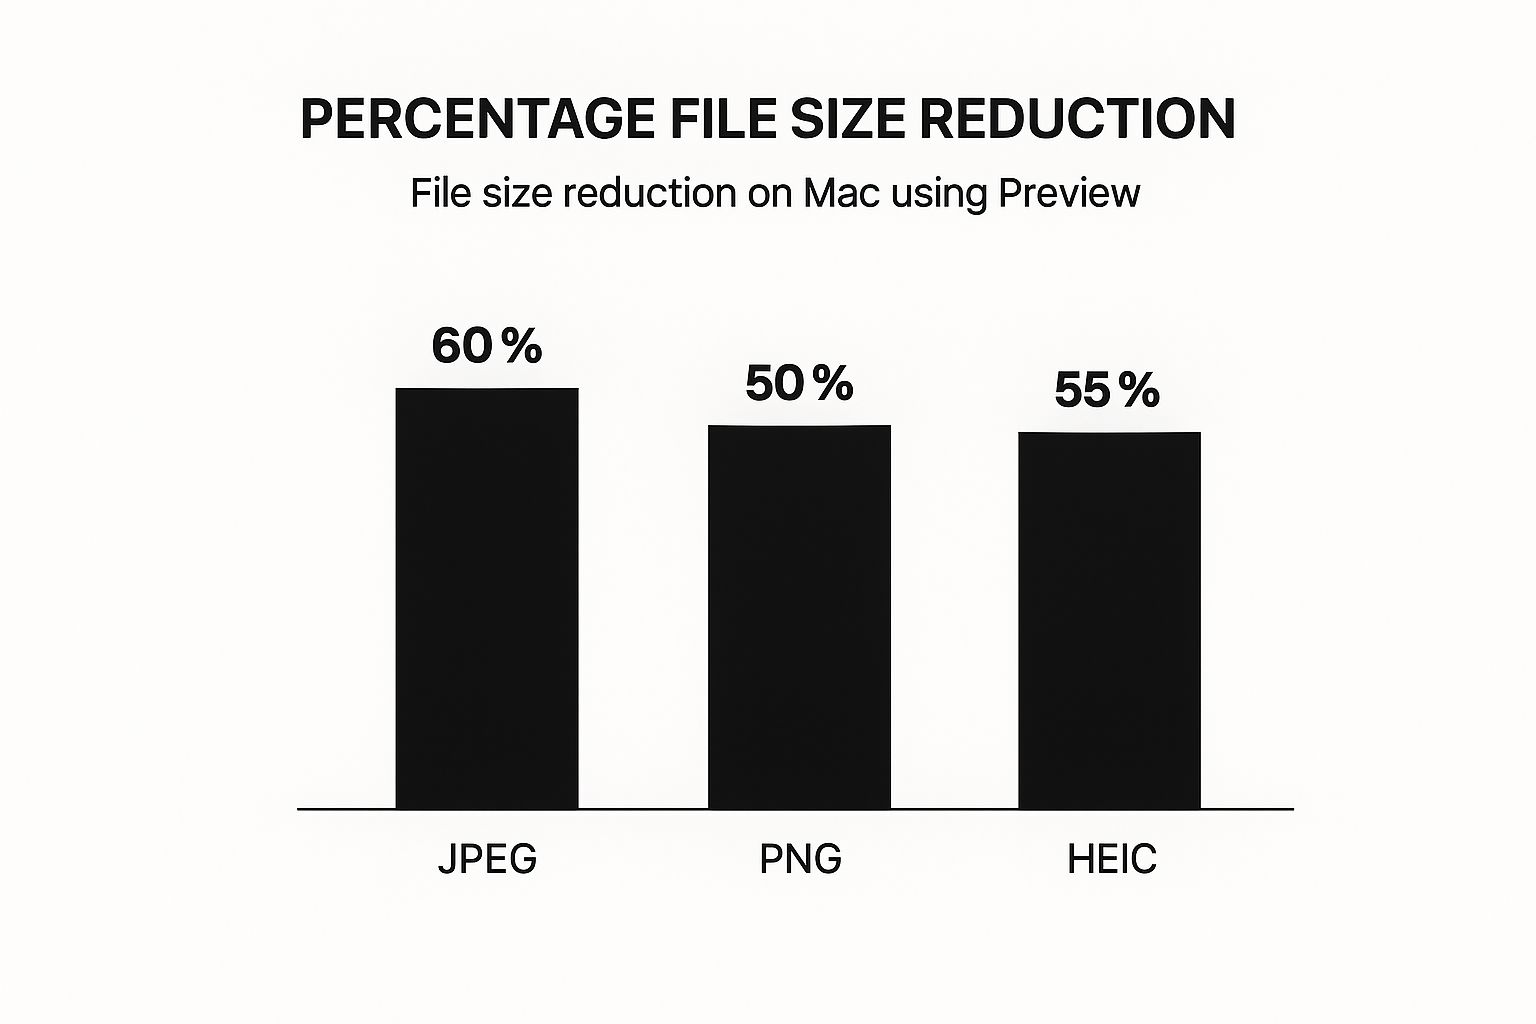
This chart illustrates the average file size reductions you can achieve with Preview using JPEG, PNG, and HEIC formats. JPEGs typically see the most significant reduction, around 60%, followed by HEIC at 55%, and PNG at 50%. This data highlights Preview’s effectiveness, particularly for JPEG compression.
Managing Originals and Optimized Copies
Preserving your original, high-resolution images is crucial. Always save compressed versions using a new filename to avoid accidentally overwriting your originals. Develop a consistent naming system to differentiate between original and optimized files. Organizing your photos into folders by project, date, or other relevant categories will further streamline your photo management process.
Preview's Limitations and Alternatives
While Preview is a handy tool, it has limitations. It offers fewer compression controls compared to dedicated image optimization software, lacking advanced features like selective compression and metadata removal. For basic resizing and compression tasks, however, Preview excels. For more robust features, consider exploring third-party applications like Compresto, a tool designed for optimizing various file types and offering granular control over compression parameters.
Photos App: Unlock Hidden Optimization Features
Beyond simply organizing your visual memories, Apple's Photos app has powerful, often overlooked, compression features. These allow you to significantly reduce photo file size on your Mac while keeping the original high-resolution versions safe and sound. This guide will walk you through using Photos' export function to create optimized images perfect for sharing online, emailing, or just freeing up space on your hard drive.
Exporting Optimized Images: A Step-by-Step Guide
The export function is your key to smaller file sizes. Here's how it works:
-
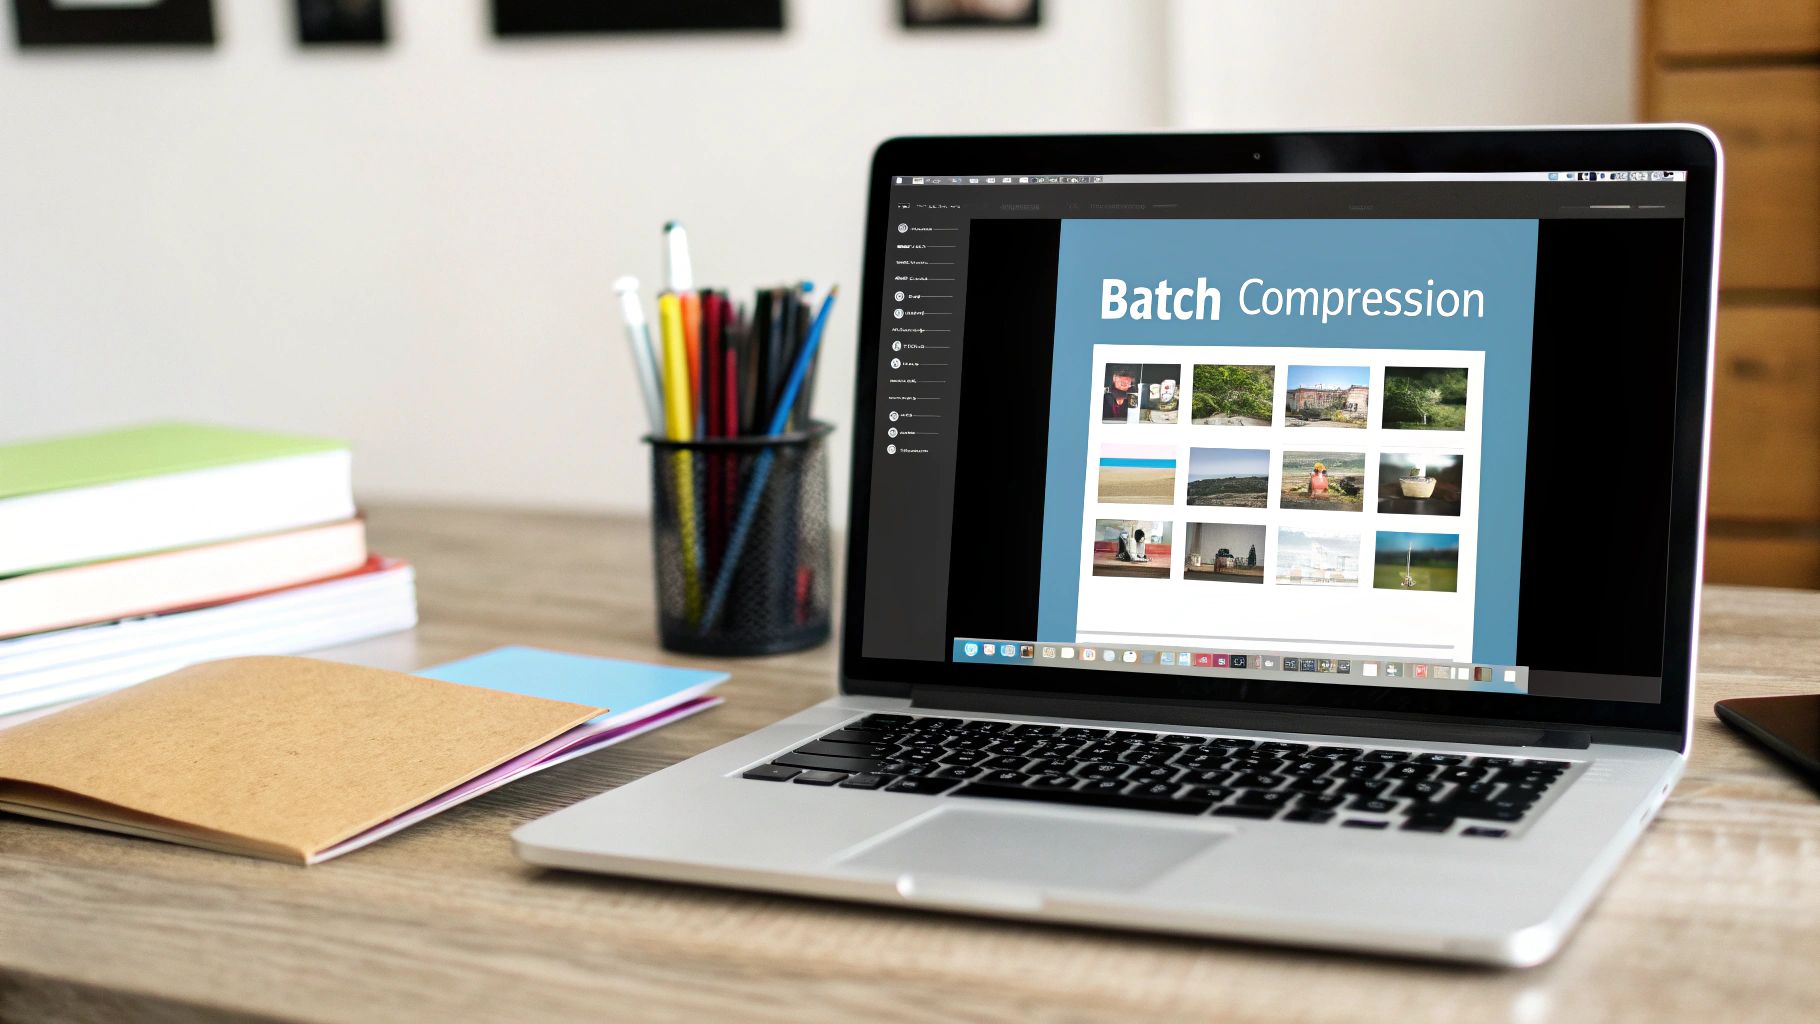
Select Your Photos: Open Photos and choose the images you want to optimize. Batch processing lets you select multiple photos at once.
-
Access the Export Function: Go to File > Export to open the export settings window.
-
Configure Export Settings: This is where you control the final file size and quality. A few key options make all the difference:
-
File Format: Pick JPEG or HEIC. JPEG is compatible with almost everything, while HEIC offers superior compression, especially on newer Macs.
-
JPEG Quality: A slider lets you balance file size and image quality. Play around with it to find what works best for you. Lower quality means smaller files, but it can sometimes make the image look a little less sharp.
-
Size: Choose a preset size or set a custom dimension. Shrinking the pixel dimensions has a big impact on file size. For online use, a maximum dimension of 2048 pixels is often recommended for platforms like Facebook.
-
-
Export: Once you've set everything up, click “Export.” Choose where to save your optimized photos and use a different filename than the originals to avoid overwriting them.
iCloud Photos Optimization: Managing Storage Efficiently
iCloud Photos has its own optimization features that automatically manage your photo library size on your Mac. It keeps full-resolution originals in iCloud but stores smaller versions on your computer, saving you a lot of space, especially if you have a massive photo collection and a smaller hard drive.
Here's how to turn on iCloud Photos optimization:
-
Open Photos and go to Preferences.
-
Choose the iCloud tab.
-
Select Optimize Mac Storage. This replaces your high-resolution images with optimized versions, downloading the full-size ones only when you need them.
Understanding File Formats and Compression
Different file formats handle compression in different ways. JPEG, the most common image format, uses lossy compression, which means some image data is lost to make the file smaller. HEIC provides even better compression than JPEG without sacrificing as much quality. PNG, often used for graphics and images with sharp lines, uses lossless compression, keeping all the original image data. This leads to bigger files than JPEG, but with perfect detail. Knowing these differences will help you pick the right format. For archiving, go for high-quality JPEG or lossless formats like TIFF, but for web use or email, a lower-quality JPEG or HEIC usually does the trick.
By using these optimization tools in the Photos app and understanding how compression works, you can free up valuable disk space and make managing your photos much easier. You'll be able to keep all your high-quality images without constantly worrying about running out of storage.
ImageOptim: Pro-Level Compression Without Quality Loss
Building on the techniques we've discussed for reducing photo file size on your Mac, let's explore ImageOptim, a powerful tool for professional-grade compression. When simpler tools like Preview and Photos aren't enough, ImageOptim delivers exceptional results, satisfying even the most discerning photographers and designers. This free, open-source utility intelligently strips unnecessary metadata and applies advanced lossless compression algorithms. This preserves visual quality while significantly shrinking file sizes.
Why Choose ImageOptim?
ImageOptim excels in several key areas:
- Lossless Compression: ImageOptim removes redundant data without affecting the pixels you see. You get smaller files without compromising visual fidelity.
- Metadata Removal: ImageOptim strips unnecessary metadata like camera settings and location information, further reducing file size.
- Batch Processing: Drag and drop entire folders of images into ImageOptim for effortless batch processing. This saves significant time when managing large photo libraries.
- Integration and Automation: Integrate ImageOptim seamlessly into your workflow. Automate tasks by adding it to your Finder's context menu for one-click optimization.
Fine-Tuning for Different Needs
ImageOptim offers flexible configuration settings to tailor the compression process. Prioritize maximum compression for archiving photos. Balance file size and optimal quality for web images. Experiment to find the right balance for your needs. For more tips, check out our article on 10 ways to optimize your files.
Real-World Performance and Comparisons
ImageOptim consistently outperforms other compression tools. Tests show it often reduces file size by 10-20% more than competing solutions and even 70-80% in larger files, without visibly altering the image, particularly regarding sRGB color profile management. This makes it a popular choice for managing large image collections without quality loss. ImageOptim removes bloated metadata, which significantly reduces file sizes, saving disk space and improving web loading times. Reductions of up to 50% are possible depending on the initial file size. ImageOptim is compatible with various file formats. Learn more about ImageOptim.
To help illustrate ImageOptim's strengths, let's look at a comparison table:
ImageOptim vs. Leading Compression Tools Compare the performance and features of top Mac compression tools to find your perfect solution.
| Tool Name | Free/Paid | Batch Processing | Metadata Removal | Average Size Reduction | Quality Preservation |
|---|---|---|---|---|---|
| ImageOptim | Free | Yes | Yes | 10-80% | Lossless |
| Compressor X | Paid | Yes | Selective | Varies | Lossy/Lossless |
| JPEGmini | Paid | Yes | Yes | Up to 80% | Lossy |
| ShortPixel | Paid | Yes | Yes | Varies | Lossy/Lossless |
This table highlights ImageOptim's strong free offering with robust features, particularly its lossless compression. While other paid tools may offer specific benefits, ImageOptim provides excellent value for its no-cost access.
Integrating ImageOptim Into Your Workflow
ImageOptim's drag-and-drop interface is easy to use:
- Open ImageOptim: Launch the application.
- Drag and Drop: Drag image files or folders into the ImageOptim window.
- Automatic Optimization: ImageOptim automatically optimizes the images.
- Retrieve Optimized Files: Optimized images are saved in their original location, overwriting the larger versions. (Back up your originals first if you need unoptimized copies).
Beyond Basic Compression
ImageOptim offers several advanced features:
- Plugin Support: Extend functionality with plugins.
- Command-Line Interface: Automate tasks with scripts.
- Open Source Nature: Benefit from community contributions and development.
You might also be interested in: Advanced File Compression Techniques.
By mastering ImageOptim, you can maintain a streamlined photo library, ensuring fast loading times and efficient storage without compromising image quality. This tool empowers you to get the most out of your visual assets.
Web-Based Solutions: Compress Without Installing Anything
For Mac users who prefer a minimalist software approach, web-based compression tools offer a compelling alternative to installed applications. These online solutions let you reduce photo file sizes on your Mac without adding extra programs. This section explores leading services, examining their compression algorithms, file handling capabilities, and security aspects.
Exploring Popular Web-Based Tools
Several online tools excel at compressing images without needing software installation. Two popular choices are:
-
TinyJPG: This service focuses on JPEG compression, offering a simple drag-and-drop interface and impressive file size reductions. You can upload up to 20 images at once, each under 5MB. TinyJPG also handles PNG files efficiently.
-
Compress JPEG: Another strong option, Compress JPEG provides similar functionality to TinyJPG, supporting both JPEG and PNG formats. It allows adjusting compression levels, giving you greater control over the balance between file size and image quality.
Both tools offer free usage with some file size and quantity limits. Paid versions provide higher limits and extra features for frequent users.
Practical User Experiences and Strategies
Choosing the right online tool depends on your needs. If you must reduce photo file size on your Mac for hundreds of images in bulk, both TinyJPG and Compress JPEG offer efficient batch processing. If you work with unusual formats, specialized tools might be necessary. For the best compression, experiment with different services to find the best results without sacrificing too much image quality.
Uploading many photos can be time-consuming. Optimize the process by:
- Organizing Files: Group images into clearly named folders before uploading for better management.
- Using Fast Internet Connection: A stable internet connection ensures quick uploads and downloads.
- Optimizing Images Before Uploading: Pre-compressing images with Preview or the Photos app can speed up the online process.
The growing use of online tools for image optimization is clear. For example, TinyJPG has become a popular choice for compressing JPEGs without significant quality loss. Explore this topic further.
Security and Privacy Considerations
While convenient, uploading personal photos to online services raises privacy questions. Make sure the platform has transparent data handling policies and uses secure encryption. Consider the service's reputation and user reviews before uploading your images. For sensitive photos, offline compression might be more secure.
Comparing Web-Based vs. Native Mac Solutions

Web-based tools are easily accessible and usually require no installation. However, they can be slower than native Mac solutions like Preview or ImageOptim, especially with slower internet. Native apps also offer more control over compression settings. Balance your needs for convenience, speed, and control when choosing between online or offline tools for reducing photo file size on your Mac.
Choosing the Right Approach
The best way to reduce photo file size on your Mac depends on your needs. If you want a quick and easy solution without installation, web-based tools are excellent. For more control, advanced features, and privacy, native Mac apps or Terminal commands offer a more powerful approach. Assess your requirements and weigh the pros and cons of each method to make the best decision.
Terminal Magic: Powerful Commands for Image Compression
For Mac users comfortable with the command line, the Terminal offers powerful tools like sips (Scriptable Image Processing System) and ImageMagick for precise image compression. These command-line tools provide a level of control not found in graphical apps, making them popular among advanced users.
sips: Your Built-In Command-Line Companion
sips is a versatile tool pre-installed on all Macs. It handles resizing, format changes, and, crucially, reducing image file sizes. A key advantage is its ability to batch process entire folders.
For example, to convert a folder of images to JPEG with a quality setting of 75, use this command:
sips -s format jpeg -s formatOptions 75 *.jpg --out OptimizedImages/
This converts all JPEGs in the current directory to JPEG format with a quality of 75 (0 is lowest, 100 is highest) and saves them to a new folder named "OptimizedImages."
ImageMagick: Advanced Image Manipulation
ImageMagick is a more advanced command-line tool with extensive image editing capabilities. It has a steeper learning curve, but ImageMagick offers significant flexibility. Installing it is simple using Homebrew: brew install imagemagick.
Here's how to resize and compress simultaneously:
convert input.jpg -resize 1000x1000 -quality 70 output.jpg
This resizes input.jpg to a maximum of 1000x1000 pixels, compresses it to a quality of 70, and saves the result as output.jpg.
Automating Compression With Scripts
The real strength of these tools lies in automation. Create scripts to automate repetitive tasks, like processing your entire photo library overnight.
Here's a basic shell script:
#!/bin/bash
for file in *.jpg; do sips -s format jpeg -s formatOptions 70 "$file" --out OptimizedImages/ done
This script compresses all JPEGs in a directory using sips with a quality setting of 70.
The Power of Customization and Control
Terminal commands offer a high degree of control but require command-line familiarity. The ability to fine-tune compression and automate complex tasks makes this method highly efficient. Abundant online resources provide tutorials and examples for both sips and ImageMagick, helping users of all levels.
Choosing Your Compression Approach
Terminal commands are ideal for users who prioritize control and automation. Consider the learning curve. If you prefer a simpler, visual approach, graphical apps like Compresto offer a user-friendly way to reduce file sizes across various formats.
Building Your Photo Size Management Strategy
Beyond quick fixes for shrinking photos on your Mac, a long-term plan is essential. It's like organizing a closet – a one-time purge is great, but without a system, clutter returns. Similarly, without a photo management strategy, new pictures will quickly fill your Mac's storage, even after compressing your current library. A solid long-term strategy includes smart organization. Explore digital asset management solutions for a more comprehensive approach.
Proactive Approaches to Prevent Storage Issues
Start by adjusting your camera settings. Shooting in JPEG format for everyday photos creates smaller files than RAW format. Save RAW for special occasions when you need its flexibility. This initial step can dramatically reduce your starting file sizes.
Also, set up a smart organization system. Separate working photos from archived ones. Consider using external drives or cloud storage for archives. This keeps your active photo library smaller and more responsive.
Auditing Your Photo Collection
Regularly review your photo collection to find large image files. Delete duplicates and blurry shots. Archive photos you don't often use. This creates more space and makes finding important images easier.
Establishing Efficient Workflows
Make compression part of your regular routine. Compress images after importing them to your Mac, preventing large files from building up. For instance, compress pictures after a trip or event before they go into your main library. You might be interested in: How to master eco-friendly file compression practices.
Leveraging Automation Tools
Automation tools can save you significant time. Automator or Hazel can automatically compress images added to certain folders. For example, create a rule to optimize images for web use when added to a "Web Images" folder.
Special Considerations for Professional Photographers
Professional photographers have unique storage needs. They must balance large client files with storage limits. Keeping high-resolution archives is important, but clients also need optimized files for sharing. A tiered storage system, combining fast SSDs for current projects and larger HDDs for archiving, is a helpful strategy.
Forward-Looking Strategies
As camera technology improves, image resolutions will only increase, making photo management even more critical. Stay informed about new compression techniques and software. Adopting these proactive strategies will keep your photo library organized and accessible.
Ready to take control of your Mac's photo storage? Compresto offers a powerful, yet user-friendly way to reduce file sizes while preserving quality. Download Compresto today and see the difference!