How to Make Video GIFs on Your Mac
Turning your videos into GIFs is pretty straightforward. You just need to trim a short clip, pick some settings like frame rate and size, and then export it as a GIF. Using a dedicated app on your Mac like Compresto makes this whole process a breeze, turning what could be a technical headache into just a few clicks.
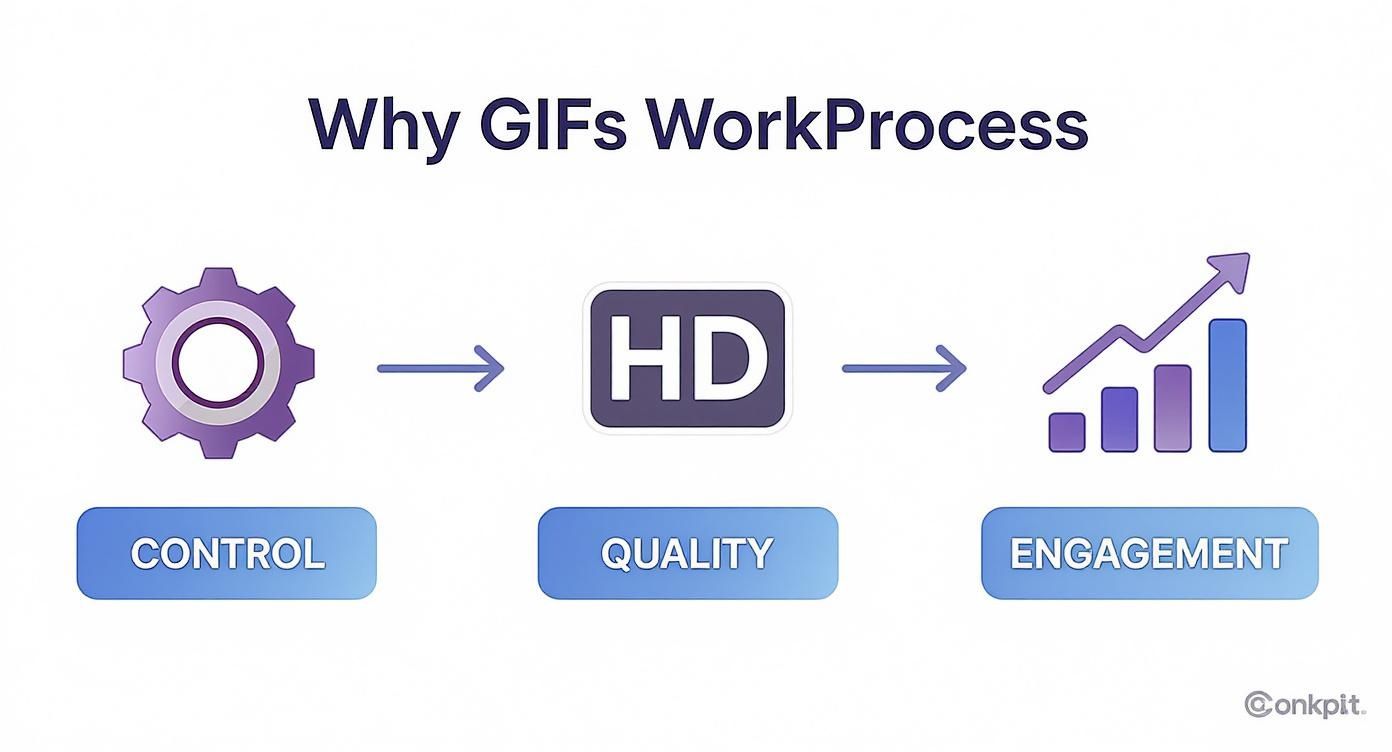
Why Creating Your Own GIFs Still Matters
With massive GIF libraries like GIPHY just a click away, you might wonder why you’d bother making your own. It really comes down to two things: control and impact. A pre-made reaction GIF is great for conveying a general feeling, but a custom GIF from your own video tells a specific story. It can showcase your brand, highlight a unique product feature, or capture a moment that's uniquely yours.
Custom GIFs are an absolute powerhouse for engagement. They hit that sweet spot right between a static image and a full-on video, giving you the best of both. Their silent, auto-playing loop is perfect for grabbing attention on a busy social media feed without making someone commit to hitting the "play" button. This makes them incredibly effective for quick tutorials, product demos, or just adding a bit of life to an email newsletter.
The Power of Custom Animation
When you make your own GIF, you’re in the driver’s seat. You control every single detail, making sure it fits your brand's voice and style perfectly. That’s a huge step up from using a popular meme that’s already been seen a million times.
A custom GIF lets you:
- Showcase specific product features in a quick, looping animation.
- Create unique, branded reactions for engaging with your audience on social media.
- Demonstrate a process in a blog post or support article without bogging the page down with a heavy video file.
- Add visual flair to your digital communications to boost click-through rates.
Custom GIFs are like "micro-videos." They pack a focused message with the efficiency of an image and the punch of motion. They're the perfect tool for capturing attention in our fast-scrolling world.
Here's a quick look at the strengths and weaknesses of GIFs compared to standard video and static images for online use.
GIF vs Video vs Static Image Quick Comparison
| Feature | GIF | Video (e.g., MP4) | Static Image (e.g., JPEG) |
|---|---|---|---|
| Animation | Yes, looping | Yes, with playback controls | No |
| Sound | No | Yes | No |
| File Size | Medium to Large | Large | Small to Medium |
| Autoplay | Yes, universal | Often requires user interaction | N/A |
| Engagement | High | High (if played) | Low to Medium |
| Compatibility | Excellent | Good (requires player) | Excellent |
While video offers sound and higher quality, and images are lightweight, GIFs provide a unique blend of motion and simplicity that's hard to beat for quick, eye-catching content.
A Growing Demand for a Versatile Format
The GIF isn't just sticking around; it's thriving. The global market for GIF converters has been on a steady climb, hitting $4,347.05 million in 2021 with projections to reach $5,520.01 million by 2025. This isn't just a niche trend; it shows a clear and growing need for tools that let people create their own animated content. You can dig into the GIF converter market trends to see the full picture.
GIFs are a fantastic visual tool, and they fit into a wide spectrum of types of social media content. From big marketing campaigns to casual team chats, their power to communicate ideas quickly and visually keeps them essential. This guide will walk you through exactly how to create them like a pro.
How to Prepare Your Video for Conversion
Creating a sharp, professional GIF starts long before you even think about conversion software. The secret to a fantastic result isn't in the final export settings; it's in how you prep your source video. It's like cooking—you get the best results when you start with the best ingredients. When it comes to making video GIFs, the old saying holds true: garbage in, garbage out.
The single most impactful thing you can do is trim your video down to just the essential action. A great GIF is short, sweet, and loops like it was meant to be on repeat forever. Aim for a clip that's only 2-4 seconds long. Anything longer usually balloons the file size and risks losing your viewer's attention. Your goal is to isolate one perfect, repeatable moment.
This whole process boils down to a few core ideas: taking control of your source material, optimizing it for quality, and creating something that people will actually want to watch and share.
As you can see, it all begins with the source. Nailing this first part of the workflow is what sets you up for a high-quality GIF that gets noticed.
Trimming Your Video with QuickTime Player
You don't need a pricey, professional video editing suite to make these crucial cuts. Your Mac already comes with a surprisingly powerful and free tool for the job: QuickTime Player. It’s perfect for making simple, precise trims without getting bogged down in complicated features.
Here’s a quick rundown on how to get it done:
- Open the Video: Just right-click your video file and choose "Open With > QuickTime Player."
- Bring Up the Trim Tool: Head to the menu bar and select
Edit > Trim. Or, for the keyboard shortcut fans, just hit Command + T. A yellow trimming bar will pop up along the bottom. - Select Your Clip: Drag the little yellow handles to highlight the exact part you want to keep. You can hit play to preview your selection and make sure you've captured the perfect loop.
- Save Your Work: Once you’re happy with it, click the "Trim" button. Then, go to
File > Saveto export your new, much shorter video clip.
This simple process ensures your starting file is lean and focused, which means you won't waste time and processing power converting footage you don't even need.
A well-trimmed clip is the biggest factor in reducing your final GIF file size. By cutting a 10-second clip down to 2 seconds, you've already slashed 80% of the data before you even start the conversion process.
Why Source Video Quality Matters
The next critical piece of the puzzle is the resolution of your starting video. It might seem a bit backward to start with a huge, high-resolution file when your goal is a tiny GIF, but it's absolutely essential for maintaining visual clarity.
When you convert a video to a GIF, it goes through some serious compression and color reduction. If you start with a video that's already low-res or blurry, those imperfections are only going to get magnified in the final product. A crisp, high-quality source—like a 1080p or even a 4K file—gives the conversion software much more visual data to work with.
All that extra detail ensures that even after you shrink the dimensions and strip down the color palette, the final GIF still looks sharp and professional, not like a pixelated, muddy mess. While you'll definitely be reducing the video's dimensions later, starting with a high-quality source file is non-negotiable for a polished result.
Part of this prep also means making sure your video is in a common format. If you're working with something obscure, it’s a good idea to check out a guide on how to convert video file formats first.
Taking just a few minutes to nail these two prep steps—trimming the length and starting with a high-quality source—will save you from a world of frustration and set you on the path to creating some truly impressive, professional-grade GIFs.
Choosing the Right Settings for Your GIF
Alright, you’ve got your video clip trimmed and ready to go. Now comes the fun part—this is where you really start shaping your final creation. The settings you pick here are a delicate dance between visual quality and file size. Nailing this balance is what separates a clunky, slow-loading animation from a sharp, professional one that just works.
Think of these settings less as technical hurdles and more as your control panel for performance. When you use a tool like Compresto, you get to see in real-time how tweaking each slider affects the final GIF. That immediate feedback is gold for developing an intuition for what works.
We're going to break down the big three: frame rate, dimensions, and color palette. Master these, and you’ll have the power to create a GIF that’s perfectly tuned for its job, whether it’s a detailed product demo for your website or a quick reaction for social media.
Finding the Sweet Spot for Frame Rate
Frame rate, measured in frames per second (FPS), dictates how smooth the motion in your GIF looks. A typical video might be shot at 24, 30, or even 60 FPS for that fluid, lifelike movement. But if you tried to carry that over to a GIF, you'd end up with a monstrously large file that completely defeats the purpose.
For most GIFs, the sweet spot is somewhere between 10 and 15 FPS. This range gives you the illusion of smooth motion without bloating the file size. Dip below 10 FPS, and things can start to look choppy and disjointed. Go much higher than 15 FPS, and you’re often adding a lot of data for very little noticeable improvement.
Here’s how I think about it in practice:
- For a quick reaction GIF: If you’re just capturing a simple facial expression or gesture, 10-12 FPS is usually plenty. The motion is clear, and the file size stays nice and small.
- For a product demo: Showing off a user interface or a product with subtle movements? Bumping it up to 15 FPS can help keep everything looking crisp and smooth.
Anything over 20 FPS is almost always overkill for a GIF. The goal here is perceived smoothness, not cinematic perfection.
The Impact of Dimensions on File Size
Your GIF's dimensions—its width and height in pixels—are probably the single biggest factor affecting its final file size. Even a small change here can lead to a massive reduction in data. Most source videos are high-def (1920x1080 pixels), but a GIF almost never needs to be that big.
For instance, shrinking a 1080p video clip down to a GIF with a width of just 600 pixels can slash the file size by over 75%. Why? Because you're drastically reducing the total number of pixels the computer has to render for every single frame.
When you're picking dimensions, always think about where the GIF is going to live. If it's for a blog post or an email newsletter, it doesn't need to be wider than the content column, which is usually between 600px and 800px.
Start by considering the final placement. A width between 400px and 600px is perfect for most web and social media uses. It’s large enough to be clear on both desktop and mobile screens without being unnecessarily heavy. This one adjustment is incredibly effective, and you can find even more strategies in our guide on the best way to reduce GIF file size for websites.
Understanding the Color Palette Trade-Off
The last key setting to master is the color palette. Unlike video, which can display millions of colors, the GIF format is hard-limited to a maximum of 256 colors. This is a fundamental constraint of the format, and how you manage it directly impacts both the look and the size of your GIF.
When converting a video, the software creates a new, limited palette that best represents the original colors. You can usually control how many colors are in that palette. A full 256-color palette will give you the most faithful color reproduction, but it will also create a larger file.
Often, you can get away with far fewer. Dropping the palette to 128 or even 64 colors can significantly shrink the file size with very little perceptible loss in quality, especially if your source video doesn't have a lot of complex color gradients.
Here’s a quick rundown of when to use which palette size:
- 256 Colors: Best for GIFs with subtle gradients, photography, or detailed product shots where color accuracy is a must.
- 128 Colors: A great all-around setting. It strikes a fantastic balance between quality and file size for most animations.
- 64 Colors: Ideal for GIFs with flat colors, like screen recordings of software, cartoons, or simple graphics.
Experimentation is everything here. Preview your GIF with different palettes to find the lowest number of colors you can use before you start to see noticeable banding or weird color shifts. This final tweak is your chance to shave off those last few kilobytes without compromising the visual integrity of your creation.
To make this easier, here's a quick cheat sheet with some starting points for common scenarios.
Recommended GIF Settings for Common Use Cases
Use this table as a practical cheat sheet for choosing the right settings. It's all about balancing quality against file size for where your GIF will ultimately be seen.
| Use Case | Recommended Frame Rate (FPS) | Recommended Dimensions (Width) | Recommended Color Palette | Target File Size |
|---|---|---|---|---|
| Social Media Feed | 12-15 FPS | 500-600px | 128 Colors | Under 3MB |
| Blog Post Illustration | 10-15 FPS | 600-800px | 128-256 Colors | Under 2MB |
| Email Newsletter | 10-12 FPS | 400-600px | 64-128 Colors | Under 1MB |
| Product Demo (UI) | 15 FPS | 800px | 64-128 Colors | Under 5MB |
| Reaction GIF | 10 FPS | 400px | 64 Colors | Under 500KB |
Remember, these are just guidelines. The best way to get a feel for it is to jump in and start playing with the settings yourself. You'll quickly see how each adjustment affects the final product and develop a knack for creating perfectly optimized GIFs every time.
How to Compress and Export Your Final GIF
You’ve tweaked the settings and are ready for the final, most crucial step. Exporting is where all your adjustments—frame rate, colors, dimensions—come together to create a polished, web-ready GIF. This isn't just about clicking "save"; it's about applying the right compression to get a file that's both high-quality and fast-loading.
This is the moment you truly balance performance with appearance. Modern tools have gotten incredibly good at shrinking file sizes without sacrificing visual quality, so you don't have to settle for a pixelated mess just to get your GIF under a platform's size limit.

Understanding Lossy Compression
When we talk about GIF compression, we’re almost always talking about lossy compression. The term sounds a bit intimidating, but it just means the software intelligently throws away redundant visual data to shrink the file. Think of it like summarizing a book—you keep the main plot points but trim some of the descriptive fluff.
A smart compression algorithm analyzes your GIF's frames. If a pixel in the background stays the same for ten frames in a row, the algorithm just tells the GIF to reuse that pixel instead of storing its data ten separate times. This trick is incredibly effective at cutting down file size without anyone noticing the "lost" data.
The key is finding the sweet spot. The more aggressive the compression, the more data gets tossed out, which can eventually lead to visual flaws called artifacts. These might show up as weird blocky patterns or fuzzy edges. Your goal is to push the compression as far as you can without introducing those unwanted side effects.
Preview Before You Commit
One of the most valuable features in a dedicated app like Compresto is the live preview of the final file size before you export. This is an absolute game-changer. It saves you from the tedious cycle of exporting, checking the file size, realizing it's too big, and starting the whole process over again.
This preview function shows you the direct impact of your choices in real-time. Nudge the color palette down from 128 to 64 colors, and you’ll instantly see the estimated file size drop. It turns what used to be guesswork into a precise, controlled workflow, letting you fine-tune your settings until you hit that perfect balance.
The ability to preview the output file size is the single most efficient way to optimize a GIF. It lets you make informed decisions on the fly, ensuring you meet file size requirements for platforms like email or social media on the very first try.
Your Final Quality Check Routine
Once you've hit that export button, you're not quite done. Before you share your new creation with the world, it’s essential to run through a quick quality-check routine. Just open the final GIF and look for a few specific things to make sure it looks professional.
This final pass only takes a minute but can catch small issues that might undermine all your hard work.
Here’s a simple checklist to run through:
- Check the Loop Point: Does the GIF loop seamlessly? A perfect loop is when the last frame transitions back to the first so smoothly you can't tell where it begins or ends. A jarring jump at the loop point can be distracting and just looks sloppy.
- Look for Visual Artifacts: Scan the GIF, especially in areas with motion or subtle color gradients. Are there any blocky patterns, color banding, or pixelation? If so, you may need to ease up on the compression or bump up the color count.
- Confirm the Playback Speed: Does the motion feel natural? Sometimes, a very low frame rate can make the action feel choppy or slow. Make sure the playback speed captures the feel you were going for.
- Verify the Dimensions: Does the GIF look sharp at its intended size? It’s always a good idea to view it at 100% scale to make sure it isn’t blurry or pixelated.
This final check is your last line of defense. It ensures that when you finally share your work, it represents the high quality you were aiming for from the start. For those on macOS looking to dive deeper, exploring the best GIF compressor for Mac can provide even more tools for achieving that professional finish, ensuring your creation loads quickly and looks great on any screen.
Exploring Other GIF Creation Tools on macOS
While a dedicated app like Compresto gives you a polished and efficient workflow, it’s smart to know the other tools available on your Mac. Different projects call for different solutions. Sometimes you need absolute command-line control, and other times you just want the simple convenience of a web-based tool. Knowing your options ensures you can always make the perfect GIF, no matter the situation.
The world of video-to-GIF tools has become incredibly accessible, and making GIFs is easier than ever. Big players like GIPHY still offer quick, user-friendly tools that cater to everyone from casual creators to professionals needing assets for a marketing campaign.
Let's dive into two of the most popular alternatives: the powerful, open-source FFmpeg for technical users and the ubiquitous online converters for those who prioritize speed and simplicity.
For Power Users: The FFmpeg Command Line
If you're comfortable working in the Terminal, FFmpeg is an absolute beast. It’s an incredibly powerful, open-source tool that can handle almost any multimedia task you throw at it, including making top-notch GIFs. It's actually the engine running behind the scenes of many popular video apps.
Sure, it lacks a graphical user interface, but it offers unmatched control over every single aspect of the conversion.
To get started, you’ll need to install FFmpeg on your Mac, usually through a package manager like Homebrew. Once it's installed, you can convert a video to a GIF with a single—albeit sometimes lengthy—command. This approach is perfect for developers, system administrators, or anyone who wants to automate their GIF creation process through scripting.
Here is the official FFmpeg website, which serves as the central hub for documentation and downloads.
The site is purely functional, which perfectly reflects the tool's focus on utility over user-friendliness. It provides incredibly comprehensive documentation for its vast command-line options.
A Simple FFmpeg Command to Get Started
To give you a practical example of how you can make video GIFs with FFmpeg, here's a basic command you can adapt. This command takes an input video, sets the frame rate, scales it, and spits out a GIF. If you specifically want to convert MP4 to GIF, our step-by-step guide covers it in detail.
ffmpeg -i input.mp4 -vf "fps=15,scale=600:-1:flags=lanczos" -c:v gif output.gif
Let's quickly break down what this command actually does:
-i input.mp4: This specifies your source video file.-vf "fps=15,scale=600:-1:flags=lanczos": This is where the magic happens. It sets the frame rate to 15 FPS and scales the width to 600 pixels while maintaining the original aspect ratio.-c:v gif: This part tells FFmpeg that the output video codec should be GIF.output.gif: And this is simply the name of your final GIF file.
While it's an incredibly potent method, FFmpeg's steep learning curve makes it less than ideal for quick, one-off tasks unless you're already familiar with command-line tools.
The Pros and Cons of Online Converters
On the complete other end of the spectrum, you have online video-to-GIF converters. Think of GIPHY's own creator tool, Imgur's Video to GIF, or Ezgif. These web-based tools are ridiculously easy to use: just upload your video, tweak a few basic options, and download the result.
The primary advantage is convenience. There’s nothing to install, and you can create a GIF from any computer with an internet connection. This makes them perfect for quick, simple conversions when you're not on your main machine.
However, that simplicity comes with some trade-offs:
- Limited Features: You typically have far less control over important settings like color palettes, dither algorithms, compression levels, and looping.
- Privacy Risks: You have to upload your video to a third-party server, which might not be ideal for sensitive or proprietary content.
- Quality and Watermarks: Free services often apply heavy compression that can seriously degrade quality, and some might even add a watermark to your final GIF.
Online converters are a great choice for non-sensitive, personal projects where speed is more important than granular control. For a more advanced approach to crafting animated content, exploring how generating video from images using AI can be a powerful method for creating unique GIF sources. Ultimately, the right tool always depends on your specific needs—it's all about balancing control, convenience, and privacy.
Answering Your Top Questions About Making GIFs
Even with the best tools in hand, you're going to hit a few snags when you first start turning videos into GIFs. It’s just part of the learning curve. This section dives into the most common questions I hear, with clear answers to help you fix issues and get your workflow dialed in.
Think of this as the last piece of the puzzle. Once you get these concepts down, you’ll go from just making GIFs to making them great, every single time.
Why Is My GIF File So Big and How Do I Fix It?
This is the big one. Without a doubt, it's the number one problem everyone runs into. A massive GIF file is almost always a combo of three things: the clip is too long, its dimensions are too big, or the frame rate is cranked too high.
Getting that file size under control means tackling each of these culprits, one by one.
- Trim Your Clip Aggressively: Your first move should always be to shorten the clip. A good GIF captures a single, perfect moment. I always aim for 2-4 seconds, max. Anything longer is probably a video, not a GIF.
- Shrink the Dimensions: Let's be real—a GIF for a blog post or social media doesn't need to be 1080p. Just dropping the width to 600px can slash the file size by over 75% on its own. It's a huge win with minimal quality loss.
- Lower the Frame Rate: You're not making a feature film here. You don't need a buttery-smooth 30 FPS. Dropping it to 10-15 FPS still looks great for motion but cuts the data load dramatically.
Hit these three points, and I guarantee you’ll solve your file size problems nearly every time. You'll end up with a GIF that loads fast and still looks fantastic.
Can I Make a GIF with a Transparent Background?
Yes, you absolutely can! But it’s a bit different than a standard video-to-GIF conversion. Since video files don't actually support transparency, you can't just click a "remove background" button in a simple converter and call it a day.
The real process involves a few extra steps. You’ll need to start with a video shot against a solid color, like a green screen. From there, you use a video editor to key out that background. The final, critical step is exporting the clip not as a video, but as a sequence of transparent PNG images. Then, you can bring that image sequence into a GIF tool to assemble your transparent GIF.
While most simple video-to-GIF converters can't handle transparency in one go, this multi-stage workflow gives you total control. It's a more advanced technique, but it's perfect for creating professional-looking product animations or custom stickers.
How Is AI Changing How We Make GIFs?
Artificial intelligence is making the whole GIF creation process much faster and way more accessible. We're seeing a huge shift with AI-powered tools, and the market for AI GIF generators is expected to jump from $1.5 billion in 2024 to over $8.2 billion by 2033. That growth is all about the demand for tools that do the heavy lifting for us. You can find more insights about this growing AI market on truefan.ai.
Instead of you scrubbing through a long video to find the perfect moment, an AI GIF creator can analyze the whole thing, pinpoint the most exciting part, and trim it for you. It can also intelligently apply the best compression settings without you having to mess with sliders. This means pretty much anyone can create a high-quality, perfectly optimized GIF in just a couple of clicks.
Ready to create stunning, perfectly optimized GIFs without all the guesswork? Compresto is the ultimate macOS app for turning your videos into lightweight, high-quality animations. With its intuitive interface, live file size previews, and powerful batch processing, you'll master the art of GIF making in minutes.
Download Compresto today and see the difference for yourself!