storage space running out? Free up Mac disk space fast
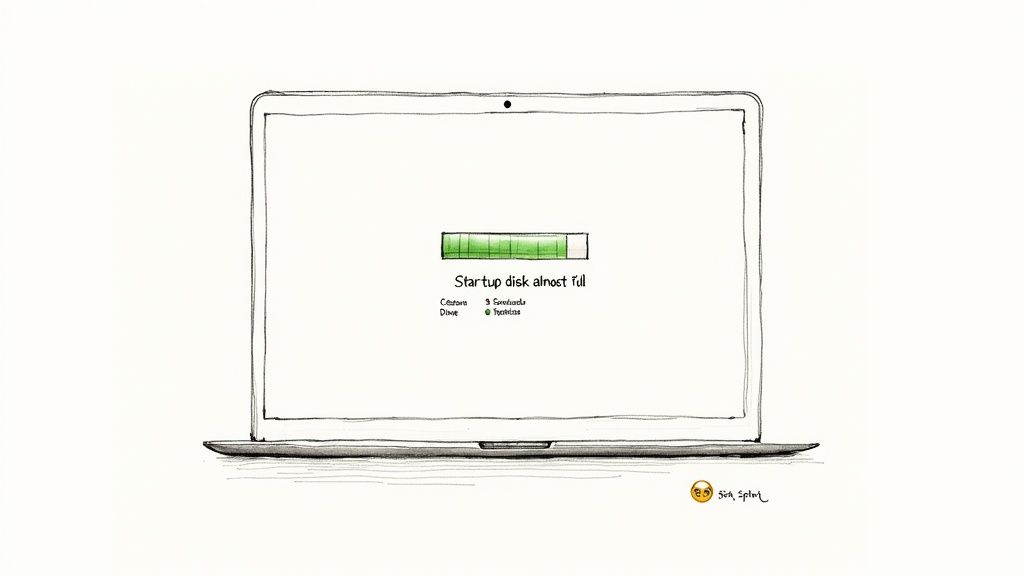
That dreaded pop-up. We’ve all seen it. "Your startup disk is almost full." It’s more than just an annoying notification; it's a direct threat to your Mac’s performance. When you're constantly fighting for every last megabyte because your storage space is running out, your whole workflow grinds to a halt. It’s stressful, and it kills your productivity.
Why Is My Mac Storage Always Full?
So, why does this keep happening? That persistent warning isn't just about having too many obvious files. It’s often a symptom of something deeper, where gigabytes of hidden data are silently eating up your precious drive space. Think of it like a leaky faucet—those small, unnoticed drips of wasted data eventually flood your entire system.
This isn't just a personal problem; it reflects a much bigger trend. Globally, we're creating data at an explosive rate. In 2020, the world generated an estimated 44 zettabytes of data. By 2025, it's projected that we'll only be able to store about one-seventh of all the data we create. The storage crunch is real for everyone.
Uncovering the Real Culprits
So, where is all your space really going? The usual suspects like photos and videos are part of it, but I’ve found the biggest offenders are often the ones you can't easily see.
Here’s what’s actually filling up your drive:
- Bloated System Data: This mysterious category is a real space hog. It’s full of temporary files, old system logs, and leftover app support files that don't always get deleted properly.
- The Downloads Graveyard: Let's be honest, your Downloads folder is probably a digital dumping ground for large installers, ZIP archives, and single-use documents you forgot about months ago.
- Hidden App Caches: Every single app—from your web browser to your photo editor—creates cache files to help it load faster. Over time, these caches can swell to enormous sizes, quietly eating up space without you even realizing it.
The very first step to regaining control is understanding exactly what's taking up all that room. Your Mac has a built-in tool that gives you a pretty clear, visual breakdown of your storage. If you want a detailed walkthrough on finding it, check out our guide on how to check storage on your Mac.
Key Takeaway: Running out of storage is rarely about just one thing. It's the cumulative effect of system data, temporary files, and forgotten assets that leads to that "disk full" notification.
When you see that warning pop up, don't panic. Here are the first few things you should do to figure out what's going on.
Your First Actions to Diagnose the Storage Problem
This quick table outlines the initial steps I always take to get a handle on the situation. It’s all about getting quick wins without spending hours on a deep dive right away.
| Action | Tool | Estimated Time | Potential Space Gained |
|---|---|---|---|
| Check Storage Overview | Apple's Built-in Storage Management | 2 minutes | N/A (Diagnostic) |
| Review Recommendations | Apple's Built-in Storage Management | 5-10 minutes | 5-50 GB |
| Empty the Trash | Finder | 30 seconds | 1-20 GB |
| Clear Downloads Folder | Finder | 5 minutes | 2-30 GB |
These simple actions give you a baseline and often free up a surprising amount of space right off the bat, giving you some much-needed breathing room. From there, you can move on to tackling the bigger, hidden space hogs.
Quick Wins to Reclaim Gigabytes in Minutes
We’ve all been there. That dreaded "storage space running out" warning pops up, and panic sets in. But you don’t need to rush into complex, long-term strategies. A few targeted cleanups can free up a surprising amount of space in just a few minutes, giving you some much-needed breathing room.
Let's start with the low-hanging fruit—the digital clutter that piles up without you even noticing. These quick wins hit the parts of your Mac notorious for hoarding junk files, giving you the biggest return for the least amount of effort.
Purge Your Cache Folders Safely
One of the biggest culprits of mystery storage loss? Bloated cache files. Every single app on your Mac, including macOS itself, creates these temporary files to help it run faster. Over time, these caches can swell to several gigabytes with data you absolutely no longer need.
Don't worry, clearing them out is generally very safe. When an app looks for a cache file that's gone, it just regenerates a fresh one. The only side effect you might notice is an app launching a fraction of a second slower one time after the cleanup. That's it.
Here’s where to find the caches that matter most:
- User Cache: This is the big one. Open Finder, click "Go" in the menu bar, then hold down the Option key and select "Library." From there, navigate into the
Cachesfolder. You can safely delete the contents of this folder. - Browser Caches: Every web browser has its own cache. Clearing this from within the browser's settings (usually under "Privacy" or "History") can reclaim a ton of space, especially if you’re a heavy internet user.
I always start with the main User Cache (~/Library/Caches). I once reclaimed over 15 GB from that folder alone after a few months of neglect. Just remember: don't delete the Caches folder itself, only the files and folders inside it.
Tackle the Downloads Graveyard
Let's be honest, your Downloads folder is probably a digital graveyard for things you only needed once. Think old app installers (.dmg files), forgotten PDF bank statements, ZIP archives, and a sea of random images. It's the default dumping ground for everything from the web, and it almost never gets cleaned out.
Take five minutes and sort this folder by "Size." You'll probably be shocked at what's lurking at the top. That software trial you downloaded six months ago? Its installer could be a gigabyte or more. Trash anything you don't recognize or no longer need, and then make sure to empty your Trash.
A Proactive Tip: Stop treating your Downloads folder like a permanent archive. Think of it as a temporary inbox. Get into the habit of moving important files to their proper home immediately after downloading. This one simple habit can prevent gigabytes of clutter from ever building up.
Hunt Down Large and Duplicate Files
Beyond the usual suspects, massive files can hide anywhere on your Mac. We're talking old video projects, forgotten virtual machine files, or huge archives you unzipped and then forgot about. Searching for them manually would take forever, but Finder has some powerful tools to help.
Here’s how to quickly find the biggest space hogs:
- Open a new Finder window.
- Press Command + F to bring up the search tool.
- Make sure the search scope is set to "This Mac."
- Click the first dropdown menu (it probably says "Kind") and select "File Size."
- In the next dropdown, choose "is greater than."
- Start with a value like 1 GB.
Just like that, Finder will show you every single file on your Mac larger than a gigabyte. Scan through the list and delete anything you no longer need, like an old movie file or a massive ZIP archive you forgot about. This is one of the most direct ways to solve the "storage space running out" problem because you're targeting the biggest offenders first.
Duplicate files are another pointless source of wasted space. While macOS doesn’t have a built-in duplicate finder, you'll often spot obvious copies during your large-file hunt—things like multiple versions of the same photo album or presentation. Deleting these redundant files is pure, effortless space savings. These first steps are your best line of defense, clearing out the junk and giving your Mac the room it needs to breathe.
Smart Compression for Long-Term Space Savings
Deleting files is a quick fix when you see that dreaded “storage space is running out” warning, but it’s usually a painful and temporary solution. What about all those important files you actually need to keep? This is where a much smarter, non-destructive strategy comes in: compression. Instead of getting rid of your files, you just make them smaller.
This approach is all about shifting your mindset from reactive panic-cleaning to proactive, sustainable management. Think about a photographer with a massive library of high-res images, or a consultant with years of chunky, multi-page PDF reports. Deleting that work is unthinkable, but shrinking it down is a game-changer.
The Power of Lossless Compression
Modern compression isn't about turning your beautiful photos into a pixelated mess. Smart tools like Compresto use advanced algorithms to slash file sizes—often by 50-80% for images—without any noticeable drop in visual quality. You get to keep the integrity of your work while clawing back huge chunks of your disk space.
This is more important than ever. By 2025, global data storage needs are projected to hit a staggering 200 zettabytes, but the hardware to actually hold all that data isn't keeping up. That massive gap makes efficient file management a personal responsibility. You can read more about the looming data crunch and storage crisis on TechRadar.com.
Making compression a regular habit is one of the best ways to manage your Mac's storage for the long haul.
A Real-World Compression Scenario
Let's say you're a designer who just wrapped up a project. You're left with a 4 GB folder filled with high-resolution PNGs, mockups, and client presentation PDFs. You can't delete it—it's portfolio material. But letting it sit there, hogging up your drive, feels wrong. This is the perfect time to compress it.
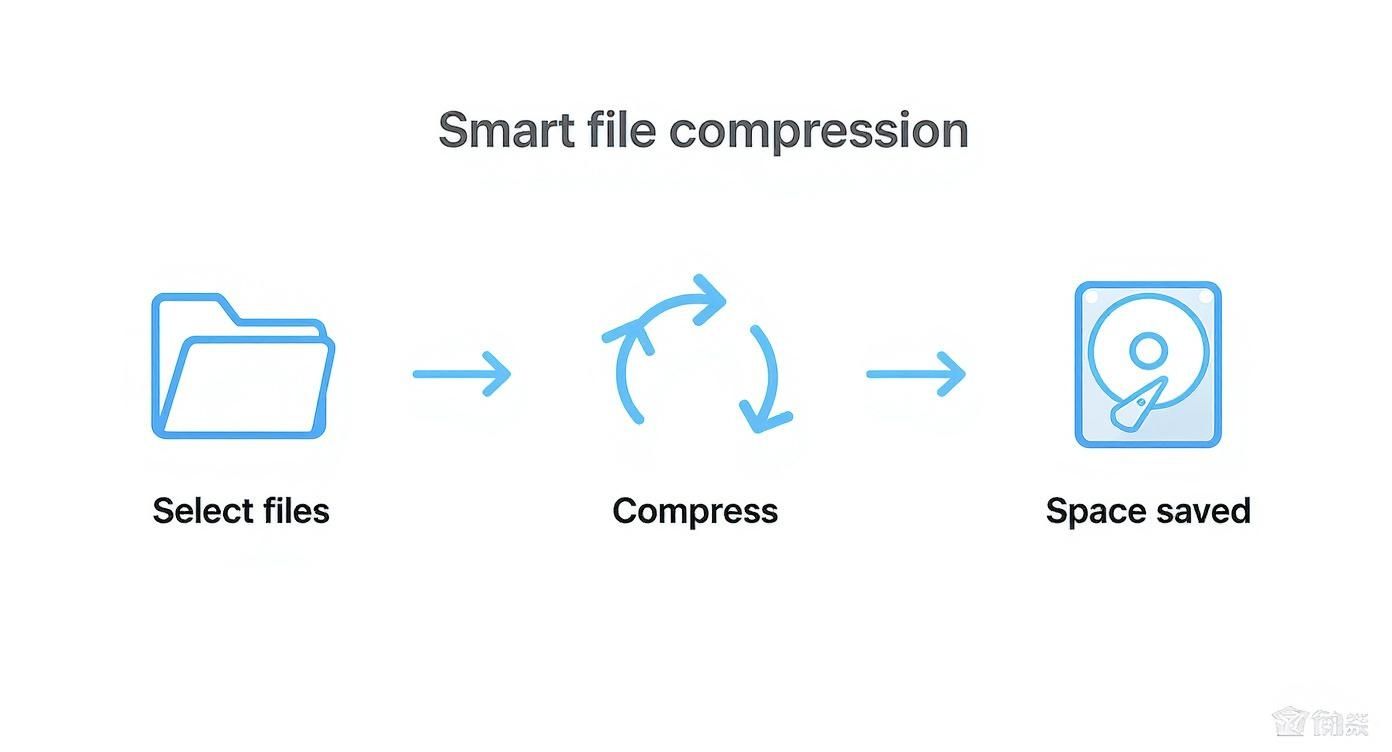
Using a tool with a dead-simple drag-and-drop interface makes this incredibly easy.
The screenshot above shows just how straightforward Compresto is. You literally just drag your files in, and the app does the heavy lifting. It removes all the technical guesswork and makes powerful file optimization something anyone can do.
Here’s what that workflow looks like in practice:
- Drag and Drop: Grab that entire 4 GB project folder and drop it right into the app.
- Pick a Preset: Choose a compression level that fits your needs. A "Strong" or "Web Optimized" preset is usually a great sweet spot between size and quality.
- Compress: The app churns through all the files in seconds, showing you the progress and how much space you're saving in real-time.
The result? That 4 GB folder is now a much more manageable 950 MB, saving you over 3 GB of precious space. The images still look sharp, and the PDFs are perfectly clear. You’ve kept your important work without sacrificing your hard drive.
Key Takeaway: Compression isn't just for old files you want to archive. It's an active management strategy that lets you keep more of what's important on your primary drive, making sure files are both small and instantly accessible.
Expanding Your Compression Toolkit
This same logic applies to all sorts of large files that give Mac users storage headaches. Video editors can shrink massive 4K footage to make sharing easier, while musicians and podcasters can make their audio files far more manageable. For example, a common practice is converting large WAV files to MP3, which can drastically cut down their size without a noticeable loss in quality for most listeners.
The benefits go beyond just your local drive, too. Smaller files mean faster uploads to cloud services like Dropbox or Google Drive, quicker email attachments, and less bandwidth usage. This is exactly why so many professionals build compression right into their daily routines. If you want to dive deeper into the specifics, check out our guide on how to compress various file types on your Mac.
By bringing smart compression into your workflow, you stop fighting a constantly full disk and start effortlessly maintaining a lean, organized, and efficient Mac. It's the best long-term solution for keeping that "storage space running out" warning away for good.
Automating Your Storage Management Workflow
Manually hunting for files to delete or compress definitely works, but it’s a reactive solution to a problem that never really stops. When you're constantly battling the "storage space running out" notification, the real win isn't just reclaiming space once—it's building a system that keeps your Mac clean without you even having to think about it. This is about turning a tedious chore into a hands-off process that works for you in the background.
The core idea is simple: instead of cleaning up messes after they happen, you prevent them from piling up in the first place. By setting up smart, automated rules, you can ensure that the files filling up your drive are managed from the moment they land on your Mac. It’s how you go from frantically fixing a full disk to effortlessly maintaining a healthy one.
This simple workflow shows just how powerful automated file compression can be.
As you can see, the whole process boils down to a few key stages, most of which you can set and forget.
Set Up Hands-Off Folder Monitoring
Imagine if every screenshot you took was automatically optimized, or if every large file landing in your Downloads folder was instantly made smaller. This is entirely possible with Folder Monitoring. It's a killer feature that watches specific folders and automatically runs a compression task on any new file that appears.
This is a complete game-changer for those folders that act as temporary holding pens for new files.
- Your Screenshots Folder: Every
Cmd+Shift+4creates a surprisingly large PNG file. Setting up monitoring on this folder can shrink each one by 70-80% the second it's saved. - The Downloads Folder: This digital dumping ground is perfect for automation. Automatically compress new PDFs, images, and other assets, making sure they take up minimal space from day one.
- Project Export Folders: If you're a designer or video editor, you can set a rule to automatically compress final exports, making them ready for sharing without any extra steps.
Setting this up transforms file management from an active task into a passive benefit. If you’re interested in a deep dive, you can learn more about how to use a Mac app to monitor a folder for automatic compression.
Use Drop Zones for On-The-Fly Compression
Automation is fantastic for routine stuff, but sometimes you just need to compress a one-off file right now. A Drop Zone is a small, floating window you can keep on your desktop. Instead of opening an app, you just drag a file or folder onto it, and it instantly gets compressed using your preferred settings.
I keep a Drop Zone tucked away in the corner of my screen for quick tasks like optimizing an image for an email or shrinking a PDF before sending it off to a client. It’s a tiny workflow tweak that saves a surprising amount of friction throughout the day.
Pro Tip: Set up different Drop Zones for different tasks. You could have one for "Web Images" that applies aggressive compression and another for "Archive PDFs" that uses a more conservative, high-quality setting. This puts powerful, customized workflows just a drag-and-drop away.
Integrate with Power-User Tools Like Raycast
For those of us who live by keyboard shortcuts, integrating your compression workflow with a launcher like Raycast takes efficiency to a whole new level. With a dedicated extension, you can trigger complex compression tasks without ever taking your hands off the keyboard.
For instance, you could create a workflow where you select a few files in Finder, hit a custom hotkey, and have them all compressed and moved to a "Ready for Upload" folder. This kind of integration is the ultimate endpoint for automation—it embeds powerful file management directly into your muscle memory. This is how you permanently solve the "storage space running out" problem by building smarter, not just cleaning harder.
Proactive Habits to Keep Your Mac Clean
Automating your cleanup is a huge win, but the real goal is to never see that "Your disk is almost full" warning again. This is where building a few simple, long-term habits comes in—it’s all about preventing digital clutter from piling up in the first place. Think of it as preventative care for your Mac.
These practices aren't about spending hours on tedious maintenance. It's about being more mindful of how you handle your files and applications. A few small tweaks to your workflow can make a massive difference, keeping your Mac feeling lean and responsive for years to come.
Offload and Archive Old Projects
Your Mac's internal drive is prime real estate. It should be reserved for the apps you use daily and the projects you're actively working on. Everything else—completed client work, old photo libraries, massive video archives—doesn't need to be sitting there taking up valuable high-speed storage.
This is where a smart offloading and archiving strategy becomes your best friend. It’s not just about dumping files onto the first external drive you find; it’s about having a tiered system.
- External SSDs: These are perfect for recent but inactive projects you might need to pull up quickly. You get fast transfer speeds without paying a premium for internal storage.
- Cloud Storage (iCloud, Dropbox): This is ideal for important documents, configuration files, and smaller assets you want accessible from anywhere, on any device.
- External HDDs: This is your cost-effective solution for deep, "cold storage." We're talking about that huge folder of raw video footage from a 2019 project or client work from five years ago that you can't bring yourself to delete.
This approach is more important than ever. The sheer volume of digital assets we create is putting pressure on storage industries worldwide. In the first three quarters of 2025 alone, global energy storage cell shipments soared by 98.5% year-over-year, showing just how intense the demand has become. You can read more about this surge in global battery shipment data on infolink-group.com.
A Simple Framework: If you haven't touched a file or project folder in six months, it's a prime candidate for offloading. You'll be amazed at how much space this simple rule can free up.
Deciding where to offload your files depends on your specific needs for access speed, cost, and security. Here’s a quick comparison to help you choose the right long-term solution.
Local vs Cloud vs External Storage Solutions
| Method | Best For | Access Speed | Cost | Security Level |
|---|---|---|---|---|
| Local (Internal Drive) | Active projects, frequently used apps, and OS files | Very High | High (per GB) | High (physical access) |
| Cloud Storage | Document collaboration, cross-device access, backups | Moderate (internet-dependent) | Moderate (subscription-based) | High (provider-dependent) |
| External SSD | Recently completed projects, large media libraries | High | Moderate | Moderate (physical risk) |
| External HDD | Long-term archiving, cold storage of massive files | Low | Low (most cost-effective) | Moderate (physical risk) |
Each method has its place. The key is to match the storage type to the file's importance and how often you need to access it. A hybrid approach often works best.
Treat Your Desktop and Downloads as Temporary
Let's be honest: the Desktop and Downloads folders are the two biggest clutter magnets on any Mac. They quickly become a digital junk drawer for everything from random screenshots and PDF receipts to huge app installers.
The single most effective habit you can build is to treat these locations as temporary holding pens, not permanent homes.
Set aside two minutes at the end of each day or week to triage these folders. Move important files to their proper project folders, and ruthlessly delete the rest. This one habit prevents the slow, creeping accumulation of junk that eventually triggers those storage warnings.
Uninstall Applications Properly
Dragging an app icon to the Trash doesn't actually get rid of everything. It often leaves behind a trail of orphaned files—preferences, caches, and support files—tucked away in your Mac's Library folder. Over time, these remnants can add up to gigabytes of wasted space.
To do a proper deep clean, you need to use a dedicated uninstaller tool. There are plenty of great options out there that scan your system to find and remove every single file associated with an app, ensuring a complete and clean removal. It’s an essential practice for keeping your system free of digital debris.
By adopting these proactive habits—archiving old files, keeping your workspace tidy, and uninstalling apps the right way—you can shift from constantly reacting to a full disk to effortlessly maintaining a clean one. It’s the most sustainable way to keep your Mac running smoothly and make that dreaded "storage space running out" notification a thing of the past.
Common Mac Storage Questions Answered
Even after a serious cleanup, it's normal to have a few questions rattling around. When you're staring down that frustrating "Your disk is almost full" warning, you want to be absolutely sure about the files you're deleting. Let's tackle some of the most common things people wonder about when they're trying to reclaim their Mac's storage.
Think of this as your quick reference guide for those "what if" moments. My goal here is to give you clear, confident answers so you can manage your Mac's storage without any of the usual guesswork.
Is It Safe to Delete Cache Files on My Mac?
Yes, for the most part, it's perfectly safe. Caches are just temporary files your Mac and its apps create to speed things up, like loading a website you visit often or launching an application. When you clear them out, the system or the app simply creates new ones the next time it needs them.
You might notice an app launching a touch slower the very first time after you clear its cache, but that's a tiny, one-time hiccup. The methods we’ve talked about focus on user-level caches (the ones in ~/Library/Caches), which are the safest to remove and usually offer the biggest bang for your buck in terms of saved space.
What Is Mac System Data and Why Is It So Large?
Ah, "System Data." This is easily one of the most confusing and frustrating categories in macOS Storage Management. It’s basically a catch-all bin for files that don't fit neatly into other groups like "Apps" or "Documents." This bucket includes system caches, temporary files, old Time Machine snapshots, and all sorts of app support files.
Its size can swing wildly and, thanks to a bug or a misbehaving app, sometimes balloon to an outrageous size. While you can't just right-click and delete the entire "System Data" category, the techniques you've already learned—clearing caches, hunting down large hidden files, and uninstalling apps properly—are the most effective ways to chip away at it.
Key Insight: Think of cleaning System Data indirectly. You can't attack it head-on, but by cleaning up its various components (caches, old files, app remnants), you effectively shrink its footprint.
How Much Space Does Compressing Files Actually Save?
This really depends on the type of file and its original state, but the results can be pretty dramatic. It’s not just a few megabytes here and there; we're often talking gigabytes.
Here are a few real-world examples I see all the time:
- High-Resolution Images (JPEGs, PNGs): It's common to see a 50-80% size reduction with almost no noticeable drop in quality. A 5 GB folder of vacation photos could easily shrink down to under 2 GB.
- Videos (MP4, MOV): Savings here can range anywhere from 30-70%, depending on how the video was originally encoded. For anyone creating content, this is a massive win.
- Documents (PDFs): For PDFs that are heavy with images, you can often cut the file size in half. This makes them way easier to email and share with others.
Honestly, compression is one of the most powerful tools for managing large files you absolutely need to keep.
I Have Tried Everything and Still Have No Space. What Now?
If you’ve gone through all the steps—cleared the caches, zapped the duplicates, compressed your big files, offloaded archives, and emptied the trash—and you're still running on fumes, it might be time for a hardware solution.
This is a common crossroads, especially for Macs with smaller internal drives, like the 128GB or 256GB models. The simple truth is you may have just outgrown its physical limits. At this point, your most practical option is to expand your storage externally. Investing in a large, fast external SSD to archive old projects or store your media libraries is often the quickest and most cost-effective fix.
Ready to stop deleting and start shrinking? Compresto gives you the power to reclaim gigabytes of space without sacrificing quality. Automate your workflow, compress files in seconds, and finally get rid of that "storage full" warning for good. Download Compresto and take control of your Mac's storage today.