Compress Files for Mac: Smart Strategies to Reclaim Space
The Mac Compression Advantage: Why It Matters
Mac users, especially those dealing with creative projects, often find themselves battling limited storage. Upgrading internal drives can be pricey, making file compression a practical necessity. Compression helps you maximize your Mac's storage potential, letting you keep more files, apps, and media without breaking the bank on hardware upgrades. This is especially helpful for professionals like graphic designers and video editors who work with large files daily.
Imagine compressing a 1GB video project down to a fraction of its original size. That’s a significant amount of space saved! Plus, compressed files transfer faster, both within your computer and over the internet. This means quicker uploads to Dropbox, faster email attachments, and smoother file sharing with colleagues. These speed improvements can significantly boost productivity, especially for those constantly collaborating or sharing large files.
Why Mac Compression Matters
Efficient file management is a global priority, driving significant growth in the data compression software market. The market, valued at $2,476.52 million in 2024, is expected to reach $4,306.13 million by 2032, a CAGR of 7.2%. This demonstrates a growing need for effective compression solutions. To learn more, check out this report on the Data Compression Software Market.
It's important to note that macOS and Windows handle compression differently. Both use common formats like ZIP, but Mac's built-in Archive Utility integrates seamlessly with Finder for a smoother experience. macOS also supports unique formats like DMG, often used for distributing software, showcasing its specialized approach to file management. You might find this article interesting: How file compression reduces digital waste.
Understanding Compression Ratios and Methods
Compression ratios tell you how much a file shrinks after compression. A higher ratio means more compression, but can sometimes affect file quality. This leads us to lossy and lossless compression. Lossy compression, good for media like images and videos, achieves smaller sizes by discarding some data. Lossless compression, ideal for text documents and code, keeps all original data intact, ensuring perfect fidelity after decompression.
Choosing the right method depends on the file type and what you'll use it for. Lossless is crucial for archiving or critical data. For regular file management or sharing media online, lossy compression usually provides a good balance between size and quality. For help with other potential Mac issues, here's a resource on troubleshooting Shopify Checkout Issues. Understanding these differences helps you make informed decisions about file compression on your Mac, optimizing storage and ensuring your files remain intact.
Hidden Powers: Mac's Built-In Compression Tools
Your Mac comes with powerful compression tools already built in, often underutilized even by experienced users. These tools provide a simple and efficient way to compress files without needing extra software. Let's explore these handy features, starting with the easiest method.
The Right-Click "Compress" Feature
The fastest way to compress a single file or several files is through the context menu. Select the file(s) in Finder, right-click, and choose "Compress." This creates a ZIP archive in the same location as the original file(s). This quick approach is ideal for compressing files for email or quick sharing.
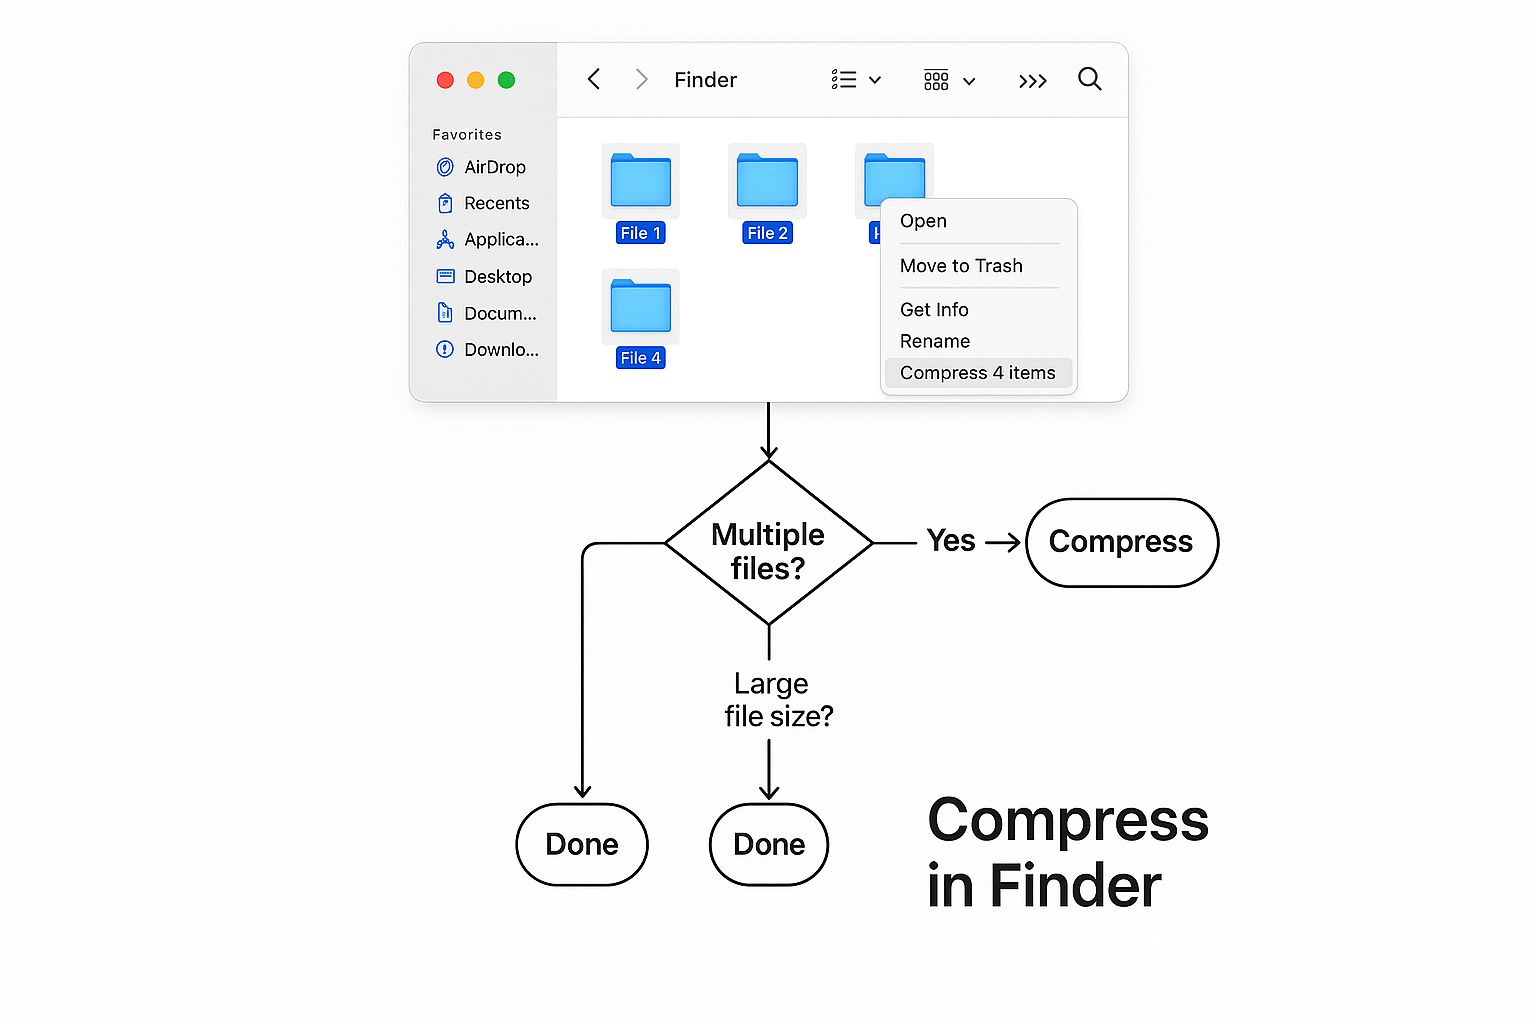
The infographic above visually shows how simple it is to compress files directly within Finder with just a right-click. This simple action starts the compression process, producing a ZIP archive of the selected items. This built-in feature makes compressing files incredibly easy and accessible.
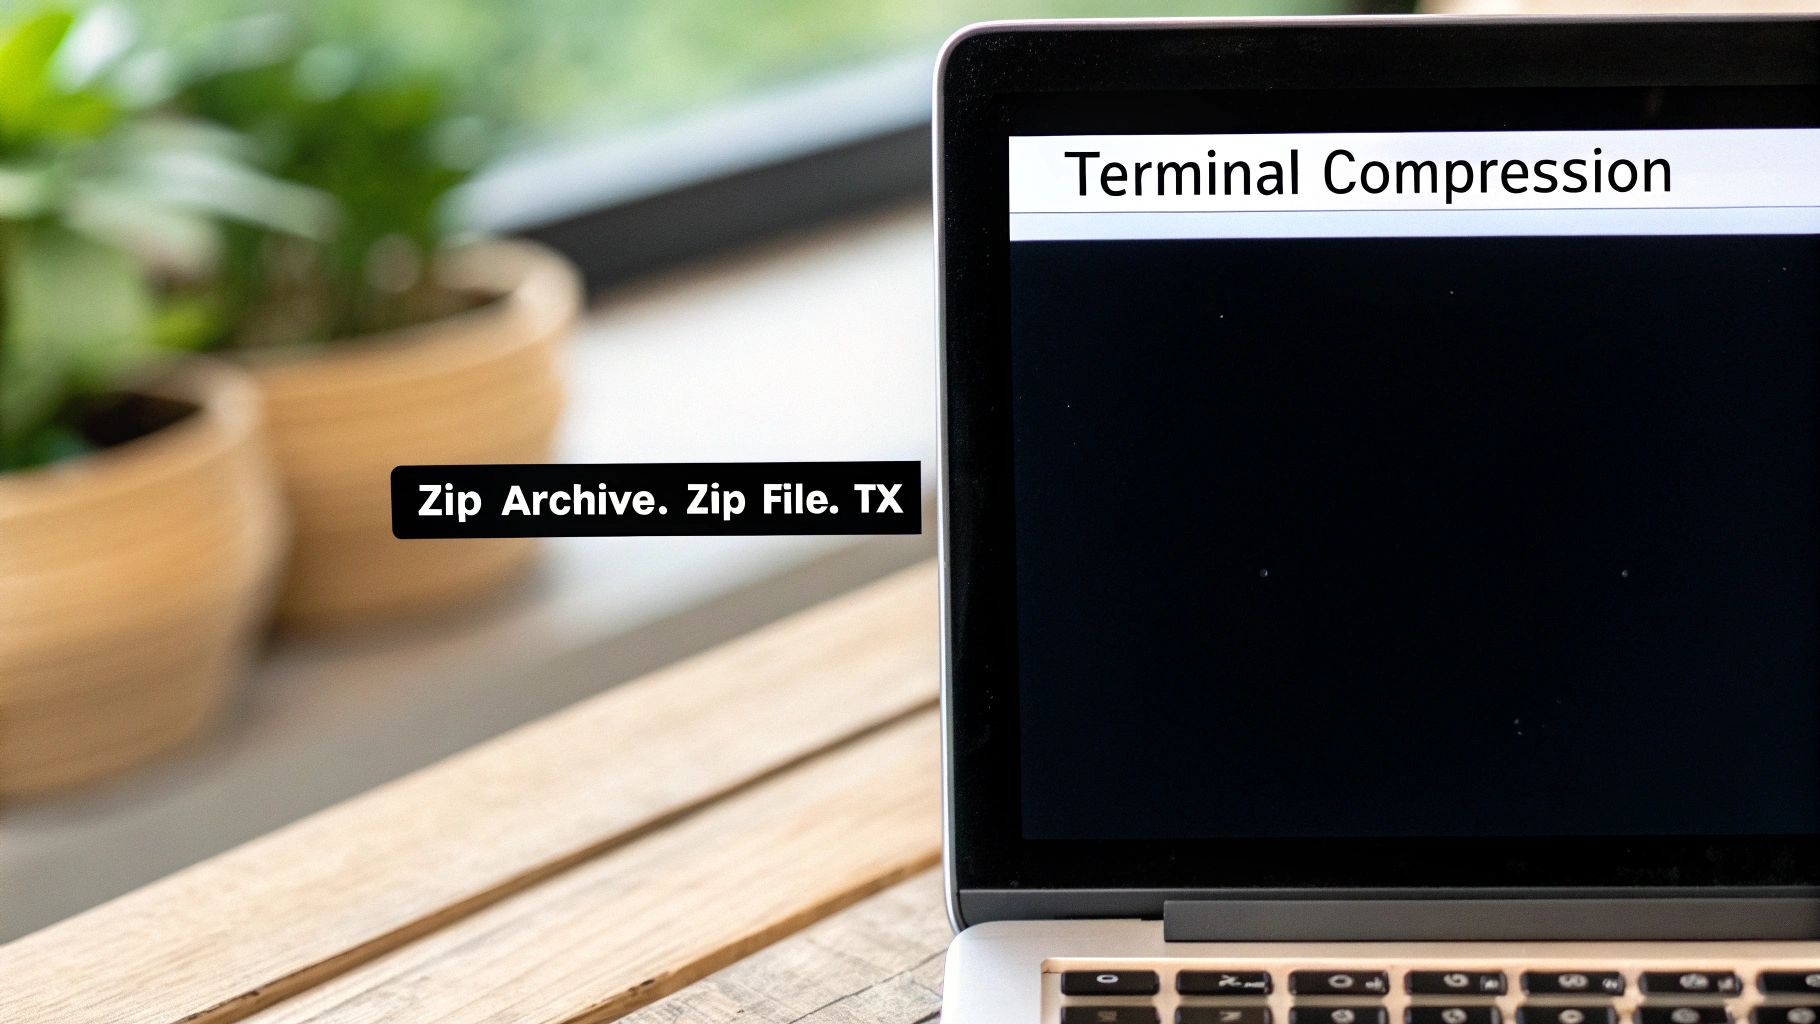
Archiving Using the Terminal
For those comfortable using the command line, the Terminal offers more advanced compression choices. Commands like zip, gzip, and tar provide greater control, including setting compression levels and creating various archive formats. For instance, the command zip -r archive.zip folder/ recursively compresses an entire folder's contents. This method provides flexibility for specific compression requirements.
Automator for Batch Compression
Mac's Automator application lets users automate repetitive tasks, including file compression. Creating a simple Automator workflow can automate compressing files in specific locations, which saves significant time and effort. This is especially valuable for those who regularly compress many files. Automator streamlines this workflow considerably.
Password Protecting Your Archives
Protecting important data is critical, and your Mac's tools offer the ability to password-protect compressed archives. Although not as detailed as dedicated encryption software, this feature adds a layer of security to compressed files. This is useful for sharing sensitive documents or storing private information.
To help visualize the differences between these built-in methods, let's examine a comparison table.
Native Mac Compression Commands Comparison A comparison of different built-in compression commands and methods available on macOS.
| Method | Access Point | Compression Format | Password Protection | Ease of Use | Best For |
|---|---|---|---|---|---|
| Right-Click "Compress" | Finder | ZIP | Yes | Very Easy | Quick, single/multiple file compression |
| Terminal Commands (zip, gzip, tar) | Terminal | ZIP, GZIP, TAR | Yes | Moderate (requires command-line knowledge) | Advanced compression, custom settings |
| Automator Workflows | Automator | Varies (based on workflow) | Yes | Moderate (requires workflow setup) | Automated batch compression |
This table highlights the key differences between Mac's compression tools. The right-click method is excellent for speed and simplicity. Terminal commands offer control, while Automator automates the process for large batches. All methods provide basic password protection.
These built-in tools provide flexible options for compressing files on your Mac, balancing simplicity and functionality. While third-party apps offer advanced features, Mac's native tools are usually enough for everyday use.
Beyond The Basics: Third-Party Compression Apps
While macOS offers built-in compression tools, third-party apps provide advanced features and more control for frequent users of compressed files. These applications are designed for power users needing specialized formats, better security, or seamless cloud integration. This section explores top-tier compression tools for Mac, comparing free and paid options.
Keka: The Compression Ratio Champion
Keka is known for its excellent compression ratios, often surpassing the built-in macOS utilities. This free, open-source application supports various formats, including 7z, ZIP, TAR, GZIP, and BZIP2, making it versatile for different compression needs. Its simple interface makes complex tasks manageable.
BetterZip: Preview and Edit Within Archives
BetterZip offers a powerful preview, letting you view archive contents before extracting, saving time and storage. This premium app allows editing files directly within archives, improving workflows. BetterZip also excels at batch processing and integrates with cloud storage services.
The Unarchiver: The Format Support King
The Unarchiver, a free app on the App Store, is known for its exceptional format support. It handles numerous archive types, including less common ones like RAR, ISO, CAB, and even older formats like StuffIt. This makes it invaluable for Mac users encountering various compressed file formats.
To help you choose the right tool, we've compiled a comparison table:
Top Mac Compression Apps Comparison
Detailed comparison of the most popular third-party compression tools available for Mac users
| App Name | Price | Supported Formats | Compression Ratio | Password Protection | Cloud Integration | Unique Features |
|---|---|---|---|---|---|---|
| Keka | Free | 7z, ZIP, TAR, GZIP, BZIP2 | Excellent | Yes | No | Open-source, simple interface |
| BetterZip | Paid | ZIP, TAR, GZIP, BZIP2, RAR, 7z, ISO, and more | Good | Yes | Yes | Preview and edit within archives, batch processing |
| The Unarchiver | Free | RAR, ISO, CAB, StuffIt, and many more | Varies | Yes | No | Extensive format support |
This table summarizes the key features and capabilities of each app, allowing you to quickly identify the best fit for your needs. Consider factors like price, supported formats, and unique features when making your decision.
Choosing The Right Tool For Your Needs
Choosing the right tool depends on your needs. Prioritize compression? Keka excels. Need advanced previewing and editing? BetterZip is a good investment. Need broad format support? The Unarchiver offers unmatched versatility. The data compression software market is growing. In 2023, it was valued at $1.03 billion, projected to reach $1.11 billion in 2024 (a CAGR of 7.6%) and $1.50 billion by 2028 (a CAGR of 7.7%). Find more statistics here. This growth highlights the increasing need for efficient compression tools.
You might also be interested in: How to compress videos using FFmpeg and an easier alternative. These third-party apps enhance your Mac's capabilities, giving you greater control over file compression, optimizing workflow, and maximizing storage. Each tool offers unique features and pricing, letting you choose the perfect match.
File-Type Mastery: Specialized Compression Techniques
Not all files are created equal, especially when it comes to compressing them on your Mac. Understanding the best strategy for different file types can dramatically improve your results. Let's explore some specific compression techniques for common file types Mac users encounter every day.
Image Compression: Balancing Size and Quality
Image compression requires understanding different file formats. JPG is a popular choice, but HEIC often offers better compression without sacrificing noticeable quality. This makes it ideal for storing photos on your Mac and saving precious disk space. For instance, a 10MB JPG might compress down to 2MB as a HEIC file while looking virtually the same.
Tools like ImageOptim can further reduce image sizes without visible quality loss. ImageOptim removes extra data and uses efficient compression, making it a must-have for photographers and graphic designers.
Video Compression: Encoding for Efficiency
Video files often take up the most storage space and need special attention. The HEVC/H.265 encoding standard offers considerably better compression than older formats like H.264. This means smaller files with the same video quality. Mac-friendly apps like HandBrake give you detailed control over video compression, letting you balance file size and quality.
Optimizing Office Documents, PDFs, and Audio
Common office documents (Word files, PowerPoint presentations) often have embedded images or fonts that increase their size. Removing these extras or converting to more efficient formats (like PDF/A for archives) can free up significant storage space. When considering other apps, comparing features is helpful. Resources like this PDF software comparison can assist in evaluating different PDF tools.
PDFs can also be compressed using tools like PDFpen or the built-in Preview app to shrink file size without impacting readability. For audio files, lossless compression is generally the best way to maintain original quality.
Automating Compression Tasks: Streamlining Your Workflow
For tasks you do repeatedly, Mac's built-in Automator and Shell scripts can be incredibly helpful. You can create an Automator workflow to automatically convert images in a folder to HEIC, for example. This automates complex tasks, saving time and ensuring consistency. Shell scripts offer even more control for advanced users. Mastering these automation features can streamline your workflow and give you back valuable time.
Compression Settings: Fine-Tuning for Peak Performance
Beyond simply zipping files, optimizing your compression settings can significantly improve both storage savings and processing speed on your Mac. This section explores advanced settings that can greatly impact your file management.
The Balancing Act: Compression Ratio vs. Speed
Understanding the interplay between compression ratio and speed is crucial. A higher compression ratio shrinks files more effectively, saving storage. But achieving this often takes longer. Prioritizing speed might mean accepting a slightly larger file size. Conversely, if storage is paramount, longer compression times for maximum size reduction may be acceptable. For example, archiving a large video might warrant a longer compression time to minimize storage needs.
Harnessing Your Mac's Power: Multi-Threading and Memory
Modern compression applications often utilize multi-threading, leveraging multiple processor cores for faster compression. Also, the memory allocated to the task impacts performance. With ample RAM, allocating more to the compression app can improve speed, especially with very large files. For example, HandBrake allows adjusting memory allocation for compressing large video files.
Solid Archives vs. Standard Archives
Consider the archive type. A solid archive treats all files as a single block, potentially achieving higher compression, especially for many small files. However, extracting even one file necessitates decompressing the whole archive, hindering frequent access. Standard archives compress each file individually, balancing access speed and compression. Standard archives are often preferable for frequent file access.
Advanced Techniques: Large Files, Incremental Backups, and Differential Compression
For massive files, splitting them before compressing can expedite both compression and extraction. Incremental backups compress only changed data since the last backup, saving time and storage. Differential compression compares new files to existing ones, compressing only the differences. See our guide on How to master file size reduction for further tips. These techniques are valuable for regular backups or projects with frequent revisions.
Command-Line Control: For the Power User
For Terminal users, many compression utilities offer command-line parameters for granular control. This allows automation and customization beyond graphical interfaces, enabling control over compression levels, file exclusions, and more. For instance, the zip command lets you specify compression levels with the - flag. Mastering these settings significantly boosts your Mac's file management, maximizing storage, and speeding up your workflow.
When Things Go Wrong: Troubleshooting Compression Issues
Even on a Mac, file compression isn't always a seamless process. Occasionally, you might run into issues that prevent you from accessing your compressed files. This section offers troubleshooting steps for common problems, helping you quickly get back on track.
Corrupted Archives: Identifying and Fixing the Damage
One frequent issue is corrupted archives. This can stem from interrupted downloads, problems with your storage device, or software glitches. A corrupted archive may not open or extract correctly. Your first step should be to try re-downloading the archive. If that fails, try a different decompression tool. The Unarchiver, known for its wide format support, may be able to recover some files even from a damaged archive.
Extraction Failures: Unraveling the Causes
Sometimes, archives seem fine but won't extract fully. This might be due to file permission errors, a common issue in macOS, especially with downloaded files. Check the file permissions in Finder's "Get Info" panel to ensure you have read and write access. Another solution is to try extracting the archive to a different location, like your Desktop, which often has more permissive settings.
Password Recovery: Retrieving Lost Access
Forgetting the password to a protected archive can be a real challenge. Password recovery tools exist, but they aren't always effective. The best strategy is using a secure password manager to prevent this situation. Create strong, unique passwords for each archive and store them securely. This proactive approach is your best defense.
Encoding Issues and Compatibility Problems
Files with international characters can sometimes cause encoding issues during compression. Make sure your compression tool supports UTF-8 encoding, which handles a wide character range. Compatibility problems can also occur between macOS versions. Older versions may not support newer compression formats or features. When possible, use the same macOS version for both compressing and decompressing.
Managing Large Files and Interrupted Processes
Very large files can sometimes strain compression tools. If you’re struggling to compress a huge file, consider splitting it into smaller parts before compressing. This can improve compression speed and lower the risk of corruption. Also, if a compression process is interrupted (like during a power outage), try resuming it if your software allows. Some tools, like BetterZip, offer features to manage interruptions and pick up where they left off.
By understanding these troubleshooting tips, you can effectively resolve most compression issues on your Mac. These strategies help you efficiently handle occasional problems, keeping your workflow running smoothly.