Mac File Compression Tips for Better Storage Efficiency
Understanding What Mac File Compression Really Means
Mac file compression isn't just about shrinking file sizes. It's a key strategy for optimizing your Mac's storage and improving how you manage your files. The process boils down to encoding information using fewer bits than the original. Essentially, the system identifies and removes redundant data, leading to a smaller file size. This understanding is fundamental for efficient storage management, particularly for large files like photos and videos.
Lossy vs. Lossless Compression: Making Informed Choices
There are two main types of compression: lossy and lossless. Lossy compression, true to its name, sacrifices some data during the process. Imagine summarizing a lengthy email—you retain the core message, but some details are lost. This method commonly compresses media files like images and audio, where a minor quality reduction often goes unnoticed.
Lossless compression, on the other hand, preserves all original data. It's like carefully packing a suitcase—everything remains intact upon unpacking. This method is perfect for crucial documents or files where data integrity is paramount. Choosing the right type depends on the specific file and your priorities.
How Mac Files Affect Compression: Unique Considerations
MacOS manages files differently than other operating systems. It often retains metadata (information about the file, like creation date and author), impacting the level of compression possible. Older Mac files may also include resource forks, storing extra data that can affect compatibility across different operating systems.
This means a file compressed on a Mac might behave unexpectedly when opened on a Windows machine. For example, a compressed image might lose its custom icon on a Windows PC if the resource fork was mishandled. Knowing these details helps set realistic compression expectations.
File Type Considerations: Not All Files Are Equal
Different file types compress differently. Files already containing compressed data, such as JPEG images or MP4 videos, won't shrink as much as uncompressed formats like TIFF or WAV. Think of compressing an already-squeezed sponge—there's not much more water to extract.
Optimizing images is another way to improve storage efficiency. For more information, see our guide to Shopify product image size. Conversely, text files and documents often compress significantly due to repeating characters and patterns that compression algorithms efficiently reduce. Consider the file type when choosing your compression method and predicting the final size.
Setting Realistic Expectations: Avoiding Compression Myths
Compression is helpful, but it has limits. Don't expect to shrink a 1GB video to 1MB without major quality loss. Understanding compression limitations and different file type characteristics is crucial for effective use. This means setting achievable size reduction goals and selecting the right method based on file type and your needs. For instance, lossy compression suits videos for online sharing, while archiving important documents demands lossless compression to preserve all data.
How Mac Compression Tools Actually Evolved

The history of Mac file compression reflects the Mac's own journey. Early compression tools tackled the platform's unique challenges, shaping the tools we rely on today. Understanding this history helps you choose the right compression method for your needs.
The Reign of StuffIt: A Mac-Centric Solution
Sharing files between Macs and other operating systems, especially Windows, was tricky in the early days. Resource forks, files used by the Classic Mac OS to store metadata like icons, caused compatibility problems. Many non-Mac compression tools couldn't handle these resource forks, making cross-platform sharing difficult.
StuffIt emerged as the leading solution. This application became essential for Mac users, compressing files while preserving resource forks. Throughout the 1990s and early 2000s, StuffIt dominated, with StuffIt Deluxe enjoying widespread adoption. By 1997, a reported 80% of Mac users relied on StuffIt for compression.
Launched in 1987, StuffIt supported native Mac resource forks, a key feature missing from many other tools. While its compression ratios typically ranged from 10% to 60%, depending on the file type, it solved the resource fork issue, enabling effective file sharing with Windows users. Discover more insights about the history of Mac Compression.
The Shift to Cross-Platform Compatibility: The Rise of ZIP
Mac OS X marked a major shift. With increased focus on compatibility, the ZIP format gained popularity over the proprietary StuffIt format. This change reflected the growing need for seamless file exchange between Mac and Windows. However, StuffIt remained a familiar part of many Mac workflows.
Modern Mac Compression: Built-In Tools and Third-Party Apps
Today's Mac compression landscape is diverse. Mac OS X introduced built-in compression, allowing users to create and extract ZIP archives directly through the Finder.
Numerous third-party tools also offer advanced features. Some specialize in certain file types (images or videos), while others focus on improved compression algorithms or security. Mac users now have a wide selection, choosing the best tool for their specific needs. This range of options shows how the Mac ecosystem has matured.
The Future of Mac File Compression: Cloud Integration and Beyond
As cloud storage grows, Mac file compression will continue evolving. Expect tighter integration between compression tools and cloud services, streamlining file storage, sharing, and synchronization. This might include automatic compression before cloud uploads or on-the-fly decompression during downloads.
New compression algorithms promising better compression ratios and faster processing speeds are continually being developed, shaping how we manage files on our Macs.
Mastering Your Mac's Built-In Compression Powers
Your Mac comes loaded with powerful compression tools that are often overlooked. We're not just talking about the simple right-click "Compress" function. Your Mac has built-in capabilities that can seriously improve how you manage files, from quick archiving to easier sharing. Let's explore how to make the most of these features.
Effortless Archiving With the Finder
The Finder makes compressing files on your Mac incredibly simple. Select the files or folders you want to compress, right-click, and select "Compress." This creates a ZIP archive, a standard format that's easily opened on other operating systems, including Windows. This quick process is perfect for bundling files to send via email or share quickly.
Quick Look Previews For Compressed Files
Want to peek inside a compressed file without extracting it? Select the ZIP file and press the spacebar. The Quick Look feature will show you what's inside, so you can confirm you have the right files before sharing or extracting. This saves you time and extra steps.
Password-Protecting Your Archives: Built-In Security
Need to protect sensitive information? Your Mac offers built-in encryption for ZIP archives. While the Terminal provides detailed control, there are simpler ways to add security. Several third-party tools integrate seamlessly with the Finder to allow you to add password protection right from the context menu. This added security is vital for keeping confidential data safe.
Spotlight Integration: Finding Compressed Files Instantly
Spotlight, your Mac's built-in search tool, can even look inside ZIP archives. This means you can search for a specific file within a compressed archive without having to extract it. Searching for "invoice.pdf" will find it, even if it's inside a ZIP file. For further reading on file organization, you can visit the Casa Makes Blog. This integration makes finding files a breeze.
Leveraging Keyboard Shortcuts for Efficiency
Keyboard shortcuts can speed up almost any task on your Mac, and compression is no exception. While the specific shortcuts depend on the tools you use, learning a few key combinations can save you a significant amount of time. Some apps let you compress files with a single keystroke, bypassing the right-click menu entirely. Mastering these shortcuts can transform your workflow.
Knowing When to Use Third-Party Apps: Avoiding Overcomplication
While your Mac’s built-in tools are quite capable, sometimes a third-party app is the right choice. Some apps specialize in specific file formats, offering better compression. Others are great for handling large batches of files. Understanding these differences will help you decide when a dedicated app is worthwhile and when the built-in features are sufficient. Sometimes, the simplest solution is the best, avoiding unnecessary software.
Choosing Third-Party Tools That Actually Matter
While your Mac’s built-in compression tools handle basic tasks, third-party apps offer advanced features that can significantly improve your workflow. We'll explore tools that serious Mac users rely on for real-world results.
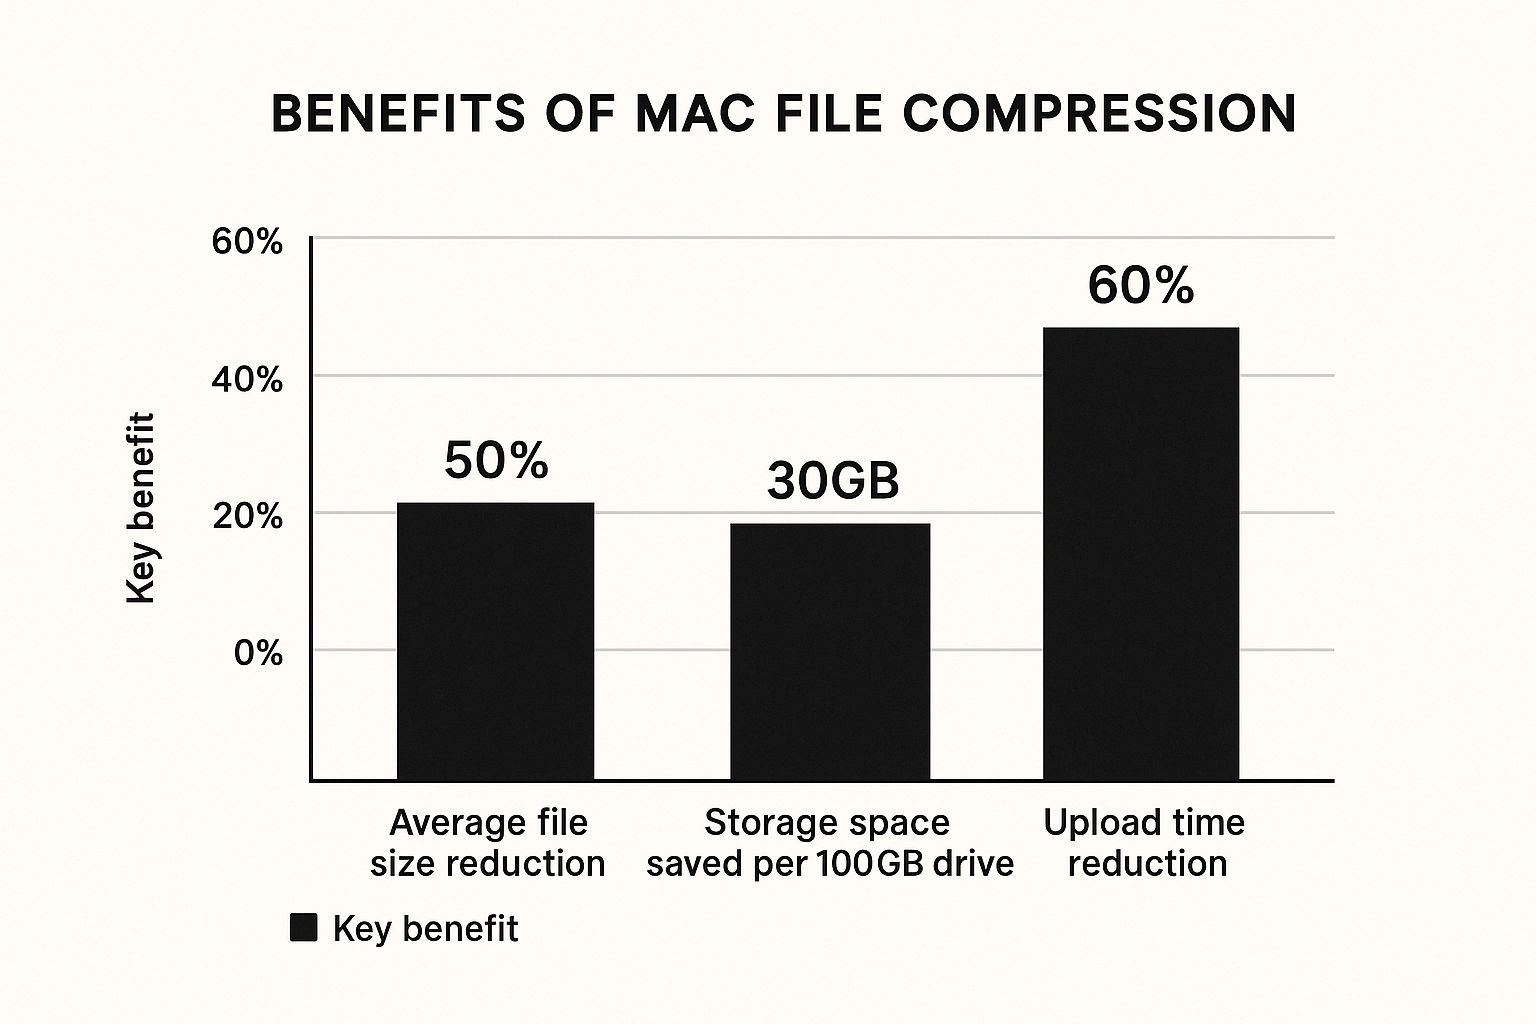
The infographic above highlights the benefits of Mac file compression: smaller files, storage savings, and faster uploads. Compressing files can shrink them by 50%, free up 30GB on a 100GB drive, and speed up uploads by 60%. These gains boost productivity, especially for those working with large files.
Evaluating Popular Mac File Compression Tools
Let's compare popular third-party compression tools, focusing on performance, features, and real-world usability.
-
The Unarchiver: This free tool handles many archive formats, great for encountering unusual file types. It lacks advanced features like batch processing and encryption.
-
Keka: Free and open-source, Keka is known for speed and efficiency. It supports common formats with a simple interface. However, it has fewer features than paid options.
-
BetterZip: This paid app provides a full suite of features: archive creation, extraction, editing, and encryption. It integrates well with Finder. The price may be a concern for some. BetterZip offers a free trial.
-
Archiver: This paid tool has a clean interface and supports formats like RAR and 7-Zip. It focuses on ease of use and Mac integration. You might find this article helpful: How to master video compression on a Mac. Its cost, like BetterZip, requires consideration. Archiver is another option.
Feature Comparison Table
The following table compares these tools:
| Software | Price | Key Features | Best For | Format Support |
|---|---|---|---|---|
| The Unarchiver | Free | Wide format support | Handling obscure archive formats | Numerous (including RAR, 7-Zip) |
| Keka | Free | Speed, efficiency, simple interface | Basic compression and extraction needs | ZIP, 7z, RAR, TAR, and more |
| BetterZip | Paid | Comprehensive features, Finder integration | Advanced users requiring powerful features | Wide range |
| Archiver | Paid | Clean interface, RAR and 7-Zip support | Users prioritizing simplicity and aesthetics | RAR, 7-Zip, ZIP, TAR, and more |
Pricing Versus Value: Making A Smart Investment
Choosing free or paid tools depends on your needs. Free tools like The Unarchiver and Keka work well for basic tasks. Paid apps offer advanced features and often better Mac integration. Consider the long-term value. If you work with sensitive data, BetterZip's encryption might be worth the investment. If you need batch processing, a paid tool's time savings could offset its price.
Choosing the right Mac file compression tool boosts productivity. Understand your needs and evaluate your options to streamline your workflow and maximize your Mac’s potential.
Smart Compression Strategies For Different File Types
Not all files compress the same way on your Mac. Knowing the differences is key to saving space and time. This guide explores smart compression strategies for common file types.
Images: Balancing Quality and Size
Image files, especially JPEGs and PNGs, are frequent compression targets. JPEGs, which already use lossy compression, offer less additional compression. However, tools like ShortPixel can optimize them further without much quality loss. PNGs, using lossless compression, have more potential for reduction. One strategy is reducing color depth, which shrinks the file without noticeably affecting quality. You can learn more tips in this guide: How to master file size reduction on a Mac.

Videos: Choosing the Right Codec and Resolution
Videos often require careful handling due to their large size. Key factors affecting file size and quality include video format, codec, bitrate, and resolution. A good balance is often achieved using codecs like H.264 or H.265 within an MP4 container. Lowering the resolution, say from 4K to 1080p, significantly reduces size for online sharing without much quality impact.
Documents and Text Files: Maximizing Lossless Compression
Documents and text files usually compress well with lossless methods like ZIP because of repetitive patterns. This ensures data remains intact after decompression. The more repetition in a text file, the greater the compression. That’s why text-heavy documents shrink considerably.
Audio Files: Lossy vs. Lossless Considerations
Audio files, like images, can use both lossy and lossless compression. Lossy formats like MP3 create smaller files but lose some audio detail. Lossless formats like FLAC preserve all audio data, essential for archiving or professional work. The best choice depends on the use: MP3 for casual listening, FLAC for preserving originals.
Archiving and Software: Handling Specialized Formats
Archiving files, especially for applications or design projects, often involves formats like DMG (disk image) on Mac. These may already use compression, but setting the right compression level when creating the DMG is crucial. For distributing software, the right level balances file size and download time.
Creative Professionals: Special Considerations for Large Files
Creative professionals dealing with large media files need specific compression strategies. Balancing size reduction with preserving professional quality requires carefully chosen compression settings and the right tools. For print images, a higher JPEG quality preserves detail while still shrinking the file. Understanding these nuances helps manage files effectively.
Advanced Techniques That Actually Work
Beyond simply compressing files on your Mac, there's a whole world of powerful techniques that can significantly improve how you manage them. This section explores these more advanced methods, covering everything from command-line tools to automation and cloud integration.
Harnessing the Power of the Terminal
The Terminal offers much more than just a programmer's tool; it provides robust control over file compression on your Mac. Command-line tools like zip, tar, and gzip allow for batch processing, customized compression levels, and even file encryption. For instance, the command zip -er archive.zip folder/ compresses the "folder" directory, encrypts it, and saves it as "archive.zip". This offers a level of granular control you won't find in the Finder's basic compression utility.
The Terminal also excels at complex archiving. You can combine multiple commands to compress, encrypt, and split a large file into smaller, more manageable pieces. This is incredibly useful for system administrators or anyone working with large datasets.
Automating Compression With Scripts and Workflows
If you find yourself repeating the same compression tasks, scripts and Automator can automate the process. Imagine needing to compress a specific folder daily—a simple script can handle this automatically. Automator takes this further, allowing you to create visual workflows without writing any code. You could build a workflow that compresses, encrypts, and uploads files to cloud storage with a single click, greatly improving efficiency for recurring tasks.
This also allows you to automate backups of important files or streamline how you prepare files for sharing, saving significant time and effort.
Integrating With Cloud Storage Services
Cloud storage services like iCloud, Dropbox, and Google Drive often handle compression behind the scenes. Understanding how this works is key. Some services compress files on your computer before uploading, improving upload speeds and saving bandwidth, which is especially beneficial for large files or slower internet connections.
Other services compress files on their servers. Knowing this difference helps you plan your storage strategy and manage files effectively, ensuring data is stored both securely and efficiently.
Encryption and Security: Protecting Your Compressed Files
When compressing sensitive information, encryption is a vital consideration. The Terminal’s zip command offers built-in encryption, and several third-party tools provide similar functionality. Encrypting your archives adds an extra layer of security, protecting your data even if someone intercepts the archive. This is especially important for confidential documents or files containing personal information.
Selective Compression Based on File Criteria
You can select specific files for compression based on factors like file type, size, or modification date. This targeted approach optimizes storage and processing time, which is particularly useful for large, diverse collections of files. You could choose to compress only files larger than a certain size, or focus on specific file types like images.
Integration with Version Control Systems
Developers can benefit from integrating file compression with version control systems like Git. Compressing large files before committing them to a repository significantly reduces its size, improving collaboration and streamlining workflows. This leads to faster push and pull operations and reduced bandwidth usage for teams working on shared projects. For more information, you might find this article helpful: How to master lossless file compression.
Performance Optimization: Leveraging Your Mac's Power
Compressing large files can be resource-intensive. Using your Mac's processing power efficiently is essential. This includes managing memory usage and using tools that support multi-threading, enabling your Mac to process multiple parts of an archive simultaneously. This prevents large compression tasks from slowing down your system or disrupting other work.
To help you explore command-line compression in more detail, the following table provides a helpful overview.
Command Line Compression Options
Overview of Terminal commands and parameters for advanced Mac file compression tasks
| Command | Format | Key Options | Use Case | Performance |
|---|---|---|---|---|
zip | .zip | -e (encrypt), -r (recursive), -9 (maximum compression) | Creating and encrypting archives, good compatibility | Generally fast, encryption can add overhead |
tar | .tar, .tar.gz, .tar.bz2 | -c (create), -x (extract), -z (gzip), -j (bzip2), -f (file) | Archiving multiple files and directories, often combined with other compression tools | Very fast for archiving, compression speed depends on the tool used |
gzip | .gz | -k (keep original file), -9 (maximum compression) | Compressing individual files, often used with tar | Good compression ratio, moderate speed |
bzip2 | .bz2 | -k (keep original file), -9 (maximum compression) | Compressing individual files, often used with tar, higher compression than gzip | Higher compression ratio than gzip, but slower |
This table summarizes common compression commands, their key options, typical use cases, and relative performance characteristics. Choosing the right tool depends on your specific needs.
By using these advanced techniques, you can move beyond basic file compression on your Mac and gain more control over your digital files. These methods greatly improve workflow efficiency, optimize storage space, and enhance data security.
Solving Common Mac Compression Problems

Even with the best compression tools, working with compressed files on a Mac can sometimes be tricky. This section offers solutions to common issues Mac users face, from dealing with damaged archives to navigating compatibility problems with Windows. We'll also cover performance bottlenecks and how to avoid future compression headaches.
Dealing With Corrupted Archives
A corrupted archive that won't open is a common frustration. This often happens due to interrupted downloads or problems with your storage drive. For instance, a partially downloaded archive might be missing key data, making it unopenable.
- Try a Different Extraction Tool: Your Mac's built-in Archive Utility might struggle with damaged archives. Third-party options like The Unarchiver or Keka sometimes handle these files better.
- Repair the Archive: Tools like BetterZip offer repair functions that might fix minor archive damage. This is worth a try if the archive contains important files.
- Redownload the Archive: If you can, redownloading the archive from its original source is often the most reliable fix. This ensures you're working with a complete, undamaged copy.
Compatibility Problems With Windows
Sharing compressed files with Windows users can sometimes lead to compatibility issues. These problems often stem from how macOS handles resource forks and file metadata, which Windows systems may not interpret correctly.
- Use a Standard Format: Stick to the ZIP format for cross-platform compatibility. Avoid older, Mac-specific formats like SITX unless you know the recipient has a compatible tool.
- Strip Metadata: Some compression tools let you remove Mac-specific metadata before sharing, improving compatibility with Windows.
- Test Before Sharing: Create a small test archive and send it to a Windows user to confirm they can open it before sharing larger, more important files.
Files That Refuse to Compress
Sometimes, files don't compress as much as expected, or at all. This can be because they are already compressed or have specific file permissions. For example, a video file already compressed with H.264 won't shrink much further.
- Check File Type: Already compressed files, like JPEG images or MP4 videos, offer less compression potential than uncompressed formats like TIFF or WAV.
- Verify File Permissions: Make sure you have read and write access to the files you are trying to compress. Permission issues can sometimes block compression.
Extraction Errors
Unexplained extraction errors can be frustrating. These might show up as error messages or incompletely extracted files. A "checksum error," for example, suggests possible corruption during download or transfer.
- Check for Corruption: Errors like "checksum mismatch" often point to a corrupted archive. Try redownloading or repairing the archive.
- Verify Disk Space: Make sure you have enough free space on your disk to extract the archive's contents. Low disk space can interrupt the extraction.
Performance Issues
Compression and extraction shouldn't take ages. If you're experiencing slowdowns or high system resource usage, there are a few things to try. Large archives can consume a lot of processing power and memory.
- Use a Faster Tool: Some tools, like Keka, are designed for speed and efficiency, potentially improving performance, especially with large archives.
- Close Unnecessary Applications: Free up system resources by closing apps you don't need while compressing or extracting files.
- Upgrade Your Mac's Hardware: If you frequently work with large files, upgrading your Mac's RAM or storage can boost overall performance.
Preventing Future Problems
A little prevention goes a long way. Taking proactive steps can minimize future compression-related issues, saving time and frustration.
- Verify Downloads: Check the integrity of downloaded archives using checksums or other verification methods to catch corruption early.
- Organize Your Files: A well-organized file system helps avoid accidental deletion or corruption of important archives.
- Back Up Your Data: Regular backups ensure you have a recoverable copy even if an archive gets corrupted.
By understanding these common Mac compression problems and their solutions, you can make file compression a smoother part of your workflow. For an even more streamlined experience, check out Compresto, a Mac app designed for easy file size reduction. Simplify your compression workflow with Compresto!