Converting MOV to AVI on Your Mac Seamlessly
Switching a video from MOV to AVI might sound overly technical, but it’s often the quickest fix for some seriously frustrating compatibility issues. The reason is pretty straightforward: MOV files are built for Apple's world, while AVI is a format that plays nice with almost everything else, especially Windows PCs. A simple conversion can be the difference between a video that works and one that won't even open.
Why Convert MOV to AVI in the First Place?
If you've ever shot a video on your iPhone or exported a project from Final Cut Pro, you’ve dealt with a MOV file. It's a fantastic format developed by Apple for its QuickTime framework, and it does a great job of keeping video quality high within that Apple universe. But the moment that video has to step outside its comfort zone, you can hit a wall.
The Compatibility Gap Between Mac and Windows
The number one reason for converting MOV to AVI is to bridge the gap between different platforms. Imagine you’re a video editor working on a Mac, and you need to send a draft to a client who’s strictly a Windows user. There’s a good chance their default media player will stumble over the MOV file, throwing up confusing error messages and bringing the project to a halt.
Flipping that file to an AVI format ahead of time solves this headache before it starts. AVI, which stands for Audio Video Interleave, was introduced by Microsoft way back in 1992 and quickly became the standard for video on Windows machines. Think of it as a universal key that unlocks your content for a much bigger audience.
While MOV is the go-to for the 60-70% of consumers using Apple gear, AVI is still recognized by over 80% of general video playback devices. You can dig deeper into these compatibility differences in this guide on MOV to AVI conversion from capcut.com.
Scenarios Demanding an AVI Conversion
It’s not just about sending files to clients. There are plenty of real-world situations where converting MOV to AVI is less of a choice and more of a necessity.
You might find yourself needing to convert a file for:
- Legacy Hardware Playback: Got an older smart TV, a digital photo frame, or an in-car entertainment system? These devices often have very limited codec support and are far more likely to recognize a basic AVI file than a modern MOV.
- Archival Purposes: Although both are older formats, AVI’s simple container structure makes it a solid choice for long-term storage. It’s less dependent on specific, proprietary software for playback down the road.
- Specific Software Workflows: Some older or more specialized video editing programs, especially on Windows, were built from the ground up to work with AVI. Trying to import a MOV can lead to glitches, audio sync problems, or even outright crashes.
At its core, converting from MOV to AVI is about ensuring accessibility. You're translating your video from a format that's excellent in one environment to one that's understood almost everywhere.
MOV vs. AVI: A Quick History
Both MOV and AVI came to life in the early 1990s, each representing the digital video vision of its creator—Apple and Microsoft, respectively. MOV was designed to work hand-in-hand with QuickTime, offering surprisingly sophisticated features for its time, like support for multiple media tracks and rich metadata.
AVI, on the other hand, was built for simplicity. It just interleaved chunks of audio and video data, which made it incredibly easy for systems to read and play. This straightforward approach is what led to its widespread adoption and why it remains relevant even as more advanced formats like MP4 have taken over. Knowing this history makes it clear why AVI is still a reliable fallback for compatibility.
Finding the Right MOV to AVI Conversion Tool
Picking the right software is probably the single most important decision you'll make when converting MOV to AVI files on your Mac. The tool you choose directly shapes everything from the final video quality and how efficiently you can work to the basic security of your files.
A quick search will throw dozens of options at you, but they really boil down to three camps: free online converters, built-in macOS apps, and dedicated desktop software. Each has its place, and understanding the trade-offs will make it easy to choose the right one for your project.
Free Online Converters
For a one-off, small file conversion, an online tool can seem like a no-brainer. You just drag and drop your MOV, pick AVI, and download the finished file. No installation, no fuss.
But that convenience comes with some serious strings attached:
- Privacy Risks: When you upload a file to a random website's server, you're giving up control. If your video is sensitive or proprietary, this is an immediate deal-breaker.
- File Size and Usage Limits: Most free services cap file sizes—often at a tiny 100MB—and limit how many conversions you can do in a day.
- Limited Control: Forget about choosing specific codecs, tweaking bitrates, or fine-tuning the audio. You get what you get, which is rarely good enough for professional work.
The world of conversion tools is broad. Beyond just video formats, some people hunt for specific tools for converting YouTube videos to MP4, which shows just how varied the needs can be.
Built-In macOS Tools Like QuickTime
Your Mac already has QuickTime, a perfectly capable video player that can handle some basic exports. You can open a MOV and use "Export As" to save it in a few different resolutions.
The catch? QuickTime is designed to keep you happily inside the Apple ecosystem. It’s all about exporting to formats like MP4 and offers absolutely no native way to get your video into an AVI container. So, while it’s handy for a quick trim, it's a dead end for MOV to AVI conversion.
Dedicated Desktop Software
For anyone who's serious about converting video, a dedicated desktop app is the only way to go. Software like Compresto is built from the ground up for macOS, giving you the kind of power and flexibility that online tools or built-in players just can't match.
The real advantage of a desktop app is control. Your files never leave your computer, you can process hundreds of files in one go, and you get to dial in every single setting for the perfect output.
A proper desktop converter gives you a few massive advantages:
- Batch Processing: This is a game-changer. You can queue up an entire folder of MOV files and let the app convert them all to AVI automatically. For big projects, this saves an incredible amount of time.
- Advanced Quality Control: Need a specific video codec? Want to set a precise bitrate to manage file size? With a desktop app, you can dive deep into the settings to ensure your final AVI file is exactly what you need.
- Offline Security: Since everything happens locally on your Mac, your confidential videos are never uploaded to a third-party server. Your work stays private.
- Speed and Reliability: Desktop software uses your Mac’s full processing power, making conversions much faster. It's also far less likely to choke on large or complex files.
There's a reason the market for these tools has grown. A market research report on video converters tracked this trend from 2015 to 2020, noting that the demand for versatile, powerful solutions is on the rise. If you want to explore this further, our guide on the best video converter for Mac breaks down the options in much more detail.
Alright, let's ditch the theory and get down to brass tacks. Actually converting your MOV files to AVI is a pretty straightforward process once you know the ropes. We'll use a solid desktop app as our guide, showing you how a real workflow looks without getting bogged down in confusing menus.
Think of it less as a rigid "Step 1, Step 2" list and more as a logical flow: get your files in, tell the app what you want, and hit go. It’s the same core process whether you've been editing video for years or this is your first time converting anything.
This diagram lays out the typical path you'll take depending on the tool you choose.
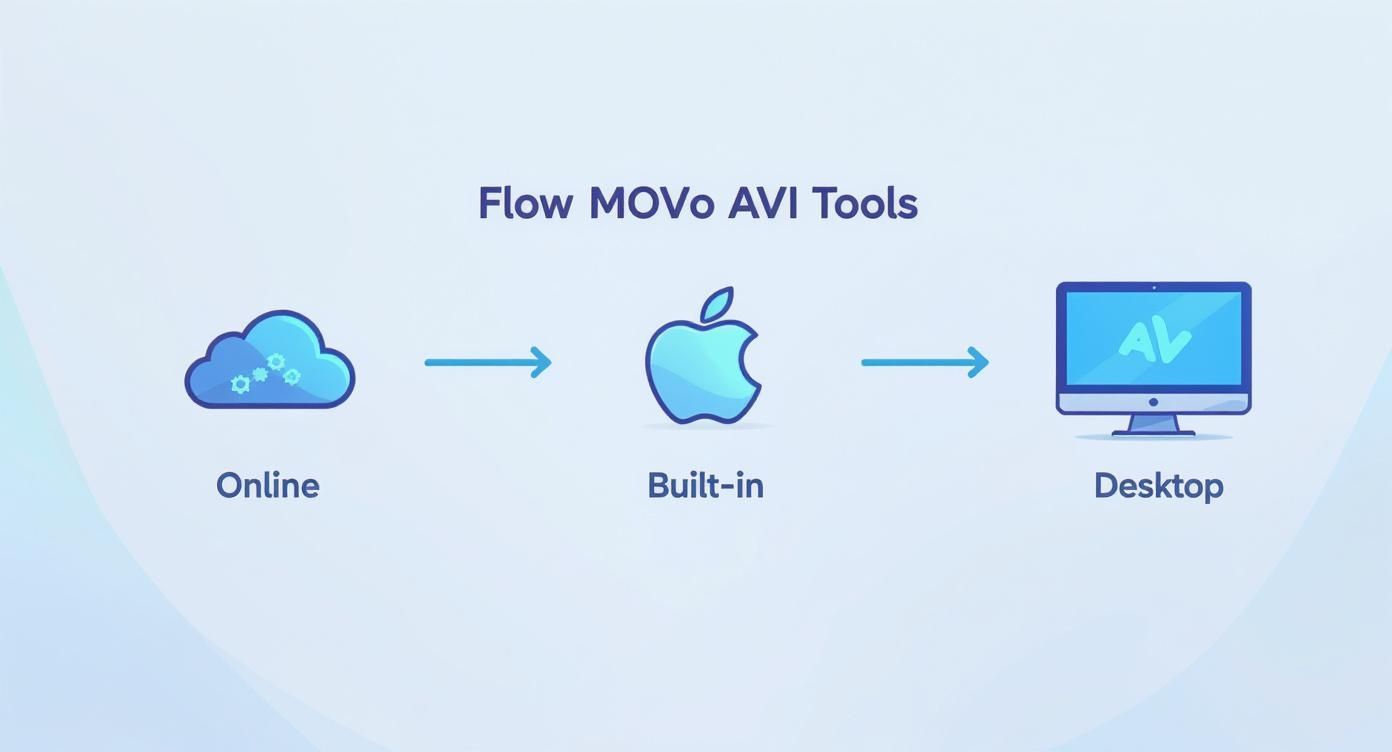
As you can see, desktop tools give you a direct, controlled path where your files stay securely on your own machine from start to finish.
Getting Your MOV Files into the App
First things first, you need to load your source media. A well-designed desktop app makes this feel effortless. For example, with a tool like Compresto, you can just drag a single MOV file from a Finder window and drop it right into the app. Simple.
But what if you've got a whole bunch of files? This is where a dedicated app really shines. Instead of converting every single clip from your iPhone vacation footage one by one, you can just grab the entire folder and drag it over. The software is smart enough to find all the compatible video files and line them up in a processing queue.
Pro Tip: Batch processing will become your best friend, especially for bigger projects. Got dozens—or even hundreds—of MOV files? Queuing them all at once saves an incredible amount of clicking and lets your Mac do the heavy lifting while you get back to other things.
Honestly, this ability to handle files in bulk is one of the main reasons pros stick with desktop software over those simple online converters.
Dialing in the Output Settings
Once your files are loaded, it’s time to tell the software what to create. This is the most important part of converting MOV to AVI, because the choices you make here directly control the final video’s compatibility, quality, and file size.
Here’s a look at the kind of clean, modern settings panel you can expect.
This kind of interface proves you don't need an engineering degree to get the settings right. It’s all about a few key choices.
Here's what you'll need to configure:
- Output Format: This one’s a no-brainer. You'll see a dropdown menu with different containers like MP4, WEBM, and of course, AVI. Just select AVI to set your target.
- Video Codec: Inside that AVI container, you need a codec. Options like DivX or Xvid are standard for AVI files and usually give you a great balance of quality and compression. If you’re not sure which to pick, DivX is almost always a safe bet for wide compatibility.
- Quality or Bitrate: This setting is the classic trade-off between visual fidelity and file size. Some apps give you a simple slider from "Lowest" to "Highest" quality, while others let you punch in a specific bitrate. For most uses, a medium-to-high setting is perfect. If you're archiving footage, you'll want to crank it as high as it will go.
- Audio Settings: Don't forget the sound! You need to make sure the audio is either being copied over directly or re-encoded with a compatible codec like MP3 or AC3. I'd recommend a bitrate of at least 128 kbps or higher to avoid that tinny, distorted sound in your final AVI file.
While some tools like HandBrake throw a dizzying number of options at you, it can be overkill for a simple conversion. If you do want to dive deep into its powerful features, we've put together a guide on how to use HandBrake for all kinds of tasks.
Kicking Off the Conversion
With your files in and your settings locked, all that's left is to hit that "Convert" or "Start" button. The app will then get to work, chugging through your queue and processing each file based on your instructions.
A good app will give you clear feedback while it’s working. You should be able to see:
- The progress of the current file, usually shown as a percentage.
- How many files are left in the queue.
- A rough estimate of the time remaining.
Once it's all done, the software will save your new AVI files to whatever destination folder you picked. I always make it a habit to open one of the converted files right away for a quick spot-check. Make sure the video plays smoothly, the audio is in sync, and the quality looks right. This little verification step can save you a ton of headaches later on.
Mastering Codecs And Quality Settings For AVI
Alright, this is where you go from just converting files to truly mastering them. Think of the AVI format as a simple shipping box. The video and audio streams are the actual contents inside, and the codec (short for coder-decoder) is the clever method used to pack everything in. Nailing this part is the secret to finding that perfect balance between quality and file size when you convert a MOV to an AVI.
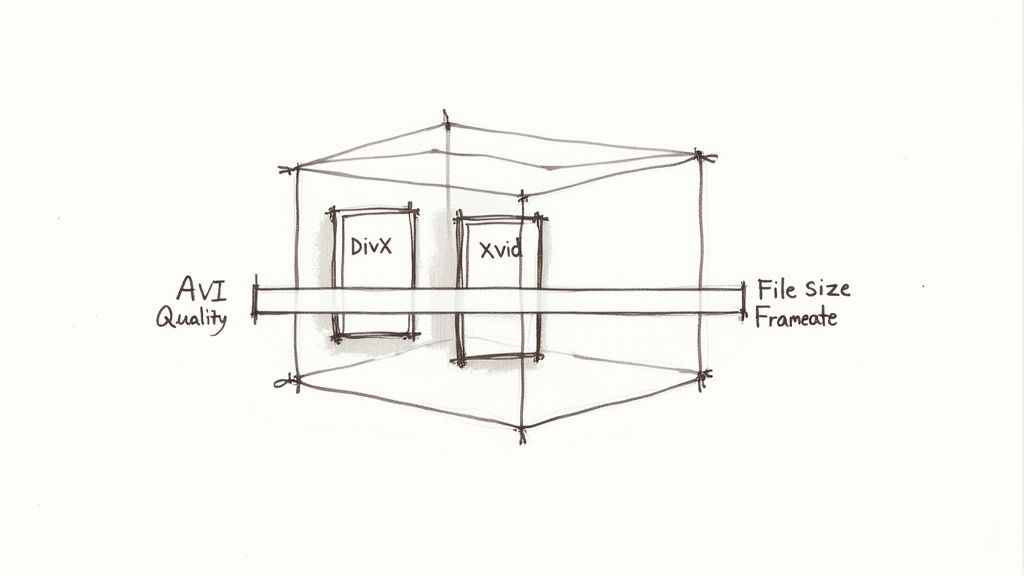
The specific codec you pick, like the ever-popular DivX or Xvid, dictates how your video data gets compressed. This compression is what transforms a massive raw video file into something you can actually manage. The trick is to find that sweet spot where the video looks great but doesn't create a gigantic file that’s impossible to share or store.
Understanding The Quality vs. File Size Trade-Off
Every single video conversion boils down to a fundamental choice: do you want pristine quality or a small file size? You really can't have the best of both. High-quality settings keep more visual data, which naturally leads to a larger file. To get a smaller file, you have to discard some of that data, which can introduce visual glitches like pixelation.
Let’s walk through a real-world scenario. Say you have a 500 MB MOV clip fresh off your camera. Your goal is what determines your settings.
- For Archival: If you're saving this clip for future editing, you’ll want to preserve every last bit of quality. You might convert it to an AVI using a near-lossless setting. The file size could even balloon up to 600-700 MB, but you've kept the visual integrity intact.
- For Email: But if you need to send a quick preview to a client, that 500 MB file is a total non-starter. You’d use a much more aggressive compression setting to shrink it down to a tiny AVI, maybe around 25-50 MB. It won't look as crisp, but it’s perfect for fast sharing.
This trade-off is absolutely central to the process. In fact, these format choices have a huge impact on storage globally. MOV files, with their modern codecs, often shrink files by 30-50% compared to uncompressed video. When you switch to AVI, which is often less efficient, you might see file sizes jump by 20-40% just to maintain a similar level of quality.
Key Settings To Control Your AVI Output
Beyond a simple "quality" slider, there are three main dials you can turn to get granular control over your AVI files. Understanding what these do will empower you to move beyond the default presets and tailor every single conversion to your exact needs.
Bitrate
This is the most direct control you have over the quality-size balance. Measured in kilobits or megabits per second (kbps or Mbps), bitrate dictates how much data is allocated to each second of video.
- A higher bitrate means more data per second, resulting in a clearer picture and a larger file. Simple as that.
- A lower bitrate uses less data, which gives you a smaller file but increases the risk of seeing those ugly compression artifacts.
Resolution
This is just the dimensions of your video, like 1920x1080 (1080p). It's almost always best to keep the resolution the same as your source MOV file to avoid unnecessary scaling. While reducing the resolution (downscaling) is a surefire way to shrink file size, you will permanently lose detail.
Frame Rate (fps)
Frame rate, measured in frames per second, determines how smooth the motion looks. Most video is shot at 24, 30, or 60 fps. Just like with resolution, you should almost always match the frame rate of the original MOV. Changing it is a recipe for jerky, unnatural-looking playback.
The goal is not to just make an AVI file, but to make the right AVI file for your specific need. By adjusting bitrate, you can decide whether you're creating a master copy or a lightweight preview, all from the same source MOV.
To help you decide, here’s a quick cheat sheet for common conversion goals.
MOV vs. AVI Codec and Quality Comparison
This table breaks down some common settings and their likely outcomes, helping you pick the best configuration for your project.
| Conversion Goal | Recommended AVI Codec | Bitrate Strategy | Expected File Size Change | Best For |
|---|---|---|---|---|
| Archival Quality | H.264 (if available) or high-quality DivX/Xvid | High (e.g., 8-12 Mbps for 1080p) | Increase of 10-30% | Storing master copies, future editing |
| General Playback | DivX or Xvid | Medium (e.g., 2-5 Mbps for 1080p) | Similar to original or slightly smaller | Watching on PCs, media players |
| Web Streaming | DivX | Low-Medium (e.g., 1-2 Mbps for 720p) | Decrease of 40-60% | Sharing on websites, social media |
| Email/Sharing | Xvid | Very Low (e.g., <1 Mbps for 480p) | Decrease of 70-90% | Sending quick previews to clients |
These are just starting points, of course. Your source file's complexity will also affect the final size, so always be prepared to do a quick test.
Making An Informed Choice
So, how do you put all of this together in the real world? Start with a preset like "High Quality" and run a short test conversion. Check the output file's size and watch it back to judge the quality. If the file is too big, try lowering the bitrate a little and test it again. This iterative, hands-on process is the absolute best way to dial in the perfect settings for your project.
It all comes down to understanding the difference between lossy and lossless compression. Most AVI conversions will use a lossy codec like DivX, which cleverly removes data the human eye is less likely to notice. As you get more comfortable fine-tuning your AVI files, you can even explore advanced techniques, like how to upscale 1080p to 4K with AI, to push your visual results even further.
Tackling Common MOV to AVI Conversion Headaches
Even with the best tools and settings, video conversions can sometimes go sideways. There's nothing more frustrating than ending up with an AVI file that refuses to play, has no sound, or looks like a pixelated mess from the early days of the internet. The good news? Most of these problems are surprisingly easy to fix once you know what you're looking for.
Instead of throwing in the towel and starting from scratch, let's walk through the usual suspects. From silent movies to sync nightmares, these issues almost always boil down to a simple settings mismatch.
Diagnosing the "No Audio" Problem in Your AVI File
One of the most common complaints I hear is about a converted AVI that plays perfectly but is completely silent. You've checked your speakers, you've double-checked the original MOV file—the audio is definitely there. So, where did it go?
This issue is almost always caused by an audio codec mismatch. Your source MOV file might be using a modern audio codec like AAC, but the older AVI container you're creating often plays better with something like MP3 or AC3. If your conversion software doesn't properly translate the audio track into a compatible format, the final file just ends up mute.
The fix is simple. Dive back into your converter's settings and find the audio tab. From there, you'll want to explicitly set the audio codec to MP3. It’s a rock-solid, universally supported format that nearly every device and media player on the planet can handle. A bitrate of 128 kbps is usually sufficient for most purposes, but bumping it to 192 kbps can add a touch more clarity.
How to Fix Pixelated or Blurry Video Output
Did your beautiful, crisp MOV file turn into a blocky, blurry AVI? This is a classic symptom of the video bitrate being set too low. The bitrate is what determines how much data is used to represent each second of video. If that number isn't high enough to handle the video's resolution and complexity, the quality takes a nosedive.
Luckily, the fix is straightforward: just increase the video bitrate. Don't be shy about experimenting here.
- If your first conversion used a bitrate of 2 Mbps (or 2000 kbps), try doubling it to 4 Mbps.
- Save yourself some time by running a short, one-minute test conversion to check the result without processing the whole file.
- Keep nudging that bitrate up until the visual quality is where you want it.
Just remember the fundamental trade-off: a higher bitrate delivers better quality but also creates a larger file. It's all about finding that sweet spot that works for your project.
When Your Audio and Video Fall Out of Sync
Another maddening problem is when the audio and video in your final AVI file slowly drift apart. You see a door slam on screen, but you don't hear the sound until a full second later. This dreaded sync issue is almost always the result of a frame rate mismatch during the conversion.
Your original MOV file was shot at a specific frame rate, like 29.97 fps or maybe 60 fps. If your conversion software defaults to something different (like a flat 30 fps), it introduces tiny timing errors that compound over the length of the video, creating that awkward delay.
The solution is to make sure the output frame rate in your AVI settings perfectly matches the source MOV file's frame rate. Most quality converters offer an "Auto" or "Same as source" option for this—use it. This one setting is the most reliable way to keep your audio and video locked together in perfect harmony.
Troubleshooting Failed or Incomplete Conversions
Sometimes, the conversion from MOV to AVI just fails completely. The progress bar gets stuck, or the app spits out a vague error message and quits. More often than not, this points to an issue with the original MOV file itself.
Before you start blaming your conversion software, try these quick diagnostic steps:
- Check the Source File: Open the original MOV file and try to play it all the way through. If it stutters, freezes, or crashes your media player, the file is probably corrupted.
- Use a Different Player: Test the MOV in another program, like the ever-reliable VLC Media Player. VLC is famous for its ability to play slightly damaged files, which can help confirm if the issue is with the file or your usual player.
If the file is indeed corrupted, your options are unfortunately limited, though you could try a specialized video repair tool. However, if the source file plays perfectly in multiple players, the problem might be with your converter's ability to handle that specific file's encoding. In that case, switching to a different, more robust desktop converter often solves the problem instantly.
Answering Your Questions About MOV to AVI Conversions
Even with a step-by-step guide, you might have a few questions rattling around. Let's tackle some of the most common ones that pop up when you're trying to get your MOV files into the AVI format.
Can I Just Convert MOV to AVI Online Without Installing Anything?
You absolutely can. For a quick, one-off conversion where the file isn't sensitive, an online converter is often the go-to. You just drag and drop your MOV file into your browser, choose AVI, and download the result a few minutes later.
But it’s important to know the trade-offs. These free web tools usually have pretty strict file size limits—sometimes as low as 100 MB. They can also be slow, and you’re uploading your video to someone else’s server, which can be a privacy concern. For anything more than occasional use, a solid desktop app is always the smarter, safer bet.
Does Converting From MOV to AVI Automatically Ruin the Video Quality?
Not necessarily, but you do need to be mindful of your settings. Most of the time, quality loss comes from re-compressing a file with a much lower bitrate than the original. The secret to keeping things crisp is to mirror the source file’s settings as closely as possible.
If you choose a high-quality AVI codec like DivX and give it a healthy bitrate—or even match the original MOV's bitrate—you'd be hard-pressed to spot the difference. The goal is to sidestep any aggressive compression that throws away too much visual information.
Why Did My Converted AVI File Get So Huge?
This is a classic "gotcha" moment, especially if you're used to how efficiently MOV files handle compression. An AVI file can easily balloon in size if you accidentally select an uncompressed codec or crank the bitrate way too high. AVI is an older container, and some of its default codecs just aren't as efficient as the modern ones packed into a MOV.
The fix is simple: head back into your converter's settings. Make sure you’re using a compressed codec like DivX or Xvid, and dial the bitrate down to a more sensible number. A quick test conversion on a small clip will show you just how much of an impact this has on the final file size.
Can I Turn My AVI File Back Into a MOV Later On?
Yep, you can convert an AVI back to MOV using the same kinds of tools. The important thing to remember, though, is that each time you convert a video with a "lossy" codec (which is most of them), you lose a tiny bit of quality.
Think of it like making a photocopy of a photocopy—each new copy gets just a little bit fuzzier. If there's any chance you'll need a MOV version again, the best strategy is to always hang onto the original file. That way, you can always return to the source for the best possible quality.
What’s the Best Free Desktop App for This?
If you want an offline tool and don't mind navigating a few menus, VLC Media Player is a surprisingly powerful choice. Most people know it as just a media player, but it has a built-in converter that can handle MOV to AVI just fine.
It definitely lacks the polished interface and batch processing power of dedicated software, but it's a reliable and free option for those one-off conversions where you'd rather keep your files on your own machine. Just be ready to poke around a bit to get the settings configured correctly.
Ready to stop worrying about file formats and start converting with confidence? Compresto offers powerful, secure, and user-friendly batch processing right on your Mac. Reclaim your time and ensure your videos are always ready for any device or platform. Try Compresto today and see the difference.