How to Use HandBrake A Practical Guide
Getting started with HandBrake is surprisingly simple. You can get a large video file compressed and ready to share in just a few minutes by downloading the app, opening your video, picking a default setting, and clicking "Start Encode." That’s the core of it.
It’s the perfect way to shrink a huge video file from your phone or camera while keeping the quality looking sharp. For anyone new to this, it's the best place to begin before diving into the more advanced stuff.
Your First Video Conversion With HandBrake
Jumping into HandBrake for the first time can feel a little intimidating with all its buttons and menus, but your first conversion is actually just a few clicks away. The trick is to ignore all the complicated settings for now and stick to the basics.
First thing's first: make sure you download HandBrake only from its official website. This is super important because you want to avoid unofficial downloads that might be bundled with malware or other junk you don't want on your computer.
Once you've got it installed and opened, HandBrake will ask you to open a source file. This can be pretty much any video file you have—a big MOV file from your iPhone, a clunky AVI from an old camera, you name it. Your goal is to make that file smaller without anyone noticing a big drop in quality.
This visual guide neatly sums up the entire workflow into three basic actions.
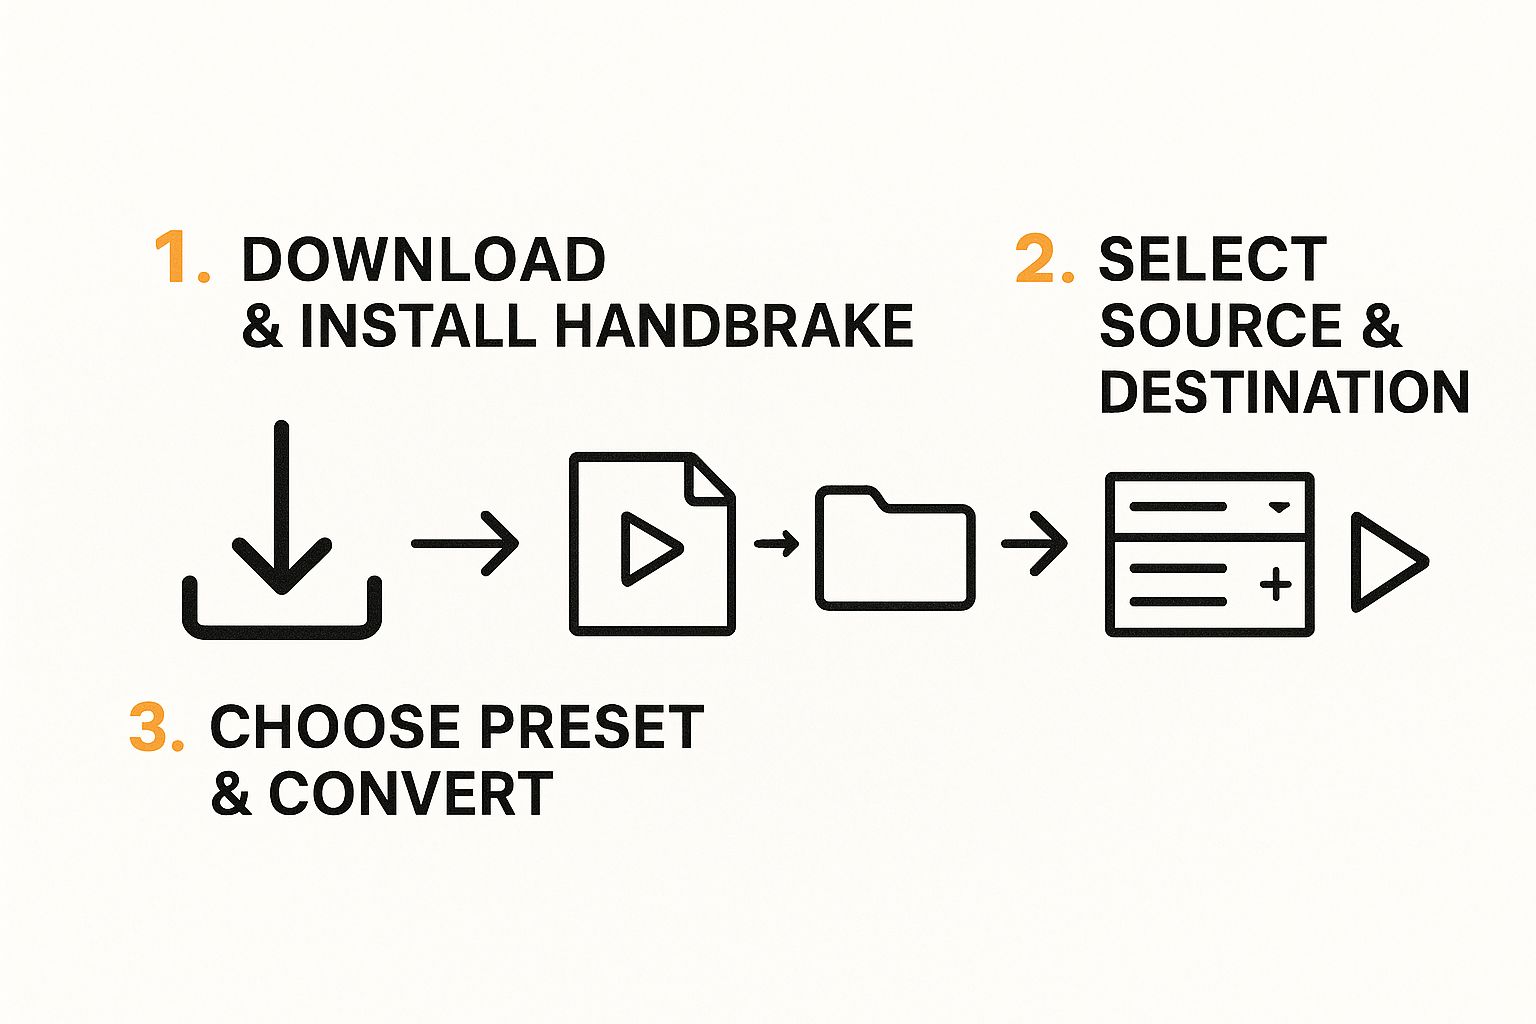
As you can see, it's a straight line: get the software, load your file, and let a preset handle the conversion.
For those who like a quick reference, here’s a simple table breaking down the essential steps to get you started immediately.
Quick Start HandBrake Workflow
| Step | Action | What It Does |
|---|---|---|
| 1 | Open a source video file. | Loads your original, large video into HandBrake for processing. |
| 2 | Select a preset (e.g., "Fast 1080p30"). | Applies pre-configured settings for a good balance of quality and speed. |
| 3 | Choose a destination and filename. | Tells HandBrake where to save the new, smaller file and what to call it. |
| 4 | Click the "Start" button. | Begins the video compression process, known as encoding. |
This workflow is all you need for your first few conversions. It’s quick, effective, and gets the job done without getting lost in technical details.
Selecting Your Source and Destination
After you open HandBrake, the first thing you'll do is click the "Open Source" button (or just drag and drop your video file right onto the window). HandBrake will scan the file for a few seconds and then show you all its details.
The file name will pop up at the top, and the app will usually select a default preset for you, giving you an immediate starting point.
Now, look for the "Save As" field. This is where you'll name your new, compressed file and pick where it goes. I usually save it right to my desktop or a dedicated "Exports" folder to keep things tidy. Pro tip: make sure the format is set to MP4. It's the most compatible format out there and will play nicely on almost any device or platform.
Using Presets to Start the Conversion
HandBrake's presets are your best friend, especially when you're just starting out. They are collections of settings that have been perfectly tuned for different uses.
For your very first conversion, I always recommend the "Fast 1080p30" preset. It's a fantastic all-rounder that strikes a great balance between conversion speed, final quality, and file size. It's perfect for videos you plan to share online or watch on your devices.
Once you've selected that preset, you're pretty much ready to roll.
Just click the green "Start" button at the top of the window. You'll see a progress bar at the bottom showing you how the encoding is going. The time it takes will depend on how long your video is and how powerful your computer is, but when it's done, you'll have a much smaller, more manageable video file.
Getting comfortable with HandBrake opens up a lot of possibilities, especially when you start learning how to repurpose content. You can easily create versions of your videos optimized for different social media platforms, each with its own specific requirements.
Understanding The HandBrake Interface
Firing up HandBrake for the first time can feel a little intimidating. There are a lot of buttons, dropdowns, and tabs staring back at you. But don't worry, it's all laid out logically. Once you get the hang of the workflow, that complex-looking dashboard becomes a familiar and powerful toolkit.
Everything important happens right in the main window. The whole interface is designed to walk you through the process, from loading your source video to tweaking the final output. You really don't need to know what every single setting does, just the key ones that get the job done.
The Main Control Panels
The best way to approach HandBrake is to work your way down from the top. You'll start by picking a video source, then move through the different tabs to adjust settings, and finish by choosing where to save the file. This top-to-bottom flow makes the whole process feel much less chaotic.
Here are the main spots you'll be clicking:
- Source Selection: This is the big button at the top left. It's your starting point for loading a video file or a whole DVD.
- Title Dropdown: If you're working with a DVD or Blu-ray, this is essential. It lets you pick which video track you want to convert, like the main feature film instead of the bonus content.
- Preset Menu: This is your best friend. It’s a shortcut to proven settings, and we'll dive deep into it in the next section.
- Output Tabs: This is the heart of the interface, where you'll find tabs for Summary, Dimensions, Video, Audio, and a few others.
This screenshot shows you where all the action is.

You can see the source selection up top, the big preset dropdown on the right, and the main configuration tabs right in the middle.
A Tour of the Core Tabs
Each of those tabs in the center panel controls a specific part of your final video. For most jobs, you’ll only need to touch a couple of them, but it helps to know what they all do.
The Summary tab is your mission control. It gives you a quick overview of your chosen settings, like the final container (MP4 is almost always the right choice for compatibility) and the video encoder. It’s the perfect spot for one last check before you hit the start button.
Think of the tabs as different departments in a factory. The 'Dimensions' department handles sizing and cropping, 'Video' manages the visual quality, and 'Audio' takes care of the sound. Each has a specific job in producing the final file.
Next up is the Dimensions tab. This is where you can control the video’s resolution and crop out any unwanted black bars. While the presets usually get this right, you’d come here if you needed to manually resize a 4K video down to 1080p, for instance.
Finally, the Video and Audio tabs are where the real magic happens. In the Video tab, you can fine-tune the quality using the RF slider and select a specific encoder. Over in the Audio tab, you can pick which audio tracks to keep, change their codecs, and adjust the bitrate for better or smaller sound.
Choosing The Right Preset For Any Device
HandBrake's presets are your secret weapon for getting excellent results without getting bogged down in technical settings. Think of them as professionally tuned recipes for your video. Instead of guessing which encoder or bitrate to use, you can just pick a preset that matches your goal, whether it's for the web, a specific device, or high-quality archiving.
This is, by far, the most efficient way to get comfortable with HandBrake. Start with a preset, check the result, and then you can start tweaking individual settings once you understand the foundation. The preset library is neatly organized into categories designed for common, real-world scenarios.

This simple dropdown menu saves countless hours of trial and error, ensuring your video looks great on pretty much any screen.
Navigating The Preset Categories
HandBrake groups its presets into several logical folders. Knowing what each one is for will help you make the right choice in seconds.
- General: These are your go-to options for everyday use. You’ll find presets like "Fast 1080p30" and "HQ 1080p30" here, which offer a great balance between speed, quality, and file size. They're perfect for all-purpose conversions.
- Web: This category is specifically tuned for online platforms. If you're prepping a video for YouTube, Vimeo, or another streaming service, start here. The "Vimeo YouTube HQ" presets are fantastic for this.
- Devices: This is where you'll find presets optimized for specific hardware like iPhones, Android tablets, Apple TV, and gaming consoles. Choosing one of these ensures maximum compatibility and smooth playback on that device.
- Production: These are high-quality, professional-grade presets. They use less compression and create much larger files, making them ideal for editing workflows or creating master copies for archiving.
My personal rule of thumb is to start with a preset from the 'General' category unless I have a specific destination in mind. The "Fast" presets prioritize speed, while the "HQ" (High Quality) presets take longer but deliver a visibly sharper result.
Common Preset Scenarios
To make this even clearer, let's look at some common goals and the best presets for the job. This table breaks down a few real-world examples to help guide your choice.
| Goal | Recommended Preset Category | Why It Works Best |
|---|---|---|
| Sharing a phone video via text | General (e.g., Fast 720p30) | Drastically reduces file size for quick sending, looks great on small screens. |
| Uploading gameplay to YouTube | Web (e.g., Vimeo YouTube HQ 1080p60) | Optimized for streaming platforms, balancing quality and file size for upload. |
| Archiving old home movies | General (e.g., HQ 1080p30 Surround) | Preserves maximum detail and audio quality for long-term storage and big screens. |
| Watching a movie on an iPad | Devices (e.g., Apple 1080p30 Surround) | Ensures perfect compatibility and smooth playback on a specific Apple device. |
Ultimately, the right preset is all about what you plan to do with the video file once it's done.
Practical Examples For Choosing Presets
Let's put this knowledge into practice. The preset you choose depends entirely on what you plan to do with the final video.
For example, if you just recorded a long 4K video on your phone and want to email it or share it in a group chat, the Fast 720p30 preset is a perfect choice. It will dramatically shrink the file size, making it easy to send, while maintaining quality that looks fantastic on a small screen.
On the other hand, if you're archiving old home movies from a DVD, you'd want to preserve as much detail as possible. In this case, starting with a preset like HQ 1080p30 Surround is a much better option. It will take longer to encode, but the resulting quality will be far superior for long-term storage and viewing on a large TV.
Most presets default to the H.264 video codec for its broad compatibility, though you can always change it manually. Understanding the difference is useful, and you can dive into the technical details in our comparison of H.264 vs H.265.
Taking Control: Customizing Your Video And Audio Settings
While presets are fantastic for getting a reliable result quickly, the real magic of HandBrake happens when you start tweaking the manual settings. This is where you get granular control over your video's final look, feel, and—most importantly—its file size.
We're going to zero in on the two tabs where you'll spend most of your time: Video and Audio. Think of presets as the automatic transmission in a car; they get the job done efficiently. Custom settings, on the other hand, are like driving a manual. You have precise control, letting you optimize performance for any situation.
Mastering The Video Tab
The Video tab is where you'll make the biggest impact on quality and file size. The two settings that matter most here are the Video Encoder and the Constant Quality slider. It all starts with your choice of encoder.
For years, H.264 (x264) has been the undisputed king. It’s the universal standard, offering rock-solid compatibility across virtually every device and platform you can think of. If you need a video that just works everywhere, H.264 is your safest bet.
But the modern, more efficient option is H.265 (x265). It can deliver the same visual quality as H.264 in a file that's often 25-50% smaller. The trade-off? Encoding takes longer, and some older devices might struggle to play it. For any audience with modern hardware, H.265 is a no-brainer for saving space.
Pro Tip: When I’m archiving personal videos or creating high-quality master files, I always use H.265 to get the best quality-to-size ratio. But if I’m uploading to a social media platform, I stick with H.264 to make sure everyone can watch it without a hitch.
Next up is the Constant Quality (CQ) slider, which you'll see labeled with an RF (Rate Factor) value. This is the single most important setting for dialing in your video’s quality. Instead of locking in a specific bitrate (which can be unpredictable), CQ tells HandBrake to aim for a consistent level of visual quality from start to finish.
The logic is simple: a lower RF number means higher quality and a bigger file. A higher RF number means lower quality and a smaller file.
Here are some starting points I've found to be reliable:
- For H.264 (1080p): An RF of 20-22 is the sweet spot. It produces a result that's often indistinguishable from the original source.
- For H.264 (4K): I usually start with an RF of 22-24.
- For H.265: You can typically add 2-4 to the H.264 value for similar quality. An RF of 24-26 with H.265 often looks just as good as an RF of 22 with H.264, but with a much smaller file.
Fine-Tuning Your Audio Settings
Don't neglect the audio! A great-looking video with bad sound is a waste. The Audio tab lets you manage audio tracks, pick a codec, and set the bitrate to ensure your video sounds as good as it looks.
First, check the Tracks list. If your source video has multiple audio tracks—like different languages or a commentary track—you can pick which ones to keep. Most of the time, you'll just need one.
The go-to audio codec is AAC (Advanced Audio Coding). It’s incredibly compatible and efficient, which is why it’s the default for MP4 files. Unless you have a very specific reason to use something else, just stick with AAC. If you want to dive deeper into how HandBrake bundles video and audio, check out our guide on MP4 file compression.
Finally, let's talk bitrate, which determines audio quality. For standard stereo audio, 128 kbps is perfectly fine for most ears. If you’re working with a high-quality source or a surround sound track, bumping it up to 160 kbps or even 192 kbps will help preserve more of that crisp detail.
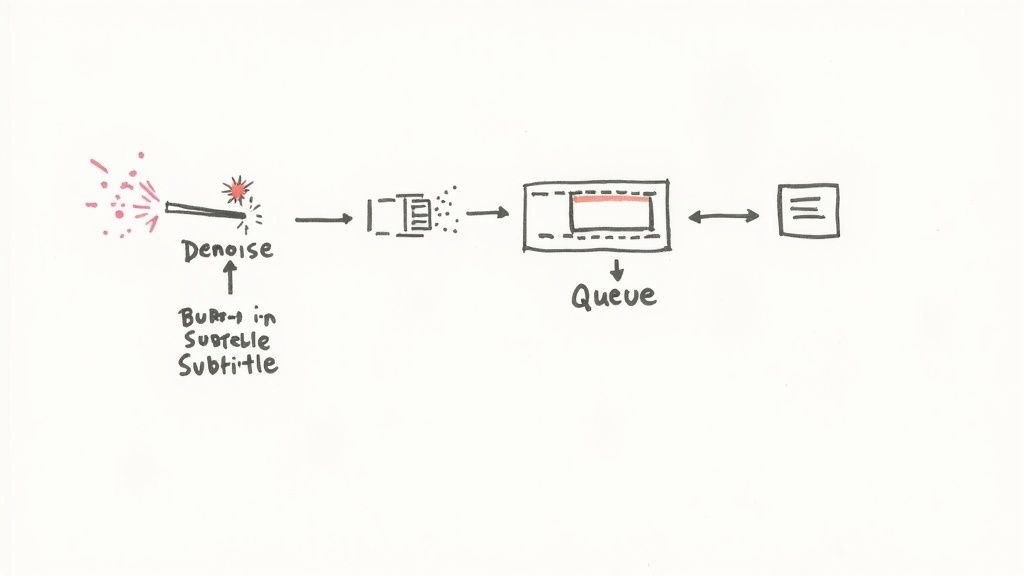
Using Filters, Subtitles, And The Queue
Once you get past simple conversions, you start to see just how deep HandBrake's toolkit really is. The Filters, Subtitles, and Queue functions are where the real power lies, letting you clean up your video, add text, and automate the entire process. These aren't just obscure features for pros; they solve common, everyday video problems.
Learning to use these tools is the next step to mastering HandBrake. It’s what transforms it from a basic converter into a seriously versatile video utility.
Cleaning Up Your Video With Filters
Ever try to digitize an old home movie from a DVD or a clip shot in really low light? The footage often looks messy, plagued by weird horizontal lines or a distracting grainy texture. The Filters tab is your secret weapon for fixing exactly these kinds of issues.
Two filters you'll find yourself using most are Deinterlace and Denoise.
- Deinterlace: Older video sources, like DVDs and broadcast TV, were often "interlaced." On modern screens, this can create a jagged, "combing" effect during fast motion. The
Decombfilter, which is HandBrake's default, is usually the best choice. It intelligently fixes these artifacts for a much smoother, cleaner picture. - Denoise: This is a lifesaver for footage from older digital cameras or anything shot in dim lighting. It reduces the visual "noise" or graininess that can make a video look cheap. The
NLMeansfilter is incredibly good at this, but be warned—it can seriously slow down your encoding time. I've found a light touch is usually best here, otherwise you risk making the video look too soft or artificial.
Adding And Managing Subtitles
HandBrake gives you a ton of control over subtitles. You can work with subtitles already baked into your source file or add your own from an external file (like a downloaded .SRT file). All of this is handled in the Subtitles tab.
You'll run into two main ways to handle them:
- Burned-In (Hardsubs): This option permanently "paints" the subtitle text onto the video frames themselves. Viewers can't turn them off. This is perfect for foreign-language films where you always want the text visible or for platforms like Instagram that don't support separate subtitle tracks.
- Soft Subtitles: These are included as a separate, selectable track inside the final MP4 or MKV file. This lets the viewer toggle them on or off in their media player, just like with a DVD or on Netflix. This is easily the most flexible and common method.
To get started, just head to the Tracks dropdown menu. You can select an existing subtitle track from your source file or click Import Subtitle to bring in an external .SRT file.
For maximum flexibility, I almost always use soft subtitles. It gives the end-user control over their viewing experience. I only use burned-in subtitles when I know the video will be played on a platform that doesn’t support subtitle tracks, like certain social media feeds.
Batch Processing With The Queue
Converting a single video file is straightforward. But what happens when you have an entire folder of clips to get through? Processing them one by one is a massive time sink. This is where the Queue becomes your best friend.
Instead of hitting that big green "Start" button after dialing in your settings, click Add to Queue. This action saves all your current settings as a single "job" in a list.
From there, you can open your next video source, tweak its settings, and add it to the queue, too. Just keep repeating this process for all your files.
Once all your videos are lined up, click the Show Queue button to see your list of pending jobs. Now, a single click on "Start" will kick off the entire batch, processing every video in order, one after the other. It's the ultimate set-it-and-forget-it solution for converting an entire season of a TV show or a batch of family videos overnight.
Honestly, this feature alone is what elevates HandBrake from a simple utility into a powerful batch-processing workhorse.
Common HandBrake Questions Answered
Even after you've dialed in the perfect settings, you're bound to hit a few snags while getting the hang of HandBrake. Let's walk through some of the most common questions that pop up, so you can get back to converting your videos without any headaches.
Why Is HandBrake So Slow?
If HandBrake feels like it's taking forever, don't worry—that's often normal. Video encoding is one of the most demanding jobs you can throw at a computer.
The speed really comes down to a few key things: your CPU's horsepower, the video's resolution (4K is way slower than 1080p), and how complex your settings are. A "Fast" preset will always finish much quicker than an "HQ" one because it's using less intensive compression methods.
For a serious speed boost, look for hardware encoders in the "Video" tab. If your computer has an Intel, NVIDIA, or Apple chip, you might see options like Intel QSV, NVIDIA NVENC, or Apple’s VideoToolbox. Ticking one of those boxes can make a massive difference.
What Is The Best Quality Setting?
This is the million-dollar question, but there’s no single "best" answer. It’s always a balancing act between how good the video looks and how big the final file is. The real goal is to find that sweet spot where the video is crisp, but the file size is manageable.
A great starting point for the standard H.264 encoder is a Constant Quality (CQ) value of RF 20-22 for 1080p video. For higher-resolution 4K footage, an RF of 22-24 is usually a solid bet.
Quick tip: If you're using the more modern H.265 encoder, you can often push the RF value a bit higher (like 24-26) and get similar visual quality in an even smaller file. The best approach is to experiment within these ranges to see what looks best for your source video.
Can HandBrake Convert Multiple Files At Once?
Absolutely, and this is where the "Queue" feature is a total game-changer.
Once you’ve configured the settings for your first video, don't hit "Start Encode." Instead, click the Add to Queue button. Now, you can open your next source file, apply your settings (or keep the same ones), and add that one to the queue, too. You can repeat this for as many videos as you need to process.
When you're ready, just open the "Queue" window and click "Start." HandBrake will work through the entire batch automatically. It’s perfect for letting it run overnight. While HandBrake is a fantastic tool, it's always smart to see what else is out there. You might want to explore other free video compression software like HandBrake to find the perfect fit for your workflow.
For a faster, simpler compression experience on macOS, try Compresto. It’s a native Mac app that compresses videos, images, and documents with an easy drag-and-drop interface, perfect for reclaiming storage and speeding up your workflow. Get started at https://compresto.app.