Convert QuickTime to AVI A Practical Guide for Mac and Windows
Struggling to play a QuickTime MOV file on a Windows PC or an older device? It’s a classic compatibility headache. The most reliable fix is often to convert that QuickTime file to AVI, a format that’s been around the block but boasts incredibly wide support. This simple conversion ensures your video will work on legacy editing systems and a much broader range of hardware, saving you from codec-related frustrations.
Why You Still Need to Convert QuickTime to AVI
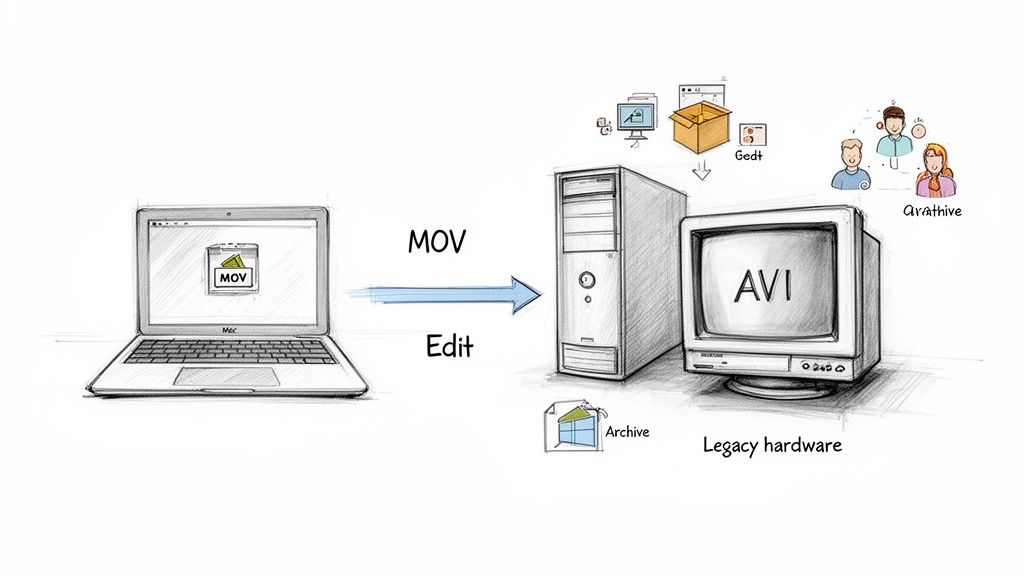
Even in a world dominated by MP4, the need to convert from QuickTime's MOV to AVI hasn't vanished. Far from it. This is still a crucial skill for anyone managing diverse video libraries, especially when dealing with older hardware or collaborating across different operating systems. Think of it less as a step backward and more as building a bridge to make your content universally accessible.
For many, this isn't just a technical preference—it's a practical necessity that solves immediate, real-world problems that newer formats sometimes overlook.
Common Scenarios Demanding an AVI Conversion
You’ll likely find yourself needing to perform this specific conversion for a few key reasons:
- Legacy Editing Systems: Many professional studios and archives still run on older, rock-solid non-linear editing (NLE) systems built around AVI workflows. If you need to work with archived footage on one of these machines, you have to convert it to a format the system understands.
- Cross-Platform Collaboration: It happens all the time. A Mac-based creative team sends MOV files to a client who works exclusively on Windows, and suddenly, nothing opens. Converting to AVI is the simplest way to ensure the files play without forcing the recipient to hunt down special software or codecs.
- Older Hardware Playback: Need to play a video on an older smart TV, a digital photo frame, or even a portable DVD player? These devices often have very limited codec support and were designed to handle AVI files right out of the box.
This decision tree breaks down the common reasons you might need to convert your QuickTime file.
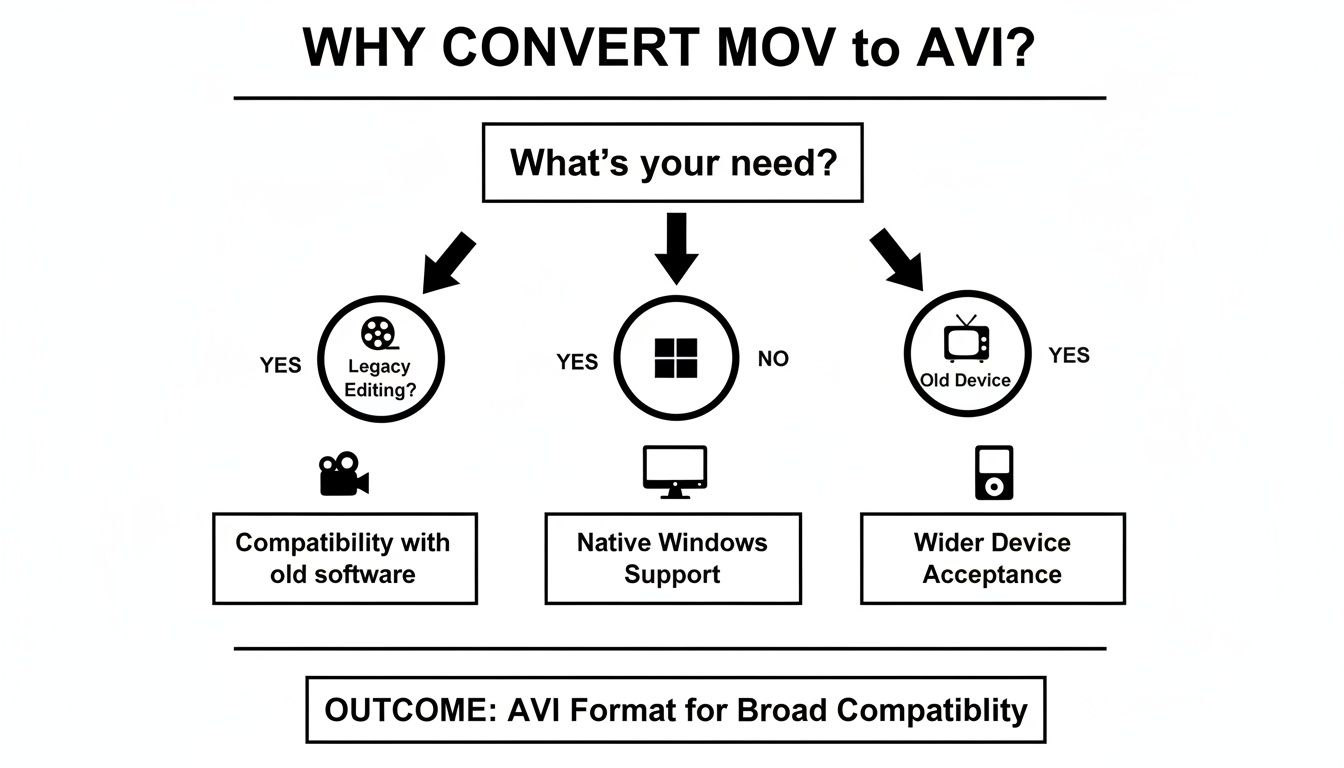
As you can see, the motivation is almost always about bridging a compatibility gap with older or different systems.
To get straight to the point, we've outlined the three main methods covered in this guide. This table will help you quickly decide which approach is the best fit for your situation.
Quick Guide to MOV to AVI Conversion Methods
| Method | Best For | Technical Skill | Key Benefit |
|---|---|---|---|
| FFmpeg (CLI) | Power users needing precise control and batch processing. | Intermediate/Advanced | Unmatched flexibility and automation capabilities. |
| VLC Media Player (GUI) | Quick, single-file conversions without new software. | Beginner | Uses a tool you likely already have installed. |
| Online Converters | Users needing a fast, one-off conversion without software. | Beginner | Extremely simple and requires no installation. |
Each of these methods has its place, depending on whether you value speed, control, or convenience. Let's dive into the specifics of each one.
The core issue isn't that MOV is a bad format—it's excellent. The problem is that its native environment is macOS, and for decades, AVI became the de facto standard for a huge range of Windows-based software and hardware.
This compatibility gap became more obvious as Apple moved away from legacy technologies. Around 2010, an estimated 60-70% of mainstream media players couldn't handle MOV files out of the box. Meanwhile, AVI kept its footing because its container supported popular codecs like DivX and Xvid, which were essential for hardware that many professionals still relied on. You can explore more about the history of this conversion and its relevance on Aiseesoft's blog.
The Power User Method Using FFmpeg and Terminal
If you're comfortable in the command line and want total control over your video conversions, then FFmpeg is your tool. It's a seriously powerful, open-source framework that can chew through just about any multimedia task you can imagine. Sure, it doesn't have a fancy graphical interface, but for precision and automation, it's in a league of its own.
This approach is perfect for professionals who need to convert QuickTime to AVI all the time, especially in big batches. Once you get your commands dialed in, you'll save an incredible amount of time.
Getting Started with FFmpeg
First things first, you'll need to get FFmpeg on your Mac. The simplest route is with Homebrew, a package manager for macOS. If you don’t have it installed yet, just open your Terminal and run the single command from the official Homebrew site.
With Homebrew ready to go, installing FFmpeg is just one line:
brew install ffmpeg
Once that finishes, you're all set to start converting. The basic structure of an FFmpeg command is pretty logical, which makes it easy to tweak for different situations.
Basic Conversion Command
Let's kick things off with the most straightforward command: converting a MOV file to AVI. This one lets FFmpeg pick the default codecs, which is often all you need for a quick and dirty conversion.
Fire up Terminal, navigate to the folder where your video is, and run this:
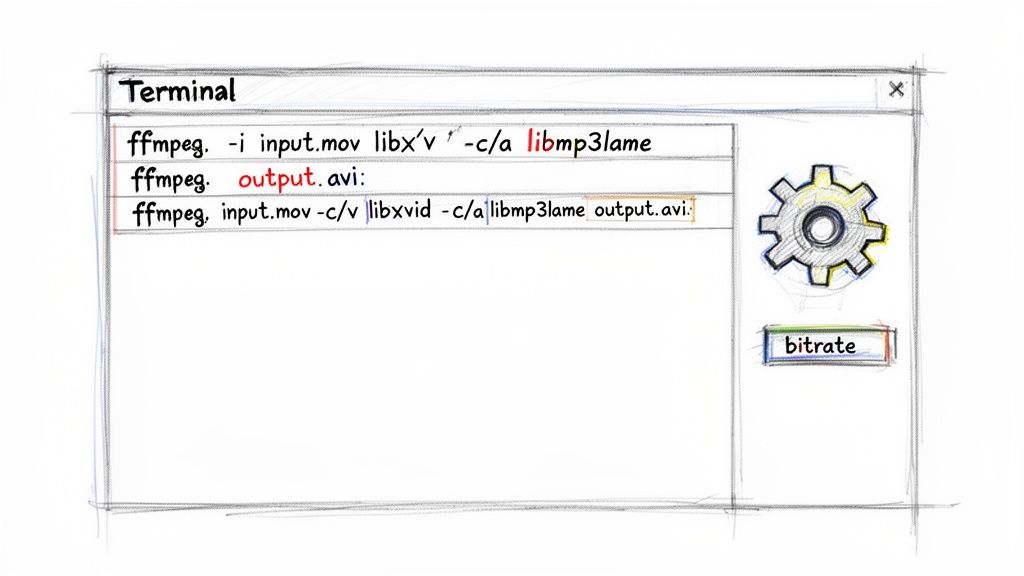
ffmpeg -i input.mov output.avi
That's it. This command tells FFmpeg to use input.mov as the input (-i) and spit out output.avi. Simple, right?
Pro Tip: When you run an FFmpeg command, don't be alarmed by the wall of text that scrolls by. It's not an error! It's actually a ton of useful info about the file's streams, codecs, and the real-time progress of the conversion. It’s a goldmine for troubleshooting.
Taking Control with Codec and Bitrate
For more predictable results, you’ll want to tell FFmpeg exactly which video and audio codecs to use. This helps guarantee compatibility and maintain quality. A really common and reliable combo for AVI files is the Xvid video codec paired with the MP3 audio codec.
Here’s how you can specify those, along with a target video bitrate (-b:v) of 2000 kbps to keep things looking sharp:
ffmpeg -i input.mov -c:v libxvid -b:v 2000k -c:a libmp3lame -q:a 4 output.avi
Let's quickly break that down:
-c:v libxvid: This sets the video codec to Xvid.-b:v 2000k: This sets the target video bitrate to 2000 kilobits per second.-c:a libmp3lame: This sets the audio codec to MP3.-q:a 4: This sets the audio quality (for MP3, it's a value from 0-9, where lower is better).
Automating with a Batch Script
This is where FFmpeg really flexes its muscles. If you have an entire folder of MOV files to convert, you can wrap a command in a simple loop right in your Terminal. This slick one-liner will find every .mov file in the current directory and convert it to a .avi file with the same name.
for f in *.mov; do ffmpeg -i "$f" "${f%.mov}.avi"; done
A script like this is a game-changer for anyone who has to manage video archives or process lots of footage.
While FFmpeg is the undisputed king of command-line conversion, maybe you're looking for a GUI tool that still offers a similar level of power. If so, it's worth exploring some great FFmpeg alternatives for Mac. They can be a nice middle ground for those who want advanced features without living in the Terminal.
A Visual Guide to Converting with VLC Media Player
If diving into the command line isn't your style, you're in luck. VLC Media Player is more than just the go-to app for playing tricky video files; it's a surprisingly capable conversion tool.
This method is perfect for those quick, one-off jobs where you just need to get a QuickTime file converted to AVI without wrestling with FFmpeg. It’s all done through a visual interface, giving you a straightforward, menu-driven path from start to finish.
Navigating to the Conversion Menu
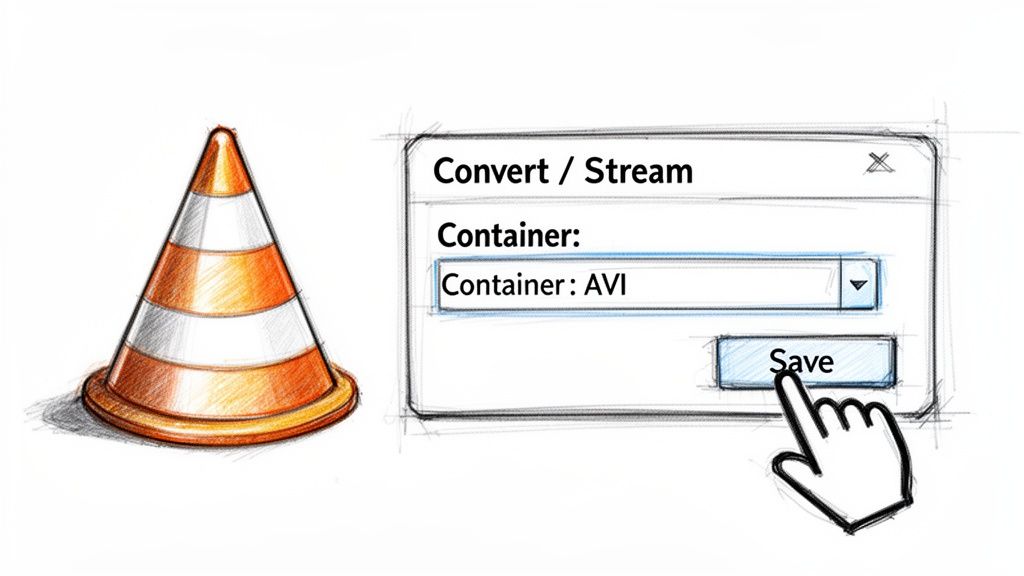
First things first, fire up VLC. In the menu bar at the top of your Mac's screen, click on the File menu and find the Convert / Stream option. This is your starting point for any file conversion work in VLC.
Once you click it, a new window pops up. This is where you'll tell VLC which QuickTime file you want to work with. You can either drag and drop your .mov file right into the window or click the Open media... button to find it on your computer.
The image below shows the "Convert / Stream" window where you'll drop your QuickTime file.
With your file loaded, you’re ready for the next step.
Selecting the Right Profile and Container
After adding your file, you'll see a Choose Profile dropdown menu. This is where you define what your output file will look like. VLC doesn't have a ready-made AVI profile with modern codecs, so we need to create a custom one.
A good place to start is the Video - H.264 + MP3 (MP4) profile. It's a common preset that gives us a solid foundation.
Select that profile, then click the Customize... button right next to it. This takes you into the more advanced settings.
Key Takeaway: Think of a VLC "Profile" as a recipe that bundles a video codec, an audio codec, and a container format. To create an AVI file, you have to manually switch the container, as there isn’t a default AVI option that works out of the box.
In the customization window, here’s what you’ll do:
- Click the Encapsulation tab.
- From the list, find and select AVI.
- You can then check the Video codec and Audio codec tabs to make sure everything looks right. The defaults from the H.264 + MP3 profile are usually a safe bet.
- Hit Apply to save your new custom AVI profile.
Finalizing the Conversion
Almost there. Now you just need to tell VLC where to save the finished product. Click the Save as File button, and then Browse... to pick a folder and name your new video.
This part is critical: make sure your filename ends with the .avi extension. For instance, you could call it converted-project-final.avi. If you forget the extension, the file might not work correctly.
Once the destination is set, click Save. You'll be back at the main conversion window. Just click the final Save button one last time to kick off the process.
You’ll see the timeline on VLC's main player window start moving—that’s your progress bar. When it reaches the end, your new AVI video will be waiting for you in the folder you selected.
Should You Use an Online Converter? A Word of Caution
When you're in a jam and just need to convert one small, non-sensitive MOV file to AVI, a browser-based tool can feel like a lifesaver. There’s no software to download or install—just upload, click a button, and you’re done. It's the quick-and-dirty solution that works when you're on a machine where you can't install something like FFmpeg or VLC.
But that convenience comes with some serious strings attached. Before you drag and drop that file, you need to understand the trade-offs.
The two biggest worries are privacy and security. The moment you upload that file, it’s sitting on someone else’s server. You've completely lost control over it. For a random video of your cat, that might be a risk you're willing to take. For anything confidential or personal, it’s a deal-breaker.
How to Spot a Trustworthy Online Tool
The internet is flooded with online converters, and they are definitely not all created equal. Some are legitimate services with transparent policies, but many are just ad-riddled fronts designed to harvest data.
Run any potential service through this quick mental checklist before you upload anything:
- Do they have a clear privacy policy? Hunt for a page that explains exactly how they handle your files. You want to see a clear statement that your data is deleted automatically, usually within an hour or two. If you can't find it, close the tab.
- What are the limits? Free services almost always have strict caps on file size or how many conversions you can do in a day. This can stop you in your tracks if you're working with a large video file.
- Is the site secure (HTTPS)? Look for the little padlock icon in your browser's address bar. If it's not there, your connection isn't encrypted, meaning your file could potentially be intercepted during upload.
- How bad are the ads? If the page is plastered with sketchy pop-ups and fake "Download" buttons, just leave. It’s a huge red flag that the service is low-quality and probably not safe.
Some services go the extra mile to prove they’re trustworthy. For example, a platform that is ISO 27001 certified has passed a tough, independent audit of its security systems. It’s a strong sign they take data protection seriously.
The online video conversion space is huge. In the mid-2020s, the big players were handling 8-12 million video conversions every single month, and MOV files were a massive part of that. Reputable services like CloudConvert, which holds an ISO certification, show that it's possible to handle user data responsibly. You can see their specific notes on the format on their official MOV to AVI conversions page.
The Hidden Cost: Quality and Compression
Beyond security, you also have to think about video quality. Most online tools slam your video with heavy compression to process it faster and keep their server costs down.
This often results in a final AVI file that looks noticeably worse—you might see ugly compression artifacts, weird color blotches, or a general lack of sharpness. It might be fine for a quick preview, but it’s definitely not what you want for anything important or for archival purposes. Many of these tools will also strip out crucial metadata, like the original date the video was created.
If you’re just trying to shrink a file and need more control over the result, you might have better luck with a dedicated free online movie compressor that gives you more options. But when it comes down to it, for any project that matters, sticking to a local application on your Mac is always going to be the safer and higher-quality choice.
What to Do When Your Video Conversion Goes Wrong
Even with the best tools, converting files isn't always a smooth ride. Sometimes you end up with a video where the audio drifts out of sync, an error message pops up about an "unsupported codec," or even worse, the final file loses its original creation date. Let's walk through how to fix the most common headaches you'll face when converting QuickTime files to AVI.
Don't worry, these problems are almost always fixable. It usually comes down to tweaking a few settings or understanding what's happening under the hood. Most of the time, the file isn't broken—there's just a mismatch in how the data is being read and rewritten.
Fixing Out-of-Sync Audio and Video
There’s nothing more maddening than watching a video where the audio and video are out of sync. You see someone's lips move, and the sound follows a second later, getting progressively worse as the video plays. This is almost always caused by a variable frame rate (VFR), which is super common in videos from modern smartphones and screen recordings.
Older containers like AVI, however, were built for a constant frame rate (CFR). When you try to shoehorn a VFR video into a CFR container without telling the software how to handle it, the timing gets completely thrown off.
Luckily, it's a pretty straightforward fix. You just need to tell FFmpeg to conform the video to a constant frame rate using a simple filter:
ffmpeg -i input.mov -vf "fps=30" -c:v libxvid output.avi
If you're using VLC, you can find similar options in the Video codec tab when you're setting up your conversion profile. Just manually set a frame rate like 30 or 29.97. This forces the converter to create a stable timing track for the new file, which usually solves the sync problem for good.
Dealing with Codec Compatibility Errors
Ever had a conversion seem to finish perfectly, only for the final AVI file to refuse to play on your target device? This usually comes down to one simple fact: AVI is just a container. The actual video and audio data inside are handled by codecs, and if your device doesn't understand the specific codec you used, it can't play the file.
For example, you might have created an AVI file with an H.264 video stream, but the old DVD player or digital photo frame you want to play it on only understands older codecs like Xvid or DivX.
Key Takeaway: Think of the AVI file as a box. What really matters is what you put inside it. For the best compatibility, stick with common codecs like Xvid for video and MP3 for audio. They're the most widely supported options for the AVI container.
So, if a file won't play, your first move should be to re-convert it using that more standard codec combination.
How to Preserve Original File Metadata
This one is a huge deal for archivists, photographers, or anyone managing a large media library. When you convert a QuickTime file to AVI, the new file often gets stamped with the current date and time, wiping out the original "date shot" information. This is a massive headache when you rely on that creation date to keep your media organized chronologically.
Unfortunately, a shocking number of conversion tools get this wrong. Research suggests that a whopping 70-85% of standard conversion apps fail to preserve the original file creation metadata. This is a frequent complaint among users of tools like Handbrake and VLC, and you can see people discussing the problem on Apple's forums.
FFmpeg provides the most reliable fix for this with a specific mapping command:
ffmpeg -i input.mov -map_metadata 0 -c copy output.avi
That little -map_metadata 0 flag is the key. It tells FFmpeg to copy all the metadata streams from the input file directly to the output, making sure your original timestamps come along for the ride. And if a botched conversion leaves your file unplayable, you might need to fix the corrupted video file before you can try converting it again.
Common Questions About QuickTime to AVI Conversion
Even after you've picked your tool, diving into video conversion always seems to bring up a few more questions. You might be wondering about quality, codecs, or why you'd even choose AVI in the first place.
This section is here to clear up those final details. Think of it as a quick reference to make sure your next conversion goes off without a hitch.
Will I Lose Video Quality When Converting From MOV to AVI?
The short answer is yes, some quality loss is pretty much unavoidable. Anytime you convert QuickTime to AVI, the video is re-encoded, which is a "lossy" process. But the goal is to make that quality loss practically invisible to the naked eye.
You can pull this off by setting a high bitrate and using a solid codec like Xvid during the conversion. If you're doing archival work where every single pixel matters, you could use a lossless codec, but be warned—the file sizes will be massive. For most projects, the sweet spot is finding the right balance between unnoticeable quality loss and a manageable file size.
Is AVI Better Than MP4 for Modern Use?
For most things you'd do today, the answer is a firm no. MP4 is simply a more efficient and universally supported format, especially for the web, streaming services, and mobile devices. It almost always uses a modern codec like H.264 or H.265.
AVI is an older container that's less efficient with compression. The main reason you’d convert to AVI these days is for compatibility with legacy hardware, specific older editing software, or maybe a unique client request. For just about everything else, converting your MOV files to MP4 is the more practical choice.
Can I Convert QuickTime to AVI on My iPhone?
You'll find apps in the App Store that claim to do this, but I wouldn't recommend it for any serious work. Mobile apps usually have serious limitations on file size, processing power, and the codec options they give you. A lot of users are curious about how conversion affects video fidelity; you can learn more about mastering mobile video quality to ensure your files look their best, but it's a task far better suited for desktop software.
For reliable, high-quality results where you have full control over the output, stick with a dedicated desktop application. Tools like FFmpeg or VLC, which we covered earlier, are always the better bet.
What Is the Best Codec for AVI Files?
If you're aiming for the best balance of quality and broad compatibility, your go-to video codecs inside an AVI file should be Xvid or DivX. They're widely recognized by older hardware and software, which is likely why you're making an AVI file in the first place.
For the audio track, MP3 is the most universally supported option and a safe bet for any AVI file. While you can technically shove a more modern codec like H.264 into an AVI container using FFmpeg, it's an oddball combination that might defeat the purpose of making a file for legacy systems. Sticking with Xvid and MP3 is your most reliable path to success.
If you're tired of wrestling with bulky video files and complex converters on your Mac, give Compresto a try. It’s a powerful, user-friendly app designed to compress your videos, images, and documents quickly without losing quality—all locally on your machine. Reclaim your storage and speed up your workflow by downloading it from https://compresto.app.