Convert NEF Files to JPG on Mac Your Complete Guide
Converting NEF files to JPG goes beyond a simple format switch. It’s about turning a hefty digital negative into a lean, shareable image that still looks great.
NEF files preserve every nuance straight from your Nikon’s sensor. But when it’s time to email a set of proofs, post to your portfolio, or archive thousands of shots, RAW files can quickly become a bottleneck.
Why Convert NEF Files To JPG Anyway

Opening a NEF often means firing up a RAW editor like Adobe Lightroom Classic or Adobe Photoshop. That’s fine for heavy edits, but overkill when you just need a quick preview or a web-ready shot.
To make the differences clearer, here’s a side-by-side look:
NEF (RAW) vs JPG A Quick Comparison
This table breaks down the key characteristics of NEF and JPG formats to help you understand when to use each.
| Feature | NEF (Nikon RAW) | JPG (JPEG) |
|---|---|---|
| Data Depth | 12–14 bits of unprocessed sensor data | 8 bits per channel |
| File Size | 30–40 MB on a 24 MP camera | 3–8 MB (high-quality export) |
| Editing Flexibility | Full range: exposure, white balance, highlight recovery | Limited adjustments; lossy format |
| Compatibility | Requires specialized apps | Universal support across devices and platforms |
| Ideal Use | Initial post-production | Final delivery, web, and social sharing |
That quick comparison shows why NEF is your editing playground, while JPG is the universal workhorse everyone can view instantly.
The Trade-Off Between Flexibility And Usability
In practice, you balance raw creative control against day-to-day convenience. Here’s what really matters:
- Universal Compatibility: JPGs open on any phone, browser, or photo viewer without extra software.
- Significant File Size Savings: Converting a 24 MP NEF (30–40 MB) into a high-quality JPG (3–8 MB) delivers a 70–90% size reduction, cutting storage and upload times dramatically.
- Web And Social Media Ready: Platforms like Instagram and Facebook expect JPGs for fast loading and consistent color rendering.
The professional photography world has embraced RAW shooting, with 60–70% of pros now capturing in formats like NEF. Converting to JPG has become a non-negotiable step for client delivery and maintaining an online presence.
Practical Scenarios For Conversion
Imagine wrapping up a wedding shoot. Your client waits for proof sheets but doesn’t own Lightroom or Photoshop. Sending NEF files is a dead end—JPGs are viewable instantly, even on a basic laptop.
Likewise, you might want to upload a landscape series to your portfolio, email a family photo, or archive years of work without investing in extra drives. You can also explore the broader benefits of file compression at Benefits of File Compression.
Converting RAW to JPG isn’t about discarding image quality. It’s about crafting a practical, share-ready version while keeping your master NEF files intact for any future deep edits.
Quick Conversions Using Built-In Mac Apps
There are times when you just need a quick JPG export without launching a heavyweight editor. macOS actually bundles two handy apps—Preview and Photos—that handle Nikon NEF files right out of the box.
When it’s a single shot and you’re in a rush, Preview is your go-to. Double-click your NEF, and it usually slides right into the app for instant viewing and conversion.
Using Preview For Single-File Conversions
Once your image is open, head straight to the File menu and pick Export to bring up the save dialog. In that window, you can get everything dialed in before you hit Save.
Here’s what to zero in on:
- Format: Select JPEG from the dropdown.
- Quality: Drag the slider—around 80–90% delivers a small file without visible loss.
- Resolution: Leave it at the original size unless you specifically want smaller dimensions.
That’s it. In under a minute, you’ll have a neat JPEG ready for email, social media, or quick client review. For a similar workflow with DNG files, check out our guide on how to convert DNG files to JPG.
Managing Conversions With The Photos App
If you’re juggling a handful of NEFs or want to tweak exposure and cropping first, open Photos instead. It doubles as a basic cataloging tool and batch exporter.
Start by dragging your NEF images onto the Photos icon or choosing File > Import. Once they land in your library, select the ones you plan to convert.
Navigate to File > Export > Export [Number] Photos for a more detailed set of options than Preview offers.
Pro Tip: In the Photos export window, set ‘Photo Kind’ to JPEG. This gives you direct control over output quality and lets you strip GPS data if you need privacy.
You’ll see options to adjust:
- JPEG Quality: High or Maximum usually keeps things crisp.
- Color Profile: Match your project’s color space (sRGB is a safe bet for web).
- Metadata: Decide if you want to include EXIF, location, and other data.
This approach turns a handful of RAW files into consistent, ready-to-share JPGs—no steep learning curve required.
Automating Conversions for a More Efficient Workflow
Manually converting images one by one feels productive for a minute, then quickly becomes a major time drain, especially when you have dozens or even hundreds of photos to get through. To truly reclaim your time, you need to build automated systems that handle the repetitive work for you. The good news is, on a Mac, this is surprisingly easy to do without any third-party software.
By creating custom workflows, you can batch convert NEF files to JPG with just a couple of clicks—or even by simply moving them into a specific folder. This is where you shift from actively managing files to letting your Mac do the heavy lifting in the background. It’s a simple change that frees you up for more important creative tasks.
The infographic below shows how straightforward this can be using the tools already built into your Mac.
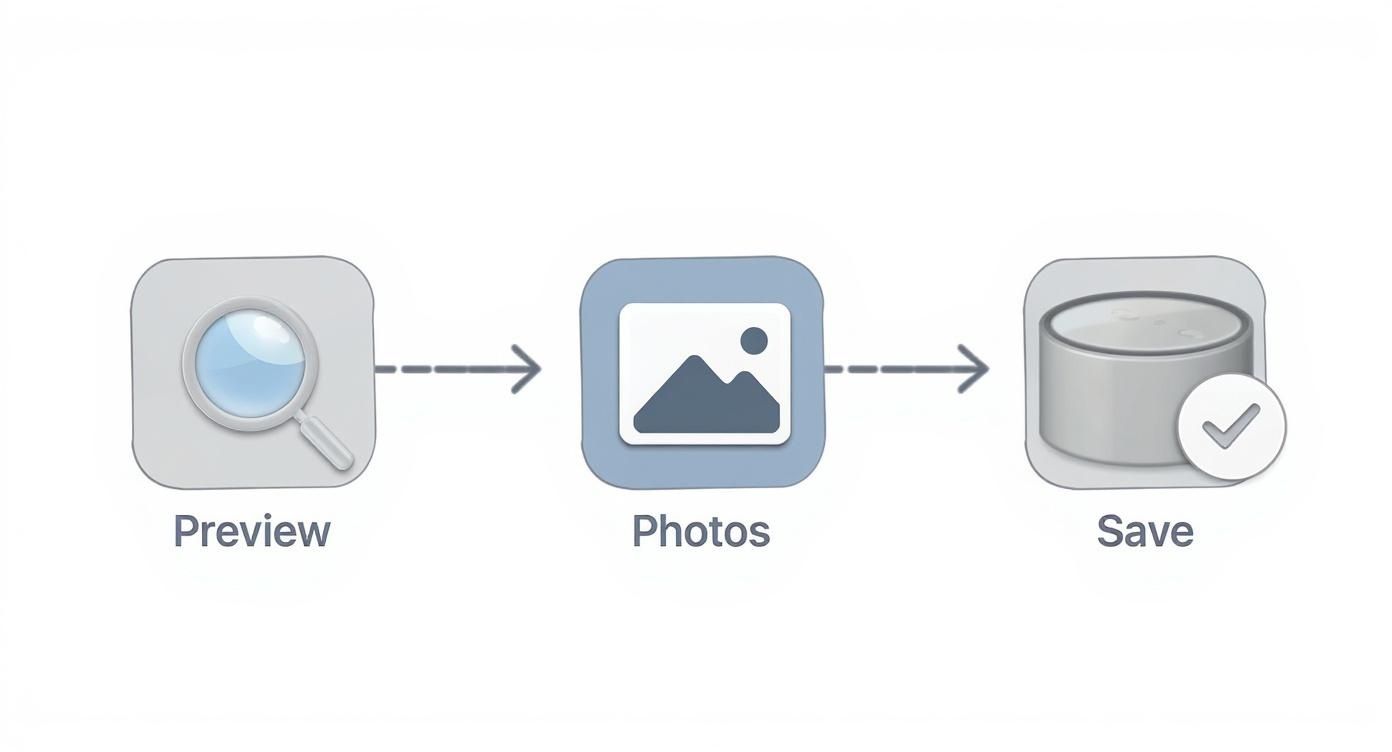
As you can see, macOS natively supports NEF files in apps like Preview and Photos, which gives us a simple foundation for building quick conversion workflows.
Build a Custom Quick Action in Finder
One of the most powerful—and underused—automation tools on your Mac is Automator. It lets you create "Quick Actions" that appear in the right-click menu right inside Finder. Imagine selecting a batch of NEF files, right-clicking, and having an option to "Convert to JPG" ready to go.
To build this, just open the Automator app and create a new "Quick Action." You’ll set it to receive "image files" in "Finder." From there, you just need to add two simple actions from the library:
- Copy Finder Items: This first step is crucial. It makes a copy of your original NEF files in a folder you choose, ensuring your master RAW files are never touched.
- Change Type of Images: Next, add this action and set the "To Type" dropdown to JPEG.
Save your Quick Action with a memorable name like "Convert NEF to JPG," and it will be available immediately. Now, you can process an entire folder of RAW images in seconds. The need for this kind of efficiency is growing; some online tools now process over 500 million NEF to JPG conversions annually, with many supporting batches of up to 1000 files at a time. You can read more about these trends at Aiseesoft.com.
Set Up a Smart Folder with Folder Actions
For a completely hands-off approach, you can create a "hot folder" that automatically converts any NEF file you drop into it. This is another Automator trick called a "Folder Action."
You’ll create a workflow similar to the Quick Action, but instead, you attach it to a specific folder on your desktop or a shared server. Any time a new file is added to that folder, the workflow runs automatically.
This method is perfect for a studio environment. A photographer can offload their memory cards into a designated "Incoming NEFs" folder, and by the time they've grabbed a coffee, a full set of JPG proofs will be waiting in an "Outgoing JPGs" folder.
This setup not only saves a massive amount of time but also standardizes your output, ensuring every single proof is processed with the exact same settings. If you're interested in taking these concepts further, you can explore more advanced techniques in our detailed guide to Mac workflow automation.
Professional Workflows in Lightroom and Photoshop
When you need total, uncompromising control over your final image, there's a reason the pros turn to Adobe's ecosystem. Both Lightroom and Photoshop offer deep, professional-grade tools to convert NEF files to JPG with surgical precision. It’s about making sure every single pixel aligns with your creative vision.
These apps aren't just for editing—they are powerful export engines built for photographers who demand consistent, high-quality results every time. This isn’t just a simple format change; it's a mastering process. You get to fine-tune every part of the final JPG, from the subtle color nuances to the metadata that protects your work.
Mastering the Lightroom Export Dialogue
Lightroom Classic is a beast when it comes to managing huge catalogs of images, which makes its export function a cornerstone of any serious workflow. Once you've finished tweaking a NEF file and are ready to create a JPG, hitting File > Export opens up a dialogue box that gives you complete command over the final output. This is where you make the critical calls based on where the image is headed.
For instance, the settings you’d use for a client's online proofing gallery are completely different from what you'd need to prepare an image for a large-format print.
Here are the key settings I focus on for different scenarios:
- Web & Social Media: Set Image Format to JPEG, Color Space to sRGB, and dial the Quality slider somewhere between 75 and 85. This combo produces a vibrant image with a small file size, perfect for fast-loading websites.
- Client Proofs: A higher Quality setting, maybe around 90, ensures clients see a crisp, detailed preview. I’ll often add a watermark here, too, using the Watermarking panel.
- Archival JPGs: If I'm creating a high-quality JPG backup of a finished NEF, I’ll crank the Quality to 100 and keep the resolution at its original size.
- Professional Printing: The print lab usually tells you exactly what they need. Often, this means using the Adobe RGB (1998) color space and setting a specific output resolution, like 300 pixels per inch.
The whole point is to create a JPG that’s perfectly suited for its destination. By using lossy compression, the JPG format can retain 85-95% of the perceived visual quality while slashing the file size—a trade-off that makes it ideal for sharing your professionally edited work. You can find more insights on balancing quality and size at Aiseesoft.com.
Leveraging Photoshop for Batch Conversions
While Lightroom is fantastic for exporting from a catalog, Photoshop brings its own powerhouse to the table for more complex batch operations: the Image Processor. This script is an absolute lifesaver when you need to convert a whole folder of NEF files to JPG and apply a specific Photoshop Action at the same time.
You can find it tucked away under File > Scripts > Image Processor.
This tool lets you automate tasks that would be mind-numbingly tedious to do by hand. For example, maybe you've created an Action that applies your signature sharpening technique, adds a specific border, and saves a web-ready copy. The Image Processor can run that Action on hundreds of NEF files, converting them all to JPGs with your custom edits already baked in.
It's simple: you define a source folder, a destination folder, and your output settings—including file type (JPEG), quality, and whether to run a Photoshop Action. This turns a complex, multi-step process into a single, automated command, freeing you up to focus on more creative work.
Optimizing Your JPGs for Web and Social Media
Converting a NEF file to JPG is only half the battle. Preparing images for websites and social channels means paying attention to color accuracy, privacy settings and file size.
To keep colors consistent across browsers, devices and social feeds, switch your images into sRGB. This widely supported profile makes sure your photos render the same way on desktops, phones and tablets.
EXIF metadata can weigh down a JPG. It’s useful to hold onto key shooting details, but you’ll often want to strip out geolocation and camera info for privacy and smaller files.
Choose The Right Color Space
Reliable color is crucial for portfolios and brand consistency. Since most web platforms assume sRGB, converting early saves you from chasing mismatched hues.
- Default to sRGB in Preview or any dedicated conversion tool
- Avoid Adobe RGB or ProPhoto RGB when exporting for the web
- Soft proof in Photoshop or Lightroom to see how sRGB renders on typical screens
By committing to the correct color space from the start, you’ll skip endless re-exports and hue hunts.
Manage Your Metadata
Every JPG carries EXIF data by default—and not all of it belongs online. Trimming metadata improves privacy and trims file size.
- Keep: copyright, author name and capture date
- Strip: GPS coordinates, camera serial numbers and lens specifications
- Automate profiles with batch tools or Compresto
“Removing unnecessary EXIF data can cut file size by 5-10% with no visible impact.”
That translates into faster page loads and fewer privacy concerns when sharing images publicly.
Compress Without Visible Loss
Smart compression keeps detail intact while slashing bytes. On your Mac, Compresto can deliver up to 90% reductions without cloud uploads.
- Drag and drop your sRGB JPGs into Compresto
- Choose the “Web Optimized” preset at 80-90% quality
- Tweak sliders to balance size versus detail
- Preview before you hit batch export
Cloud converters have experienced a 45% year-over-year growth, underlining the demand for no-install solutions. Learn more about trends in cloud-based conversion at Aiseesoft
To make informed decisions for your final output, consider exploring further by understanding the differences between WebP and JPEG and their impact on web performance.
| Compression Setting | Approx. Reduction | Recommended Use |
|---|---|---|
| 80% Quality | ~50% | Standard web pages |
| 70% Quality | ~60% | Mobile-first layouts |
| 60% Quality | ~70% | Email and social |
Tailor Images For Specific Platforms
Each social network applies its own compression and dimension rules. Knowing these limits keeps your JPGs from being re-compressed twice.
- Instagram: 1080×1080 px, max 100KB for feed
- Facebook: 1200×630 px, target 150KB
- Twitter: 1200×675 px, under 5MB
- LinkedIn: 1200×627 px, < 200KB
“Instagram applies its own compression, often reducing file sizes by 20% on upload.”
Setting up Compresto presets for each network helps you avoid unwanted quality drops. For our blog hero, exporting at 1200×600 px at 85% quality yields about 150KB and crisp text.
By combining color management, metadata control and intelligent compression, your final NEF→JPG step becomes painless. Start experimenting with presets—you’ll notice pages load faster and engagement climb.
Burning Questions About NEF to JPG Conversion
Even with the best tools, you’ll probably have a few questions about converting your NEF files to JPGs. Getting clear on the details from the start helps you sidestep common mistakes and ensures your final images look just right. Let's tackle some of the most common things photographers ask.
The biggest concern I hear is always about image quality. When you go from a rich, lossless format like NEF to a compressed format like JPG, are you just throwing away crucial detail? Well, yes and no.
Am I Going to Lose Image Quality?
Technically, yes, some data is permanently lost when converting from NEF to JPG. You're moving from a lossless RAW format to what's called a "lossy" compressed one. Think of your NEF file as the digital negative—it holds every bit of raw sensor data your Nikon captured. A JPG, on the other hand, is more like a finished print where some of that underlying data has been simplified to keep the file size down.
But that doesn't mean your photo will look bad. Far from it. If you export your JPG at a high-quality setting, usually 90% or higher, the visual difference is almost impossible to spot with the naked eye. What you're really giving up is editing flexibility.
Always, always keep your original NEF files backed up. They are your master copies. You can create a new JPG from a NEF anytime, but you can never, ever turn a JPG back into a true RAW file.
What’s the Best Color Space for My JPGs?
The right color space is all about where the image is going to live. For anything that will be viewed on a digital screen—websites, social media, email, or client galleries on a phone—the answer is sRGB. It’s the universal standard for the web and ensures your colors look consistent across different devices and browsers.
If you export using a wider gamut like Adobe RGB, your colors can end up looking dull or washed out when viewed in an app that isn't color-managed, like a web browser. The only time you’d typically use another profile like Adobe RGB is if a professional print lab specifically asks for it.
Can I Convert a JPG Back into a NEF File?
Nope. This is strictly a one-way street. The conversion from NEF to JPG permanently throws out all the extra sensor data, white balance information, and extended dynamic range. Once that information is gone, there's no way to get it back.
Trying to wrap a JPG file in a .nef container won't magically restore the lost data. This is the single most important reason to stick to a non-destructive workflow where you never, ever overwrite your original RAW files. Always work on copies or use software that handles edits non-destructively, making sure your digital negatives stay perfect for any future projects.
Ready to reclaim disk space and speed up your workflow? Compresto offers powerful, local compression for all your images, videos, and documents right on your Mac. Drag, drop, and watch file sizes shrink by up to 90% without sacrificing quality. Download Compresto today and see how much space you can save.