DNG to JPG: 5 Free Ways to Convert on Mac & Windows (2026)
Quick answer: To convert DNG to JPG for free, use macOS Preview (File → Export → JPEG), Adobe DNG Converter, or XnConvert for batch processing. All three preserve quality at 90–95% JPEG settings and handle batch conversion.
Before we jump into the nuts and bolts of converting DNG files, let’s talk about why you’d even want to. It really boils down to three things: universal compatibility, much smaller file sizes for sharing, and meeting the specs for websites or printers.
Simply put, DNG is for editing; JPG is for delivery.
Why Convert DNG to JPG in the First Place?
While DNG files are a dream for professional photography, they're just not practical for everyday use. I like to think of a DNG as the raw ingredients for a meal—it holds all the potential but isn't ready to be served. A JPG, on the other hand, is the finished dish, ready for everyone to enjoy.
The DNG format, which Adobe introduced way back in 2004, was designed to be an open-source, archival raw format. It’s essentially a standardized container that packs in all the original sensor data from your camera. This gives you maximum flexibility for future edits without locking you into a specific brand's proprietary format. This raw flexibility is its greatest strength, but it’s also its biggest weakness when it comes to sharing.
Key Reasons for Conversion
The most obvious reason to convert is compatibility. DNG files need specialized software like Adobe Lightroom or another capable raw editor just to be viewed, let alone edited. Your clients, friends, and family probably can't open them on their phones or computers. JPG is the universal language of images, viewable on pretty much any device or platform without a second thought.
Another huge driver is file size and performance. DNGs are packed with a massive amount of uncompressed data, which means the files are often 5 to 10 times larger than their JPG counterparts. This has some serious real-world consequences:
- Sharing: Trying to email a 30 MB DNG is a non-starter. A 3 MB JPG? No problem.
- Web Performance: Uploading a DNG to a website would absolutely cripple its loading speed. For web use, a compressed JPG is non-negotiable. Properly optimizing images for web performance is critical for user experience and SEO.
- Storage: A gallery of 1,000 DNG files could easily eat up over 30 GB of space. The same images as JPGs might only take up 3-5 GB. If you want to dive deeper into managing file sizes, check out our guide on how to https://compresto.app/blog/reduce-image-file-size-mac.
To help you see the differences at a glance, here’s a quick rundown of how DNG and JPG stack up against each other.
DNG vs JPG Quick Comparison
This table gives you a summary of the key differences between DNG and JPG files, helping you quickly decide which format best suits your needs at any given moment.
| Feature | DNG (Digital Negative) | JPG (Joint Photographic Experts Group) |
|---|---|---|
| Primary Use | Professional editing and archiving | Viewing, sharing, printing, and web use |
| File Size | Large (contains all raw sensor data) | Small (uses lossy compression to reduce size) |
| Image Quality | Maximum, lossless quality with full editing flexibility | High quality, but some data is lost during compression |
| Editing Flexibility | Extremely high; allows for non-destructive edits to core data | Limited; repeated edits degrade quality |
| Compatibility | Requires specialized software (e.g., Adobe Lightroom, Photoshop) | Universal; can be opened by virtually any device or software |
| Best For | The "digital negative" you keep for archival and re-editing | The final, shareable version of an image |
In short, each format has its place. DNG is your master copy, while JPG is the version you share with the world.
Converting your final, edited image from DNG to JPG is a standard, final step in any professional photo workflow. It prepares your work for its intended audience, whether that's a client, a social media feed, or a print lab.
At the end of the day, you should always hang onto your original DNG file as your "digital negative." It's your safety net for any future edits. The conversion to JPG should only happen when the image is polished, finalized, and ready to be seen.
Simple Conversions with Built-in Mac Apps
Sometimes you just need a JPG, and you need it now. You don't always have to fire up heavy-duty professional software for a simple DNG conversion. Your Mac already has a couple of fantastic, free tools that are perfect for these exact moments: Preview and the Photos app.
Each one offers a simple path to a shareable JPG file, and knowing which to use can save you a surprising amount of time. For a single image, Preview is almost always the fastest route. It’s the default image viewer on macOS, but it has some surprisingly capable export functions tucked just below the surface. Best of all, there’s nothing to install.
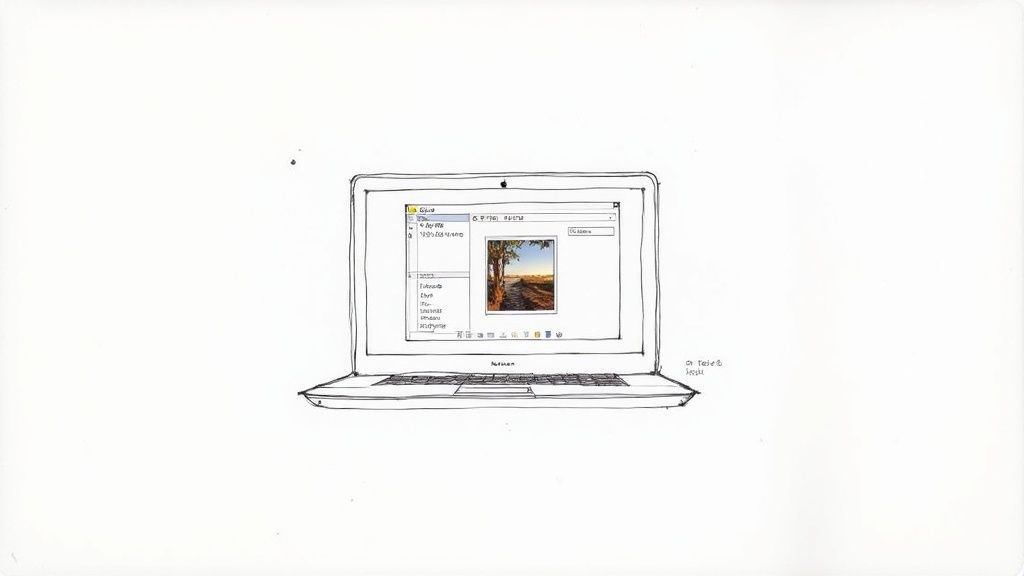
Using Preview for Quick Individual Conversions
Think of Preview as the Swiss Army knife for files on your Mac. When you open a DNG, you’re not just viewing it—you have access to basic adjustments and a robust export menu that gets the job done without any fuss.
The process is incredibly direct. Once your DNG is open, head up to the menu bar and navigate to File > Export. This is where the magic happens. A dialog box will pop up with a few key options that give you total control over the final JPG.
- Format: This is the most important dropdown. Make sure you select JPEG.
- Quality: You'll see a slider that lets you balance file size against image quality. For sharing online or in an email, a setting around 80% is usually a great sweet spot. If you’re preparing an image for a high-quality print, you can crank it all the way up to 100%.
- Resolution: You can also adjust the pixels per inch (PPI), which is handy when you're prepping images for specific print jobs.
This method is perfect for converting one or two images on the fly. Need to quickly email a photo to a colleague or upload a single shot to a website? Preview gets it done in seconds.
My personal rule of thumb is simple: if it’s five photos or fewer, I use Preview. The process is so fast that opening a larger application would take more time than the conversion itself.
Managing Small Batches with the Photos App
When you have a handful of DNG files to process—maybe from a weekend trip or a small photoshoot—the Photos app is a much more organized and efficient choice. It acts as a lightweight photo manager, making it perfect for handling small-scale batch conversions.
First, you’ll need to get your DNGs into the Photos library. You can either drag the files directly onto the Photos app icon or use the File > Import menu. Once imported, your DNGs will appear in your library, usually with a small "RAW" badge to identify them.
From there, you can select multiple images at once. Just hold down the Command key and click on each DNG you want to convert. With your images selected, go to File > Export > Export [Number] Photos. This brings up a detailed export window where you can fine-tune the settings for your new JPGs.
Here’s what you can control:
- Photo Kind: Be sure to choose JPEG.
- JPEG Quality: You can select from Low, Medium, High, or Maximum. High is a safe bet for most uses, offering a good balance of quality and file size.
- Color Profile: For web and general sharing, stick with sRGB. This helps ensure colors look consistent across different devices and browsers.
- Size: Export at full size or choose a custom dimension. This is great for creating smaller versions for a blog post or social media without extra steps.
The Photos app provides a more structured workflow than Preview, especially when you need consistent settings applied across a dozen or so images. It’s the perfect middle-ground solution—more powerful than Preview for batches, yet far simpler than a full-fledged editor like Lightroom.
Batch Convert DNG to JPG with XnConvert (Free)
For high-volume batch conversion without the complexity of Lightroom, XnConvert is the standout free tool. It's available for Mac, Windows, and Linux, and handles thousands of DNG files with customizable output settings.
How to batch convert DNG to JPG with XnConvert:
- Download XnConvert from xnview.com/en/xnconvert/
- Open XnConvert and go to the Input tab
- Click Add Files or Add Folder to load your DNG files
- Go to the Output tab:
- Set Format to JPG
- Set Quality to 90–95%
- Choose your output folder
- Click Convert — XnConvert processes all files with a progress bar
Why XnConvert stands out for DNG batch conversion:
- Handles thousands of files without crashing
- Supports over 500 image formats (not just DNG)
- Optional actions: resize, rename, watermark, strip metadata
- Multi-core processing for faster conversion
- Completely free for personal use
For photographers who regularly convert large photo libraries, XnConvert combined with Compresto for post-conversion compression creates an efficient workflow: convert DNG → JPG with XnConvert, then batch compress the JPGs with Compresto to save even more storage.
Professional Workflows in Adobe Lightroom
For professional photographers and anyone serious about their images, Adobe Lightroom Classic is more than just an editor—it’s the command center. When you need to turn your DNG files into JPGs, Lightroom gives you a non-destructive workflow with a level of control you just can't get anywhere else. This is how you ensure your final images are perfectly tailored for the web, for print, or for a client.
Unlike a quick, one-off conversion in an app like Preview, Lightroom’s process is built for consistency, especially when you're dealing with a high volume of photos. The whole system revolves around its powerful Export module, which lets you dial in every single attribute of the final JPG. You're not just converting a file; you're running a professional export.
Mastering the Lightroom Export Dialog
Once you've finished tweaking your DNG file in the Develop module, you kick off the conversion by selecting your image (or a whole batch of them) and heading to File > Export. This brings up the Export dialog, a comprehensive panel where all the magic happens.
Think of this as much more than a "save as" button. It’s where you control the critical details of your final JPG:
- File Naming: Set up custom templates that automatically rename your files based on date, a sequence number, or any custom text you want. No more
_DSC1234.jpg. - Image Sizing: Specify the exact dimensions in pixels, inches, or centimeters. You can also set the resolution, like 72 PPI for web use or 300 PPI for high-quality prints.
- Output Sharpening: Apply just the right amount of sharpening for either a screen or a specific paper type (like matte or glossy), making sure your JPGs always look crisp.
- Metadata: You get to choose exactly what information stays in the file. You can strip out all the camera EXIF data for privacy or embed your copyright and contact info.
- Watermarking: Add a simple text or graphical watermark to protect your images before you post them online.
Creating and Using Export Presets
The real power of Lightroom for any busy photographer comes from using presets. If you find yourself constantly exporting photos for your blog, a particular client, and your social media feeds, you can create a unique preset for each of those scenarios. This saves you from having to manually tweak dozens of settings every single time.
For instance, you could create a "Web Blog" preset that automatically resizes images to 2048 pixels on the long edge, sets the quality to 80, applies screen sharpening, and converts the color space to sRGB. Once you save it, that entire configuration is just one click away in the Export window. Learning how to manage these presets is a total game-changer. For a deeper dive, you can check out a great guide on adding presets to Lightroom for more workflow tips.
The core idea is simple: make the decision once, then automate it forever. Export presets turn a repetitive, error-prone task into a reliable, one-click action that ensures every image you deliver is perfectly formatted.
Interestingly, even though DNG is an Adobe format, not all photographers who use Lightroom bother converting their camera's proprietary RAW files into DNGs first. For many, that extra conversion step just adds time to their workflow without a big enough payoff, especially since most camera manufacturers haven't fully jumped on the DNG bandwagon. You can find more on why some pros skip this step over at Lightroom Killer Tips. This just goes to show that no matter what your intermediate raw format is, the end goal is almost always a perfectly crafted JPG.
Automating Conversions for Maximum Efficiency
Manually converting images is fine for a few files here and there, but when you’re dealing with a steady stream of DNGs, it quickly becomes a repetitive drag. This is where your Mac can become a seriously powerful assistant. By setting up some simple automation, you can turn that repetitive task into a background process you never have to think about again.
We'll dive into two fantastic built-in macOS tools: Automator and Folder Actions.
These tools let you create "set it and forget it" workflows. Imagine dropping a folder of DNGs into a specific spot and having your Mac instantly convert them to high-quality JPGs in another folder—all without a single click. This isn’t just about saving a few minutes; it's about building an efficient, error-free system that handles the grunt work for you.
Creating a Quick Action with Automator
Automator is your go-to for building custom workflows that you can run from anywhere in macOS, including the right-click menu. For our DNG to JPG task, we can whip up a "Quick Action" that appears whenever you right-click an image file.
The setup is surprisingly simple. You just open Automator, choose "Quick Action," and then chain together a couple of commands. The main command you'll use is "Change Type of Images," where you’ll set the output format to JPEG. You can even add another step to move the new JPGs to a designated folder, keeping your original DNGs safe and untouched.
Once you save it, this Quick Action is always ready to go. Just select your DNG files, right-click, and run your custom conversion. It’s an incredibly satisfying way to handle batches on the fly.
The real beauty of an Automator Quick Action is how it’s context-aware. It only shows up when you’ve selected image files, keeping your right-click menu clean while putting powerful batch processing right at your fingertips.
This infographic gives a good overview of a typical professional workflow, from import to the final export.

While professional software like Lightroom gives you granular control, automating that final export step with system-level tools can dramatically speed up your delivery process.
Setting Up a Hot Folder with Folder Actions
For the ultimate hands-off automation, nothing beats Folder Actions. A Folder Action is essentially a script or workflow that you attach to a specific folder on your Mac. Anytime you add files to that folder, it automatically triggers the action.
Think of it as creating a "hot folder." You could designate one folder as your "DNG Drop Zone." Any DNG file you drag into it will be automatically converted to a JPG and saved to a different output folder, like "Converted JPGs" on your desktop. This is perfect for photographers who offload images from a memory card and want the conversion to start immediately in the background.
For those interested in taking this kind of automation even further, our guide on a Mac app to monitor folders for automatic compression explores some more advanced solutions.
When you're setting up any automated image workflow, especially with powerful libraries, it's vital to keep an eye on performance. This is particularly true for developers, who may run into issues like addressing memory issues when using Node.js Sharp for image processing.
By combining Quick Actions for on-demand control and Folder Actions for true automation, you can build a highly efficient system to convert dng to jpg that fits perfectly into your workflow.
Using Command-Line Tools for Full Control
If you want the ultimate in speed, flexibility, and automation, the macOS Terminal is where the real power lies. While graphical interfaces are great for visual tasks, command-line tools give you a level of control that developers, power users, and anyone who loves scripting will appreciate. It's the perfect way to build custom workflows or chew through massive batches of images programmatically.
Instead of clicking through menus, you can write a simple command to convert dng to jpg files with your exact settings, then save and reuse that script forever. It’s a completely different way of working that puts efficiency and repeatability first.
We’ll dig into two command-line heavyweights: sips, which comes built right into macOS, and ImageMagick, a powerhouse open-source tool for more complex jobs.
Fast Conversions with Native macOS Sips
Before you go installing anything, you should get to know sips (scriptable image processing system). This lightweight command is already on your Mac and is surprisingly capable for quick and dirty conversions. It's the ideal choice when speed is your main goal and you don't need a bunch of fancy image manipulation features.
For instance, converting a single DNG file is as easy as typing a single line in your Terminal. You can tell it the output format and even set the final JPEG quality. The real magic, though, happens when you wrap it in a simple loop to process an entire folder of images in seconds.
Here’s a quick look at what you can do with it:
- Single File: A simple command that points to your input DNG and names the output JPG.
- Batch Processing: A short
forloop in your terminal can fly through every.dngfile in a directory and convert each one automatically. - Quality Control: You can add flags to the command to control the compression level of the final JPG, giving you a say in the final file size versus quality.
Since sips is part of macOS, it's blazing fast and requires zero setup. Just open Terminal and you're ready to go.
Getting comfortable with built-in tools like
sipsis a fantastic first step into command-line image processing. It shows you just how much power is already hiding on your Mac, no extra software needed.
Advanced Control with ImageMagick
When your conversion needs get more complex than what sips can handle, ImageMagick is the industry-standard tool to reach for. It’s a free, open-source software suite that can tackle almost any image processing task you can throw at it. For macOS users, installing it is a breeze with a package manager like Homebrew.
The cornerstone of ImageMagick is its convert command. This tool gives you incredibly fine-grained control over every single part of the conversion, going way beyond just changing the file format.
With ImageMagick, you can do things like:
- Resize images to precise dimensions or percentages.
- Apply or convert color profiles to ensure consistency (like converting to sRGB for web use).
- Preserve, edit, or completely strip metadata (EXIF, IPTC) from your files.
- Perform more advanced operations, like adding watermarks or creating composite images.
This depth of control makes ImageMagick the go-to for anyone building a serious, automated pipeline. You can write scripts that not only convert your DNGs but also get them perfectly prepped for their final destination, whether that’s a web gallery, a print shop, or a long-term archive. If you're building a fully automated workflow, ImageMagick is pretty much essential.
Which Conversion Method Is Right for You?
Choosing the right tool depends entirely on your needs. A quick one-off conversion has different requirements than a fully automated, high-volume workflow. This table breaks down which method shines in different scenarios.
| Method | Best For | Batch Conversion | Ease of Use | Cost |
|---|---|---|---|---|
| macOS Preview | Quick, single-file conversions or small batches. | Manual | Very Easy | Free |
| macOS Photos | Users already managing their library in Photos. | Yes | Easy | Free |
| Adobe DNG Converter | Converting proprietary RAWs to DNG before JPG. | Yes | Moderate | Free |
| Adobe Lightroom | Photographers needing professional editing and export control. | Yes | Moderate | Paid |
| Sips (Command-Line) | Fast, scripted conversions with basic quality control. | Yes | Advanced | Free |
| ImageMagick (Command-Line) | Complex, automated workflows needing granular control. | Yes | Advanced | Free |
| Automator & Folder Actions | "Set it and forget it" automated folder conversions. | Yes | Moderate | Free |
Ultimately, the best method is the one that fits seamlessly into your existing process. For many, a combination of tools—like using Lightroom for primary edits and a sips script for quick web exports—offers the most flexibility.
Common DNG to JPG Conversion Questions
Even with the best tools, a few questions always seem to pop up when you start converting DNG files to JPGs. Getting these sorted out early on helps you sidestep common mistakes and ensures your final images look just right, no matter where you plan to use them.
Let’s walk through some of the things that photographers run into the most.
Do I Lose Quality When Converting DNG to JPG?
Technically, yes, some data gets left behind. This is because JPG is a lossy compressed format, while your DNG is a raw file holding every last bit of data captured by your camera's sensor. The conversion process basically "bakes in" all your edits and tosses out the extra, unused information to create a much smaller, more shareable file.
But here’s the good news: you’re in complete control of how much quality you keep. When you export from a program like Lightroom or even macOS Preview, you can set the JPG quality. Pushing it to a high value like 90-100% almost always gives you a file where any visual difference is practically impossible to spot with the naked eye.
A good rule of thumb is to always treat your original DNG file as your "digital negative." It's the master copy you can always go back to for future edits or different types of exports. The JPG is just one of many possible outputs from that master.
What Is the Best Color Space for JPGs?
The right color space really just depends on where the image is going to end up. Getting this setting right is critical if you want your colors to look consistent everywhere.
- sRGB: This is the gold standard for anything viewed on a screen. If your JPG is headed for a website, social media, or an email, always use sRGB. It’s the best way to prevent your colors from looking washed out or way too saturated on different monitors and phones.
- Adobe RGB: This color space has a wider gamut (meaning a bigger range of colors) and is sometimes requested by professional print labs. Only use it if your printer specifically asks for it by name.
When in doubt, sRGB is your safest bet for any kind of digital sharing. It just works.
How Do I Keep My Metadata in the JPG?
Hanging onto your metadata—things like camera settings (EXIF), copyright info, and keywords (IPTC)—is non-negotiable for most professional photographers. Luckily, most modern conversion tools are smart enough to handle this for you.
Professional software like Adobe Lightroom is already set up to include all that data by default when you export. It's a good habit to double-check the "Metadata" panel in the export dialog box and make sure "Include All Metadata" is selected. Simpler tools like macOS Preview and Photos also do a pretty good job of keeping the basic camera data automatically. It never hurts to glance at your export settings, just to be sure that valuable info isn’t getting stripped out by accident.
Ready to reclaim disk space without sacrificing quality? Compresto is the macOS app designed for creators who need fast, powerful, and local file compression. Effortlessly shrink images, videos, and PDFs with a simple drag-and-drop, and see exactly how much space you save. Download your free trial and start optimizing your workflow today at https://compresto.app.
Convert DNG to JPG Online Free
If you don't want to install software, several online tools convert DNG to JPG directly in your browser:
- CloudConvert — Supports DNG to JPG with quality and resolution controls. Free for 25 conversions/day.
- Convertio — Simple drag-and-drop DNG to JPG converter. Free up to 100 MB per file.
- ILoveIMG — Batch image conversion including DNG. Free with a watermark-free output.
Important: Online converters upload your files to remote servers. For sensitive or professional photos, use a desktop tool like Adobe DNG Converter or XnConvert to keep your files private. Batch conversion is also significantly faster with desktop software — converting 500 DNG files online could take hours, while XnConvert processes them in minutes.
For macOS users handling large photo libraries, Compresto can batch compress the resulting JPG files to save additional storage space without visible quality loss.
Want to understand the source format better? Our RAW image format explained guide covers what DNG actually is, how it differs from camera-native RAW (CR3, NEF, ARW), and why the files are so large.
Looking to compress other file types? See our guides on how to reduce PDF file size, how to compress photos on iPhone, and batch converting HEIC to JPG.