Adding Presets to Lightroom A Simple Guide
Adding presets to Lightroom is one of the quickest ways to unlock powerful, one-click photo editing. The whole process is about importing either .XMP or DNG files straight into the desktop or mobile app, instantly giving you a whole new range of styles to play with. It's the fastest way I've found to get a consistent, professional look across a batch of images.
Why Presets Are an Essential Editing Tool
Using presets in Lightroom is so much more than a simple shortcut; it's a strategic way to streamline your entire creative process. For photographers and content creators, time is everything. Presets give you a solid starting point by applying a whole bunch of adjustments—from tricky color grading to exposure tweaks—all in a single click. This incredible efficiency is exactly why they've become so popular.
Industry reports have shown that over 70% of professional photographers rely on presets to maintain a consistent aesthetic, which is absolutely critical for building a recognizable brand. A good preset can slash your editing time per photo by up to 90%, turning a 10-minute job into just a few seconds.
Before we jump into the step-by-step, this simple infographic breaks down the core idea.

As you can see, the first thing you always need to do is figure out your file type. From there, you can match it to the right version of Lightroom.
Key Benefits of Using Presets
Beyond just saving time, a well-organized preset library offers some serious advantages that will elevate your work. Think of it as building a custom toolkit for your unique artistic vision.
- Consistency: Effortlessly achieve a uniform look across an entire photoshoot or your social media feed.
- Learning Opportunity: You can actually reverse-engineer presets to see how the pros get certain looks. Just apply a preset and study the slider settings to learn the techniques.
- Creative Exploration: Quickly audition different styles and moods without having to manually fiddle with dozens of sliders each time.
By mastering how to add presets to Lightroom, you’re not just saving time—you’re building a more efficient, consistent, and scalable editing system that truly supports your creative goals.
While this guide is all about making the most of Lightroom presets, it's also worth looking into other modern technologies. For example, it can be fascinating to learn how AI tools can make photos look professional for a completely different approach to getting polished results.
Mastering Preset Installation in Lightroom Classic
Lightroom Classic is still the go-to powerhouse for so many photographers, and thankfully, adding presets is a breeze once you know the modern method. Forget the old days of manually dragging files into obscure system folders—the current approach is much cleaner and even syncs your presets across your Adobe ecosystem.
Let's say you just bought a pack of 50 wedding presets that arrived as a single .ZIP file. Your first instinct might be to unzip it, but Lightroom Classic is actually smart enough to handle that for you. The key is to do everything from inside the Develop module, which is where all your editing magic happens anyway.
This kind of efficiency is exactly why presets have become so critical in professional workflows. In a recent survey, a whopping 62% of professional photographers said they use presets as their main editing tool. The biggest benefit they cited? Delivering a consistent look across huge photo galleries, which is absolutely vital for jobs like weddings that can generate over 1,000 images. You can find more insights on how presets are changing the game for pros over at kevinmullinsphotography.co.uk.
The Modern Import Process
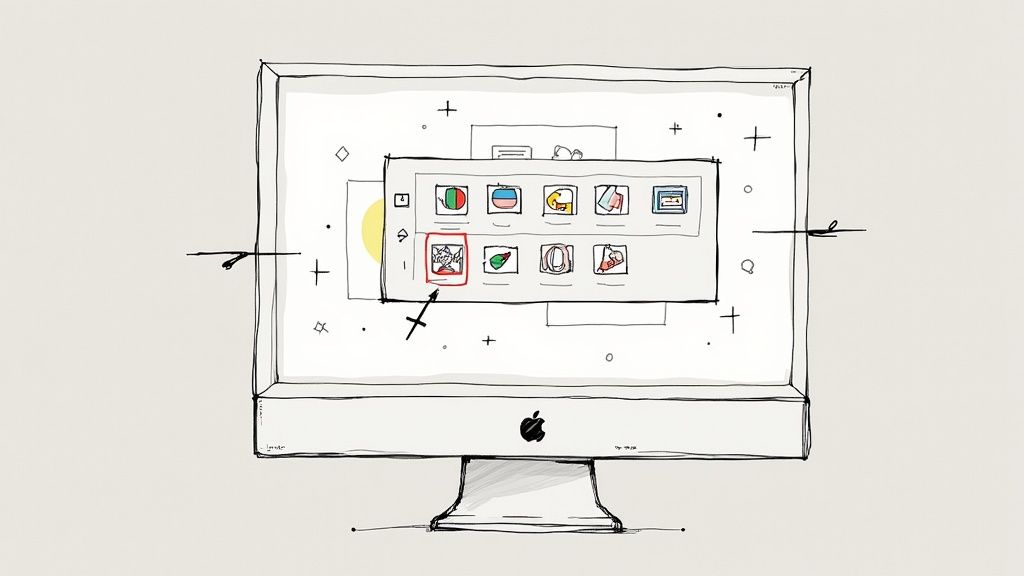
Alright, let's get those presets installed. First, head over to the Develop module. On the left side of your screen, you’ll find the Presets panel. This is your command center for adding and organizing all your new styles.
- Look for the small plus (+) icon at the top right corner of the Presets panel and give it a click.
- A dropdown menu will appear. From there, choose Import Presets.
- This will pop up an import window, letting you navigate to where you saved your downloaded files. You can select individual .XMP files, but it's even easier to just select the entire .ZIP archive.
- Once you’ve selected your file, hit Import. Lightroom will automatically unzip the file if needed, install the presets, and tuck them into a neat new group right inside your Presets panel.
Here's the best part: Any .XMP presets you add to Lightroom Classic this way will automatically sync through the Adobe Cloud to Lightroom CC and your mobile app, assuming you’re logged into the same account. It just works.
Dealing with Older .lrtemplate Files
Have some older presets in the .lrtemplate format? No problem. Lightroom Classic will automatically convert them into the modern .XMP format when you import them. The process is exactly the same—just follow the import steps above.
Once they're converted, these older presets will also sync to your other devices. A tidy preset library is a happy one, and you can learn more about keeping all your assets in order with our guide to Lightroom folder structure best practices. It makes finding and using your creative tools that much easier.
Adding Presets to Lightroom CC for Cloud Syncing
When it comes to Lightroom CC, adding presets is all about speed and simplicity. This cloud-based version is designed to be a unified ecosystem—what you do on your desktop shows up instantly on your phone or tablet. For any photographer who edits on more than one device, this is a massive advantage.
Imagine importing a new preset pack on your main computer and having it ready to go on your laptop moments later, with zero extra steps. That’s the whole point of this system. Unlike the manual folder diving you sometimes have to do with Classic, Lightroom CC handles all the backend stuff for you.
The app is also smart enough to handle different file types. You can import individual .XMP files or, even better, an entire .ZIP archive without having to unzip it first. It’s a small detail, but it saves time and keeps your downloads folder from getting cluttered.
The Easiest Import Method
To get started, open any image in Lightroom CC. Head over to the Edit panel, which you'll find on the right-hand side. At the very bottom of this panel, you’ll see a button labeled Presets. This is your command center for all your saved styles.
Click that Presets button, and a new panel will slide open. Look for the three-dot icon (...) tucked away in the upper-right corner. A quick click on that will bring up a menu where you’ll find the Import Presets option. This opens up a file browser, letting you track down and select your downloaded presets or the ZIP file they came in.
Once you’ve selected your files and hit Import, Lightroom CC takes over. The presets will pop up in a new group right there in your panel, and then the real magic kicks in: the cloud sync.
The moment your presets are imported into Lightroom CC, Adobe’s cloud service automatically starts pushing them to all your connected devices. This means they'll show up in your Lightroom Mobile app on your phone and tablet, ready for on-the-go editing.
This automatic sync is a total game-changer. It keeps your editing toolkit consistent no matter where you are, which is absolutely critical for maintaining a cohesive look across your work. If you’re editing large batches of photos that need to be uploaded quickly, this can make a huge difference. You might also want to look into other ways to get faster upload speeds for your assets to really streamline your workflow.
Installing Presets on the Lightroom Mobile App
For the growing army of photographers who edit primarily on their phones, getting presets onto Lightroom Mobile is a total game-changer. Whether you're a paid Creative Cloud subscriber or a free user, there's a straightforward path to get your favorite looks loaded up and ready to go.
If you have an Adobe Creative Cloud plan that includes Lightroom CC, life is incredibly simple. Any .XMP preset you add to your desktop app will automatically sync over the cloud to your phone. Seriously, that's it. Adobe handles all the background work, making this the perfect setup for anyone who bounces between a computer and a mobile device.
But what about the huge number of creators who only use the free Lightroom Mobile app? Don't worry, you're not left out. For you, the DNG method is the way to go.
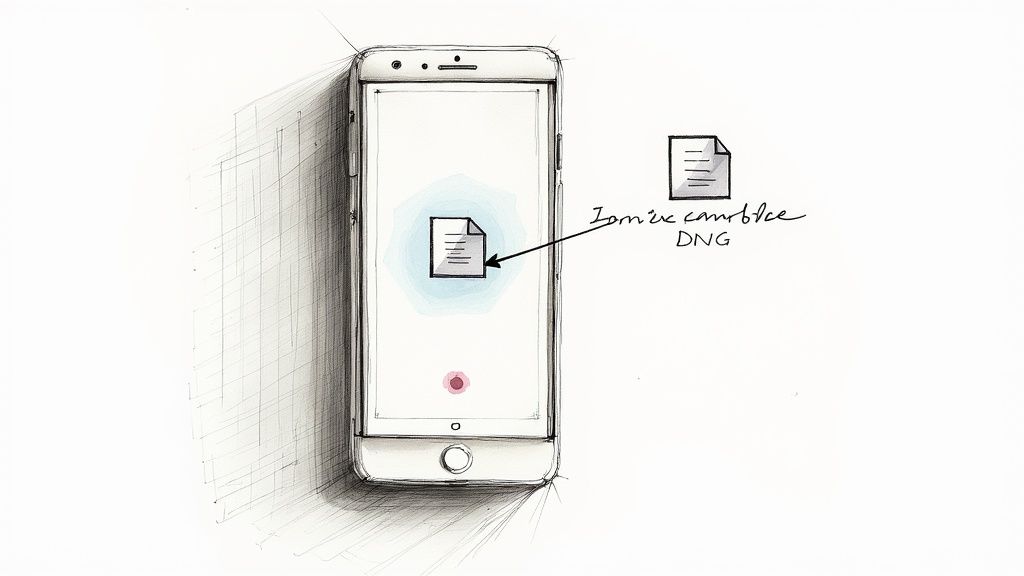
Installing with DNG Files
This manual process might feel a bit like a workaround, but it works perfectly for getting presets onto the mobile app without needing a desktop computer. Preset sellers often provide their looks as .DNG files, which are basically raw photos that already have the preset's settings baked in.
Your job is to get that DNG "photo" into Lightroom Mobile and then save its settings as a brand new preset. It sounds more complicated than it is.
Here’s how it breaks down:
- Download and Unzip: First, get the .DNG files from the seller onto your phone. You'll likely need to unzip a folder first, which you can do with your phone's built-in file manager or a free app. Once unzipped, save the DNG files to your phone's camera roll.
- Import into Lightroom: Open up the Lightroom app. I recommend creating a new album specifically for these DNG files to keep things organized. Import your DNG files into that album—they’ll just look like regular photos.
- Copy the Settings: Tap on one of the new DNG images to open it. Find the three-dot menu (...) in the top-right corner and tap Copy Settings.
- Create Your Preset: Now, navigate to one of your own photos. Tap the three-dot menu again, but this time choose Paste Settings. If you love how it looks, hit that three-dot menu one last time and select Create Preset. Give it a memorable name, assign it to a preset group, and you're done.
Just repeat this copy-and-paste process for each DNG file you downloaded. It only takes a few minutes, but it fully unlocks the power of presets for everyone, even if you're working exclusively on your phone.
Organizing and Managing Your Preset Library
Once you start collecting presets, your library can get crowded, fast. A tidy preset panel isn’t just about looking good; it's about pure efficiency. When your presets are organized, you can find the perfect look in seconds, which dramatically speeds up your editing sessions.
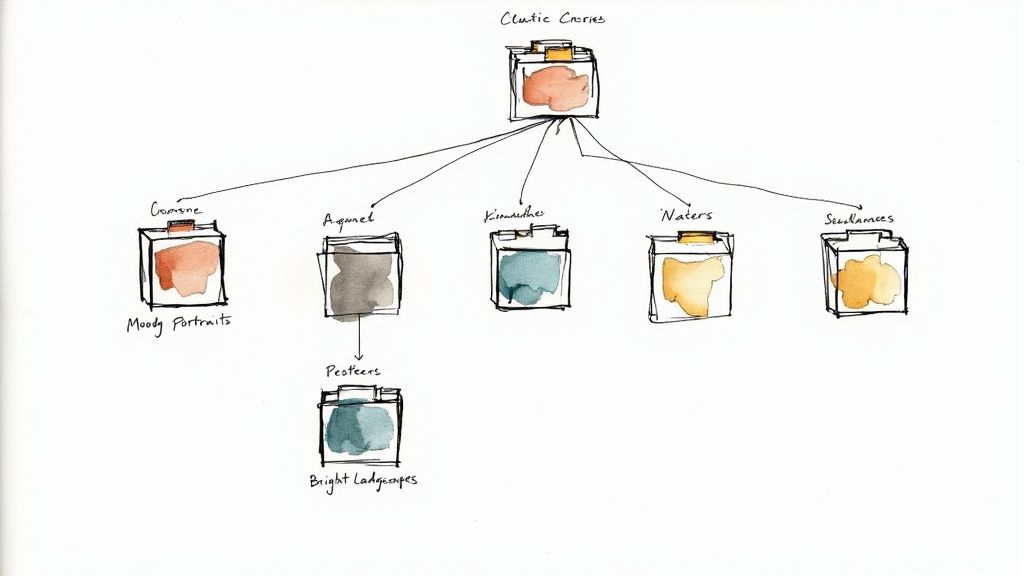
The best way to start is by creating custom folders, or "Groups," right inside the Presets panel. This lets you categorize everything in a way that makes sense to you—whether that’s by project, style, or the creator you bought them from.
Smart Organization Strategies
A little structure goes a long, long way. Instead of scrolling through one massive, endless list, try building groups that mirror how you actually work.
Here are a few ideas that have worked for me:
- Group by Style: Create folders like 'Moody Portraits,' 'Bright & Airy Landscapes,' or 'Vintage Film.' This is perfect when you know the vibe you're going for but not the specific preset.
- Group by Creator: Keep all the presets you bought from a specific photographer or brand together. It makes it easy to maintain a consistent look if you love a particular creator's style.
- Rename Presets: Don't forget you can right-click any preset to rename it. A consistent naming convention, like "Creator - Style 01," can make your library searchable and much easier to navigate.
A clean preset library is a core part of a productive workflow. Think of it like organizing files on your computer—a well-managed preset collection saves you time, reduces creative friction, and lets you focus on the edit itself.
This idea of smart organization extends way beyond just presets. A solid system is crucial for all your creative files. To take it a step further, you can learn more about building a great digital asset management workflow to keep everything in order.
Understanding the principles of photo color grading can also give you a better framework for deciding how to categorize your presets based on the color and mood they create.
Troubleshooting Common Preset Installation Issues
It happens to the best of us. You follow all the steps to install a new preset pack, you’re excited to start editing, and… nothing. The presets are nowhere to be found. Don't worry—most installation hiccups have simple fixes that will get you back on track in minutes.
https://www.youtube.com/embed/AYCv_ADcpck
Before you dive into complex troubleshooting, try the oldest trick in the IT book: restart Lightroom. I know it sounds too simple, but you'd be surprised how often this single step forces the program to re-scan its folders and make your new presets appear.
If a quick restart doesn't do the trick, the issue is likely related to file compatibility or where Lightroom decided to put the presets.
Why Your Presets Aren't Showing Up
When presets go missing after import, it's usually for one of a few common reasons. Let's walk through the most likely culprits to figure out what's going on.
- Check the File Format: Modern versions of Lightroom are built around the .XMP preset format. If you’re trying to use older .lrtemplate files, Lightroom Classic should automatically convert them, but Lightroom CC and Mobile might not. Make sure the presets you have are the right format for your version of the software.
- Look in a New Group: Lightroom often creates a brand-new folder, or "group," when you import a preset pack. It’s easy to miss. Take a moment to scroll through your entire presets panel—you might find them tucked away in a newly named group at the very bottom.
- Mobile Sync Issues: Seeing your presets in Lightroom Classic but not on your phone? The problem is likely with the cloud sync. Check your internet connection on both your computer and your mobile device, and make sure cloud syncing is turned on. Sometimes, it just takes a few minutes for everything to catch up across devices.
An "Incorrect File Type" error is a dead giveaway. If you're a mobile-only user, this almost always means you're trying to use .XMP files when what you really need are .DNG files. They work like a photo with the preset settings "baked in" for mobile use.
Frequently Asked Questions About Lightroom Presets
Jumping into the world of presets usually brings up a few questions, especially when you're trying to sync them across different devices or figure out which file type you actually need. Let’s clear up some of the most common things photographers run into.
Can I Use Classic Presets on Mobile?
Yes, you absolutely can. Modern .XMP presets that you install in Lightroom Classic will automatically sync over to the Lightroom Mobile app, provided you're logged into the same Adobe account on both.
The one catch is with older .lrtemplate files. These won't sync on their own. You'll need to import them into Lightroom Classic first, which will convert them into the modern .XMP format. After that, they’ll sync up just like any other preset.
What Is the Difference Between XMP and DNG Presets?
This is a great question, and the difference is pretty important for your workflow.
- .XMP files are the go-to standard for any modern desktop version of Lightroom. They're just small text files that contain all the slider settings for an edit, nothing more.
- .DNG files, on the other hand, are basically raw photo files that have preset settings embedded inside them. They’re used as a clever workaround to get presets installed directly onto the free Lightroom Mobile app without needing a desktop computer.
Why Are My New Presets Not Showing Up?
This is probably the most common headache, but the fix is usually simple. The first thing to try is just restarting Lightroom—that often forces it to refresh and find the new files.
If they're still missing, double-check the Presets panel. Sometimes presets get imported into a brand new folder or group, so you might just be looking in the wrong place. Finally, make sure the preset files you have are compatible with your version of Lightroom.
A key takeaway: If you can see your presets on your computer but they won't appear on your phone, it's almost always a sync issue. Check your internet connection and make sure cloud syncing is turned on in both the desktop and mobile apps.
Ready to reclaim your storage space and speed up your workflow? Compresto is the macOS app designed to compress your images, videos, and PDFs without losing quality. Download Compresto and start creating lighter, faster assets today!