How to Optimize Images for SEO to Boost Rankings
Optimizing your images for SEO isn't just a single task.Optimizing your images for SEO isn't just a single task. It’s a process that involves a few key steps: compressing files so they load fast, using descriptive file names and alt text to give search engines context, picking modern formats like WebP, and making sure your images adapt to any screen size.
When you get these elements right, your images start pulling their weight for your rankings instead of dragging them down.
Why Image SEO Is a Non-Negotiable Strategy

Let's get one thing straight: image optimization isn't some minor technical detail you can afford to ignore. It’s a powerful lever for growth. We’re well past the old "images make content engaging" conversation. Now, we're talking about how they directly boost your bottom line through faster page speeds, higher rankings, and a much better user experience.
Google's algorithms have gotten incredibly sophisticated, placing a heavy emphasis on visual content and accessibility. This turns your well-optimized images into powerful ranking signals. It’s no longer just about aesthetics; it's a fundamental piece of any modern SEO strategy.
The Real Impact on Traffic and Engagement
The numbers don't lie. Content with properly optimized images gets a staggering 94% more views than articles that are just plain text. And a huge chunk of that traffic comes directly from image searches—10% of all Google searches happen on Google Images. That alone shows you just how critical visual content is for getting discovered.
By ignoring image SEO, you are essentially closing a major entry point for potential customers to find your website. Every un-optimized image is a missed opportunity for traffic, engagement, and accessibility.
This guide will give you a clear roadmap to mastering the essentials. Before we dive into the step-by-step process, let's get a quick overview of what we'll cover.
Key Pillars of Image SEO at a Glance
This table breaks down the core components of image SEO, giving you a quick snapshot of what truly matters for your site's performance.
| Optimization Area | Primary Goal | Impact on SEO |
|---|---|---|
| File Compression | Reduce file size to improve page load speed. | Boosts Core Web Vitals and user experience scores. |
| Descriptive Names | Provide context to search engines about the image content. | Helps images rank in Google Images and supports topic relevance. |
| Alt Text | Enhance accessibility and provide context for crawlers. | Improves accessibility and provides keyword-rich context. |
| Next-Gen Formats | Deliver high-quality images in smaller file sizes (e.g., WebP). | Significantly improves load times and overall performance. |
| Responsiveness | Ensure images display correctly on all devices. | Crucial for mobile-first indexing and user experience. |
Understanding these pillars is the first step. Next, we’ll dive into how to put them into practice.
This guide will walk you through exactly what you need to do. We'll explore how to:
- Choose the Right Format: Figure out when to use JPEG, PNG, or next-gen formats like WebP to get the best mix of quality and speed.
- Compress Files Intelligently: Learn the techniques to shrink image sizes without turning your visuals into a pixelated mess.
- Write for Humans and Bots: Master the art of crafting descriptive filenames and alt text that appeal to both users and search engines.
To really get the most out of your efforts, image optimization needs to be woven into your broader content SEO best practices. When you treat your images as a core part of your content—not an afterthought—you unlock their full potential to drive your site's performance.
Setting the Foundation with File Names and Formats
Before you even think about uploading an image, two fundamental choices can make or break its SEO potential. Getting the file name and format right provides invaluable context for search engines and can drastically improve your site’s performance. They’re small habits, but the payoff is huge.
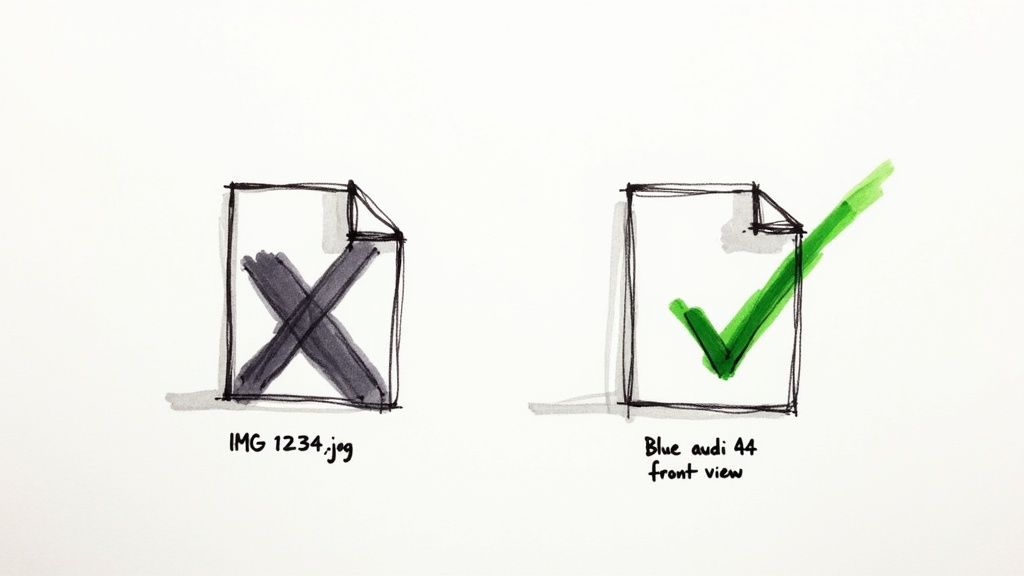
Think of an image file name as the first clue you give Google about its content. A generic name like IMG_7890.jpg is a completely wasted opportunity. Search crawlers can’t “see” an image, so they lean heavily on text-based signals like the file name to figure out what it shows.
By simply renaming that file to blue-audi-a4-front-view.jpg, you’re telling search engines exactly what the image is about. This simple tweak helps it rank in both web and image search results for all sorts of relevant queries.
Crafting SEO-Friendly File Names
Creating descriptive file names is pretty straightforward once you get the hang of it. The key is to be concise but informative, using keywords that genuinely describe what’s in the picture.
Here are a few best practices I always follow:
- Use Descriptive Keywords: Think like a user. What would someone search for to find this image? Weave those terms into the name naturally.
- Separate Words with Hyphens: Always use hyphens (
-) to separate words. Search engines read hyphens as spaces, makingblue-audimuch more understandable thanblue_audiorblueaudi. - Keep It Concise: Aim for a name that gets straight to the point. Avoid stuffing it with a long string of keywords; clarity beats clutter every time.
Mastering this is one of the easiest wins in image SEO. For a deeper dive, check out our full guide on file naming conventions and best practices.
Choosing the Right Image Format
Next up is your image format. This decision directly impacts file size, visual quality, and page load speed—all critical ranking factors. According to HTTP Archive, images make up over 40% of an average web page's weight, so this isn’t a small detail.
Each of the common formats has a specific job:
- JPEG (or JPG): Your go-to for photographs and images with lots of colors. JPEGs offer fantastic compression, shrinking file sizes with almost no noticeable drop in quality.
- PNG: Perfect for graphics that need a transparent background, like logos or icons. PNGs use lossless compression, so they keep every detail but usually create larger files than JPEGs.
- WebP & AVIF: These are modern formats built for the web. They deliver much better compression and quality than the older options. A WebP file, for instance, can be 25-34% smaller than a similar JPEG.
The goal is to find that sweet spot between visual quality and file size. A fast-loading, high-quality image improves user engagement and sends positive signals to Google, which can give your Core Web Vitals scores a real boost.
Ultimately, picking the right format isn’t just a technical task; it's a strategic one. By choosing the best format for each image, you ensure your site loads quickly without sacrificing the visual punch that keeps people on your page.
Writing Alt Text for Accessibility and SEO
When it comes to image optimization, alt text (or alternative text) is probably the single most important piece of text you'll write. It plays a powerful double role: making your content accessible to visually impaired users and giving search engine crawlers the context they need to understand your images. If you want to know how to optimize images for SEO, getting alt text right is non-negotiable.
Too many people treat alt text as an afterthought. They either leave it blank or, even worse, just cram it full of keywords. That completely misses the point. The whole idea behind alt text is to describe an image for someone who can't see it. It turns out that search engines use this exact same signal to figure out what an image is about and how it connects to the rest of your content.
Moving from Bad to Great Alt Text
Crafting good alt text is all about being descriptive without being wordy. It’s a classic case of writing for humans first, which in turn gives search engines exactly what they want.
Let's look at a real-world example to see the difference.
- Poor:
alt="car"(Way too generic. This helps no one.) - Okay:
alt="blue car"(Getting warmer, but it’s still missing key details.) - Excellent:
alt="A shiny blue Audi A4 parked on a city street at sunset"(Perfect. It’s specific, descriptive, and paints a clear picture for both a screen reader and a search engine.)
See how the best example describes the main subject, its important features, and the surrounding environment? That level of detail makes your content more inclusive and naturally works in contextual keywords without feeling forced or spammy.
This quick infographic breaks down the process of creating effective alt text.
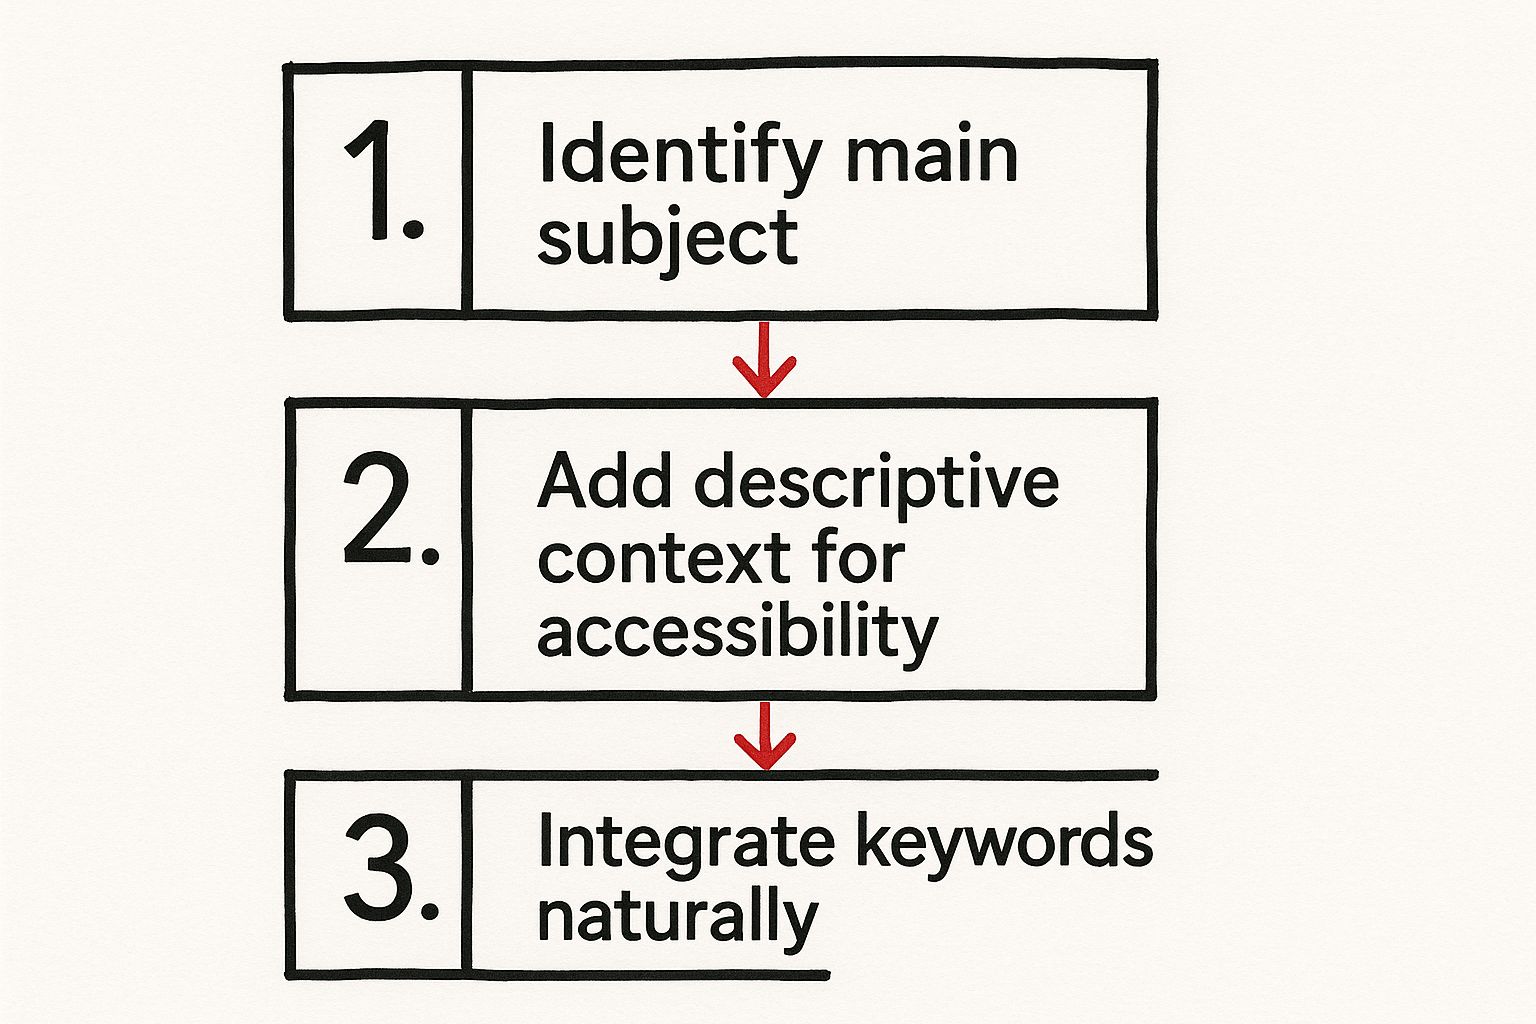
As you can see, the workflow is simple: start with what the image is, add descriptive details for accessibility, and then weave in relevant keywords where they fit naturally.
Common Alt Text Mistakes to Avoid
While the concept is simple, it's surprisingly easy to get alt text wrong. A recent global analysis found that only 26% of websites consistently use descriptive alt text. That means a massive three-quarters of images online are basically invisible to visually impaired users and are a missed opportunity for search engines. The same study showed that sites with well-optimized images can see up to a 23% boost in organic traffic.
The biggest mistake I see is keyword stuffing. Alt text like
alt="blue car audi sports car buy new car cheap car sale"is just spam. It creates a terrible user experience and can even get you penalized by Google.
Here are a few other common slip-ups to watch out for:
- Redundant Phrases: Never start your alt text with "Image of..." or "Picture of..." Screen readers already announce that it's an image, so this is just clutter.
- Leaving it Blank: An empty alt attribute (
alt="") tells screen readers to just skip over the image. This is only okay for purely decorative images that have zero contextual value, like a background pattern. - Forgetting Context: The description needs to tie the image back to the topic of your article. You can use an image metadata extractor tool to audit your existing images and find any that are missing alt text or other important data.
By focusing on writing clear, human-first descriptions, you’ll end up with alt text that genuinely helps people and gives your SEO a nice little boost.
Mastering Image Compression and Responsive Sizing
 Let’s be honest: slow websites kill conversions, and massive, unoptimized images are almost always the main culprit. If you look at the data from HTTP Archive, images frequently account for over 40% of a page's total weight. Shrinking their file size is one of the most impactful moves you can make for better site speed and, by extension, better SEO.
The real challenge is cutting down that file size without turning your beautiful, crisp photos into a pixelated mess. This is where image compression comes in, and it's a fundamental skill for anyone serious about optimizing images for the web.
Lossy vs. Lossless Compression
First, you need to understand the two main flavors of compression. Each one serves a different purpose and has a different effect on your final image quality.
-
Lossless Compression: This method shrinks the file size without tossing out any of the original image data. It’s perfect for technical drawings, logos, or sharp-edged graphics where every single pixel counts. The file size reduction is more modest, but the quality is perfectly preserved.
-
Lossy Compression: This technique gets more aggressive by intelligently removing some data from the image to make the file significantly smaller. For most photographs, the quality difference is virtually invisible to the human eye, but the file size savings are huge—often up to 80%.
For the vast majority of web use cases, especially with photographs, lossy compression is the way to go. It strikes the perfect balance between a tiny file size and perceived quality, which directly boosts your site’s load times and Core Web Vitals.
Of course, manually compressing every single image is a soul-crushing task. If you’re juggling a large number of visuals, a good batch image compression tool can automate this whole process, saving you countless hours and ensuring everything is consistently optimized.
Finding the Right Tool for the Job
Choosing a compression tool can feel overwhelming with so many options available. To make it easier, here’s a quick breakdown of some popular choices to help you find the right fit for your workflow.
Image Compression Tool Comparison
| Tool Name | Type (Online/Plugin) | Compression Method | Key Feature |
|---|---|---|---|
| Compresto | Online App | Lossy & Lossless | Batch processing and advanced format conversion |
| TinyPNG | Online / WordPress Plugin | Lossy | Excellent compression for PNG and JPG files |
| Imagify | WordPress Plugin | Lossy & Lossless | Three levels of compression, bulk optimization |
| Squoosh | Online App | Lossy & Lossless | Advanced controls and side-by-side comparisons |
Each tool has its strengths. For quick, one-off compressions, an online tool like TinyPNG is great. If you’re managing a WordPress site, a plugin like Imagify can automate the process for you. For those who need more control or handle large batches, a dedicated app like Compresto is a game-changer.
Match Image Dimensions to Your Layout
Beyond just compressing the file, the actual dimensions (width and height) of your images play a huge role in performance. One of the most common and costly mistakes I see is uploading a massive 4000-pixel wide photo into a space that’s only 600 pixels wide on the page.
When this happens, the user's browser is forced to download that enormous file and then shrink it down. It’s a complete waste of bandwidth that slows everything to a crawl.
Before you even think about uploading, resize your images in an editor to the maximum dimensions they will ever be displayed at on your site. This simple step alone can cut your file sizes by more than half before you even apply compression.
Embrace Responsive Images with srcset
In a mobile-first world, serving the same huge image to a 27-inch desktop monitor and a 6-inch smartphone screen just doesn’t make sense. This is where responsive images, using the srcset attribute in your HTML, become absolutely essential.
The srcset attribute is a clever bit of code that lets you give the browser a menu of different-sized versions of an image. The browser then intelligently picks the most appropriate one based on the user's screen size, resolution, and even network speed.
This stops a mobile user on a spotty 4G connection from having to download a massive desktop-sized image, drastically improving their experience and your mobile performance scores. To dive deeper into making sure your images contribute to fast load times, check out these strategies on how to optimize images for web performance. Implementing responsive images isn't just a "nice-to-have"; it's a powerful technique that directly impacts your site’s usability and SEO.
Advanced Tactics for a Competitive Edge
Once you have the basics down, you’re ready to move on to the strategies that will really push your images ahead of the competition. Think of these as the power moves that give search engines deeper, more structured information about your visual content. They're your ticket to standing out in a crowded search results page.
One of the most effective tools in your arsenal is an image sitemap. You probably already have a standard sitemap that lists all your pages, but an image sitemap is different—it tells search engines about the specific images on those pages. If visuals are central to your site, like an e-commerce store, a photography portfolio, or a food blog, this isn't just a nice-to-have; it's essential.
By creating one, you're basically handing Google a direct catalog of all your visual content. This ensures every important image gets discovered and indexed, even those loaded by tricky JavaScript that crawlers might otherwise miss. It's a proactive step that can seriously boost your chances of ranking in Google Images.
Using Structured Data for Rich Results
Ready to take things even further? It’s time to get familiar with structured data, also known as Schema markup. This is a bit of code you add to your site that acts like a translator, helping search engines understand your content on a much deeper level. When you apply it to your images, they can become eligible for those eye-catching rich results.
Ever searched for a recipe and seen a photo with the cooking time and star rating right there in the results? That's structured data at work.
Implementing this markup transforms your images from simple pictures into rich, informative snippets that demand attention on the SERP. All that extra context can do wonders for your click-through rate.
Here’s how different sites can put it to work:
- E-commerce: Use
Productschema to show pricing, availability, and review ratings directly with your product images in search. - Recipe Blogs: Apply
Recipeschema to display cooking times, calorie counts, and user ratings right next to your food photography. - Articles: The
ImageObjectproperty withinArticleschema helps lock in the connection between specific images and your content, reinforcing its topical relevance.
Turbocharge Delivery with CDNs and Lazy Loading
Finally, let's talk about pure, unadulterated speed. A Content Delivery Network (CDN) is a game-changer. It's a global network of servers that stores copies of your images, serving them to visitors from a server that's geographically closest to them. This simple change can slash latency and load times, especially for an international audience.
Combining a CDN with lazy loading is a winning formula for performance. Lazy loading is a clever trick that tells a browser not to load images below the fold until a user actually scrolls down to them. This dramatically improves the initial page load speed—a massive factor for Google's Core Web Vitals.
These advanced tactics—sitemaps, structured data, and intelligent delivery—all work together. They create a better user experience and give search engines undeniable proof of your content’s quality and relevance. If you're serious about mastering how to optimize images for SEO, these are the techniques that will help you dominate your niche.
Answering Your Top Image SEO Questions
Even after you’ve got the basics down, a few tricky questions always seem to pop up once you start optimizing images in the real world. Let's tackle some of the most common ones I hear, so you can clear up any lingering doubts and get your strategy dialed in.
Does Image SEO Really Matter for My Website?
Yes, absolutely. For some sites—think e-commerce, travel blogs, or recipe sites—it’s a massive source of traffic. But even if that’s not you, image SEO is still a huge deal because it directly impacts page speed, user engagement, and accessibility. Google cares a lot about all three.
Optimizing your images is one of the most direct ways to improve your Core Web Vitals scores. A faster, more accessible website almost always performs better in search results, making this a non-negotiable task for anyone serious about their online presence.
Think of it this way: every unoptimized image is a small anchor slowing your site down. When you have dozens or even hundreds of them, they collectively sink your rankings.
What Is the Ideal File Size for a Web Image?
There’s no single magic number, but a great rule of thumb is to keep your images under 150 KB. For bigger, more important visuals like a hero image, you might push it to 300 KB, but that should be the exception, not the standard.
The real goal is finding that sweet spot between visual quality and file size. This is where modern formats like WebP are a game-changer. They can maintain fantastic quality at a fraction of the file size of an old-school JPEG or PNG.
Can I Use AI to Write My Alt Text?
Using AI is a fantastic way to get a head start, but you absolutely need to review and tweak what it produces. AI tools are great for generating a solid baseline description, which can save you a ton of time, especially if you're dealing with a large batch of images.
The catch is that an AI might miss the specific context or keyword relevance that’s crucial for your content.
Here’s the workflow I typically use:
- Generate with AI: Get a quick, descriptive foundation.
- Manually Refine: Edit the text to make sure it's accurate, genuinely helpful for visually impaired users, and aligned with the article's specific SEO goals.
- Check for Natural Language: Make sure it sounds like a human wrote it, not a robot.
How Do I Ensure My Images Are Responsive?
The best and most standard way to do this is with the srcset attribute in your <img> HTML tag. This little bit of code gives the browser a list of different-sized versions of the same image. The browser then intelligently picks the best one for the user's specific screen size and resolution.
Many modern content management systems, like WordPress, handle this for you automatically when you upload images. Still, understanding how srcset works helps you confirm it’s doing its job and troubleshoot any issues, ensuring every visitor gets a fast experience on any device.
Ready to stop wrestling with manual compression and start saving hours? Compresto is the macOS app built to make image and video optimization fast and effortless. With a simple drag-and-drop interface, you can batch-process hundreds of files, automate your workflow, and see exactly how much space you’ve saved—all locally on your Mac.