Guide: what is video codec and how it powers video quality
Ever wonder how you can stream a massive 4K movie on Netflix without it taking hours to buffer? Or how that video you just shot on your phone can be uploaded to Instagram in seconds? The magic behind it all is a powerful, invisible piece of technology called a video codec.
Think of a codec as a specialized digital language. It’s a set of rules that shrinks enormous raw video files down to a manageable size for storage or sending across the internet, then translates them back to their original glory for you to watch. Without codecs, the modern video world simply wouldn't exist.
Deconstructing Digital Video
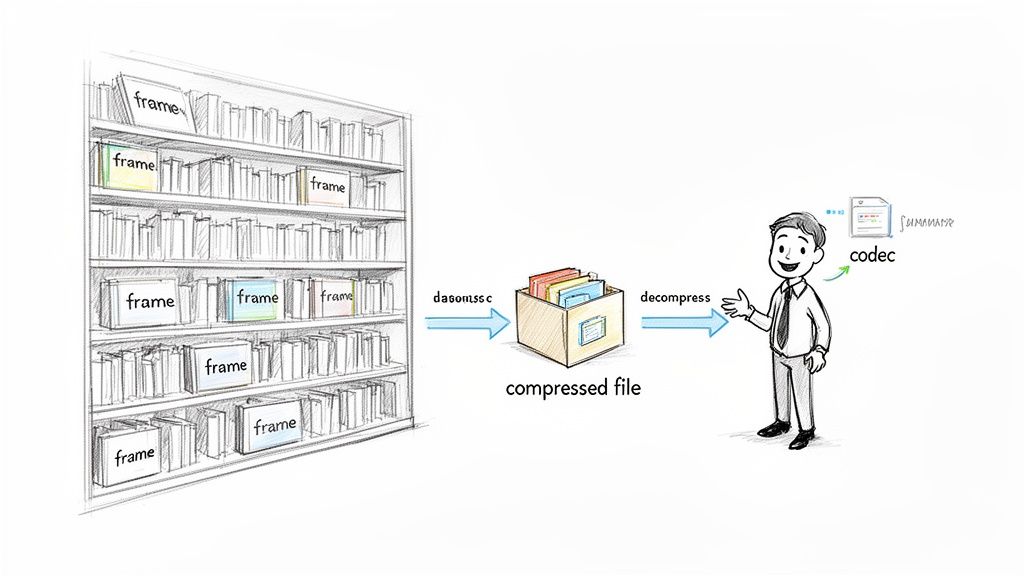
To really get what a video codec is doing, let's use an analogy. Imagine your raw video footage is an entire library filled with thousands of heavy, hardcover books. Each book represents a single frame of your video. Trying to move that entire library from one city to another would be a painfully slow, expensive, and impractical nightmare.
A video codec is like a brilliant librarian who reads every single book and writes a super-condensed summary. This summary has all the crucial plot points and character details, but it’s a fraction of the original size, making it a breeze to transport. When it arrives, another librarian (the decoder) uses that summary to perfectly reconstruct the library for the reader.
The word “codec” itself is a mashup of two words: coder and decoder.
- Coder (Encoder): This is the part that does the shrinking, compressing the raw video data into a much smaller file.
- Decoder: This is what unpacks the file, decompressing it for playback on your phone, laptop, or smart TV.
This compression and decompression cycle is the invisible engine that powers all digital video. It’s what allows streaming services to deliver more than 360,000 hours of video every single minute without completely breaking your internet connection.
Codecs vs. Containers: A Common Mix-Up
One of the biggest points of confusion for newcomers is the difference between a video codec and a video container. They aren't the same thing, but they work hand-in-hand.
Think of it this way: if the codec is the language the book is written in (like English or Spanish), the container is the physical book itself—the cover, binding, and pages that hold it all together.
A container, which you’ll recognize by its file extension like .MP4, .MOV, or .MKV, is a wrapper that bundles all the different parts of a video file. This includes the video stream (compressed by a video codec), the audio stream (compressed by an audio codec), subtitles, and other metadata.
To put all the pieces of this puzzle together, you can check out our detailed guide on video encoding.
Below is a quick table to help make the distinction crystal clear.
Codec vs Container at a Glance
| Aspect | Video Codec (e.g., H.264, HEVC) | Video Container (e.g., .MP4, .MOV) |
|---|---|---|
| Role | Compresses and decompresses video data. It’s the compression “language.” | A wrapper that holds video, audio, subtitles, and metadata together. |
| Purpose | To reduce the file size of the video stream while maintaining quality. | To package all the different media streams into a single, playable file. |
| Analogy | The language spoken in a book. | The cover and binding of the book. |
| Example | H.264, HEVC (H.265), VP9, AV1, ProRes | MP4, MOV, MKV, AVI, WebM |
Essentially, the container is the box, and the codec determines the nature of what's inside that box. You can have an MP4 container holding a video compressed with the H.264 codec, or you could have that same MP4 container holding a video compressed with the newer HEVC codec. The box stays the same, but the contents change.
Lossy vs. Lossless Codecs: The Art of Shrinking Video
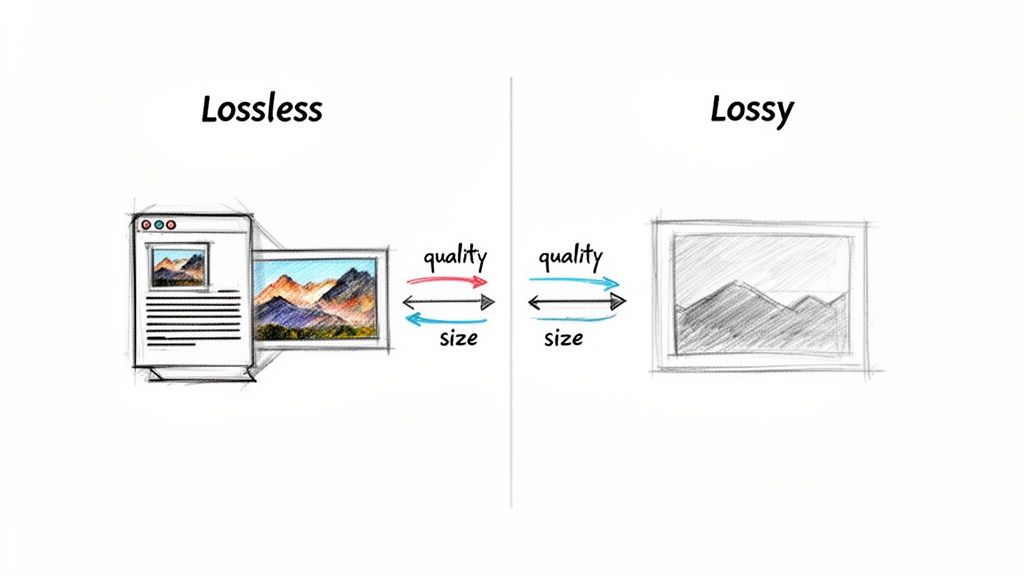
So, we know a codec’s job is to shrink video files. But how does it decide what to shrink? It all comes down to two completely different philosophies of compression: lossy and lossless.
Think of it like packing a suitcase. The lossless method is like being an expert packer who meticulously folds every shirt and uses vacuum-seal bags to suck out all the air. Every single item you started with is still there, just squeezed into a much smaller space. When you unpack, it's all identical to how it was before.
The lossy method, on the other hand, is like packing for a quick weekend trip. You decide you probably don't need five pairs of shoes and that bulky sweater. You strategically leave non-essential items behind to make the bag lighter and smaller. When you unpack, you have everything you need, but not everything you started with.
Understanding Lossless Compression
Lossless compression is the digital version of that perfect packer. It cleverly reorganizes the video data to be more efficient, but it doesn't permanently delete a single bit of information. This approach is absolutely critical when the integrity of the original file is non-negotiable.
This is the world of professional video editors and archivists. Why? Because every single pixel of data is perfectly preserved. That pristine quality gives them maximum flexibility for color grading, adding visual effects, and other post-production magic where even the slightest data loss could ruin the final product.
Of course, this perfect preservation comes at a cost: lossless files are still enormous compared to their lossy cousins.
Key Takeaway: Lossless compression gives you a perfect, bit-for-bit reconstruction of the original file. It's the gold standard for pro-level production and archival workflows, but be prepared for some seriously large file sizes.
The Power of Lossy Compression
Lossy compression is the unsung hero of the internet. This incredibly smart method achieves massive file size reductions by permanently throwing away data that the human eye is unlikely to notice anyway.
It's all about making smart sacrifices. The codec analyzes the video and hunts down redundant or imperceptible information. For instance, in a shot of a clear blue sky, it might decide that you don't need thousands of unique shades of blue. Instead, it can use a single color for a whole block of pixels, and to you, the sky still looks perfectly blue.
This is the magic that lets a marketer upload a high-definition ad to social media in seconds, and it’s how Netflix can stream a 4K movie to millions of people at once. The trade-off is that some quality is lost forever. If you re-compress a lossy file over and over, these tiny imperfections (called artifacts) can start to become noticeable. You can dive deeper into the difference between lossy and lossless compression in our detailed guide.
Choosing between them is all about your goal.
- Lossless for Production: You’d use a lossless codec like Apple ProRes while editing to maintain maximum quality for tweaks and effects.
- Lossy for Delivery: You’d switch to a lossy codec like H.264 when you export the final video for YouTube, getting a small file size for fast uploads and smooth streaming.
This strategic choice is at the heart of nearly every modern video workflow.
Meet the Most Popular Video Codecs for Creators
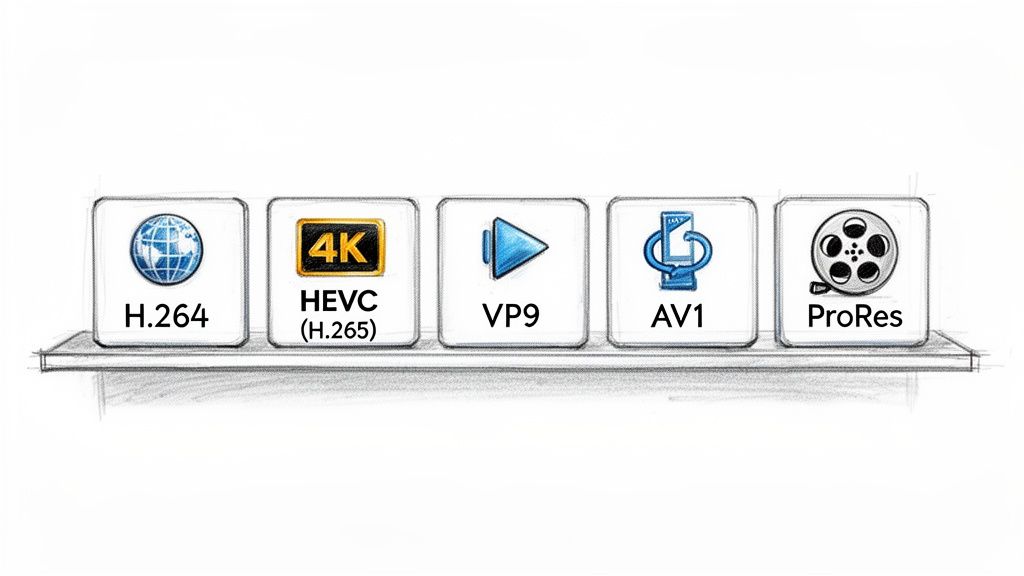
Now that you have a handle on lossy versus lossless compression, let's meet the major players on the field. The world of video codecs can feel like a crowded party, but the truth is, you only need to know a handful of key names that do most of the heavy lifting for the videos you watch, edit, and share every day.
Think of these codecs as different tools in your workshop. You wouldn't use a sledgehammer to hang a picture frame, right? In the same way, you wouldn't use a massive, high-quality editing codec for a quick social media clip. Knowing which tool to grab for the job is what separates an efficient workflow from a frustrating one.
Let's walk through the heavyweights—the codecs you’ll bump into constantly—and break down exactly where each one shines.
H.264 (AVC): The Universal Workhorse
If there’s one codec that truly runs the internet, it's H.264, also known as Advanced Video Coding (AVC). Developed way back in 2003, it became the undisputed king for a simple reason: it just works, everywhere. It struck the perfect balance between decent compression and universal compatibility, making HD video streaming over early broadband connections a reality for the first time.
Today, H.264 is the default language of online video. It's supported by practically every device, web browser, and platform imaginable—from iPhones and Androids to smart TVs and gaming consoles. This universal acceptance makes it the safest, most reliable bet for getting your video in front of the widest possible audience.
As the kingpin of codecs, H.264/AVC still holds a 44.20% share of the video encoder market. It powers an estimated 80% of all online video traffic by slashing file sizes by up to 50% compared to older standards. For anyone creating content on a Mac, its universal support means your compressed files play back perfectly anywhere, without the headaches of incompatibility.
You can dive deeper into how H.264 is paired with the most common container in our guide to MP4 and H.264.
- Best For: Web streaming, social media uploads (Instagram, Facebook, X), and ensuring your video plays on absolutely everything.
- Key Strength: Unrivaled device and browser support. It's the gold standard for reliable playback.
HEVC (H.265): The 4K Streaming Champion
As our screens got sharper and resolutions jumped from 1080p to 4K, we needed a smarter, more efficient way to compress video. Enter H.265, or High Efficiency Video Coding (HEVC). As the direct successor to H.264, its main job is to deliver the same visual quality at roughly half the file size.
This incredible efficiency is what makes streaming crisp 4K and even 8K video possible without bringing your internet to a grinding halt. It’s the magic behind the ultra-high-definition content on services like Netflix and Disney+, and it's what allows modern iPhones to record stunning video without instantly maxing out your storage.
Key Insight: HEVC achieves its efficiency with more complex compression tricks. This means it demands more processing power to encode and decode, which is why older, less powerful devices sometimes struggle with smooth playback.
Its adoption has been a bit slower than H.264's, mainly due to some complex (and sometimes pricey) patent licensing. Even so, its superior compression makes it the clear winner for high-resolution content where saving bandwidth and storage space is the top priority.
VP9 and AV1: The Royalty-Free Challengers
Tired of the licensing headaches that came with HEVC, a coalition of tech giants—including Google, Amazon, and Netflix—formed the Alliance for Open Media. Their mission? To create powerful, open-source, and royalty-free video codecs that anyone could use without paying a fee.
The first major result was VP9, Google’s direct competitor to HEVC. It offers very similar compression efficiency and is the main codec that YouTube uses to stream high-resolution video to billions of users. It’s widely supported across modern web browsers and Android devices.
Building on that foundation, the Alliance released AV1. This next-gen codec is a true powerhouse, promising up to 30% better compression than even HEVC. That means delivering the same jaw-dropping 4K quality with an even smaller data footprint. While it takes some serious processing power to encode, AV1 is quickly gaining support from major streaming platforms and hardware makers, setting it up to be the future of online video.
Apple ProRes: The Editing Gold Standard
Finally, we have a completely different beast: Apple ProRes. Unlike the others on this list, ProRes isn't built for streaming or final delivery. It's what's known as an intermediate or editing codec, designed for one thing: maintaining pristine quality throughout the post-production process.
ProRes uses a much lighter form of compression that is far less demanding on your computer's processor. The trade-off is much larger file sizes, but the benefit is huge: video editing software can scrub through timelines, apply effects, and render changes buttery-smooth, without the lag you'd get from a heavily compressed format like H.264.
It’s the undisputed industry standard for professional editors on macOS, ensuring that every color grade and visual effect is applied to a nearly perfect source.
- ProRes 422 HQ: A high-quality variant perfect for demanding professional work.
- ProRes 4444 XQ: The absolute top tier, which can even preserve transparency data (alpha channels) for visual effects.
You'd never upload a ProRes file directly to the web, but it's the critical link in the chain that ensures your edits are flawless before you export the final version using a delivery codec like H.264.
Popular Codec Comparison for Creators
To help you choose the right tool for the job, here's a quick comparison of the codecs we've just covered. This table breaks down what makes each one unique and where it fits best in a modern creator's workflow.
| Codec | Key Feature | Best For | Efficiency vs H.264 |
|---|---|---|---|
| H.264 (AVC) | Universal compatibility | Web, social media, general use | Baseline standard |
| HEVC (H.265) | High efficiency at high resolutions | 4K/8K streaming, modern devices | ~50% more efficient |
| VP9 | Royalty-free, high efficiency | YouTube, web streaming | Similar to HEVC |
| AV1 | Next-gen, open-source | Future of web video, premium streaming | ~30% more efficient than HEVC |
| ProRes | Visually lossless, edit-friendly | Professional video editing | Much less efficient (by design) |
Ultimately, picking the right codec isn't about finding the "best" one, but the best one for your specific task—whether that's reaching the widest audience, streaming in stunning 4K, or editing your masterpiece without a single hiccup.
Getting to Know Key Settings Like Bitrate and GOP
Going beyond your software's default "Export" button is the secret to really mastering video compression. Once you get a handle on a few core technical settings, you unlock total control over your video's final quality and file size. Think of these parameters as the levers you pull to tell your chosen video codec exactly how to do its job.
It’s a bit like giving instructions to a professional artist painting a portrait. You could tell them to use a broad brush for speed or a fine-tipped one for painstaking detail. In the same way, you guide the codec, telling it to prioritize either a smaller file size or perfect visual fidelity.
Let's pull back the curtain on the most important of these settings. Once you understand them, you can make smart adjustments and find the perfect balance for any project.
Understanding Bitrate: The Data Budget for Your Video
At its core, bitrate is simply the amount of data you're willing to spend to create one second of video. It's usually measured in megabits per second (Mbps). More data means higher quality and a bigger file. Less data means lower quality but a much smaller file. Simple as that.
Imagine you're packing a box (which represents one second of video) with information (all the pixels, color, and motion). A high bitrate gives you a huge box, letting you fit everything in neatly without squishing it. A low bitrate gives you a tiny box, forcing you to throw out some details just to make it all fit.
This single setting is your most direct control over the classic trade-off between quality and file size. Most export software gives you two main ways to manage this data budget.
-
Constant Bitrate (CBR): This method locks in a steady, unchanging bitrate for the entire video. It's predictable and stable, which is why it’s the go-to for live streaming—a consistent data flow is critical to prevent buffering. The downside? It's inefficient. It wastes data on simple, static scenes and can starve complex scenes of the data they desperately need to look good.
-
Variable Bitrate (VBR): For most pre-recorded content, this is a much smarter way to go. VBR analyzes your video frame by frame, giving more data to complex, fast-moving scenes (like an action sequence) and less data to simple ones (like a talking head against a plain background). This optimization gives you way better overall quality for a similar, or even smaller, file size compared to CBR.
For almost everyone exporting videos for the web or social media, VBR is the way to go. It intelligently spends your data budget where it's needed most, making sure your video looks its best without unnecessary file bloat.
What Is a Group of Pictures, or GOP?
While bitrate manages the amount of data, the Group of Pictures (GOP) manages how that data is structured over time. It's a seriously clever compression trick that dramatically cuts down file size by not storing a full, complete image for every single frame. A GOP is made up of different types of frames that all work together as a team.
- I-frames (Intra-coded): This is the "keyframe." Think of it as a complete, self-contained image, just like a JPEG photo. It doesn't rely on any other frames for its information.
- P-frames (Predicted): These frames are much smaller because they only store the changes from the I-frame or P-frame that came before them. For example, if a person blinks, the P-frame only needs to record the data for the moving eyelids, not the entire unchanging scene.
- B-frames (Bi-directional): These are even more efficient. They look both backward and forward to other frames to find redundant information to discard. They offer the highest level of compression.
A common GOP structure might look something like this: I-B-B-P-B-B-P-B-B-I. The GOP length is the distance between two I-frames. A longer GOP means more P and B-frames, which leads to better compression and a smaller file, but it also takes more processing power to decode and play back.
For most web delivery, a GOP length of one to two seconds is a solid, effective standard. By understanding bitrate and GOP, you're no longer just blindly clicking "Export"—you're making deliberate, informed choices about how your video is built, ensuring it looks fantastic and performs perfectly wherever it ends up.
Choosing the Right Codec for Any Project
Getting the theory behind video codecs is a huge step, but now it’s time for the practical part. Picking the right codec isn't about finding one "best" option that rules them all. It's about choosing the right tool for a specific job. Every project has different needs, and your choice will directly affect things like compatibility, file size, and how long you’ll be staring at that export progress bar.
This is where you move from just knowing the concepts to building an efficient, reliable workflow. The whole point is to make intentional choices that save you time, hard drive space, and a lot of headaches later on. When you match the codec to the task, you make sure your video looks great and works perfectly, whether it’s on a client's 4K TV or a follower's tiny phone screen.
Best Codecs for Web and Social Media
When you're putting video online, one word is king: compatibility. You need your video to just work, no questions asked, on any device, browser, or platform. That's why H.264 (AVC) is still the undisputed champ for web and social media.
Its universal support means you can upload one file to YouTube, Instagram, X (formerly Twitter), and your own website, and be confident it's going to play for everyone. Sure, newer codecs are more efficient, but H.264’s incredible reach makes it the safest, most reliable pick for getting your content out there to the widest possible audience.
Pro Tip: Want your social media videos to look as crisp as possible? Export your H.264 video at a high bitrate. Every platform is going to re-compress your file anyway, so giving them a high-quality source file to work with leads to a much cleaner final video for your viewers.
Of course, things are always changing. The next big thing in video is AV1, the royalty-free powerhouse developed by the Alliance for Open Media. It’s blowing up for good reason—it delivers around 20% better bitrate efficiency than HEVC, which is perfect for bandwidth-hungry 4K and 8K streaming. The market for this next-gen video tech is set to explode, projected to grow from USD 5.21 billion in 2025 to a massive USD 38.41 billion by 2035. You can dig into more data about the future of video codecs on Business Research Insights.
Best Codecs for Professional Video Editing
The needs of a video editor are worlds apart from someone delivering a finished file. During post-production, your priorities are all about preserving quality and getting smooth performance inside your NLE. Delivery codecs like H.264 are absolutely terrible for this—they make your computer work overtime just to unpack each frame, leading to a laggy timeline and frustrating playback.
This is where intermediate codecs become non-negotiable. For anyone on a Mac, Apple ProRes is the gold standard. It uses a very light, visually lossless compression that is incredibly easy for your computer to process on the fly.
- ProRes 422 HQ: An excellent all-arounder for high-quality editing, color grading, and VFX work. It's the workhorse for most professional projects.
- ProRes 4444: This is the top-tier option for projects that need transparency (alpha channels) or the absolute maximum color information you can get.
If you’re a Windows-based editor, DNxHR (Digital Nonlinear Extensible High Resolution) offers a similar family of codecs built for the exact same purpose: smooth, high-quality editing. Using these codecs frees you up to be creative without fighting against technical limitations.
Codecs for High-Resolution Delivery
So, what happens when you need to send a 4K preview to a client or deliver a final master to a high-end streaming service? Sending a gigantic ProRes file is totally impractical because of the file size. This is where efficiency comes back into play, and it’s the perfect use case for HEVC (H.265).
HEVC delivers roughly the same visual quality as H.264 but at about half the file size. This makes it the ideal choice for:
- Sending high-res previews to clients without waiting forever for uploads to finish.
- Archiving high-quality master files at a much more manageable size.
- Delivering 4K content to modern smart TVs and streaming devices that support it.
The decision tree below gives you a simple way to visualize when to use a Constant Bitrate (CBR) versus a Variable Bitrate (VBR).
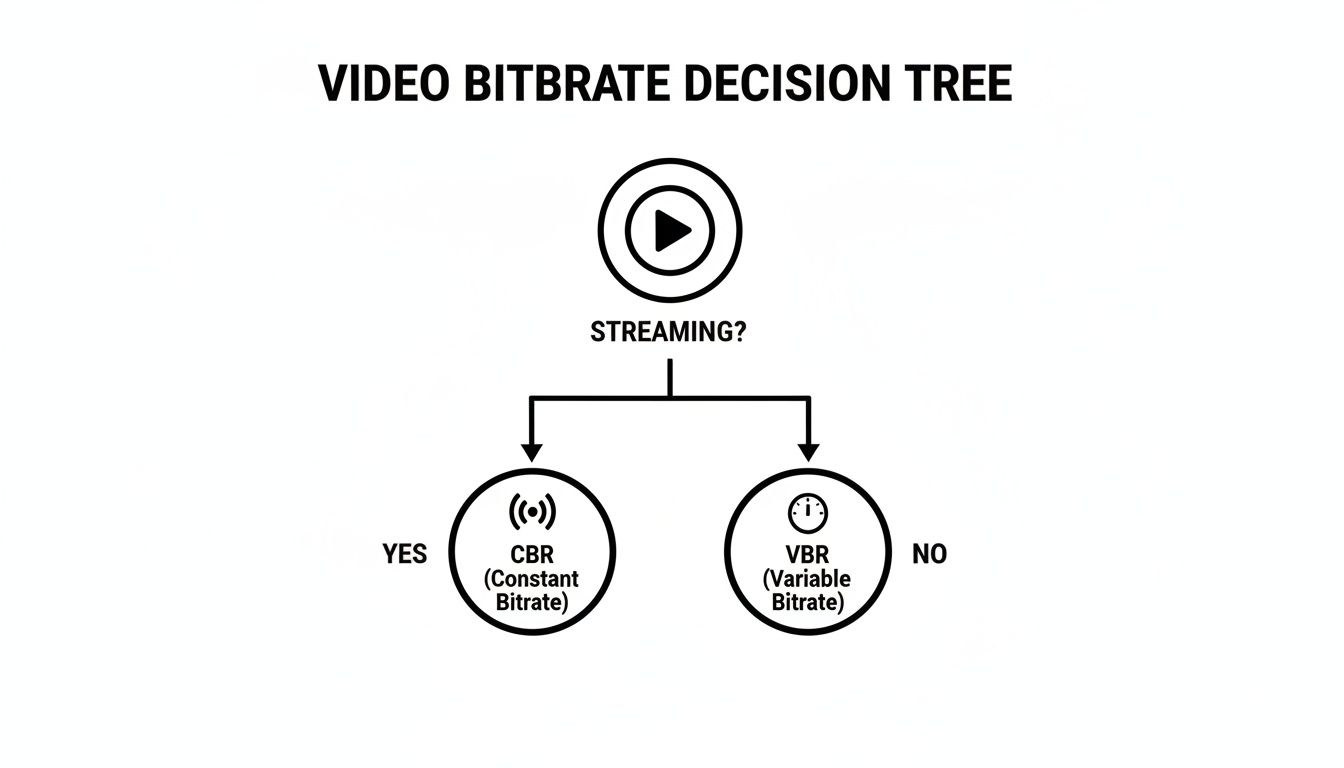
This graphic breaks it down nicely: CBR is all about maintaining a stable data stream, which is critical for live content. VBR, on the other hand, is smarter for pre-recorded video, as it allocates more data to complex scenes and less to simple ones, optimizing for quality.
Your Guide to Smarter Video Compression
Getting a handle on video codecs isn't just about learning some technical jargon—it's a real strategic advantage for any modern creator. When you master the core concepts, you can stop guessing and start making intentional choices that truly elevate your work.
This means you’ll finally understand the difference between a codec and a container, know exactly when to use lossy versus lossless compression, and be able to pick the right tool for the job. For example, knowing how codecs work is fundamental to using tools like an AI video quality enhancer, which can dramatically improve video clarity by intelligently optimizing the visual data.
Ultimately, this knowledge empowers you to stop guessing. You can now save valuable storage space, speed up your workflow, and deliver higher-quality video to your audience.
Armed with this foundation, you can navigate the world of digital video with confidence. Whether you're optimizing a file for the web, editing a professional project, or archiving precious footage, you now have the skills to make everything you create more efficient and look better in the end. Your journey to smarter compression starts now, ensuring every pixel serves its purpose without wasting a single byte.
Frequently Asked Questions About Video Codecs
Even after you get the hang of codecs, some practical questions always pop up in the middle of a project. Here are some straightforward answers to the things creators and editors run into all the time.
What Is the Best Codec for YouTube and Social Media?
When in doubt, go with H.264 (AVC). It's the undisputed champion of compatibility and remains the safest bet for getting your video to play on pretty much any device, browser, or platform without a hitch.
While YouTube and others will re-encode your video on their end using slicker codecs like VP9 or AV1, uploading a high-quality H.264 file is a bulletproof strategy. It gives their systems a clean, rich file to work from, ensuring your video looks its best everywhere.
Why Do My Videos Look Pixelated After Uploading?
This is almost always the result of a nasty little thing called "double compression." First, you compress the video when you export it. Then, the social media platform crushes it again to make it stream-friendly. Each compression pass throws away data.
To fight back, always export from your editor at a high bitrate. Think of it like giving the platform a high-resolution photo to work with instead of a tiny thumbnail. The more data you give it, the more quality it can preserve, which means a cleaner final video for your audience.
Does My Mac Have Built-In Support for These Codecs?
Absolutely. macOS has fantastic native support for the big players, including H.264, HEVC (H.265), and the entire family of Apple ProRes codecs. This is all handled by Apple's core AVFoundation framework, which is why those files play and edit so buttery smooth in apps like QuickTime and Final Cut Pro.
Where things get a bit spotty is with newer codecs like AV1. Support is getting better across the ecosystem, but it's not universal yet. For these emerging formats, a dedicated compression app can often give you more reliable and up-to-date encoders.
What Is the Difference Between Hardware and Software Encoding?
This all comes down to which part of your computer is doing the heavy lifting.
- Hardware Encoding: This uses a specialized, dedicated chip built right into your computer's processor (like the Media Engine in Apple Silicon). It's ridiculously fast and efficient because that's the only job the chip was designed to do.
- Software Encoding: This puts your computer's main brain—the CPU—to work. It's much slower but can sometimes squeeze out slightly better quality at very low bitrates because it can be more methodical.
For most creators, the choice is easy. The massive speed boost from hardware encoding is a game-changer for daily tasks. It lets you export videos for the web in a fraction of the time, freeing you up for your next creative idea.
Of course, once your videos are perfectly encoded, you need a smart way to manage them. An effective video content management system is what ties everything together, helping you organize, store, and distribute all your hard work so it’s always ready to go.