What Is Codec in Video: How It Works and Why It Matters
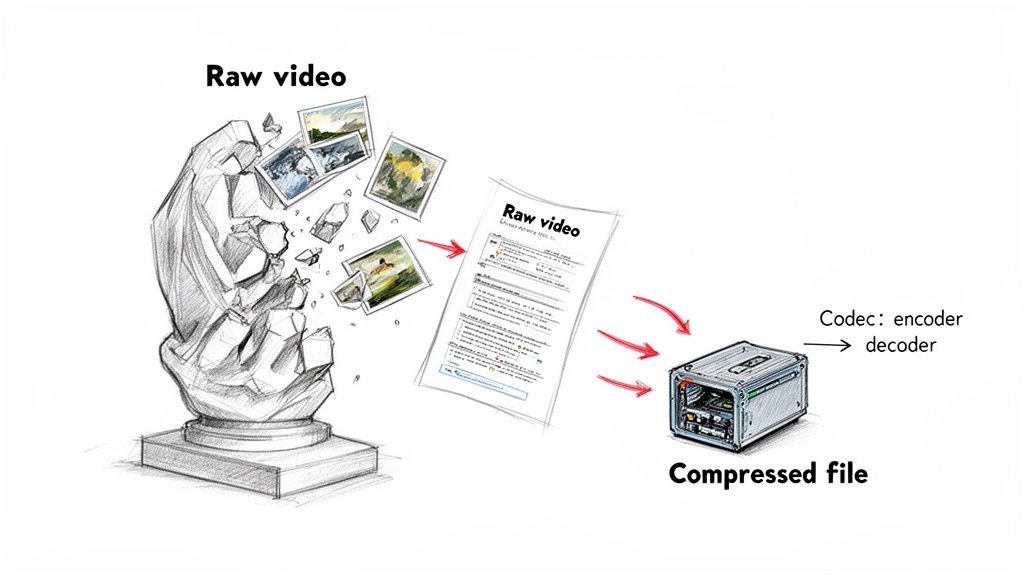
At its core, a video codec is the technology that shrinks a massive video file down to a manageable size, then unpacks it again for you to watch. Think of it as a specialized vacuum-sealing bag for your video. It sucks all the unnecessary air (redundant data) out to make the package tiny and easy to send, then lets the air back in when it's time to open it. This whole process is the unsung hero behind every video you stream, download, or share.
The Secret Language of Digital Video
Ever wondered what would happen if you tried to download a raw, uncompressed 4K video? A single minute could easily eat up over 100 gigabytes of space. Streaming would be a fantasy, and your hard drive would be full in seconds. This is where a codec steps in. The name itself is a mashup of two simple words: coder and decoder.
It really does just two things, but it does them incredibly well:
- Encoding: This is the "shrinking" part. The codec takes the raw video data from your camera or editing software and cleverly removes information you won't miss. It uses complex algorithms to pack everything into a much smaller file.
- Decoding: When you hit play on your phone, laptop, or TV, the codec gets to work in reverse. It reads the compressed file and perfectly reconstructs the video, frame by frame, so you can watch it.
Why Codecs Are Essential for Creators
Let's be blunt: without codecs, the video world as we know it simply wouldn't exist. No YouTube, no Netflix, no video calls. For us creators and editors, especially those on macOS, codecs are the fundamental tools that make our workflows even possible.
Take the H.264/AVC codec, for instance. When it was standardized back in 2003, it completely changed the game. It managed to cut file sizes by up to 50% compared to its predecessor, MPEG-2, without a noticeable drop in quality. That efficiency is what unlocked the explosion of online video and made HD streaming a reality for everyone. You can dive deeper into the lossless video codec market to see just how far things have come.
A codec’s job is to find the perfect balance between three competing factors: file size, visual quality, and compatibility. Choosing the right one is one of the most important technical decisions a video professional can make.
Understanding the Difference Between Codecs and Containers
Let's clear up one of the most common points of confusion in the world of video. People often throw around the terms "codec" and "container" like they're the same thing, but they represent two totally different parts of a video file. Getting this right is the key to solving a ton of frustrating playback and compatibility issues.
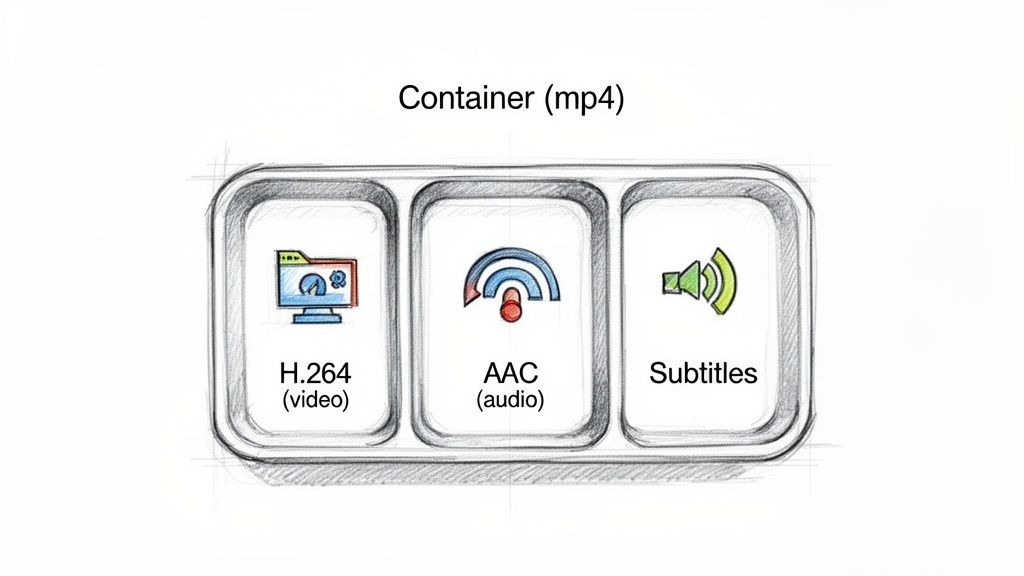
To make it simple, think of your video file like a bento box.
The container is the physical box itself. This is the file you actually see on your computer—think .MP4, .MOV, or .MKV. Its only job is to hold all the different pieces of your video project together in one neat package.
What Goes Inside the Box
The codecs are like the different kinds of food packed inside that bento box. A video file isn't just one continuous stream of data. It’s actually made up of multiple components, and each one is compressed using its own specific codec.
Typically, a container holds a few key things:
- A video stream: This is compressed with a video codec like H.264 or HEVC.
- An audio stream: This gets compressed with an audio codec like AAC or MP3.
- Metadata: Extra info like subtitles, chapter markers, and even thumbnails.
This is exactly why you can have two files with the same .MP4 extension, but one plays perfectly on your device while the other gives you an error. They might be in the same "box," but one contains "food" (codecs) that your media player doesn't know how to handle. You can see how this plays out with common formats in our guide on the difference between MP4 and MOV.
The file extension (like
.MP4) only tells you about the container. It reveals nothing about the actual video and audio codecs held inside, which is what truly determines compatibility.
This relationship explains why troubleshooting video problems requires looking beyond just the file name. For any video to play, your device or software has to support both the container format and all the individual codecs used within it. If there's a mismatch in either one, you'll end up with errors, missing audio, or a file that won't play at all.
Lossy vs. Lossless Compression: The Big Trade-Off
When a codec sets out to compress a video, it has to make a fundamental choice—one that ripples through everything from your final file size to how crisp the image looks. This decision comes down to two very different paths: lossy and lossless compression. Getting a handle on this trade-off is key for any video creator, as it shapes how your work looks, shares, and gets stored.
Think of it like this: you have a perfect, high-resolution digital photo of a masterpiece painting.
Lossless: The Perfect Digital Copy
Lossless compression is like meticulously taking that painting apart, piece by piece, packing those pieces into a slightly smaller box, and then putting it all back together later. Every single piece is there. The final image is 100% identical to the original, pixel for pixel. Absolutely nothing is lost.
This method is the go-to for archival work or deep in the editing process, where keeping every single speck of the original data is a must. Professional codecs like Apple ProRes (in some of its settings) use techniques that are virtually lossless for exactly this reason.
The catch? The file size reduction is pretty modest. Lossless files are definitely smaller than raw, uncompressed video, but they are still massive. This makes them a tough sell for streaming or just sharing over the internet.
Lossless compression is all about perfect data integrity. It’s the digital equivalent of a flawless clone, ensuring the video you decompress is an exact, bit-for-bit match of the original source.
Lossy: Smart and Efficient Reduction
Now, imagine a skilled artist looking at that same painting and creating a brilliant sketch of it. They capture the essence—the mood, the key colors, the important details—but they strategically leave out the tiny, subtle brushstrokes your eye probably wouldn't even notice from a few feet away. That, in a nutshell, is lossy compression.
This clever approach permanently throws away data it decides is redundant or simply invisible to the human eye. The payoff is a massive drop in file size, often hitting over 90% compression. This is the magic that makes modern video streaming possible.
It's really important to get that "lossy" doesn't automatically mean "low quality." A well-done lossy compression can be almost impossible to tell apart from the original for most people. Nearly every codec you use for final delivery is in this camp:
- H.264 (AVC): The workhorse for just about all web and social media video.
- HEVC (H.265): The engine behind 4K streaming and modern devices.
- AV1 and VP9: The powerhouses driving streaming on platforms like YouTube and Netflix.
The one thing to watch out for is that every time you re-save a lossy file, you lose a little more data, which can lead to a gradual drop in quality over generations. But for that one final, efficient export for the web? It’s absolutely the right tool for the job. You can dive deeper into the nuances in our guide on the difference between lossy and lossless compression.
A Practical Guide to Today's Most Common Codecs
Stepping into the world of video codecs can feel like walking into a massive workshop. There are tools for every possible job, and picking the right one is the key to a smooth project from start to finish. Let’s break down the major players you'll run into every day.
We'll cover the universal workhorse, the high-efficiency successor, the royalty-free future, and the editor's best friend. Knowing when and where to use each will save you a ton of time, storage space, and headaches down the road.
H.264 (AVC): The Universal Translator
If there’s only one codec you learn, make it H.264, also known as Advanced Video Coding (AVC). Think of it as the most widely spoken language in the video world. It's the undisputed king for web streaming, social media, and even Blu-ray discs. Its greatest superpower? Unmatched compatibility. Pretty much any device made in the last decade knows how to play it.
While it’s not the leanest option for 4K video anymore, H.264 is still the go-to for delivering HD content to the biggest possible audience. It strikes a fantastic balance between quality, file size, and universal support, making it the safest bet for final delivery to platforms like YouTube, Instagram, and Facebook. For a deeper dive, check out our guide on MP4 and H.264.
HEVC (H.265): The Modern Efficiency Expert
Next up is HEVC, or High Efficiency Video Coding, the direct successor to H.264. Its whole mission is to deliver the same stunning visual quality but at roughly half the file size. This incredible efficiency makes it the perfect codec for streaming high-resolution content like 4K, 8K, and HDR video without needing a firehose of an internet connection.
Early adoption was a bit rocky due to some complicated royalty fees, but HEVC is now widely supported by modern smartphones, smart TVs, and streaming boxes. If your project is destined for a 4K screen, HEVC is the clear winner for delivery, giving you crisp, beautiful visuals in a much smaller package.
AV1: The Royalty-Free Future
Born from a massive collaboration between tech giants like Google, Netflix, and Amazon, AV1 is an open-source, royalty-free codec built to be the next big thing for web video. It packs a serious punch, boasting compression that's roughly 30% more efficient than HEVC. That means even higher-quality streams at lower bitrates.
Major streaming platforms are already jumping on the AV1 bandwagon to deliver breathtaking 4K and HDR content. While hardware support is still catching up, AV1's momentum and royalty-free model have it positioned to be the future of online video.
Apple ProRes: The Editor's Best Friend
Unlike the other codecs on this list, Apple ProRes isn't meant for your final export to YouTube. Instead, it's an intermediate codec, purpose-built for the chaos of post-production. It uses visually lossless (or very close to it) compression that hangs onto an incredible amount of detail, which is exactly what you need for intensive color grading and visual effects.
Working with ProRes files in your editing timeline is a dream compared to wrestling with heavily compressed H.264 files. It's far less demanding on your computer's processor, which means smoother playback, fewer crashes, and a much happier editor.
How to Choose the Right Codec for Your Project
Knowing the theory behind video codecs is one thing, but actually putting it to work is where your project comes to life. Picking the right codec isn't a single decision. It's a series of choices you make across your entire workflow, from the moment you hit record to the final upload. Each stage has different needs, and the right codec will save you time, storage, and a whole lot of frustration.
Thinking about your project in three distinct phases makes this process much clearer: shooting, editing, and delivery. Each phase prioritizes something different—quality for shooting, performance for editing, and efficiency for delivery.
Codecs for Shooting and Capturing Footage
When you're recording, the main goal is to capture as much data and visual information as possible. This gives you the most flexibility later on in post-production for things like color grading and visual effects.
Many cameras offer high-quality internal recording options. While you could record directly to a highly compressed format like H.264, it’s usually better to choose an option that prioritizes quality over file size at this stage.
- Professional Cameras: Often record in robust codecs like Apple ProRes or Avid DNxHD. These are specifically designed to preserve detail and are much easier to edit with.
- Consumer Cameras: May offer high-bitrate versions of H.264 or HEVC, which are a good compromise between quality and file size.
Choosing a higher-quality codec during capture is like shooting on a larger canvas; it gives you more room to work with when you start refining your image.
Intermediate Codecs for Editing
Once your footage is on your computer and in your editing software, your priorities shift from raw quality to real-time performance. This is where intermediate codecs become your best friend. While you can edit with compressed H.264 files, it can make your computer feel sluggish because it has to decode complex frames on the fly.
The smart move is to transcode your footage. By converting your highly compressed camera files into an editing-friendly format like Apple ProRes, you create larger files that are significantly easier for your computer to process. This leads to smoother playback and a much more responsive editing experience.
Delivery Codecs for Final Export
Finally, when your edit is locked and you're ready to export, it's time to choose a delivery codec. The goal here is to create the smallest possible file that still looks great on whatever platform it's destined for. This is where you return to highly efficient, lossy codecs.
When planning for applications like corporate event video production, selecting the optimal codec ensures your content is delivered efficiently and with high quality.
Your choice depends entirely on where the video will be seen:
- For Universal Compatibility (YouTube, Social Media): H.264 is still the undisputed king. It’s supported by virtually every device and platform out there, making it the safest and most reliable choice for reaching the widest audience.
- For High-Resolution 4K/HDR Content: HEVC (H.265) is the superior option. It delivers roughly the same quality as H.264 at about half the file size, making it perfect for streaming crisp 4K video to modern devices and smart TVs.
- For the Future of Web Video: AV1 is the emerging standard for major streaming platforms like YouTube and Netflix, offering even better compression than HEVC. While it's not yet universally supported for direct uploads, it's quickly becoming the backbone of high-efficiency streaming.
Decoding Bitrate and Other Essential Settings
Stepping beyond presets is where you gain true mastery over your video's final look and feel. This is all about striking the perfect balance between video quality and file size, and the single most important setting to get right is the bitrate.
Think of bitrate as the "data budget" for your video. A bigger budget allows for more detail, sharper images, and smoother motion, but you'll end up with a much larger file. A smaller budget shrinks the file size but can introduce blocky artifacts if you cut it too low. This budget is measured in bits per second (bps)—usually in kilobits (kbps) or megabits (Mbps).
For a standard 1080p video destined for YouTube, you might aim for a budget of around 5-8 Mbps. Bumping up to a crisp 4K stream? That could demand 15-25 Mbps or even more to maintain all that beautiful detail.
CBR vs. VBR: The Smart Choice
Once you’ve set your data budget, you have two main ways the codec can "spend" it:
-
Constant Bitrate (CBR): This is the simple, brute-force method. CBR allocates the exact same amount of data to every single second of your video, no matter what’s happening on screen. It’s predictable, but it’s also incredibly inefficient. It wastes data on quiet, static shots and often starves complex, high-action scenes that need it most.
-
Variable Bitrate (VBR): This is the much smarter approach. VBR analyzes your video and intelligently allocates more data to the complex, fast-moving parts and less data to the simple, static scenes. For almost any video you're putting on the web, VBR is the way to go because it delivers much higher quality for the same average file size.
Think of VBR as an intelligent spending account for your video's data. It saves its budget during quiet moments so it can spend big when the action kicks in, ensuring every part of your video looks its best without bloating the file.
For final delivery, choosing VBR is almost always the right call. It’s the key to letting the video codec technology do its job effectively, giving you that perfect harmony between stunning quality and a manageable file size.
Common Codec Questions Answered
Understanding how a codec works is the first step, but the real test comes when you’re staring at a deadline and your export settings feel like a guessing game. Let's tackle some of the most common hurdles creators run into when putting codec theory into practice.
Why Does My Video Look Awful on Social Media?
You spent hours color grading and exported a beautiful, high-quality H.264 file. You upload it, and suddenly it looks like it was filmed on a potato. What gives?
The short answer is that social media platforms like YouTube and Instagram re-compress every single video you upload. It doesn't matter how perfect your file is; their servers are going to run it through their own aggressive compression to save bandwidth and storage space.
So, how do you fight back? You give their algorithm a better source file to work with.
- Start with a high bitrate: Don't cripple your video before it even gets there. Use the platform’s recommended export settings as a baseline, which almost always means using a high variable bitrate (VBR).
- Give them more data to chew on: A pristine, high-quality export provides more information for their encoder to analyze. This leads to a much cleaner, sharper final video after their compression does its thing.
Is AV1 Ready to Replace HEVC?
AV1 is the new kid on the block, and it's impressive—it’s roughly 30% more efficient than HEVC, which is a massive leap. Major streaming players like Netflix and YouTube are already using it heavily behind the scenes to save on bandwidth.
But is it ready for your projects? Not quite yet. While adoption is growing fast, hardware decoding support isn't nearly as universal as it is for H.264 or HEVC. Many older devices will struggle to play it back smoothly.
For now, think of it this way: H.264 is your go-to for universal compatibility. HEVC (H.265) is for high-resolution delivery to modern devices. And AV1 is the future of super-efficient web streaming. If you need your video to play absolutely everywhere today, H.264 is still your safest bet.
Should I Actually Edit with H.264 Files?
You can, but you probably shouldn't. It’s like trying to build a ship in a bottle.
H.264 is a delivery codec, meaning it's designed for final playback, not for editing. It uses complex inter-frame compression that makes your computer work overtime just to decompress frames as you scrub through your timeline. The result? Lag, stuttering playback, and a whole lot of frustration.
For a buttery-smooth workflow, the professional standard is to transcode H.264 footage into an editing-friendly codec like Apple ProRes. These files are much larger, sure, but they are incredibly easy for your Mac to process frame-by-frame. That means no more lag, no more beach balls, and a much happier editor.
Ready to take control of your file sizes without getting lost in complex settings? Compresto is the macOS app built for creators who need fast, simple, and powerful video compression. Reclaim your storage and speed up your workflow by trying it today at https://compresto.app.