VLC to MP4: Convert Any Video in 30 Seconds (2026)
Of course, you can use VLC Media Player to convert videos to MP4. It’s one of those surprisingly powerful features hiding in plain sight. Once you know where to find the built-in conversion tool, it’s a quick, free, and surprisingly simple process.
Why VLC Is Your Go-To Tool for MP4 Conversion
Before diving into the how-to, it’s worth understanding why VLC is still such a popular choice for this kind of task. You’ve got countless specialized converters out there, but VLC’s staying power really comes down to three things: it’s accessible, it’s versatile, and it costs nothing. It’s that reliable multi-tool millions of us keep handy.
Getting files into the MP4 format is a constant need, and VLC handles it beautifully. Launched way back in 2001, VLC has become one of the most downloaded apps ever—hitting over 3 billion downloads by 2023. That longevity is a direct result of its powerful, open-source DNA, which includes the ability to transcode videos without asking for a dime.
The Power of Universal Compatibility
At its core, VLC is a media player built to handle nearly any audio or video file you can imagine. This "play anything" philosophy is exactly what makes its conversion feature so useful.
- Broad File Support: It takes formats like AVI, MKV, MOV, and WEBM and turns them into the universally accepted MP4 container without breaking a sweat.
- Cross-Platform Availability: Whether you’re on Windows, macOS, or Linux, the process feels almost identical. You only have to learn it once.
The real magic of VLC is its simplicity. You don't need a high-end editing suite just to change a file's format. For quick, everyday tasks, it’s often the fastest and most direct route from source file to a shareable MP4.
Understanding Its Place in a Modern Workflow
While VLC is a fantastic free option, it’s good to be realistic about its limits, especially for professional work. The conversion process is entirely manual, handling just one file at a time. That’s perfectly fine for the occasional video, but it becomes a serious bottleneck when you’re facing dozens or hundreds of files.
For creators and teams who need more speed and automation, it’s worth checking out some of the best free any-format video converter software to find tools better suited for high-volume workflows. Still, VLC is an incredible starting point and a reliable backup for anyone needing to convert a video to MP4 without any fuss.
Your First VLC to MP4 Conversion, Step by Step
Alright, let's get our hands dirty and walk through your first conversion. The goal here isn't to get bogged down in technical specs, but to confidently turn a video from one format into a universally friendly MP4. We'll use a classic real-world scenario: converting a clunky .MOV file, maybe straight off a camera, into something slick and ready for the web.
Getting Started: The Convert / Save Menu
Your journey begins in the main menu bar at the top of the screen.
If you're on Windows, click on the Media menu. On a Mac, you'll look for the File menu. Despite the different names, your destination is the same: find and click the Convert / Save option. This is your command center for all things transcoding in VLC.
Adding Your Source File
Once you click Convert / Save, a new window pops up. Your first job is to tell VLC which video you want to work with.
You’ll see a prominent "Add..." button. Give that a click, and your computer’s file browser will open. Navigate to wherever your source video is hiding—in our case, that big .MOV file—and select it.
You'll see the file path appear in the list. While you can add multiple files here for batch processing (more on that later), it's best to stick with just one for your first run.
With your file loaded, click the Convert / Save button at the bottom to move on to the next stage.
Choosing the Right MP4 Profile
This next screen is where the magic happens. The most important choice here is the Profile.
Click the dropdown menu and you'll see a list of presets. For our goal, you want to select Video - H.264 + MP3 (MP4). This is the gold standard. It creates MP4 files that play nicely on just about every device, website, and social media platform out there.
Why this one? The H.264 video codec and MP3 audio codec strike the perfect balance between great quality and small file size, which is precisely why the MP4 format took over the world. You can dive deeper into these settings by clicking the small wrench icon next to the profile, but for now, the default preset is perfect.
It's this kind of straightforward power that makes VLC such a go-to tool. It's free, works everywhere, and handles almost anything you throw at it.
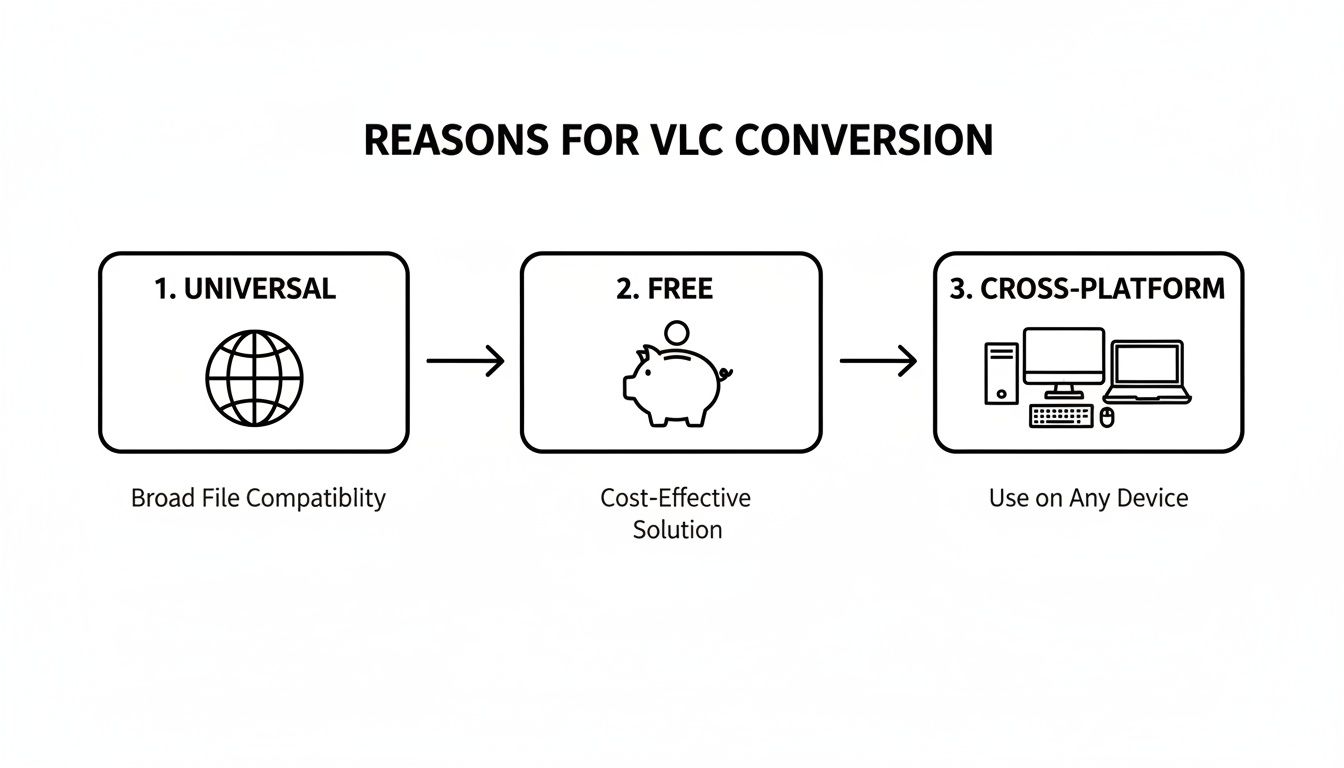
As the graphic shows, VLC's strengths are its simplicity and accessibility. No paywalls, no platform lock-in—just a reliable tool that gets the job done.
Saving Your Final MP4 File
Last step! You just need to tell VLC where to save the finished product.
In the "Destination" section, click the Browse button. This opens up another file browser. Find the folder where you want your new video to live, and then type in a file name.
This part is crucial: make sure you add the .mp4 extension to the end of your filename yourself, like my-converted-video.mp4. VLC doesn't always do this automatically, and skipping this can cause file errors later.
Pro Tip: Never overwrite your original file! It's a common mistake and there's no undo button. Get into the habit of giving your converted file a new name. Something simple like adding "-converted" or "-mp4" to the end can save you a world of pain.
With your profile selected and your destination set, all that's left is to hit the Start button.
You’ll see the progress bar in VLC’s main window start to move. That's your conversion happening in real-time. How long it takes depends on your video’s length and your computer's horsepower. Once the bar is full, your shiny new MP4 will be waiting for you in the folder you chose.
Fine-Tuning Your Conversion with Advanced Settings
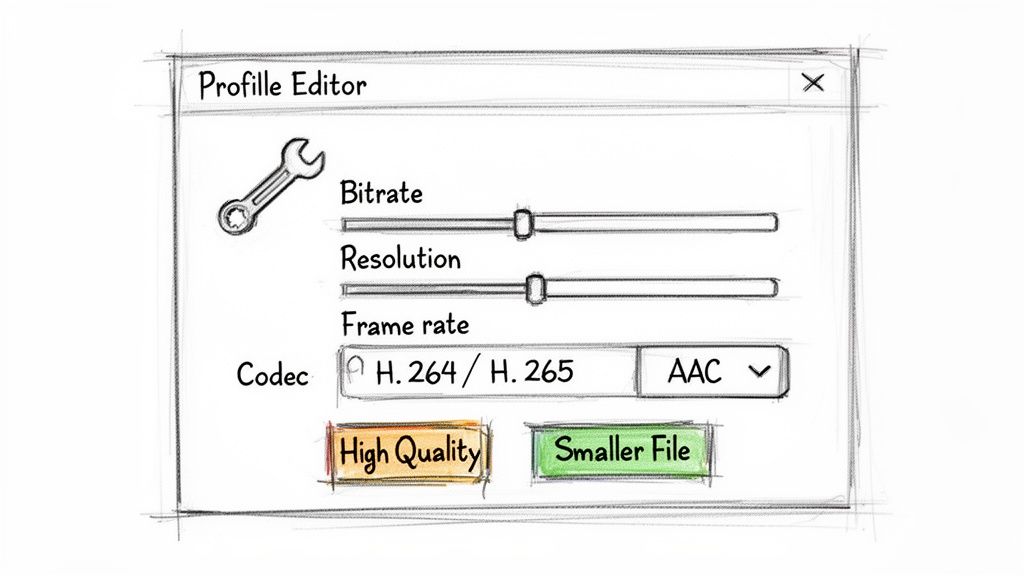
Ready to move beyond the default presets? This is where VLC's real power as a conversion tool shines. By clicking the small wrench icon next to the profile dropdown, you'll open the Profile Editor. This is where you get granular control over every aspect of your output file.
It might look a little intimidating at first, but this is where you can truly optimize your video. Whether you're trying to shrink a file to email it or preserve every last pixel for an archive, understanding these settings is key. You don't need to memorize a bunch of numbers—it's more about knowing which levers to pull to get the result you want.
Decoding Your Video Codec Choices
The first tab you’ll land on is Video Codec. Think of this as the engine of your video file, responsible for compressing all the visual data.
- H.264 (AVC): This is the undisputed workhorse of the internet, and for good reason. It delivers excellent quality at very manageable file sizes and plays nice with practically every device, browser, and platform out there. For maximum shareability, stick with this.
- H.265 (HEVC): As the successor to H.264, this codec is about 50% more efficient. That means it can give you the same quality at half the file size, which is a game-changer for 4K video. The catch? It’s more demanding on your computer to encode and isn't as universally supported just yet.
So, when should you use which? Go with H.264 for general use—uploading to social media, sharing with friends, etc. Choose H.265 if you're archiving high-resolution footage and you're certain your playback device can handle it. Getting a grip on the basics is crucial, and you can learn more about how video encoding works to really master these concepts.
Mastering Bitrate, Resolution, and Frame Rate
These three settings are the holy trinity of video quality and file size. They all work together, and changing one often impacts the others.
Bitrate is the amount of data used to encode one second of video. A higher bitrate means more data, which translates directly to better quality and, you guessed it, a larger file. If your converted video looks blocky or pixelated, bumping up the bitrate is usually the fix. For a standard 1080p video you plan to upload to YouTube, a bitrate between 8,000 and 12,000 kb/s is a great starting point.
Resolution refers to the video's dimensions in pixels (like 1920x1080 for Full HD). You can use the "Scale" option here to downsize a massive 4K video to 1080p, which will dramatically slash its file size. Just remember the golden rule: never try to scale up. You can't magically create detail that wasn't there in the first place.
Frame Rate (FPS) is simply how many individual images are displayed per second. The best practice is almost always to match the source frame rate. While you can drop a 60 FPS clip to 30 FPS to reduce file size, you'll likely notice that fast-motion scenes look choppy or less smooth.
Perfecting Your Audio Settings
Don't neglect the sound! Hop over to the Audio Codec tab to fine-tune your audio settings. It's an easy way to trim a little more fat from your file size without anyone noticing.
For MP4 files, AAC (Advanced Audio Coding) is the industry standard. It's your best bet for compatibility and quality. A bitrate of 128 kbps is perfect for most situations, giving you crisp, clear audio without adding unnecessary bulk. If you're working with content that's mostly dialogue, like an interview or a podcast, you can often get away with as low as 96 kbps without a perceptible drop in quality.
Solving Common VLC Conversion Problems
Even a reliable workhorse like VLC can stumble during a conversion. When a vlc convert to mp4 task goes sideways, it’s almost always due to a small, easily fixable setting. Instead of getting frustrated, let’s walk through the most common hiccups and how to get them sorted out.
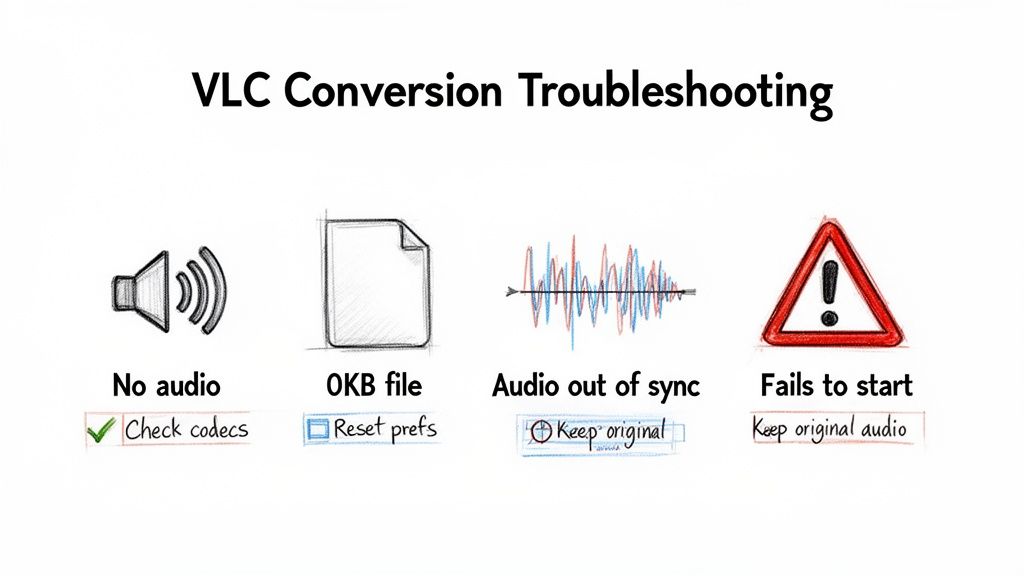
Issues like silent videos or files that refuse to save are usually just a sign that a codec or setting didn't quite translate from the source file to the new MP4 container. No big deal.
The Silent Video Problem: No Audio
This one’s a classic. You run a conversion, the video looks perfect, but the audio track is completely gone. This is the number one sign of an audio stream hiccup.
Before you redo the entire thing, check this one simple setting:
- Head back into the Profile Editor (the little wrench icon).
- Click over to the Audio Codec tab.
- Make sure the "Keep original audio track" box is checked.
If that box is unchecked, VLC might be trying to re-encode the audio with settings it doesn't like, or it might just discard the track altogether. Ticking this box tells VLC to just pass the original audio through untouched, which solves the problem more than 90% of the time.
Pro Tip: If the original audio codec is incompatible with the MP4 container (which is rare), uncheck the box and manually set the Codec to AAC and the Bitrate to 128 kbps. This forces VLC to create a fresh, compatible audio track from scratch.
The 0KB File and Failed Conversions
It’s a baffling problem: the conversion seems to finish instantly, but the output file is either empty (0KB) or doesn't show up at all. This usually boils down to a permissions or naming issue.
First thing to check: did you manually add the .mp4 extension when naming your destination file? Sometimes VLC forgets to do this automatically, and your operating system might reject the file save without it.
Next, look at where you're trying to save the file. Saving directly to the root of your C: drive or another protected system folder on Windows can trigger permission errors. Always choose a user-friendly spot like your "Documents" or "Desktop" folder.
If you've tried both and are still stuck, it might be time for a soft reset. VLC's preferences can occasionally get corrupted over time, leading to weird behavior. You can reset them by going to Tools > Preferences and clicking Reset Preferences at the bottom. This clears up a surprising number of mysterious conversion failures.
Fixing Out-of-Sync Audio
Ever play your newly converted MP4, only to find the audio is noticeably ahead of or behind the video? The culprit is usually a timing mismatch between the audio and video streams during the conversion. This happens a lot when converting from formats with variable frame rates, like MKV.
The most reliable fix is to force VLC to use a standard video codec and a constant frame rate.
- In the Profile Editor, go to the Video Codec tab.
- Make sure you've selected H.264.
- Then, set the Frame Rate to a specific value like 30 instead of leaving it as "Same as source."
This locks both the audio and video streams to a consistent timing, smoothing out any sync issues from the original file.
Here's a quick reference table to help diagnose and solve these common conversion headaches.
VLC Conversion Error and Solution Guide
| Common Error | Potential Cause | Quick Fix |
|---|---|---|
| No Audio in Output | Audio track was discarded or improperly re-encoded. | In the Audio Codec tab, check "Keep original audio track." |
| 0KB Output File | Missing file extension or folder permission issues. | Manually add .mp4 to the filename and save to a user folder like Desktop. |
| Conversion Fails Instantly | Corrupted VLC preferences or permission error. | Reset VLC preferences (Tools > Preferences > Reset) or change the save location. |
| Audio/Video Out of Sync | Variable frame rate in the source file. | In the Video Codec tab, set Codec to H.264 and Frame Rate to a fixed value (e.g., 30). |
With these simple fixes in your back pocket, you should be able to tackle just about any conversion error VLC throws your way.
Building a Better Workflow for macOS Creators
Look, VLC is a phenomenal free utility. For quick one-off tasks, it's a lifesaver. But for macOS creators—the video editors, marketers, and social media managers in the trenches every day—that manual, one-file-at-a-time process becomes a serious productivity killer.
When you're staring down a folder with dozens of clips for your next project, the whole vlc convert to mp4 dance just doesn't scale. This is the point where you need to move past a simple tool and start building a real, specialized workflow.
A professional workflow isn't just about one app; it’s an ecosystem. To that end, it’s always a good idea to know about the best video editing software that can complement your conversion tools and round out your creative suite.
Moving Beyond Manual Conversions
The fundamental problem with using VLC for professional work is the sheer lack of batch processing and automation. Dragging, converting, and saving each file by hand is a time sink that pulls you away from the creative work that actually matters. This is exactly the kind of friction that native macOS apps like Compresto are designed to eliminate.
Instead of a manual queue, just imagine a simple drag-and-drop window where you can line up hundreds of files to be converted all at once. An approach like this completely changes the game, turning conversion from an active, hands-on task into a background process that just happens. You get to focus on what's next.
The goal here is simple: reclaim your time. A truly efficient workflow automates the repetitive stuff. You should be able to queue up an entire day's worth of video assets, walk away, and have complete confidence they’ll be processed correctly and consistently.
Automating with Folder Monitoring
For a truly hands-off system, you can take it a step further with a feature like Folder Monitoring. You can designate a specific folder on your Mac—maybe call it "Raw Footage - To Convert"—and any file you drop into it gets automatically compressed and converted to MP4. It’s a set-it-and-forget-it system, perfect for teams sharing assets or for anyone who just wants to streamline their ingest process.
This is where specialized tools really start to outshine general-purpose players. By integrating these kinds of practices, you're not just converting files; you're learning about powerful data optimization techniques that save you a massive amount of time and storage space in the long run.
The efficiency gains are huge. A typical 4K video can easily drop from 5GB to under 1GB after conversion without a noticeable quality hit. This trend is why the video converter market is projected to hit USD 1.5 billion by 2033—everyone is feeling the squeeze of massive file sizes and needs that perfect balance of quality and size that MP4 offers. With searches for 'VLC convert to MP4' hitting 1.2 million every single month in 2023, the demand for better, faster conversion methods is crystal clear. You can dig into more about these video encoder market trends if you're curious.
VLC Conversion FAQs
Once you get the hang of basic conversions in VLC, you'll inevitably start pushing its limits. That's when the real questions pop up. Think of this section as the next layer of know-how, built from the common "what ifs" we hear all the time.
Let's clear up a few of the most frequent curiosities so you can use VLC's conversion tools with total confidence.
Can VLC Handle Batch Conversions?
Yes, but there’s a huge catch. While you can add a whole bunch of files to the "Convert / Save" window, VLC will stitch them all together into a single, continuous output file. It doesn't have a built-in feature to process a folder of videos and spit out individual MP4s.
This is a really important distinction. If your goal is to merge a handful of clips into one long video, VLC works perfectly. But if you’re trying to convert a folder of 50 separate video files into 50 separate MP4s, you're stuck doing them one by one. This is easily one of its biggest limitations for anyone doing high-volume work.
How Do I Preserve the Best Possible Video Quality?
Keeping your video quality high is all about giving the encoder enough data to work with. The single most critical setting for this is the bitrate. VLC’s default profiles are decent, but they’re built for a compromise between file size and quality, not for maximum fidelity.
To hang on to as much quality as possible:
- Pop open the Profile Editor (the little wrench icon).
- Head over to the Video Codec tab.
- Instead of typing in a number, try leaving the Bitrate field blank.
Leaving it blank often tells VLC to use a variable bitrate that closely mimics the source file's quality, which helps prevent unnecessary and destructive compression. If you absolutely have to set a value, aim high. For 1080p footage, a good starting point is at least 10,000 kb/s—you can always adjust from there.
The golden rule of video conversion is that you can always go down in quality, but you can never go back up. Start with the highest-quality source file you have. You can't magically add detail that wasn't there in the first place.
Can I Include Subtitles in the Converted MP4?
You bet. VLC is actually great at embedding subtitles directly into the final MP4 file. This process is often called "hardcoding" or "burning in," and it makes the subtitles a permanent part of the video image.
When you're in the Profile Editor, find the Subtitles tab. From there, just check the "Subtitles" box and then make sure the "Overlay subtitles on the video" box is also checked. This tells VLC to render the text from your subtitle file (like an SRT) right onto the video frames.
This is super useful for creating accessible content or for videos destined for social platforms where many people watch with the sound off. The best way to make this work seamlessly is to ensure your subtitle file is in the same folder and has the exact same name as your source video; VLC is usually smart enough to pick it up automatically.
For macOS creators tired of manual, one-by-one conversions, Compresto offers a faster and more automated workflow. Drag and drop hundreds of files for batch processing, set up Folder Monitoring for true automation, and reclaim hours of your time. Learn more and streamline your workflow at Compresto.