The Ultimate Mac Video Compressor Guide to Shrink Files
A good Mac video compressor like Compresto does more than just shrink video files. It makes them manageable—easier to store, faster to share, and quicker to upload, all without a noticeable hit to quality. These tools are built to handle everything from massive 4K project files to quick social media clips, saving you a ton of space on your hard drive.
Why You Need to Compress Video on Your Mac
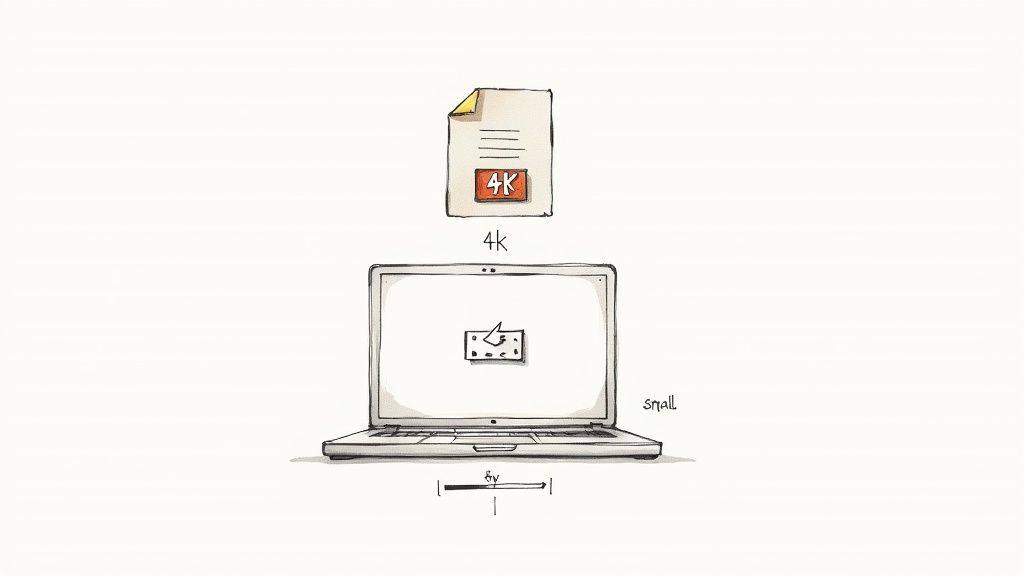
Let's get past the obvious "save space" reason. The real need for video compression on your Mac pops up in the day-to-day grind. It’s about turning a huge 4K project into a crisp Instagram Reel that doesn't end up looking like a pixelated mess. It's about archiving a client's final video without having to buy yet another external hard drive.
For anyone just getting into content creation, particularly if you're following a beginners guide to starting your stream, getting your video compression workflow dialed in is a must. It's fundamental for smooth broadcasts and keeping your file sizes from getting out of control.
Modern Workflows Demand Efficiency
The days of starting a video upload and coming back hours later are long gone. A powerful Mac video compressor should slide right into your workflow, making file size reduction a quick background task instead of a frustrating bottleneck.
Today’s Macs, especially the ones with Apple Silicon, are absolute beasts at these kinds of jobs. That hardware advantage is a game-changer for:
- Sharing Previews: Sending a small, high-quality preview to a client that they can download and watch in seconds.
- Archiving Projects: Squeezing multi-gigabyte project files down to a fraction of their original size for long-term storage.
- Social Media Content: Quickly repurposing high-res footage for platforms like TikTok or YouTube Shorts without a headache.
The core idea is simple: spend less time managing files and more time creating. Efficient compression removes the friction between finishing a video and getting it where it needs to go.
Leveraging Apple Silicon for Speed
The latest Mac hardware turns video encoding from a chore into something you barely have to think about. Modern apps are optimized for these chips, and the results are pretty stunning.
For example, recent tests show that dedicated Mac compressors can slash file sizes by up to 90% when converting 4K video. Even better, they can speed up the process by 3–5× compared to older, non-accelerated software. As we've covered before, the https://compresto.app/blog/benefits-of-file-compression go far beyond just saving disk space—they impact everything from upload speeds to how you organize your projects.
Getting to Know Your Compression Settings
Jumping into a Mac video compressor for the first time can feel a bit like stepping into a cockpit—so many dials and switches. But don't worry, you only need to understand a few key settings to get fantastic results. Instead of getting bogged down in technical jargon, let's focus on the choices that really matter for your video's final size and quality.
Codecs: The Language of Compression
At the heart of it all is the codec, which is just a fancy term for the method used to shrink your video. Think of it like a language. For the best possible compatibility across almost any device or platform you can imagine, H.264 (AVC) is your workhorse. It's the universal standard, and you can never really go wrong with it for web video.
But what if your goal is the absolute smallest file size without sacrificing quality? That's where H.265 (HEVC) comes in. It's a more modern and efficient codec that can cut file sizes by up to 50% compared to H.264. This makes it perfect for archiving huge 4K footage or sending high-resolution files to a client without waiting forever for an upload.
Bitrate and Resolution: The Balancing Act
Next up is bitrate, which is basically the amount of data packed into each second of your video. A higher bitrate means more detail and a larger file, while a lower bitrate saves space. Push it too low, though, and you’ll start to see those ugly compression artifacts, like blockiness in dark areas.
Here are a few practical targets I use all the time:
- YouTube 1080p Uploads: A variable bitrate (VBR) between 8-12 Mbps usually hits the sweet spot.
- Social Media Stories: For Instagram or TikTok, dropping to 3-5 Mbps keeps files small and quick to upload from your phone.
- High-Quality Archives: If I'm saving a master copy, I might push the bitrate to 20-50 Mbps or even higher, depending on the source.
Resolution is much simpler. Your original video might be 4K, but you don't always need to export it that way. Downscaling to 1080p is one of the easiest and most effective ways to slash your file size for web use, and most people won't notice the difference on a phone or laptop screen. It’s also a good idea to match the original frame rate (like 24 or 30 fps) unless you have a specific creative reason not to.
Choosing the Right Codec for the Future
The world of video compression is always moving forward. While H.264 and H.265 are the big players right now, newer standards are already here. The industry is slowly shifting toward even more efficient codecs like AV1, which some vendors claim can reduce bitrates by another 20–50% over HEVC with the same visual quality. In fact, many modern Mac compressors now include AV1 support to future-proof your workflow. You can find more details on these trends in recent video compressor market research.
Here’s a quick cheat sheet to help you pick the right settings for common tasks.
Quick Guide to Compression Settings for Common Uses
Use this cheat sheet to quickly find the right settings in your Mac video compressor for the most popular platforms and tasks.
| Platform or Use | Recommended Codec | Target Bitrate (VBR) | Resolution | Key Tip |
|---|---|---|---|---|
| YouTube | H.264 (AVC) | 8-15 Mbps (for 1080p) | 1080p or 4K | YouTube re-encodes everything, so start with high quality. |
| Instagram/TikTok | H.264 (AVC) | 3-5 Mbps | 1080p (vertical) | Keep it small and punchy for fast mobile uploads. |
| Email/Messaging | H.264 (AVC) | 1-2 Mbps | 720p | The goal is the smallest possible file that's still watchable. |
| Archiving Footage | H.265 (HEVC) | 20-50+ Mbps | Original (e.g., 4K) | Prioritize quality over file size for long-term storage. |
| Client Previews | H.264 (AVC) | 5-8 Mbps | 1080p | Add a watermark and keep the file size manageable for review. |
This table should give you a solid starting point for most of your projects.
Key Takeaway: Think of it as a trade-off. For universal sharing, H.264 and 1080p is a safe bet. For maximum quality at the smallest size, H.265 is your friend.
Getting comfortable with these settings means understanding the basics of how your video is actually being processed. To get a better handle on the tech behind it all, check out our guide on what video encoding is. The more you know, the smarter your compression decisions will be.
A Practical Workflow for Compressing Video Files
Knowing the theory behind compression settings is one thing, but putting it into practice is what really matters. Let’s walk through a repeatable process you can use every time you need to shrink a video file on your Mac. This turns the technical jargon into an efficient, real-world workflow.
First up, importing your files. Most modern tools, including Compresto, let you just drag and drop what you need. For maximum efficiency, don't just compress one file at a time. Grab a whole folder of clips and drop them in to take advantage of batch processing—this is a massive time-saver, especially if you're dealing with a bunch of social media videos or project archives.
Start with Presets, Then Customize
Once your videos are loaded, presets are your best friend. A good mac video compressor will offer defaults like "Web Optimized," "Email," or "High Quality." These are fantastic starting points that take the guesswork out of the initial setup.
For instance, you might start with a "Web Optimized" preset but realize you need an even smaller file for an email attachment. No problem. Just select the preset, then manually lower the bitrate a bit further or drop the resolution from 1080p to 720p. This small adjustment can shave off precious megabytes without a huge hit to visual quality.
This diagram shows the core settings you'll typically be adjusting in your workflow.
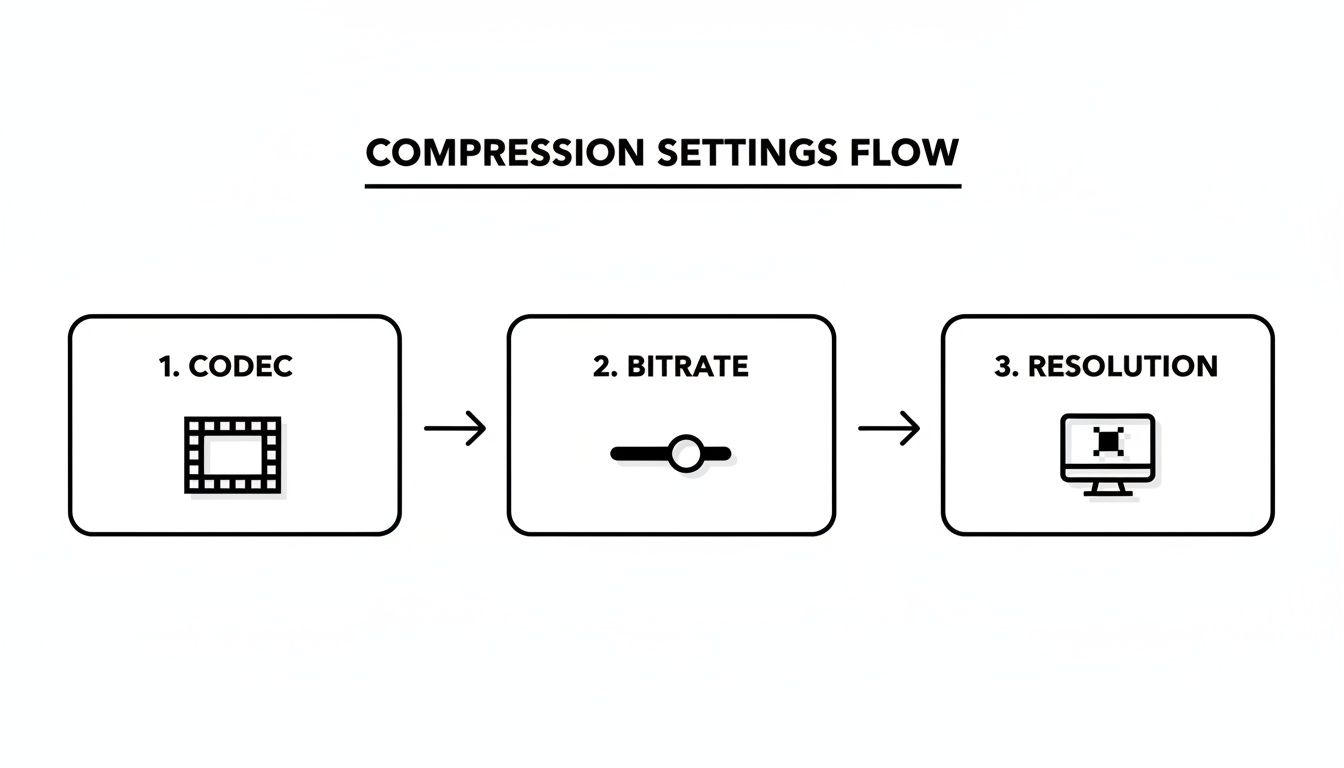
This flow highlights the main levers you can pull—Codec, Bitrate, and Resolution—to get the final file size and quality you're after.
Finalizing and Firing Up the Compression
Before you hit "Start," always pick an output folder. Here's a personal tip: I always create a dedicated "Compressed" folder to keep my originals and their smaller counterparts separate. This simple step has saved me more than once from accidentally overwriting a high-quality source file.
Now, you can kick off the compression. As it runs, keep an eye out to see if your software is using hardware acceleration. Many apps will show a small icon or a status message indicating it's tapping into your Mac's Apple Silicon or dedicated video encoders. That's your signal that the process is running at its absolute fastest speed.
If you're interested in a deeper dive into the settings of another popular tool, our guide on how to use HandBrake offers some great additional insights.
Workflow in a Nutshell: Import in batches, start with a smart preset, tweak it for your specific needs, set a clear destination, and let your Mac's hardware do the heavy lifting. This simple process makes video compression a quick and painless part of any project.
Advanced Tricks to Keep Your Video Quality High
For those moments when "good enough" simply isn't, we need to move beyond the basic settings. Preserving every possible detail in your video requires a smarter approach to compression. A few advanced techniques can make a massive difference, ensuring your final file is both small and stunningly clear.
One of the most powerful tools in a high-quality Mac video compressor is the choice between Constant Bitrate (CBR) and Variable Bitrate (VBR). Think of CBR as a fixed budget for data—every second of video gets the same amount. This is predictable but incredibly inefficient. A quiet, static scene gets the same data as a fast-paced action sequence, often wasting space on the simple parts or starving complex scenes of detail.

VBR, on the other hand, is the secret weapon for quality. It intelligently allocates more data to complex, high-motion scenes and far less to simple, static ones. This dynamic approach is how you get a smaller file that still looks fantastic.
Multi-Pass Encoding for Smarter Decisions
To take this a step further, look for a feature called multi-pass encoding. Instead of compressing your video in a single go, this method lets the software analyze the footage multiple times, making much smarter decisions about where to spend its data budget.
Here’s how it works:
- First Pass: The compressor scans the entire video to map out which parts are complex (like explosions or fast pans) and which are simple (like a still landscape). It’s basically creating a cheat sheet.
- Second Pass: Using the data from the first pass, it applies the bitrate much more precisely, dedicating resources exactly where they're needed to preserve detail and avoid ugly compression artifacts.
This process takes a bit longer, sure, but the result is a significantly cleaner and more efficient file. It’s the go-to method for anyone who refuses to compromise on the final output.
Choosing VBR with multi-pass encoding tells your compressor to think before it acts. This intelligent analysis is key to achieving a smaller file size without sacrificing the visual fidelity of your most critical scenes.
Finally, many modern tools now bring AI-powered enhancements into the mix. These features can intelligently analyze a scene to preserve detail where the human eye is most likely to focus—like faces or sharp text—while being more aggressive with compression in less noticeable background areas. It’s another layer of smart decision-making that helps you strike that perfect balance between size and quality.
The Future of Video Compression on Mac
Investing in a solid Mac video compressor isn't just a nice-to-have anymore—it’s a smart, forward-thinking move for anyone who works with video. The reason is simple: the sheer volume and size of video files are absolutely exploding. From the 4K footage we shoot on our iPhones to the demands of remote work and streaming, the need for better, faster compression is higher than ever.
This isn't some passing trend. It's a fundamental shift in how we create, share, and store media. As a result, developers are pouring resources into optimizing compression software specifically for macOS and Apple Silicon. These platforms offer incredible hardware acceleration, turning what used to be a slow, painful rendering process into a quick background task. It's a direct response to a rapidly growing market.
Efficient compression is quickly becoming a core skill for anyone working with digital video on a Mac. The tools are evolving to meet the demands of higher-resolution content and faster, more agile workflows.
The global video compressor market was valued at around USD 2.5 billion in the mid-2020s and is on track to more than double by the early 2030s. This growth is directly fueled by the mainstream adoption of 4K/8K content and the massive expansion of streaming services. You can read more about the trends shaping the video compressor market to see just where things are headed.
Common Mac Video Compression Questions
When you start diving into video compression, a lot of questions pop up. Getting straight answers is the key to making smart choices for your workflow and picking the right Mac video compressor for the job.
Does Compressing a Video Always Reduce Its Quality?
Not in a way you'd probably notice, no. Modern compression is incredibly clever, especially with advanced codecs like H.265 (HEVC). These tools are pros at shrinking file sizes while keeping the video looking crisp and clear. It’s all about using the right settings.
By using a Variable Bitrate (VBR) and sticking to a reasonable resolution, you can often knock 70-80% off the file size with no perceptible drop in quality on most screens. The goal is intelligent reduction, not just blind shrinking.
What Is the Best Video Format for Small Size and Good Quality?
For the best all-around balance, MP4 (using the H.264 codec) is the undisputed champion. It’s the universal standard, meaning it plays nicely on virtually any device and is perfect for uploading to the web.
But if your absolute top priority is the smallest possible file for high-res video (like 4K), then H.265 (HEVC) is the winner. It offers much more efficient compression, making it a great choice for archiving footage or sending massive files. Just keep in mind, it’s a little less compatible with older devices.
How Do I Compress a Large Video for Email?
Getting a video small enough for email means you have to be aggressive, usually aiming for something under 25 MB. Here’s a quick game plan for that:
- Resolution: Drop it down significantly. Think 720p or even 480p. The person watching on their phone won't mind.
- Bitrate: Lower the bitrate to somewhere around 1-2 Mbps. This will make the biggest difference in file size.
- Length: If you can, trim any dead air from the beginning or end. Every second counts.
This approach will definitely result in a noticeable quality drop, but it’s a necessary trade-off to get the file into an email attachment.
Ready to take control of your video files? Compresto offers a powerful yet simple drag-and-drop interface to shrink your videos, images, and documents without a headache. Try it today and see how much space you can save. Learn more and get started at https://compresto.app.