how to rip dvds to a mac: Quick, Free Tool Guide
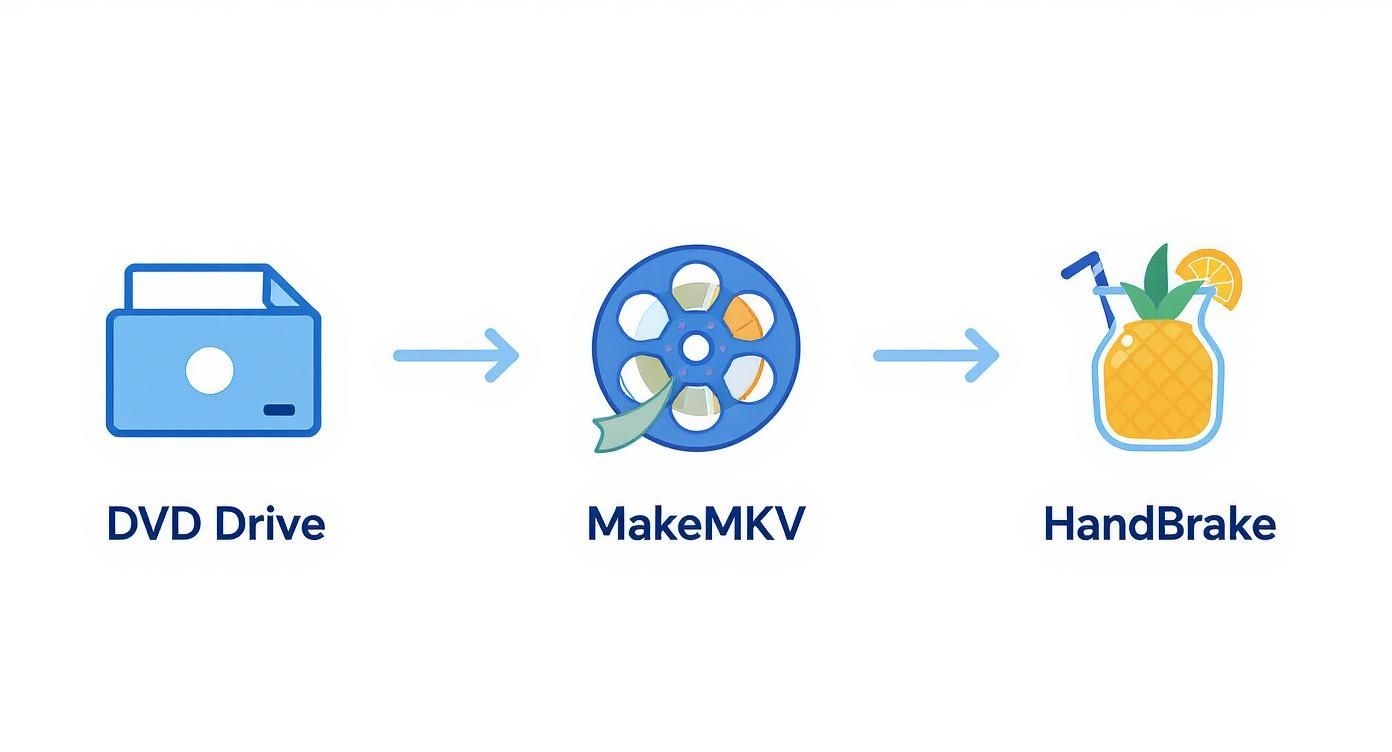
Ripping DVDs to your Mac is a pretty simple affair once you know the right tools for the job. You'll need three main things: an external USB DVD drive, a free program called MakeMKV to get a digital copy off the disc, and another free tool called HandBrake to shrink it down to a manageable size. This combo gives you a perfect, high-quality backup of your movie collection that you can watch on any device.
Why Digitize Your DVD Collection on a Mac

Let's get into the real reasons to turn that stack of physical DVDs into a sleek, versatile digital library. Sure, watching movies on an iPad is great, but digitizing is really about future-proofing your media against the slow, inevitable decay of physical discs. DVDs get scratched, they can warp, and they're even susceptible to "disc rot," where the data layer just degrades over time until they're unplayable.
Creating digital files means you’re building a permanent, high-quality archive that won't wear out. It also lets you reclaim a ton of shelf space and build a modern, centralized media hub. Imagine having your entire movie collection, neatly organized and instantly streamable to any screen in your house using a personal media server like Plex or Jellyfin. No more hunting for a specific disc.
Understanding the Process
The whole workflow breaks down into a few clear phases. Since modern Macs don't have built-in optical drives, you'll start by hooking up an external DVD drive. From there, you'll use a couple of specialized apps to handle the two main tasks: copying and compressing.
To give you a quick overview, here's how the process looks from start to finish.
Quick Guide to Ripping DVDs on Your Mac
| Stage | Purpose | Primary Tools |
|---|---|---|
| Ripping | Create a full-quality, uncompressed digital copy from the DVD. | External DVD Drive, MakeMKV |
| Encoding | Compress the large ripped file into a smaller, device-friendly format. | HandBrake, VLC |
| Organizing | Store and manage your new digital files for easy access. | Plex, Jellyfin, macOS Finder |
This table shows the core steps, but there are a few important details to know before you start.
One of the main reasons this process needs specific tools is because of copy protection. For a deep dive into the technology we'll be navigating, check out this guide to understanding Digital Rights Management (DRM).
And it's not just a niche hobby; the global DVD ripping software market was valued at around USD 245 million in 2023 and is expected to hit USD 410 million by 2033, with Mac users making up a big part of that. You can see more market insights here.
A Note on Legality: Making personal backups of media you own is generally considered "fair use" in many places. However, circumventing copy protection can be a legal gray area depending on where you live. This guide is for educational purposes only—always check your local laws.
The final, crucial step is shrinking those massive, raw files into something more practical. Getting familiar with the benefits of file compression helps you understand why this last stage is so important for building a library that doesn't eat up all your storage space.
Gathering Your DVD Ripping Toolkit
Before you can get into the nitty-gritty of ripping DVDs on your Mac, you'll need to pull together a few key pieces of gear and software. Think of it as your mission prep—getting this part right from the start saves a ton of headaches and makes the whole process way smoother. The best part? Most of what you need is either a one-time purchase or totally free.
The first and most important piece of hardware you'll need is an external USB DVD drive. Apple ditched internal optical drives years ago, so this is non-negotiable. When you're picking one out, try to find a model with a USB-C connector. That way, you can plug it straight into any modern MacBook without fumbling with adapters. Another pro-tip: look for drives that are "bus-powered," meaning they get their juice directly from your Mac's USB port, saving you from another bulky power brick.
Your Software Dream Team
Once your hardware is sorted, it’s time to download the right apps. For this guide, we’re going to focus on a killer one-two punch that gives you the best mix of quality and flexibility: MakeMKV and HandBrake.
- MakeMKV: This is your digital photocopier. Its only job is to get past the disc's copy protection and create a perfect, uncompressed 1:1 backup of your movie. You'll end up with a big MKV file that's an exact replica of the video and audio on the disc, keeping every bit of the original quality.
- HandBrake: Think of this as your compression specialist. It takes that massive file from MakeMKV and shrinks it down into a much more manageable format like MP4 or a compressed MKV. This is the file you'll actually use for your library since it’s small enough to store efficiently and plays on just about any device you own.
This two-app method is the way to go because it separates the ripping from the encoding. MakeMKV does one thing perfectly—getting a flawless source file—while HandBrake specializes in top-notch compression. The result? You get more control and a much better final product.
Here's the MakeMKV homepage where you can grab the macOS version.
The site is super simple, offering direct downloads and the beta key you'll need to keep using it. That no-frills approach reflects the software itself—it's built for one purpose and does it well.
Handling Copy Protection with Libdvdcss
Most commercial DVDs are encrypted with something called the Content Scramble System (CSS). To read these discs, some apps need a little helper library called libdvdcss. While MakeMKV handles this decryption on its own, if you ever want to use other tools like VLC for ripping, you'll need to install it yourself.
The simplest way to get this on a Mac is by using a package manager called Homebrew.
What exactly is Homebrew? Think of it as an App Store for command-line tools. Homebrew is a free, open-source package manager that makes installing software on macOS a breeze, especially for developer utilities that don't have a typical installer.
If you don't have Homebrew installed yet, open your Terminal app (you can find it in Applications > Utilities). Copy and paste the command below, then hit Enter:
/bin/bash -c "$(curl -fsSL https://raw.githubusercontent.com/Homebrew/install/HEAD/install.sh)"
Just follow the on-screen instructions to get it set up. Once Homebrew is ready to go, you can install the decryption library with one quick command in the Terminal:
brew install libdvdcss
That's it. This command automatically downloads and installs the library, making it available for any program that needs it. With your external drive plugged in and these tools installed, you are officially ready to start digitizing your DVD collection.
Creating a Perfect Digital Copy with MakeMKV
Okay, you've got your external drive hooked up and the software is installed. Now for the satisfying part: turning that physical disc into a pristine digital file. For this first crucial step, we'll be using MakeMKV. Think of it as a digital photocopier—it creates a perfect, uncompressed replica of your movie.
Go ahead and pop your DVD into the external drive. Once it spins up, launch MakeMKV. The first thing you'll see is a big, hard-drive-looking icon for your DVD drive. Click it. The software will immediately start scanning the disc, analyzing its contents and cracking any copy protection. Give it a minute or two to work its magic.
After the scan, MakeMKV will show you a list of "titles." This is where most newcomers get a little lost. A DVD isn't just the movie; it's also menus, trailers, FBI warnings, and special features, and MakeMKV sees them all as separate titles.
Finding the Main Movie
Your job is to pick out the main feature from all that extra fluff. Luckily, it’s usually pretty easy to spot.
The main movie is almost always the largest file on the disc, typically somewhere between 4 GB and 8 GB. You should also look for the title with the most chapters—a full-length film will have anywhere from 15 to 30 chapters, whereas a trailer might only have one. If you find the biggest file with the highest chapter count, you can be 99% certain you’ve found your movie.
The easiest way to do this is to uncheck all the boxes first, then go back and select only the one that matches the main feature.
Pro Tip: If you're ripping a TV show, you'll probably see several large titles of a similar size. Each one is an episode. In that case, you'll want to select all of them to rip everything in one go.
This simple workflow shows how the tools fit together. We start with the physical drive, use MakeMKV for the initial rip, and then pass that file over to HandBrake for the final compression.
MakeMKV is the critical first step. It's responsible for creating that high-quality source file that HandBrake will refine later on.
Choosing Your Audio and Subtitle Tracks
Once you've selected the main title, click the little triangle next to its checkbox. This expands the view to show you all the audio and subtitle streams packed into that video file. This is your chance to decide exactly what makes it into your final digital copy.
You’ll probably see several audio tracks. Here’s how to pick the right ones:
- Look for 5.1 Surround: For movies, you almost always want the main surround sound track, usually labeled "DTS 5.1" or "Dolby Digital 5.1." This gives you that full, immersive audio experience.
- Identify Stereo Tracks: There might also be a 2.0 stereo track. It's smaller and perfectly fine if you'll be watching on a laptop or tablet, but I usually deselect it to save a little space.
- Keep Commentary Tracks: Sometimes you'll find an extra track labeled "Commentary." If you're a fan of behind-the-scenes stuff, make sure to keep this selected.
You'll see a similar list for subtitles. You can pick and choose which languages you want to keep. I usually just keep the English subtitles for the hearing impaired (often marked as "SDH") and get rid of the rest.
Setting the Output and Starting the Rip
With your video, audio, and subtitle choices locked in, the last thing to do is tell MakeMKV where to save the file.
Over on the right side of the window, you'll find the Output folder field. Click the folder icon to browse your Mac and pick a destination. I'd recommend creating a dedicated folder called "DVD Rips" on your desktop or an external drive just to keep things organized.
Once your destination is set, just hit the big "Make MKV" button on the right.
The rip will now begin, and a progress bar will show you how it’s going. A standard DVD usually takes about 15-30 minutes to rip, depending on the speed of your drive and your Mac. Since MakeMKV is just copying data and not re-encoding it, the process is pretty quick.
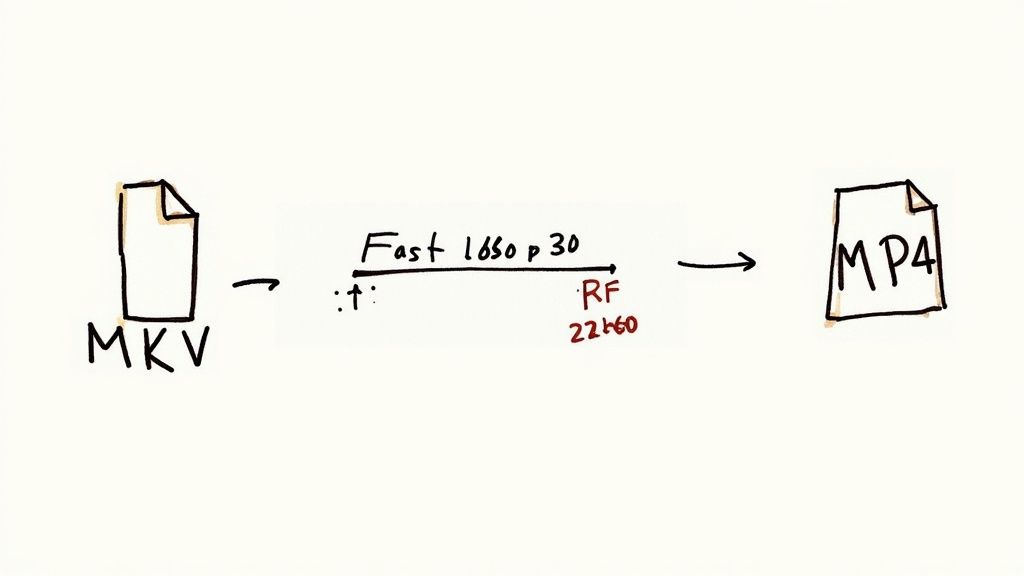
When it’s done, you’ll have a single, large MKV file waiting for you in your output folder. This is your perfect digital replica—a bit-for-bit copy of the movie from the disc, with all the quality, audio, and subtitles you selected. Now this high-quality file is ready for the next step: compression with HandBrake.
Making Your Video Files Practical with HandBrake
So, you’ve used MakeMKV and now you’ve got a perfect, bit-for-bit digital copy of your DVD. That massive MKV file on your Mac is your master copy, but let's be real—at 4 GB to 8 GB a pop, it’s not exactly practical for everyday viewing. This is where HandBrake comes in to save the day (and your hard drive space).
HandBrake is a free, open-source tool that’s legendary in the video community for a reason. It takes that giant source file and intelligently compresses it, shrinking the file size way down while keeping the picture looking sharp. It’s the magic step that turns your digital archive into something you can actually watch on your iPhone, iPad, or Apple TV without burning through all your storage.
First Steps with Your Ripped File
Getting started is a breeze. Fire up HandBrake, and it’ll immediately ask you to pick a source file. Just point it to the MKV you just ripped, and HandBrake will quickly scan it to see what it's working with—resolution, frame rate, audio tracks, the works.
The interface can look a little busy at first, with tabs for Summary, Dimensions, Video, and more. Don't let it intimidate you. For most DVD rips, you only need to tweak a few key settings to get a fantastic result.
The real beauty of this two-app process is the control it gives you. MakeMKV handles the raw rip flawlessly, and HandBrake gives you total command over the final product. You get to decide the perfect balance between file size and quality.
Choosing the Right Preset for Your Mac
One of HandBrake’s best features, especially if you’re new to this, is its library of presets. These are pre-made configurations optimized for different devices and quality levels, and they take all the guesswork out of the process.
For a standard DVD, the Fast 1080p30 preset under the "General" category is a brilliant place to start. I know what you're thinking—DVDs are only 480p. But this preset uses modern, efficient settings that work wonders on standard-definition content, spitting out a high-quality MP4 file that will play on just about anything.
A few great presets to have on your radar:
- Fast 1080p30: This is your workhorse. It delivers a great mix of speed, quality, and universal compatibility.
- HQ 1080p30 Surround: Got a nice sound system? Use this to step up the quality and keep that rich surround sound audio track.
- Apple 1080p30 Surround: This one is specifically tuned for flawless playback on Apple hardware like the Apple TV.
Just pick the one that fits what you’re trying to do. Honestly, for most people, Fast 1080p30 is the perfect set-it-and-forget-it option.
Fine-Tuning Your Video Quality
If you want to move beyond presets and get your hands dirty, the Video tab is where the real magic happens. The single most important setting here is the Constant Quality slider, labeled with an RF (Rate Factor) value. This tells HandBrake what level of visual quality you want to hit.
Instead of locking in a specific bitrate, the RF slider lets the encoder use as much or as little data as it needs to maintain consistent quality from scene to scene. A lower RF number means higher quality and a bigger file; a higher number means lower quality and a smaller file.
For standard-definition DVDs, I’ve found that an RF value between 20 and 23 is the sweet spot. An RF of 22 usually gets you a final video that’s visually identical to the original DVD for most people, but at a tiny fraction of the file size.
Managing Audio and Subtitle Tracks
Just like we did in MakeMKV, you get full control over the audio and subtitles in your final file. Hop over to the Audio tab.
HandBrake is pretty smart and usually picks the main audio track by default. But it's always worth checking the dropdown to make sure you've selected the 5.1 Surround track if you want the best sound. If you want to include other tracks, like a director’s commentary, just click "Add Track" and grab it from the source list.
The Subtitles tab works the same way. Here you can choose to either "burn in" the subtitles (making them a permanent part of the video) or include them as a selectable track. For flexibility, I almost always recommend adding them as a selectable track so you can turn them on or off in your video player.
Starting the Encoding Process
Once your settings are dialed in, all that's left is to tell HandBrake what to name the file and where to save it. Down at the bottom, click the Browse button, pick a destination, and give your movie a name. A simple Movie Title (Year).mp4 works perfectly.
With that done, just click the green Start button up in the toolbar.
Now, HandBrake gets to work. This part of the process is much more demanding on your Mac's processor than the initial rip, since it’s re-compressing every single frame. The encoding time can range from 15 minutes to over an hour, all depending on the movie's length and how powerful your Mac is.
When it's finished, you'll have a perfectly compressed, high-quality MP4 file ready for your media library—optimized for storage, streaming, and playback on any device you own. If you want to dive even deeper, you can explore how to use HandBrake for different scenarios in our detailed guide.
Taking Your Digital Library to the Next Level
Once you’ve got the hang of ripping and encoding a single DVD, you can start thinking bigger. Taking on an entire collection of movies or TV shows is a whole different ballgame—it demands a real workflow. This is where you graduate from one-off tasks to building a polished, professional-quality media library that’s a joy to browse.
One of the biggest time-savers here is HandBrake’s queue feature. Instead of babysitting each MKV file one by one, you can line up a whole batch of encodes to run automatically. A great strategy is to spend an afternoon ripping several DVDs with MakeMKV, then add each of those big MKV files to the HandBrake queue with your go-to preset.
Kick off the queue before you go to bed, and you'll wake up to a folder full of perfectly compressed videos. It's set-it-and-forget-it efficiency.
Mastering File Naming for Media Servers
You might not think much about what you name your files, but it’s incredibly important, especially if you plan to use a media server like Plex or Jellyfin. These platforms are brilliant—they scan your files and automatically pull in movie posters, cast info, plot summaries, and more. But they can only work their magic if they know what they're looking at.
A messy folder full of files like MyMovie_rip_01.mp4 will leave you with a jumbled library, missing artwork, and a lot of manual cleanup. A clean, consistent naming convention is the secret to a beautiful, automated media collection.
Here's a simple table outlining the go-to naming patterns that media servers love.
File Naming Conventions for Media Servers
| Media Type | Recommended Naming Pattern | Example |
|---|---|---|
| Movie | Movie Title (Year).ext | Blade Runner (1982).mp4 |
| TV Show | Show Name/Season XX/Show Name - sXXeYY.ext | The Office/Season 02/The Office - s02e15.mkv |
Sticking to this structure lets your media server instantly identify your content and do all the heavy lifting for you. For those really looking to personalize their home theater experience, exploring custom prerolls for your Plex, Emby, or Jellyfin server can add a cool, custom touch before your movie starts. It’s a fun way to make your server feel uniquely yours.
Handling TV Box Sets and Preserving Chapters
TV show box sets can be a bit tricky since they often span multiple discs. The best way to tackle this is to create a main folder for the show, then subfolders for each season, just like in the table above. Rip the episodes from each disc, but be careful to name them with the correct season and episode numbers (s01e01, s01e02, etc.) so they all line up in the right order.
Another pro tip is to preserve the chapter markers from the original DVD. HandBrake actually does this by default, which is fantastic. These markers let you skip to different scenes within a movie or episode, just like you could with the physical disc. It’s a small detail, but it makes your digital copy feel so much more polished and professional.
Key Takeaway: A well-organized digital library is built on two pillars: batch processing to save time and meticulous file naming to ensure your media server can automatically organize and beautify your collection.
Of course, as your library grows, so does its storage footprint. Ripped DVDs, even after compression, can eat up disk space fast. This makes smart storage management essential. We’ve got some great strategies you can use in our guide on how to free up disk space on your Mac, and the tips apply perfectly to managing a large video collection.
Common Questions About Ripping DVDs on a Mac
Whenever you're diving into a new project like digitizing your movie collection, a bunch of questions are bound to pop up. It's totally normal. From wondering about the legal side of things to figuring out why your first ripped file is absolutely massive, let's clear up some of the most common queries people have.
Is It Legal to Rip My Own DVDs on a Mac?
This is easily the most frequent question, and honestly, the answer is a bit of a gray area. In places like the U.S., the law technically forbids breaking the copy protection (DRM) found on commercial DVDs. At the same time, the idea of "fair use" often allows you to make personal backups of media you've already paid for.
This guide is for educational purposes only. It's a good idea to look into the specific copyright and fair use laws in your country, as we don't endorse any activities that go against copyright law.
Why Is My Ripped File So Large After Using MakeMKV?
If you just finished your first rip with MakeMKV and are staring at a file that’s somewhere between 4 GB and 8 GB, don't panic! That’s exactly what's supposed to happen.
MakeMKV isn't a compression tool; it creates a perfect, bit-for-bit copy of the video and audio straight from the disc. Think of it as a pure, uncompressed digital clone.
The MakeMKV file is your high-quality "digital master." The whole point of the next step with HandBrake is to take this huge source file and shrink it down to a manageable size without you ever noticing a drop in quality.
Can I Use This Method to Rip Blu-ray Discs?
You bet. The MakeMKV and HandBrake combo is also the go-to workflow for ripping Blu-rays. The process is pretty much the same, but there are a couple of key differences to keep in mind.
First, you'll need an external Blu-ray drive for your Mac, since a regular DVD drive can't read those discs. Second, get ready for much bigger files and longer waits. A raw Blu-ray rip from MakeMKV can easily hit 20 GB to 50 GB, and HandBrake will take a lot longer to encode the higher 1080p or 4K resolution video.
Which HandBrake Video Quality Setting Is Best?
For most rips, you can't go wrong with HandBrake's official presets. Just starting with Fast 1080p30 or HQ 1080p30 Surround will give you a fantastic result without having to mess with a ton of settings.
If you like to fine-tune things, the Constant Quality RF (Rate Factor) slider is your best friend. Here’s a simple rule of thumb:
- For DVDs (480p): Aim for an RF value between 18-20. This is the sweet spot.
- For Blu-rays (1080p): An RF of 20-22 provides an amazing balance between file size and picture clarity.
Just remember, a lower RF number means higher quality and a bigger final file.
Ready to shrink those ripped movie files without losing quality? Compresto is the perfect tool for compressing your videos, images, and other media directly on your Mac. Its drag-and-drop interface and powerful batch processing make it easy to reclaim disk space and prepare your digital library in seconds. Learn more and get started at https://compresto.app.