Compress PDF on Mac Without Losing Quality
Ever found yourself stuck trying to email a massive proposal or upload a portfolio, only to be blocked by a strict size limit? It’s a common frustration. Oversized PDFs can bring your workflow to a grinding halt, but the fix is surprisingly simple: learning how to compress PDF on Mac.
This is one of those essential skills that takes just a few minutes to pick up but can save you from countless upload errors and inbox headaches down the line.
Why Bother Compressing PDFs on Your Mac?
Knowing how to shrink a PDF on your Mac goes way beyond just freeing up a little storage space. In a lot of professional and academic situations, it’s a practical necessity. Large, clunky files create real friction in your day-to-day, causing delays and technical snags that are completely avoidable.
Think about the last time you tried to share a high-resolution design proof. Sending that huge file not only clogs up the recipient's inbox but might even get bounced by their email server. The same thing happens when you’re submitting a resume or a term paper through an online portal with a strict 2 MB upload limit.
Mastering PDF compression isn’t just about file sizes; it’s about making sure your work actually gets seen. A smaller file means faster uploads, smoother sharing, and a more professional look for everyone involved.
Common Scenarios Where This Comes in Handy
You’ll find yourself needing this skill more often than you might think. For example, freelancers need to send client proposals without worrying if they’ll actually be delivered, while students have to submit assignments without getting tripped up by platform limits. Even just archiving old project documents is a whole lot easier when the files aren’t taking up so much room.
Each of these situations highlights the tangible benefits of file compression, making your digital life a whole lot easier.
Learning this skill helps you:
- Send Emails Faster: No more bounced attachments. Your files just go through.
- Meet Upload Requirements: Easily submit documents to websites, job portals, and cloud services without a hitch.
- Improve Archiving: Keep your files organized and stored efficiently without maxing out your hard drive.
Ultimately, compressing a PDF on your Mac is all about efficiency. It’s a small, easy step that removes common digital roadblocks, letting you focus on what’s in your documents, not the technical headaches of sharing them.
Using Your Mac's Built-In Compression Tools
Before you even think about downloading new software, it's worth knowing your Mac has some surprisingly decent tools for basic PDF compression already built in. The Preview app, which you probably use all the time for viewing documents and images, has a simple but effective feature that can shrink your files in just a few clicks. It's the perfect first stop when you need to quickly compress a PDF without installing a thing.
The most straightforward method is hidden inside the "Export" function. With a PDF open in Preview, just navigate to File > Export. In the pop-up window, you'll see a dropdown menu for Quartz Filter. All you have to do is select Reduce File Size from that menu, save it as a new file, and let Apple’s default compression settings do their thing.
Understanding the Trade-Offs
While this built-in method is incredibly convenient, it's pretty much a one-size-fits-all solution. You get zero control over the final quality.
For a document that’s mostly text, the results are often perfectly fine. But if you’re trying to shrink a marketing brochure packed with high-resolution images, you’ll likely notice a big drop in visual clarity. The compression algorithm is aggressive with images to save space, which can leave them looking blurry or pixelated.
This is a classic case of speed versus quality. When is "good enough" actually good enough?
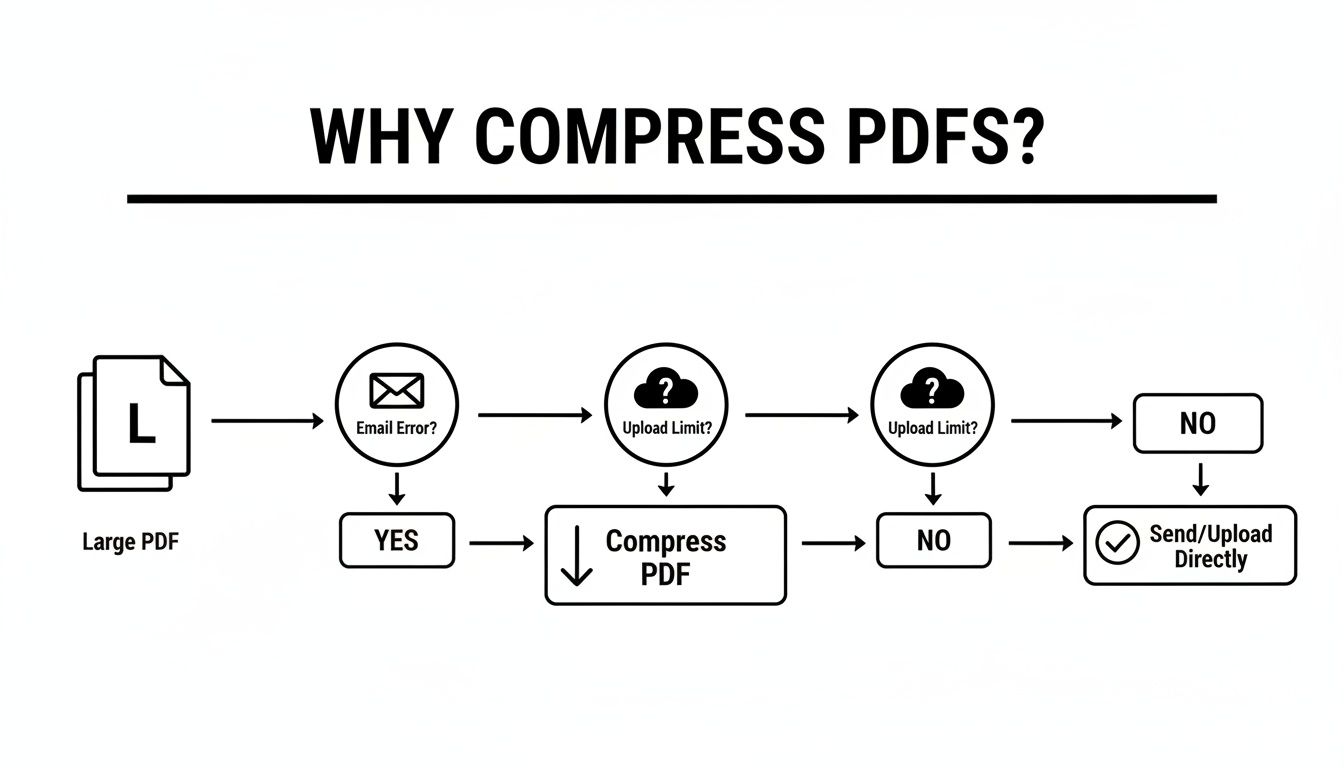
As you can see, an oversized PDF can quickly bring things to a halt, whether you're trying to email a colleague or upload a file to a web portal.
A Lesser-Known Trick: The Print Dialog
There’s another built-in approach you can try using the Print dialog. Open your PDF, head to File > Print, and look for the PDF dropdown menu in the bottom-left corner. From there, choose Save as PDF.
Now, this might seem like it’s just making a copy, but what it's actually doing is re-rendering the document. This process can sometimes result in a smaller file, especially if the original PDF was created inefficiently. For more foundational tips on this, check out our guide on how to create a PDF on Mac.
Comparing macOS Built-in Compression Methods
So, you have two native options. Which one should you pick? Here’s a quick breakdown to help you decide on the fly.
| Method | Best For | Potential Quality Impact | Ease of Use |
|---|---|---|---|
| Export with Quartz Filter | Quickly shrinking image-heavy files where quality isn't the top priority. | High. Can significantly degrade image quality. | Very Easy |
| Save as PDF via Print Dialog | Documents with inefficient internal structures; a "last resort" attempt. | Low to Medium. Generally preserves quality better. | Easy |
Both methods have their place, but as you can see, they serve slightly different purposes. The Quartz Filter is your sledgehammer, while the Print Dialog trick is a bit more nuanced.
Ultimately, Preview’s built-in tools are fantastic for non-critical tasks where you value speed over pristine quality. Sending a quick draft or archiving a simple text document? It’s an excellent choice. On average, the “Reduce File Size” filter can cut a PDF’s size by 30% to 80%, with the biggest savings coming from image-heavy files. But if you need precise control and want to guarantee your images and graphics stay sharp, you'll want to reach for a more specialized tool.
Getting Serious with Advanced Compression Tools
Your Mac's built-in Preview app is fine for a quick-and-dirty compression job, but it’s a bit of a blunt instrument. It tends to hammer down file size without much regard for visual quality, often leaving you with pixelated images and a document that looks less than professional.
When you absolutely can't afford to turn crisp graphics into a blurry mess, it's time to bring in a specialist.
This is where a dedicated app like Compresto really shines. It offers the kind of surgical precision that Preview just can't match, letting you shrink files down significantly while keeping your documents looking sharp. Instead of one aggressive, catch-all filter, it uses smarter algorithms to analyze what’s actually in your PDF and apply targeted optimizations.
The result? You no longer have to pick between a small file and a good-looking one. You get both.
Using Smart Compression for Everyday Needs
Tools built for the job move beyond a simple "reduce size" button by offering different modes tailored to what you’re trying to accomplish. This flexibility is a game-changer. For anyone tired of wrestling with clunky software, exploring an Adobe PDF alternative like Compresto can make a huge difference in your daily workflow.
Let's say you’re about to email a final proposal to a major client. Your PDF is loaded with detailed charts and high-resolution product photos. Using Preview’s default filter here is a huge gamble—it could easily make your hard work look amateurish.
With a tool like Compresto, you’d just select a Smart Compress mode. This setting is clever enough to lower the image resolution just enough to slash the file size without any noticeable drop in quality. Meanwhile, it leaves all your text and vector graphics completely untouched. You end up with a dramatically smaller file that looks identical to the original.
Key Takeaway: The real power of a specialized tool is its ability to be selective. It knows a photograph needs different treatment than a block of text, ensuring every part of your document is compressed as efficiently as possible without sacrificing clarity.
When Quality is Non-Negotiable: Lossless Options
Now, picture a different scenario. You're dealing with a legal contract or a technical schematic where every single line and pixel is critical. Any loss of detail, no matter how small, is completely out of the question.
This is exactly what a Lossless Compression setting is for.
This mode doesn’t touch the visual content at all. Instead, it works behind the scenes to reorganize the PDF's internal data and strip out any redundant information. The file size reduction might not be as jaw-dropping as with other methods, but it guarantees that 100% of the original quality is preserved.
So, when do you use each one?
- Smart Compress: Your go-to for most things, especially image-heavy documents like portfolios, marketing materials, and presentations. It strikes the perfect balance between small file size and high visual fidelity.
- Lossless Compression: The only option for critical documents like legal papers, architectural plans, or high-quality proofs intended for print. When absolute precision matters, this is the mode you need.
By choosing the right tool for the job, you get total control over the outcome. Your documents will always be perfectly suited for their purpose—a level of precision that built-in tools simply can't deliver.
Fine-Tuning Your PDF Optimization
Smart presets are great for most everyday situations, but sometimes you need to get under the hood and take more surgical control over how you compress a PDF on Mac. This is where you move beyond the one-click settings and start fine-tuning the individual components of your file to strike that perfect balance between size and quality.
Dedicated tools open up a control panel of advanced options that something like macOS Preview just can't offer. You get to manually adjust the nuts and bolts of your document, letting you shave off every last unnecessary kilobyte. This level of control is a game-changer for professionals who need to optimize a file for a very specific purpose.
Mastering Granular Controls
Imagine you're a graphic designer preparing a portfolio for your website. The original PDF is stuffed with high-resolution images, making it painfully slow to load in a browser. A generic compression might crush the whole file, but with granular controls, you can specifically target and downsample the images to a web-friendly 72 DPI while leaving all the crisp text and vector elements completely untouched.
Or think of an office administrator who needs to distribute a public report. They can easily strip out all the sensitive metadata—things like author names, creation dates, and the software used to create it—that the public doesn't need to see and which adds to the file's overall weight.
Here are a few of the key adjustments you can typically make:
- Image Quality and DPI: Lowering the resolution of embedded images usually gives you the single biggest file size reduction, especially in image-heavy documents.
- Metadata Removal: Erase all the hidden data like author info, keywords, and creation software details.
- Form Flattening: Convert interactive form fields, like text boxes and checkboxes, into a static, non-editable part of the document.
- Font Optimization: Un-embed common system fonts that your recipient almost certainly has on their computer already.
By getting comfortable with these settings, you stop treating compression as a blunt instrument and start using it as a precision tool. You can tailor every PDF for its exact destination, whether it's going into a client email, living on a web server, or being put into long-term archival storage.
Beyond just shrinking the file, fine-tuning can also involve optimizing the content itself. For example, you could use an AI-powered PDF summarizer to condense a lengthy document before you even compress it. This granular approach ensures you're sending the smallest possible file that still perfectly meets your quality standards.
How to Batch Compress Multiple PDFs
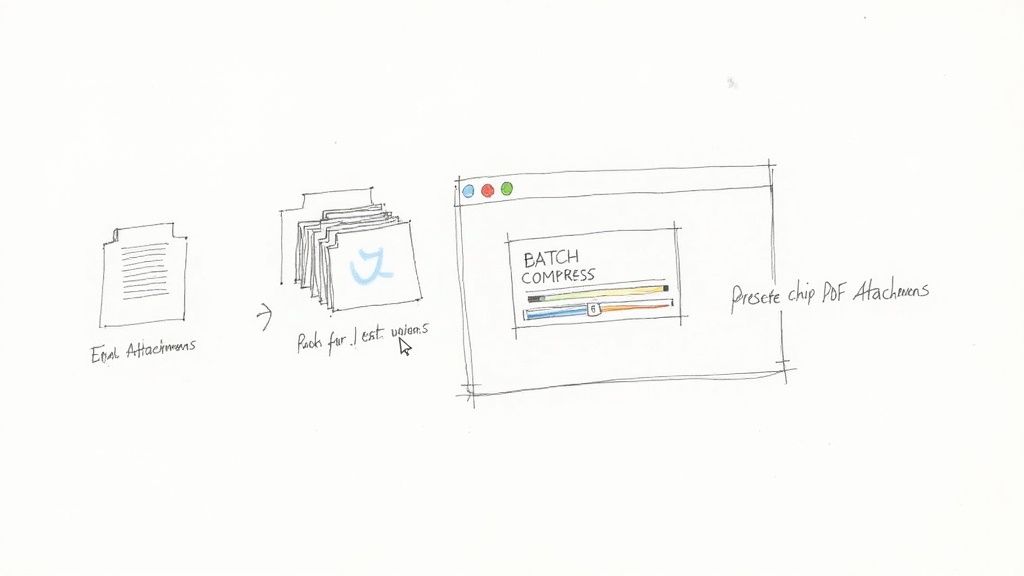
Let's be honest, staring at a folder full of huge PDFs that need to be sent out is a pain. Compressing them one at a time is a soul-crushing, repetitive task that nobody has time for. This is exactly where batch processing comes in to save the day.
Instead of clicking through the same tedious steps over and over, you can tackle an entire project's worth of documents in one go.
A dedicated tool like Compresto makes this incredibly simple. It’s a straightforward drag-and-drop affair. You can grab ten invoices, a hundred report drafts, or an entire folder of scans and just drop them right into the app. From there, you apply a single compression setting to the whole lot. Done.
Streamline Your Repetitive Tasks
The real game-changer is creating presets for the jobs you do all the time. Think about it: you probably have a few common reasons for compressing PDFs, and each one has different needs.
You could set up custom profiles for your most frequent tasks:
- Email Attachments: A more aggressive setting that really shrinks files down to fly through email servers without a hitch.
- Web Uploads: A balanced profile optimized for quick loading on a website, keeping quality high so it still looks sharp.
- Internal Archiving: A lighter touch that prioritizes preserving detail while still trimming down the file size for long-term storage.
By creating and saving these profiles, you take all the guesswork out of the equation and guarantee every file is handled the same way, every time. This approach to compressing PDFs on a Mac isn't just about saving a few minutes; it’s about standardizing your entire workflow.
The market for these kinds of PDF tools is heating up, which is great news for us. It’s leading to more powerful, Mac-friendly options with smart features like batch processing. This competition pushes developers to give us faster performance and better quality. You can learn more about the latest trends in PDF editor software to see where things are headed.
A Few Common Questions About Compressing PDFs
Whenever you need to shrink a PDF on a Mac, a few questions always seem to come up. Getting them answered upfront saves a lot of headaches and helps you pick the right tool for the job.
Will Compressing a PDF Wreck the Quality?
Not always, but it really depends on the tool you're using. If you just use your Mac’s built-in "Reduce File Size" filter, you're going to see a noticeable hit in quality, especially with images. That tool is pretty aggressive.
On the other hand, specialized apps can give you intelligent or even lossless compression.
Lossless compression is your go-to for anything important. It cleverly optimizes the PDF's internal data without touching the visual content. Every single pixel stays exactly as it was, but the file size still drops.
For most day-to-day files, a smart compression algorithm finds the perfect sweet spot, making the file much smaller with little to no visible difference.
Can I Compress a PDF That's Password-Protected?
Almost never. Compression software needs to get under the hood to analyze and optimize the file’s contents, and a password blocks that access.
The standard workflow is to remove the password first. Once you've compressed the PDF, you can easily pop a new password on the smaller version to keep it secure.
What’s the Best Free Way to Shrink a PDF on a Mac?
For pure convenience, you can't beat the built-in Preview app. It’s already on your Mac and works just fine for quick jobs where top-tier quality isn't the main goal. Just go to File > Export and select the Reduce File Size option from the Quartz Filter dropdown.
But if you need more control and want to keep the quality sharp, a dedicated tool like Compresto gives you the advanced options to get it just right. You can learn more and grab the app at https://compresto.app.
If your PDFs are leaving your firm or going to a counterparty, compress and strip metadata in one pass — author names, edit timestamps, and hidden text often leak through compression alone. Our remove metadata from a PDF guide covers the full sanitize workflow.