Mastering compress files without losing quality: Save Space Without Sacrifice
We’ve all been there: trying to email a large video only to be blocked by that dreaded "file too large" error. Your first thought might be to just bite the bullet and sacrifice some quality to shrink the file down. But what if you didn't have to?
The real solution is learning how to compress files without losing quality, and the key is something called lossless compression. It’s a clever method that shrinks your file size without deleting a single pixel of data.
The Secret to Shrinking Files While Keeping Them Perfect
Ever noticed how a heavily compressed JPEG can look blocky and smeared? That’s the work of lossy compression, a process that permanently throws away visual information to make the file smaller. While it has its place for quick shares where top-notch quality isn't the priority, it's a complete non-starter for professional work.
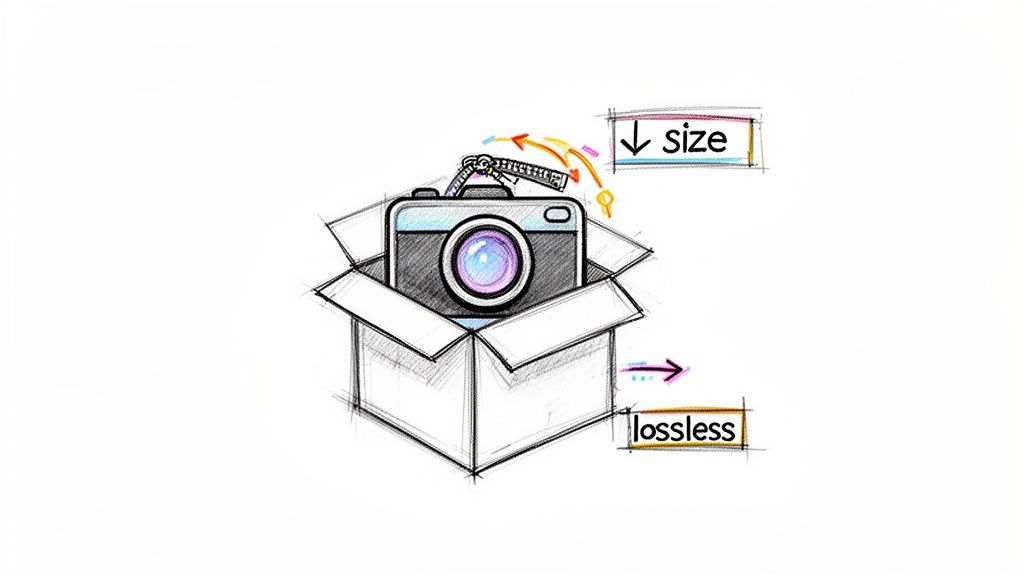
Lossless compression, on the other hand, is like a perfect packing system. It finds redundant data inside a file—think of a huge patch of solid blue sky in a photo—and simply describes it more efficiently instead of storing every single identical pixel. When you open the file later, every single piece of original data is restored, perfectly intact.
No degradation, no weird artifacts, just a smaller, more manageable file. If you want to dive deeper, we have a detailed guide explaining the difference between lossy and lossless compression.
Why Lossless Matters for Professionals
For a video editor archiving a 4K project or a designer sending over a high-resolution portfolio, every detail is critical. Even a tiny drop in fidelity can compromise hours of meticulous work. This is exactly why lossless compression is the standard in demanding industries like media, healthcare, and IT.
The demand for this kind of smart compression is skyrocketing. The data compression market is projected to jump from USD 2.95 billion to USD 4.53 billion by 2030. Interestingly, on-premise solutions that process files locally—like Compresto—hold a majority 55% share, mostly because of the enhanced security that’s vital for government and financial sectors.
To give you a clearer picture, here's a quick rundown of how the two methods stack up against each other.
Lossy vs Lossless Compression At a Glance
| Attribute | Lossless Compression | Lossy Compression |
|---|---|---|
| Quality Impact | No quality loss. The original file can be perfectly reconstructed. | Permanent quality loss. Data is discarded and cannot be recovered. |
| File Size Reduction | Moderate reduction. Typically around 20-30%. | Significant reduction. Can be up to 90% or more. |
| Best Use Cases | Archiving, professional photography (RAW), medical imaging, source code. | Streaming video, web images (JPEG), online audio (MP3). |
| Common Formats | PNG, GIF, FLAC, ALAC, ZIP | JPEG, MP3, MPEG, OGG |
Ultimately, choosing the right method depends entirely on your end goal. For anything where preserving the original, pristine quality is non-negotiable, lossless is the only way to go.
Lossless compression turns a workflow bottleneck into a strategic advantage. It lets you maintain pristine quality while making your files easier to store, share, and collaborate on.
Mastering how to compress files without losing quality means you never have to choose between excellence and efficiency. With the right tools, like Compresto for macOS, compression stops being a necessary evil and becomes a smart, seamless part of your creative process.
Compressing Videos and GIFs Without Visible Quality Loss
We've all been there. Large video and GIF files are notorious bottlenecks, clogging up storage and making sharing a nightmare. Trying to email a 2GB video preview to a client often ends with a dreaded bounce-back message, forcing you into a time-consuming re-render at a lower quality.
The good news? You don't have to compromise. You can compress files without losing quality, preserving the clarity of every single frame.
This is especially true for things like motion graphics or tutorials. Let's say you've just wrapped up a high-resolution screen recording for a new support article. With the right approach, you can turn that into a perfectly looped, optimized GIF that loads instantly for users—all without sacrificing any of the crucial on-screen detail.
A Practical Workflow for Videos
The secret to compressing video without butchering it lies in choosing the right codec and container. Think of a codec as the algorithm that does the heavy lifting of compression, while the container (like .MP4 or .MOV) is the box that holds the video, audio, and metadata together.
For archival or master copies, a lossless codec is your best friend. It guarantees you have a perfect source file for any future edits. But for sharing, a "visually lossless" approach is usually more practical. This just means using a highly efficient codec that slashes the file size with changes so minor, they're completely invisible to the human eye.
A smart workflow usually looks something like this:
- Find the Redundancy: Videos with static elements, like a tutorial with an unchanging background, have massive potential for lossless compression. The algorithm doesn't have to re-render what isn't moving.
- Use Smart Presets: Instead of getting lost tweaking dozens of settings, use presets designed for specific platforms. A preset for "Social Media Clips" in a tool like Compresto will automatically apply the best settings for you.
- Go for Batches: Don't waste time compressing files one by one. Drag an entire folder of clips into your tool and process them all at once. This can save you hours.
This simple process creates a repeatable system that reclaims gigabytes of disk space and makes your content delivery pipeline incredibly fast.
By focusing on visually lossless compression for delivery and true lossless for archiving, you get the best of both worlds: manageable file sizes for sharing and pristine quality for your master files.
Optimizing GIFs for Peak Performance
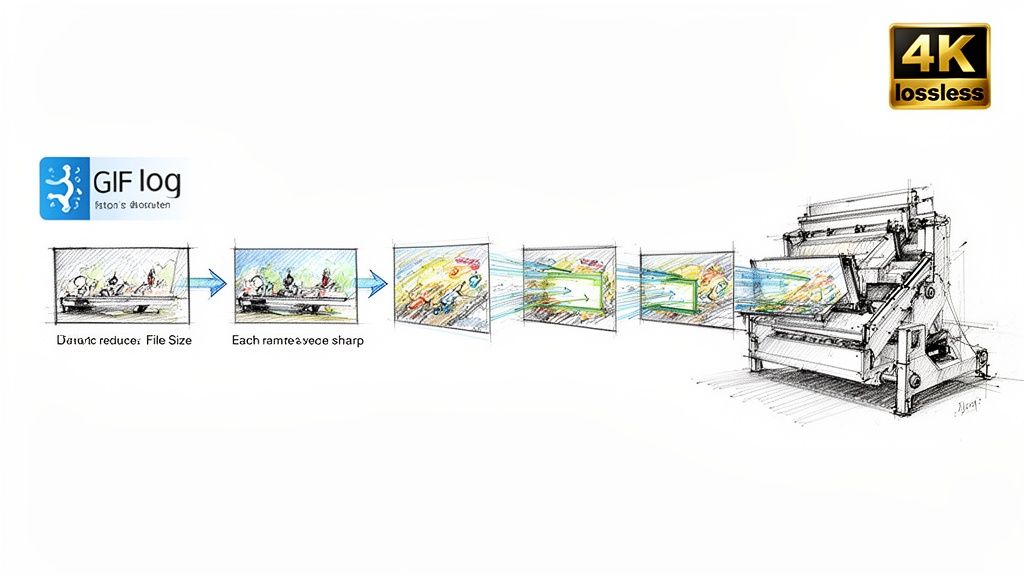
GIFs are a special case. They're technically a lossless format, but an unoptimized GIF can be absolutely massive. The final file size is a direct result of its frame rate, dimensions, and color palette.
To shrink a GIF without turning it into a pixelated mess, you have to address these elements intelligently. For instance, most GIFs are full of redundant pixel data between frames. If only a small part of the image moves, why save the entire frame over and over again?
Smart optimization tools analyze each frame and discard this duplicate information, leading to a much smaller file that looks identical to the original. This is how you create those perfectly smooth, high-quality GIFs that won't bog down your website or support docs.
For a much deeper dive into the nuts and bolts, check out our guide on how to compress a GIF without losing quality. It's packed with advanced techniques for creating sharp, lightweight animations.
Optimizing Images and Photos for Web and Storage
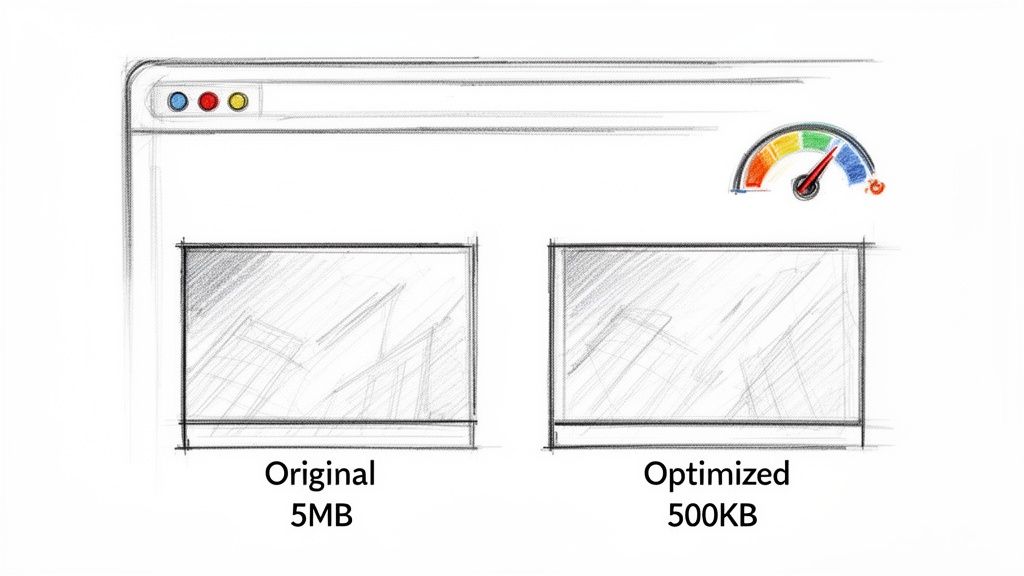
If you're a photographer or a web designer, you live this balancing act every day: how do you keep your images looking incredible without letting the file size kill your website's performance? A stunning, high-res hero image is great, but not if it takes so long to load that your visitors click away before they ever see it.
This is exactly where you can compress files without losing quality. The goal is to make sure your visuals are both beautiful and fast.
Think about prepping a full photo gallery for your online portfolio. Each picture has to be crisp, but uploading dozens of huge, multi-megabyte files will absolutely cripple your site's speed and chew through your hosting bandwidth. It’s the same story in e-commerce, where slow-loading product photos have a direct, negative impact on sales.
Choosing the Right Format for the Job
The very first step in lossless image compression is simply starting with the best file format for the task at hand. Different formats are built for different things, and making the right choice from the get-go can make a massive difference in the final compressed size.
- JPEG (Joint Photographic Experts Group): This is your go-to for photographs and complex images with millions of colors. JPEGs use lossy compression, but you can set the quality high enough that the degradation is virtually invisible to the human eye while still getting a huge reduction in file size.
- PNG (Portable Network Graphics): Perfect for graphics with sharp lines, text, or transparent backgrounds—think logos and icons. PNG uses lossless compression, which means it preserves every single pixel perfectly.
- WebP: A modern format from Google that offers superior lossless and lossy compression. On average, it can create files that are 26% smaller than PNGs at the same visual quality.
If you want to go deeper on this, there’s a great guide on how to optimize images for web for speed and SEO that provides excellent context for prepping visuals for online use.
The need for this kind of efficiency isn't just a hunch; the numbers back it up. The market for data compression software is projected to hit USD 2,465.4 million by 2035, a demand fueled by the absolute explosion of digital content. In fact, global data creation is expected to reach a staggering 181 zettabytes by 2025.
In the world of e-commerce, where every millisecond counts, optimized images have been shown to load 40% faster, which can lead to a 7% boost in conversion rates.
Creating an Automated Optimization Workflow
Let's be honest, manually compressing every single image is a soul-crushing and inconsistent task. A much smarter way to handle it is to automate the entire process.
This is where a feature like Compresto’s Folder Monitoring comes in. It lets you set up a simple "drop and forget" workflow that keeps all of your team's assets standardized.
Just pick a specific folder on your Mac—let's call it "Ready for Web."
Whenever you export a new image from your editing software and save it into that folder, Compresto instantly gets to work, automatically compressing it in the background based on the rules you've already set. No extra clicks, no manual steps.
This simple setup ensures every single image is perfectly optimized before it ever gets uploaded. It's a powerful way to slash web hosting costs, dramatically improve site speed, and maintain a consistent quality standard across all your projects. You can turn a tedious, repetitive chore into a completely seamless background task.
Making PDFs Smaller for Effortless Sharing
PDFs are the universal language for documents, but they can quickly become bloated and a real pain to share. We've all been there: a marketing portfolio packed with high-res images or a technical manual filled with detailed graphics that just won't attach to an email. It’s frustrating for you and the person waiting for the file. The challenge is clear: how do you compress files without losing quality, ensuring text stays sharp and images remain crisp?
Imagine trying to send a 200MB client proposal. It takes forever to upload, and your client might struggle to even download it. Using a lossless approach, you can shrink that same file to under 20MB in seconds, making it a breeze to share and view. This isn’t about degrading your work; it's about making it accessible.
This kind of efficiency is a huge part of modern workflows. The global market for file compression software was valued at a whopping USD 1.5 billion in 2023 and is projected to hit USD 3.2 billion by 2032. Businesses can save 30-50% on bandwidth costs alone, which explains why tools that process files locally for privacy are gaining so much traction. You can dig into more insights about this growing market on dataintelo.com.
Key Strategies for Shrinking PDFs
To effectively shrink a PDF without any noticeable drop in quality, you need to understand what’s taking up all that space. Spoiler: it’s rarely the text. The real culprits are almost always embedded images, fonts, and other complex data.
A smart compression tool like Compresto doesn't just blindly crush your file. It intelligently targets these heavy elements:
- Image Optimization: It applies lossless compression to JPEGs and PNGs embedded inside the PDF, cutting down their size without adding blurriness or ugly artifacts.
- Data Redundancy Removal: The tool scans your document for duplicated information and objects, then gets rid of them to slim down the file's structure.
- Unused Data Cleanup: PDFs often carry around hidden metadata or leftover resources from the creation process. A good tool strips this junk out, trimming even more fat.
The best way to compress a PDF is to treat it like a container. You don’t need to change the text or layout; you just need to optimize the heavy items packed inside it. This preserves the document's professional appearance.
Handling Single vs. Multiple PDFs
Sometimes you just have one massive file to send off, but other times you're archiving an entire project folder. Your workflow dictates the best approach.
For a single document, a simple drag-and-drop into an app is all it takes. The software analyzes the file and automatically applies the best optimization settings. It’s a one-and-done deal.
But for bigger jobs, batch processing is a total game-changer. You can grab an entire directory of PDFs and compress them all at once with a single click. This ensures all your documents are consistently optimized and saves you a massive amount of manual effort. Every file you share will be lean and ready for fast delivery. And if you're working with other document types, like e-books, you can also learn how to convert from Word to EPUB to create efficiently sized digital publications.
Automating Your Compression Workflow on a Mac
Compressing files one by one works, but let's be honest, it's a drag. The real magic happens when you automate the process. Moving beyond single-file tweaks to a completely hands-free workflow is where you start reclaiming serious time and guarantee every single asset is perfectly optimized. This is how you compress files without losing quality at scale.
For anyone juggling deadlines—developers, marketers, content creators—setting up an automated system is a total game-changer. Just imagine a process humming along in the background, keeping your files lean and your projects flying, all without you having to lift a finger. This isn't some complex, tech-heavy setup; it's about using smart tools to handle the grunt work for you.
Set Up Folder Monitoring for Hands-Free Compression
One of the most effective automation tricks in the book is Folder Monitoring. The idea is simple but incredibly powerful. You pick a specific folder on your Mac—maybe you call it _for_upload or _Ready_for_Web—and tell your compression tool to keep an eye on it.
From that point on, any new file you save or drop into that folder gets automatically compressed in the background based on your rules. No more manual steps.
This "set it and forget it" approach fits perfectly into everyday workflows:
- Designers: Exporting final assets from Figma or Photoshop? Just send them straight to the monitored folder. They'll be instantly optimized and ready for the web.
- Content Creators: Got a batch of screen recordings or a folder full of social media clips? Drag them in, and they'll be ready to upload in moments.
- Developers: Saving screenshots for documentation into a shared folder? They'll all be consistently small and high-quality without a second thought.
If you want to get this set up, our guide on a Mac app to monitor a folder for automatic compression will walk you through everything you need to know.
Speed Up Your Workflow with Quick Actions
While Folder Monitoring is fantastic for batch jobs, sometimes you just need to compress one file, right now. This is where tools like a Drop Zone or a Raycast Extension become your best friend. They're built for pure speed, weaving compression directly into your daily habits.
The Drop Zone is a small, floating window that hangs out on your desktop. You can drag literally any file onto it—a video, a PDF, a whole folder of images—and it gets to work immediately. It's way faster than opening an app and hunting for the file you need.
For the keyboard warriors out there, a Raycast Extension lets you fire off compressions with a quick command. It’s an absolute must-have for power users who live by keyboard shortcuts.
This flowchart breaks down the basic idea of turning a bulky PDF into something small and easy to share.
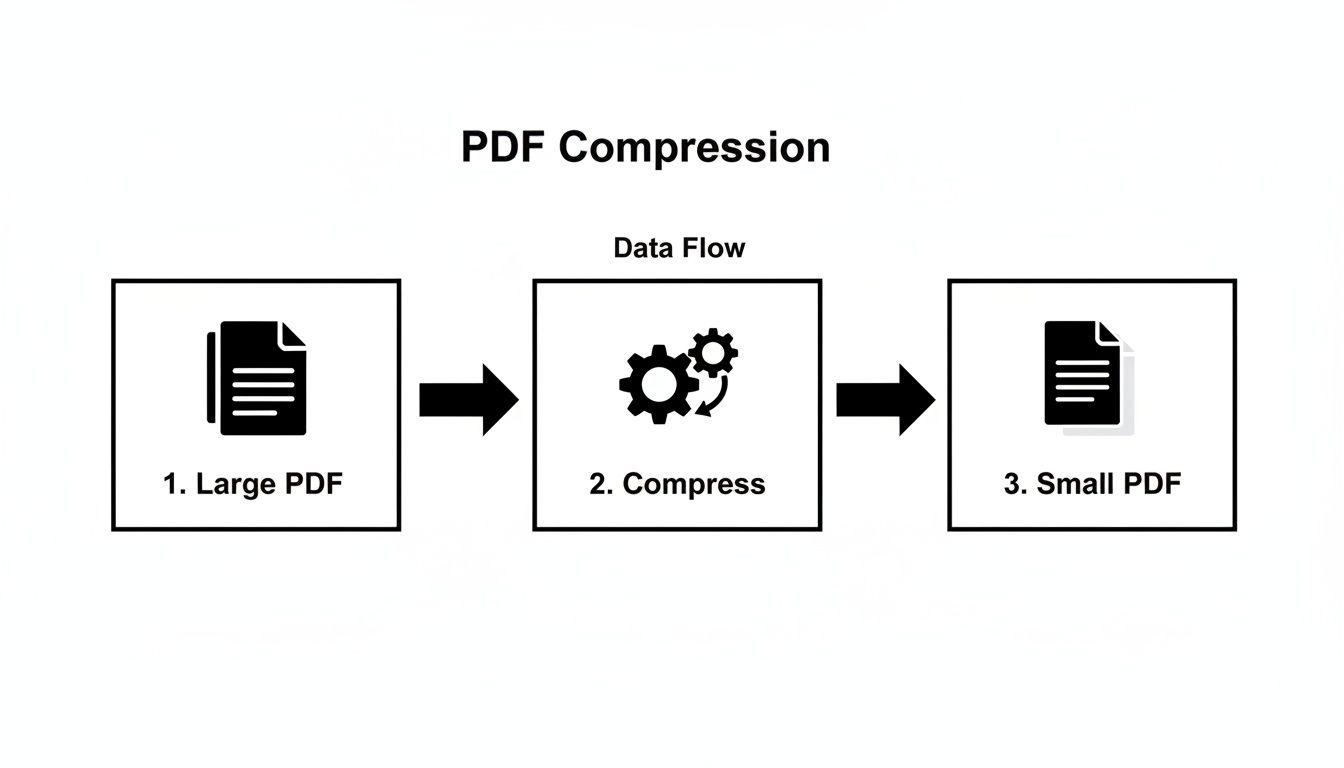
As you can see, the core of the process is an intelligent optimization engine that shrinks the file without messing up the actual content.
By combining these automated techniques, you build a resilient system that not only saves space but also standardizes your assets. Every file is consistently optimized, ensuring a professional and efficient output every time.
Common Questions About Lossless Compression
When you first dive into lossless compression, a few questions always seem to pop up. I get it. The claims can sound a little too good to be true. Let's walk through some of the most common ones I hear so you can get clear, practical answers for your own workflow.
Can I Really Shrink a File by 90% Without Losing Quality?
Yes, in some cases, you absolutely can. It sounds like magic, but it all comes down to how lossless algorithms work: they're masters at finding and eliminating redundant data.
Imagine a screen recording of a presentation. The background is static, right? Instead of storing the exact same pixel data for that background in every single frame, the algorithm just stores the changes—like your mouse moving or text appearing. That’s where the huge savings come from.
While a 90% reduction is the best-case scenario—think simple graphics or videos with lots of static elements—it's very common to see significant reductions of 50-80% on more complex files like detailed PDFs or busy videos. And all of this happens without any visual degradation.
The key is redundancy. The more repetitive data a file has (solid colors, unchanging backgrounds, repeated patterns), the more a lossless algorithm can shrink it down.
Will Compressing a Bunch of Files on My Mac Slow It Down?
This is a valid concern, especially if you're working on a tight deadline. The good news is that modern compression apps are built to be incredibly efficient, especially on Apple Silicon and modern Intel Macs. While the process definitely uses your CPU, it’s usually over in just a few seconds for most files.
The real advantage of a native app is that you aren't stuck waiting on slow internet speeds to upload and download massive files to a web tool. If you're running a huge batch job with hundreds of files, you might see a quick spike in system usage, but it's a world away from the frustrating wait times of cloud-based services.
Is a Desktop App Really Better Than an Online Tool?
For anyone handling sensitive information—client work, proprietary designs, or even just personal photos—a native desktop app isn't just better; it's the only responsible choice.
When you use an online tool, you're uploading your files to someone else's server. That opens up a whole host of privacy and security risks. You have no real idea who has access to your data, how it's being stored, or if it ever truly gets deleted.
A desktop app like Compresto keeps everything on your machine. This gives you three huge advantages:
- Total Privacy: Your files never leave your computer. Period.
- Blazing Speed: The process isn't bottlenecked by your internet connection.
- Offline Access: It works wherever you are, with or without Wi-Fi.
This combination of speed, security, and control makes it the clear winner for professional creators and anyone who takes their data privacy seriously.
Ready to reclaim your storage and speed up your workflow without sacrificing an ounce of quality? Try Compresto and see how easy it is to compress files without losing quality on your Mac. Get started today at https://compresto.app.