Compress GIF Without Losing Quality: Expert Tips & Tricks
So, you want to compress a GIF without wrecking its quality. The secret? You have to use lossless compression. This clever method shrinks the file size without touching a single pixel, keeping your animation perfectly sharp.
It works by optimizing the data already inside the GIF, like its color palette and animation frames. We'll walk you through exactly how it’s done.
How to Shrink GIFs While Keeping Them Sharp
The whole idea of making a file smaller without hurting its quality might sound a little too good to be true, but it’s actually the core principle of how GIFs were designed from the start.
The magic comes down to two very different ways of compressing files: lossless and lossy. Getting a handle on this difference is the first step to creating GIFs that are both small and crystal-clear. When you compress a GIF without losing quality, you aren't throwing any data away—you're just rearranging it more efficiently.
Lossless vs. Lossy Compression
Think of lossless compression like packing a suitcase perfectly. All your clothes are still in there, just organized so they take up less space. The process finds patterns and repetitive data in the file and rewrites them in a more compact way. When you open the file, it all gets put back together exactly as it was, pixel for pixel.
Lossy compression, on the other hand, is like leaving a few shirts behind to make your suitcase lighter. It permanently discards data it decides is "unnecessary." This can make files a lot smaller, but it always comes at a cost. You'll see it as blurriness, blocky-looking artifacts, or weird color shifts.
The GIF format itself, which has been around since 1987, was built on a lossless foundation. It uses an algorithm that shrinks file sizes while keeping every pixel intact. This is a huge part of why GIFs have stuck around for decades as the go-to for simple animations. You can dive into the original GIF specs on Wikipedia if you're curious.
For anyone who wants to compress a GIF without losing quality, sticking with lossless methods is the only way to go.
Lossless vs Lossy GIF Compression At a Glance
To make the choice even clearer, here’s a quick comparison of how lossless and lossy methods stack up when you're working with GIFs.
| Feature | Lossless Compression | Lossy Compression |
|---|---|---|
| Quality | Identical to the original; no data is lost. | Reduced; irreversible data loss occurs. |
| File Size Reduction | Moderate (typically 20-50%). | Significant (can be over 80%). |
| Best Use Case | When visual integrity is critical (logos, UI elements). | When a very small file size is the top priority. |
| Visual Artifacts | None. | Possible blurriness, pixelation, or banding. |
By choosing lossless techniques, you guarantee your optimized GIF will look just as crisp as the original. The only difference is that it will load a whole lot faster.
Prepare Your GIF for Maximum Compression

Before you even think about uploading your GIF to a compression tool, there are a few smart moves you can make to get a much smaller file. Think of it as prep work. This is the groundwork that lets a tool like Compresto work its magic, ensuring you can compress your GIF without losing any noticeable quality. Honestly, these foundational steps often give you the biggest bang for your buck.
The goal here is simple: get rid of all the unnecessary data before the main compression kicks in. This usually means trimming extra frames, cropping out dead space, and being smart about your color palette. Each of these tweaks chips away at the file size without hurting the visual information your audience actually cares about.
Optimize Your Color Palette
One of the most effective ways to shrink a GIF is to reduce its color count. The GIF format can handle a maximum of 256 colors, but let's be real—most animations don't need anywhere near that many to look sharp. Every color you remove directly cuts down the amount of data in the file.
For instance, a simple animation of a user interface or a logo probably only uses a handful of brand colors. In that scenario, dropping the color palette from 256 down to 64 or even 32 can slash the file size with zero visible impact. For more complex, photo-realistic GIFs, you might only be able to go down to 128 colors before you start seeing weird artifacts. But even that is a worthwhile optimization.
The key is finding that sweet spot. You want to reduce the color count just enough to make a real difference in file size, but not so much that you create distracting visual flaws. Always preview your changes to find the right balance.
Trim Frames and Crop Dimensions
Another incredibly powerful technique is to cut out redundant information. There are two main ways to do this, and both are super effective.
- Frame Trimming: So many GIFs have identical frames at the beginning or end of their loop. Lopping off these duplicates is pure savings. It shortens the animation's data load without changing the motion one bit. Easy win.
- Strategic Cropping: Does your GIF have a bunch of static, empty space around the main action? Crop it out. Every single pixel adds to the total file size, especially when it's being animated frame after frame. Focusing only on the essential moving parts is a simple move that pays off big time.
Getting these pre-compression edits right is fundamental for anyone who's serious about web performance. If you want to dive deeper into getting your files ready for optimization, you can check out our other file size reduction tips for all sorts of formats.
A Hands-On Guide to Online Compression Tools
Alright, let's get our hands dirty and put these compression ideas into practice. Plenty of online tools offer a simple "upload and click" experience, but to really compress a GIF without losing quality, we need to be more deliberate.
Think about a common task: you’ve recorded your screen for a software tutorial and want to pop it into a blog post. The original GIF is a bit heavy, but you need to shrink it while keeping all the text and user interface elements perfectly crisp. This is exactly where mastering the settings pays off.
The Real Workflow for Lossless Compression
Instead of just smashing the first "optimize" button you see, preserving quality means taking a more thoughtful approach. The goal here is to use lossless techniques—smart methods that trim file size without messing up the visual information.
This flowchart breaks down the basic process.
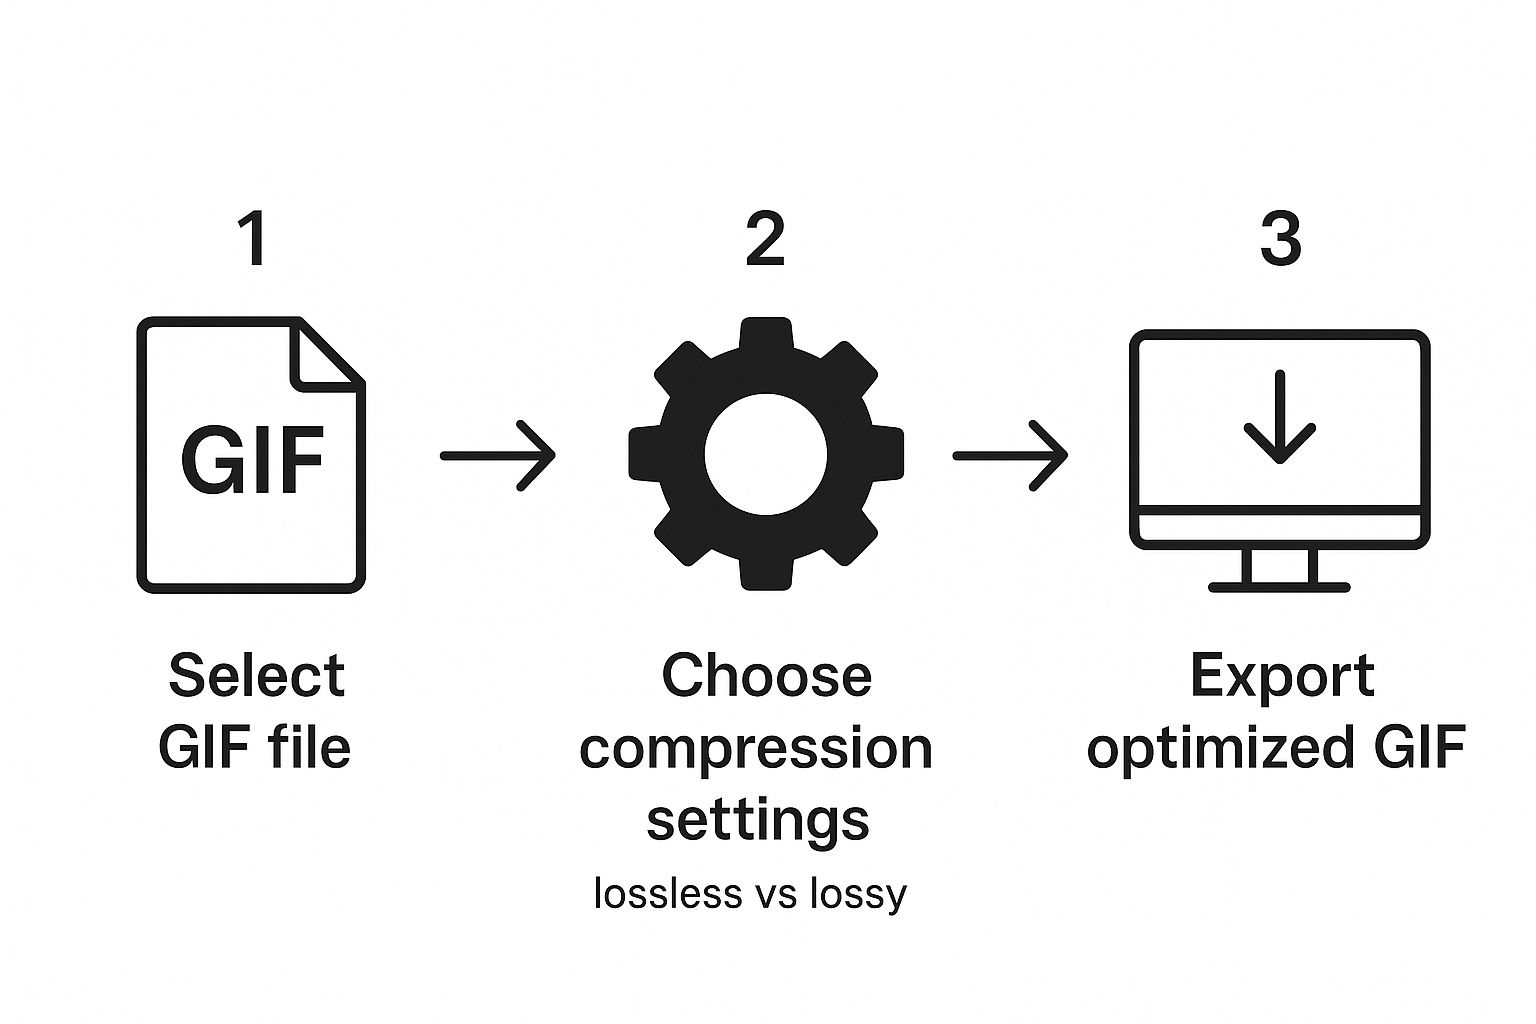
As the diagram shows, the most important part is choosing your compression settings. That’s what directly shapes the final GIF.
Truly effective optimization comes from combining a few different methods. From my experience, a well-executed compression can slash GIF file sizes by 20-50% with zero noticeable drop in quality. You get there by using techniques like color palette reduction and frame optimization, which cut down data while leaving the pixels alone.
Here are the key settings you'll want to look for in most online tools:
- Compression Method: Always hunt for a lossless or LZW option. This is the absolute foundation for preventing pixel mush.
- Frame Optimization: Look for settings like "Remove duplicate frames" or "Optimize transparency." This is a clever trick that merges identical areas between frames, which can dramatically reduce the file's data load.
- Color Reduction: This one requires a careful touch. Try lowering the number of colors. For something like a software tutorial GIF, you can often drop from 256 to 128 or even 64 colors before you'd ever spot a difference.
By combining these adjustments, you move from a blunt compression to a surgical optimization. You're not just making the file smaller; you're making it smarter and more efficient. For a deeper look at automated optimization, check out our guide on the Compresto auto-compress feature.
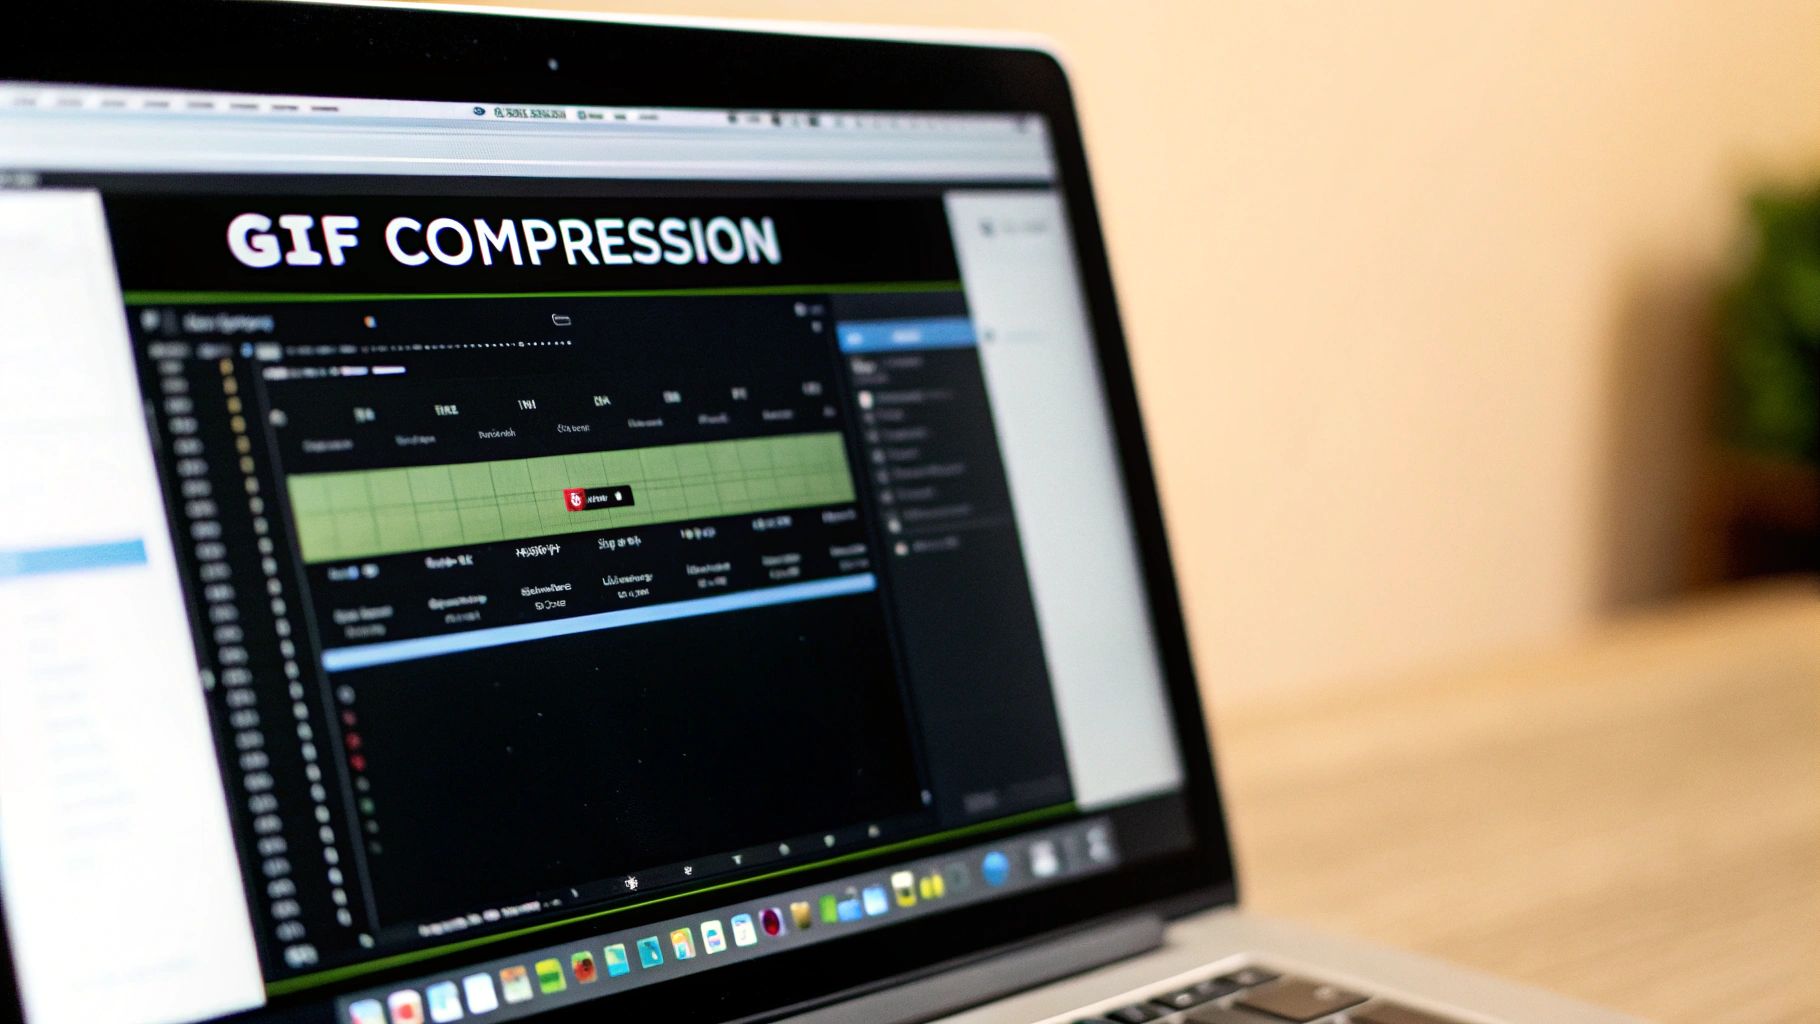
The screenshot below shows a pretty standard interface for an online GIF optimizer. You can see the different compression levels and optimization methods available. Your mission is to find the right blend that shrinks the file size without sacrificing that sharp, professional look.
When every last kilobyte counts, it's time to roll up your sleeves and go beyond the simple online tools. For those moments where you need maximum compression without wrecking your GIF, desktop software like Adobe Photoshop or the open-source hero, GIMP, gives you the granular control that web-based optimizers just can’t offer.
This is where you get to manually compress a GIF without losing quality in ways automated tools can only dream of. By diving into the individual frames and color data, you can make surgical cuts to the file size.
Master Inter-Frame Optimization
One of the most powerful pro techniques is inter-frame optimization, sometimes called frame merging. Instead of letting an algorithm guess which parts of your GIF are static, you can go in and do it yourself by identifying and deleting redundant frames. It's especially effective for GIFs with pauses or mostly still elements.
Imagine a GIF of someone typing. Their hands move, but the desk and computer screen stay put. A pro tool lets you treat that background as a single static layer, only updating the pixels that actually change—the hands and the text. This stops the software from redrawing the entire scene in every frame, which is a massive source of file bloat.
By storing only the changes between frames instead of the entire frame each time, you can slash the data payload. This is the single biggest advantage of using desktop software for complex animations.
Strategically Use Dithering and Lossy Settings
Another advanced trick is to get comfortable with dithering. Dithering is a clever technique that creates the illusion of more colors by arranging pixels from your limited palette in a specific pattern. It allows you to be aggressive with color reduction—say, dropping from 256 colors down to 32—without your GIF looking horribly flat and banded.
When you get it right, dithering can make a 32-color GIF look almost as good as a 128-color one, but at a tiny fraction of the file size.
Finally, while the goal is often lossless quality, sometimes a tiny, controlled bit of lossy compression is the smartest trade-off you can make. In tools like Photoshop, you can apply a very subtle lossy setting, maybe just 5-10%.
- When to Use It: This works wonders for GIFs made from photos, which often have complex gradients and textures.
- The Result: You can often shave off an additional 30-40% from the file size with a quality reduction so minimal it’s practically invisible to the naked eye.
This measured approach gives you the best of both worlds: a huge drop in file size with almost no perceptible hit to visual quality. It's a professional-grade secret for getting truly optimized GIFs.
Common Mistakes That Ruin GIF Quality
It’s a painfully familiar story: you find the perfect GIF, run it through a compressor, and end up with a pixelated mess that’s barely smaller than what you started with. If you want to compress a GIF without losing quality, you first have to know what not to do. Avoiding these common traps is the real secret to getting clean, lightweight animations every time.
One of the biggest culprits is getting too aggressive with the color palette. While trimming the 256 colors available in a GIF is a standard trick, going overboard creates hideous color banding. This is when smooth gradients turn into chunky, distinct blocks of color, making your GIF look cheap and unprofessional.
Forgetting Key Optimizations
Another major pitfall is forgetting to optimize the animation frames. Think about it: many GIFs have moments where nothing moves. A smart compression tool should spot these duplicate frames and toss them out, but it's a step that often gets missed in a rush.
Leaving those extra frames in is like packing a suitcase with five identical shirts—you're just wasting space. Each redundant frame adds useless data that slows everything down.
The whole point of efficient GIF compression is to store only the changes between frames. When you skip frame optimization, you’re forcing the file to redraw the entire image over and over, completely defeating the purpose of making a lightweight animation.
On top of that, a lot of people simply use the wrong tool for the job.
- Using a JPEG Compressor: This is a recipe for disaster. JPEGs are designed for photos and use a type of compression that will absolutely wreck the sharp lines and limited colors of a typical GIF. The result? A blurry, artifact-riddled nightmare.
- Ignoring Transparency: A GIF with a solid background is much bigger than one with a transparent background. Proper transparency optimization can dramatically shrink your file size by telling the animation which pixels don't need to be redrawn in each frame.
By sidestepping these common blunders, you’re already well on your way to GIF compression success. You can dive deeper into how these techniques have evolved in our article on GIF compression history and features.
Frequently Asked Questions About GIF Compression
Even when you follow all the right steps, compressing GIFs can sometimes throw you a curveball. If you've run into a snag trying to compress a GIF without losing quality, you're not alone. Let's tackle some of the most common questions that pop up.
Why Does My GIF Look Bad After Lossless Compression?
This is a classic head-scratcher. You chose "lossless" for a reason, right? So why does your GIF look fuzzy or artifacted? In most cases, the issue isn't the compression—it's the source file you started with.
Lossless compression is perfectly faithful. It preserves everything in the original file, including any existing blurriness, pixelation, or other flaws. If you start with a low-quality GIF, you’ll just end up with a smaller, low-quality GIF.
Another potential culprit is aggressive color reduction. Some tools might automatically slash the color palette to shrink the file size, even on a supposedly lossless setting. This can introduce that ugly, blocky color banding.
The golden rule here is to always start with the highest-quality source video or image sequence you can get your hands on. A clean input is the only way to get a clean output.
Is It Better to Use a GIF or an MP4 for Animations?
Ah, the great debate. The truth is, it completely depends on what you're trying to show. There's no single right answer, just the right tool for the job.
- GIFs are perfect for short, punchy animations with a limited color palette. Think UI elements reacting to a click, simple icons, or brand logos. For these, a well-optimized GIF is king.
- MP4s are the clear winner for anything that looks like a video clip. If your animation is longer, has complex scenes, or features smooth gradients and rich colors, an MP4 will give you a drastically smaller file size with much better quality.
Don't try to cram a complex video clip into a GIF. You'll end up with a massive, poor-quality file. Choosing the right format from the start is half the battle.
What Is the Ideal Number of Colors for a GIF?
There’s no magic number here—it’s a balancing act that depends entirely on your specific animation. The best way to find out is to experiment.
Start with the maximum of 256 colors and see how it looks. From there, work your way down.
Try dropping it to 128, then 64, and maybe even 32. Check the preview at each step. For simple, flat-style graphics, you can often get away with 64 colors and achieve a fantastic balance of quality and file size. For GIFs made from real-world photos or videos, you’ll probably want to stick closer to 128 or 256 to avoid that noticeable color banding.
Ready to take control of your file sizes? Compresto offers powerful, quality-preserving compression for GIFs, images, videos, and more, right on your macOS desktop. Start optimizing your workflow today by visiting https://compresto.app.