Boost Mac Performance: clean up mac hard drive quickly
Before you start frantically dragging files to the Trash to clean up your Mac hard drive, just pause for a moment. A successful cleanup isn't about random deletion; it’s a strategic process. It starts with backing up your data, figuring out what's actually eating up your storage, and then making a smart plan to deal with it.
This careful approach is the difference between reclaiming gigabytes of useful space and accidentally deleting something you’ll regret later.
Your Mac Is Full? Here's What to Do Before Deleting Anything
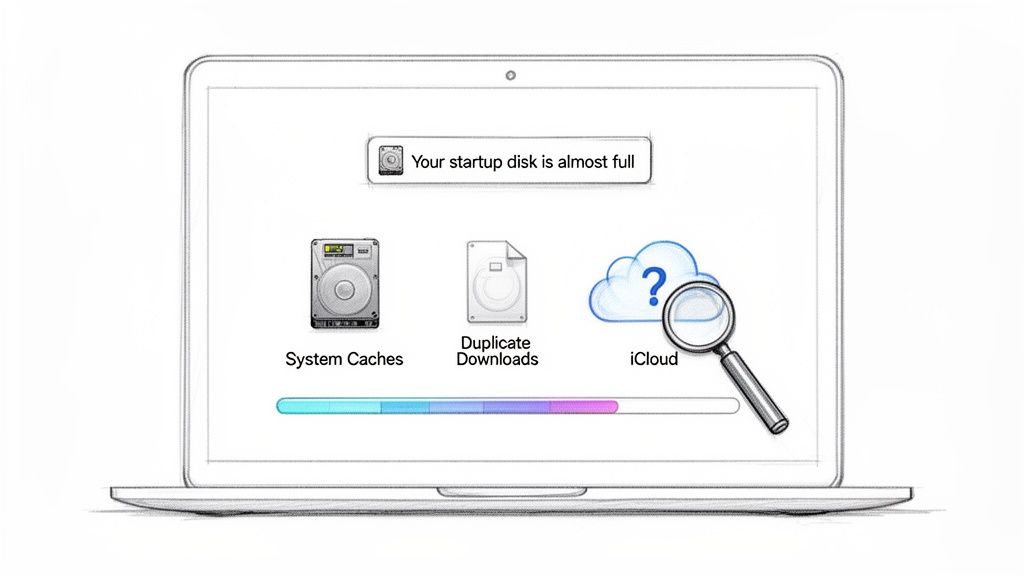
We’ve all been there. That dreaded "Your startup disk is almost full" notification pops up, bringing your workflow to a screeching halt. The immediate impulse is to start purging folders, but that reactive approach rarely ends well. A truly effective cleanup begins with understanding, not deleting.
The absolute first step is safety. Before you change a single thing, run a full system backup. Time Machine is built-in and works great, but any trusted solution will do. Think of it as your digital insurance policy—a complete safety net that lets you restore any file you might accidentally toss. You hope you won't need it, but you'll be incredibly glad it's there if you do.
This table breaks down the essential prep work. Running through this quick checklist ensures you're ready for a safe and effective cleanup.
Mac Storage Cleanup Safety Checklist
| Action Item | Why It's Important | Recommended Tool |
|---|---|---|
| Full System Backup | Creates a complete, restorable copy of your Mac. It's your ultimate undo button if you delete the wrong file. | Time Machine (built-in) or a third-party app like Carbon Copy Cloner. |
| Diagnose Storage | Identifies what's really using your disk space, including hidden files, caches, and system data. | Your Mac’s built-in Storage Management tool. |
| Formulate a Plan | Decide what to delete, what to compress, and what to offload to an external drive or cloud storage before you act. | A simple text note or checklist. |
Completing these steps turns a chaotic guessing game into a methodical, stress-free process.
Understand What’s Really Hogging Your Space
The way macOS reports storage can be surprisingly tricky, especially with iCloud deeply integrated into the system. Files might look like they're on your Mac but are actually just cloud placeholders, while massive system caches and hidden files are gobbling up gigabytes without you even knowing.
It’s a classic scenario: your 1TB SSD shows 600GB used, but when you add up your user folders, it comes to 735GB. What gives? This kind of confusing math often points to things like iCloud's Mobile Documents folder, which can look enormous in your Library but contains many cloud-synced files that aren't taking up much local space. You're not alone in this—plenty of Mac users have run into the same confusing discrepancies.
The simple flow below highlights the essential steps to take before you start the real work of cleaning your Mac's hard drive.
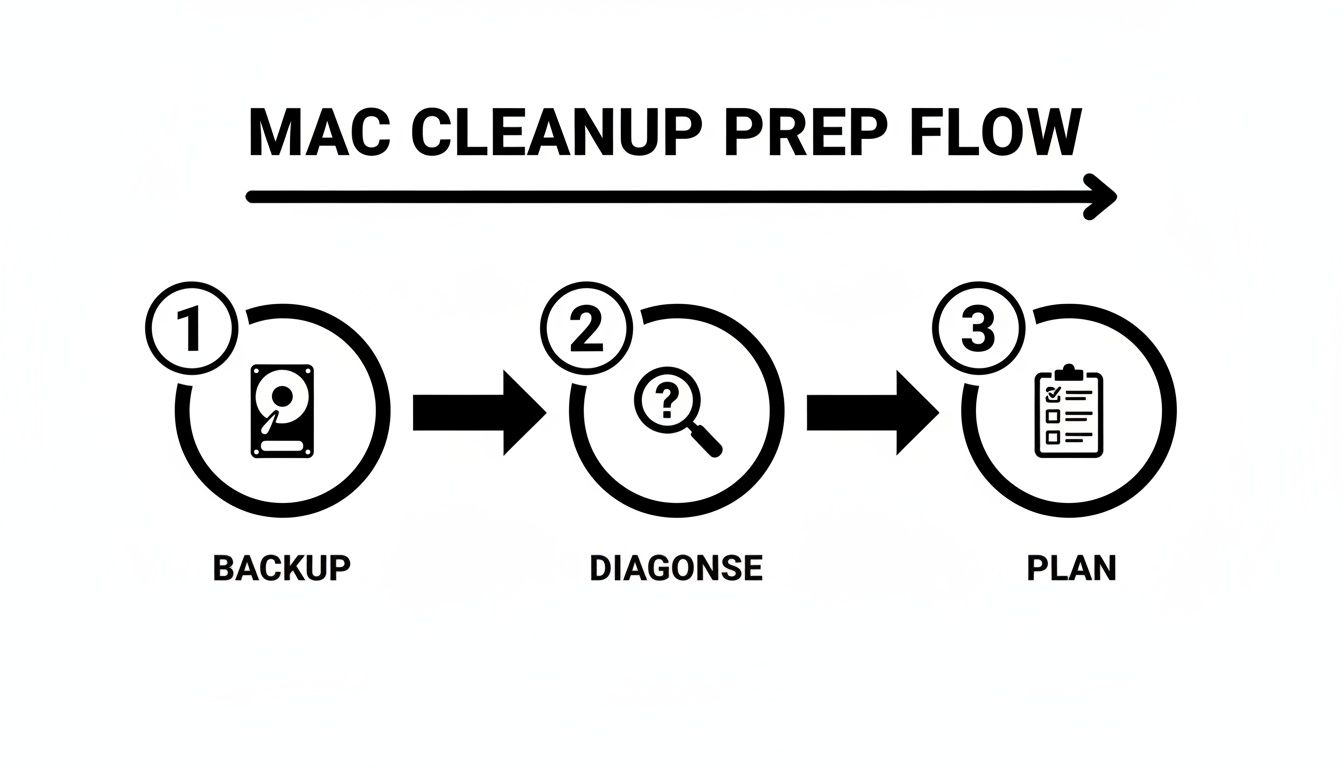
This Backup, Diagnose, Plan approach hammers home the point that preparation is every bit as important as the cleanup itself.
Use Your Mac’s Built-In Tools First
Your Mac already has a powerful, and often overlooked, tool to get you started. Just head to the Apple menu > About This Mac > Storage > Manage. This utility gives you a clear, categorized overview of your disk usage and even provides some initial recommendations for optimization.
For a deeper dive into this feature, check out our complete guide on how to check storage on Mac.
Before you delete a single file, your goal is clarity. A few minutes spent diagnosing the problem will save you hours of guesswork and prevent the accidental deletion of important documents or critical system files. A proper diagnosis is the foundation of any effective cleanup.
How To Find The Files Hogging The Most Space
It’s an age-old Mac problem: gigabytes of storage held hostage by a handful of massive files you've completely forgotten about. To really clean up your Mac hard drive, your first mission is to hunt down these digital behemoths. We can move beyond the basic storage overview and dig into Finder's powerful—but often overlooked—search tools.
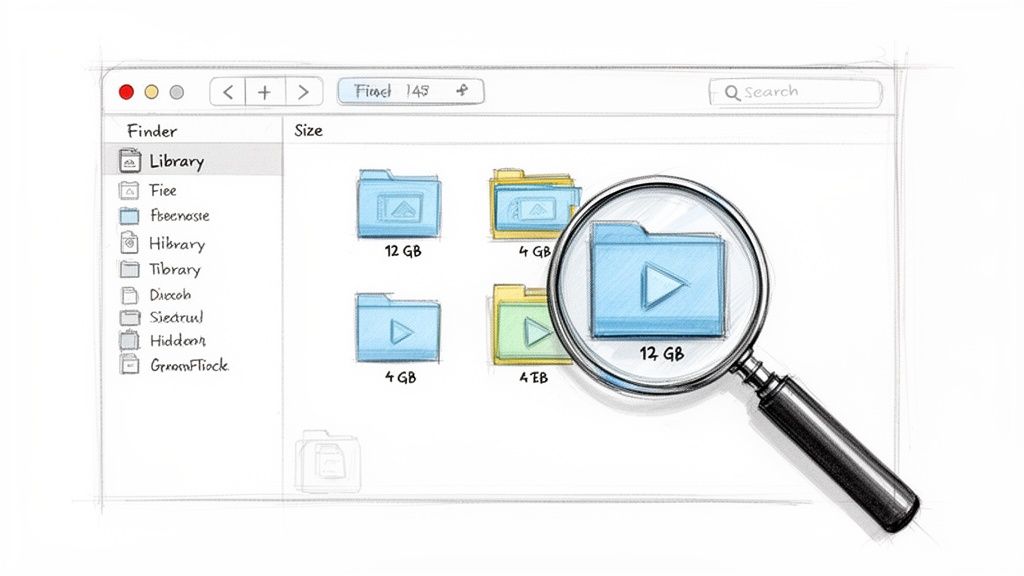
Pop open a new Finder window and hit Command + F. This brings up the search bar. Click the first dropdown menu, select "Kind," then "Other..." to see a massive list of search attributes. Find "File Size," check the box next to it, and you'll add it to your main search menu for good.
Now for the fun part. You can create a search rule like "File Size is greater than 1 GB." Instantly, your Mac will cough up a list of every single file over a gigabyte. You'll be amazed at what surfaces—old project ZIP archives, forgotten movie downloads, and lengthy screen recordings are the usual suspects.
Going Beyond The Obvious Folders
Sure, your Documents and Downloads folders are the first places to check, but some of the biggest space hogs live in hidden directories. The user Library folder, for example, can quietly pile up gigabytes of application caches and old support files.
To get there, open Finder, click "Go" in the menu bar, then hold down the Option (⌥) key and select "Library." Be careful in here—deleting the wrong file can cause real problems. Look for folders like ~/Library/Caches or ~/Library/Application Support and sort them by size to see which apps are the worst offenders.
I once helped a friend who discovered their
~/Library/Messagesfolder was eating over 23GB of space. Because they synced messages via iCloud, years of attachments, photos, and videos were stored in a hidden Photos library for Messages they didn't even know existed.
Visualizing Your Disk Space
Sometimes, staring at a list of files just doesn't cut it. A visual map of your storage can reveal problem areas instantly. This is where third-party disk analyzer apps are worth their weight in gold.
Tools like GrandPerspective, OmniDiskSweeper, or Disk Graph scan your drive and create an interactive map where larger files appear as bigger blocks. This approach is incredibly effective for a few reasons:
- Intuitive Spotting: A giant block on the map is an immediate red flag. You know exactly what to investigate.
- Finding Duplicates: It’s easy to spot multiple large blocks of the same color and size, which often points to duplicate project files or backups you can ditch.
- Revealing Hidden Culprits: These apps scan your entire user directory, often surfacing massive files in hidden folders that a manual search would have missed.
Just spending 15 minutes with one of these tools can help you reclaim a surprising amount of space. If your Mac is sluggish and you keep seeing those dreaded warnings, it’s a clear sign your storage space is running out. Visual tools will show you exactly why.
What You Can Safely Delete From Your Mac
Now that you have a clear picture of what’s eating up your storage, it’s time for the most satisfying part: getting rid of the junk. But the key here is to be strategic. You need to purge files without touching anything that could mess with your Mac's stability.
This isn’t about blindly dragging folders to the Trash. Think of it as a series of surgical strikes on the biggest, most cluttered areas of your drive.
Purging Caches And Unused Language Files
Every app you use creates temporary cache files to help it run faster. Over time, this digital sediment builds up, especially from apps you barely use anymore. Clearing it out is a quick win.
You can find your main user cache by opening Finder, clicking "Go" in the top menu, selecting "Go to Folder," and typing in ~/Library/Caches. You’ll see folders named after your apps. You can safely delete the contents of these folders, but leave the folders themselves intact.
Another easy target is language files. Most apps come bundled with translations for dozens of languages you’ll never speak, which can quietly consume hundreds of megabytes.
- Application Caches: These are temporary files that apps use. Deleting them is perfectly safe; the app will just recreate them as needed.
- Language Files: Unused translations bundled with apps. Removing them has zero impact on how your Mac works if you only use it in one or two languages.
- Old iOS Backups: If you’ve ever backed up an iPhone or iPad to your Mac, those files can be enormous. You can find them under System Settings > General > Storage > iOS Files.
A word of caution: while user caches (
~/Library/Caches) are generally safe to clear, be very careful with system-level cache folders. Sticking to your user directory is the best way to avoid any potential headaches with macOS.
The Digital Junk Drawer: Your Downloads Folder
Let's be honest: the Downloads folder is the digital equivalent of a junk drawer. It’s a chaotic mix of installers, old PDFs, random images, and forgotten ZIP files. Over time, it can easily become one of the single largest folders on your Mac.
Be ruthless here. Sort the folder by "Date Added" and start with the oldest stuff. You’ll probably find installers for apps you set up years ago or documents you only needed for a day. Drag them to the Trash without a second thought.
If you're serious about making sure deleted files are truly gone, learning how to wipe a computer hard drive will give you a deeper understanding of data removal beyond just emptying the Trash.
Uninstalling Applications The Right Way
Just dragging an app icon to the Trash often leaves behind gigabytes of associated files scattered across your system. To properly uninstall an app and really clean up your Mac hard drive, you have to hunt down its leftover support files, preferences, and caches.
These orphaned files usually live in a few key locations inside your hidden Library folder:
~/Library/Application Support/~/Library/Preferences/~/Library/Caches/
Scan these locations for folders with the application's name (or the developer's name) and delete them. This methodical approach is what truly reclaims every last bit of space an app was hogging.
Compressing Files To Reclaim Space Without Deleting
For a lot of us, especially creatives and other professionals, just hitting "delete" on large files isn't a realistic way to clean up your Mac hard drive. Those massive video projects, high-resolution photo libraries, and layered design files are often critical assets or your life's work. This is where smart compression comes in—it's your best friend for reclaiming space.
Instead of trashing your files, you can shrink them down dramatically, often without a noticeable drop in quality. It’s like vacuum-sealing your digital closet. Everything’s still there, just taking up a fraction of the room and freeing up gigabytes of precious SSD space. This is the perfect strategy for archiving finished projects or just taming an out-of-control media library.
A Modern Workflow for File Compression
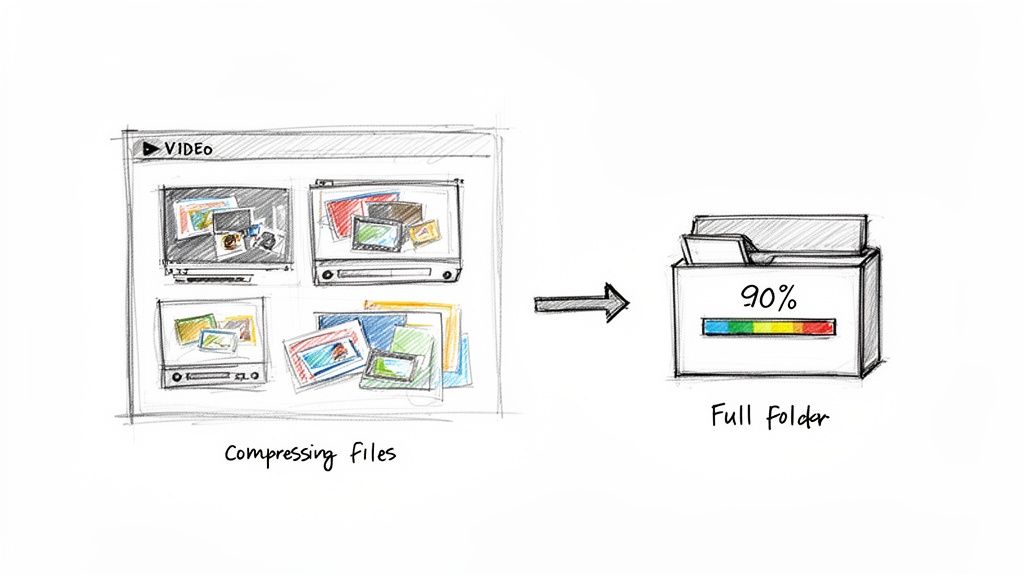
The right tool can turn a tedious chore into a quick, almost effortless process. Modern apps like Compresto are built for exactly this, letting you process entire folders of media in minutes. Imagine squashing a folder of 4K video clips by up to 90% with just a few clicks.
That’s what a simple, drag-and-drop interface makes possible.
You literally just drag your files into the app, and it gets to work. This makes it incredibly accessible, even if you’re not a tech wizard. When you're dealing with hundreds or even thousands of files at once, that kind of efficiency is a lifesaver.
And here’s a crucial point: with a modern compression app, all the processing happens right on your Mac. Your files never get uploaded to a server, which means your data stays private and secure. For anyone dealing with client work or sensitive personal media, that’s non-negotiable.
A video editor, for example, can completely change their workflow with this. Once a project is delivered, they can compress the entire project folder—source footage, renders, and all. Hundreds of gigabytes are reclaimed instantly. The project is safely archived and accessible, but it's no longer crippling their available storage.
Putting Compression Into Practice
Let’s walk through a real-world example. A social media manager has a folder packed with video assets for an upcoming campaign. The raw files are huge, making them a pain to upload and share with the team.
Using a batch compression tool, they can shrink the entire folder in one go.
- Original Size: A folder with 15 video clips, totaling 24 GB.
- Action: Drag the whole folder into Compresto and choose a web-optimized preset.
- Result: In less than ten minutes, the folder is compressed to just 2.8 GB.
The quality is still perfect for social media, uploads are blazing fast, and over 21 GB of disk space is immediately freed up. This is a practical, sustainable way to manage large media files without constantly shelling out for more storage. For a deeper dive, our guide on how to compress files for Mac has even more tips and techniques.
This same logic applies to designers compressing their portfolios, developers shrinking app assets, or anyone looking to archive years of family photos and videos. It’s a proactive strategy for keeping your hard drive lean without having to part with the files you need.
Keeping Your Mac Clean With Smart Automation
A one-time digital declutter feels great, but the real victory is keeping that mess from ever coming back. To truly clean up your Mac hard drive for good, you need to build sustainable habits and lean on smart automation. This is how you shift from reactive, panicked cleanups to a proactive maintenance routine that runs quietly in the background, keeping your storage lean without you having to constantly think about it.
Think of it as setting up a self-cleaning system for your Mac. Instead of letting digital dust bunnies pile up in forgotten corners of your hard drive, you create simple rules that handle them automatically. This is the secret to making sure your Mac stays fast and responsive, and it keeps those dreaded "startup disk is almost full" warnings from becoming a regular headache.
Use Your Mac's Built-In Helpers
Your Mac already has some basic automation tools baked right in, and they're surprisingly useful. You can find them by heading to System Settings > General > Storage. Right below the storage bar, you'll see a few recommendations. These are simple but effective "set it and forget it" options.
- Optimize Storage: This one is a no-brainer. It automatically removes movies and TV shows from the Apple TV app after you’ve watched them. It’s perfect for clearing out those huge video files you're probably not going to watch again on your Mac anyway.
- Empty Trash Automatically: Flip this switch, and your Mac will permanently delete anything that's been sitting in the Trash for more than 30 days. It’s a simple but brilliant way to stop your Trash from becoming just another massive folder of forgotten files.
Just activating these two settings is a fantastic first step. You're automating some of the most common cleanup tasks without needing to install a single thing.
Advanced Automation With Folder Monitoring
For a more powerful, hands-off approach, you can use tools that watch specific folders and take action for you. This is where apps like Compresto really shine with features like Folder Monitoring. The concept is simple, but the impact on your workflow can be huge.
You just designate a specific folder—maybe you create one called "To Be Compressed" on your Desktop. From then on, any file you drop into it—a massive video export, a batch of RAW photos, a chunky PDF—gets automatically compressed based on rules you’ve already set.
This workflow is a game-changer for content creators. Imagine exporting a video and just dropping it into that monitored folder. By the time you’re ready to upload it to YouTube or send it to a client, Compresto has already shrunk it down in the background, saving you time and disk space without an extra thought.
This simple trick transforms a manual chore into a seamless background process. You build the habit of saving certain files to one specific place, and the automation handles the rest, ensuring your new files are always as space-efficient as possible. It’s the ultimate strategy for keeping a clean hard drive over the long haul.
Deciding between a one-off manual purge and setting up an automated system comes down to your goals. Are you looking for a quick fix or a sustainable solution?
Manual vs. Automated Mac Cleanup
| Cleanup Method | Effort Required | Long-Term Effectiveness | Best For |
|---|---|---|---|
| Manual Cleanup | High initial effort, requires discipline to repeat regularly. | Low. Without consistent effort, clutter inevitably returns. | Quick, one-time space recovery before a big project or OS update. |
| Automated Maintenance | Low initial setup, then runs passively in the background. | High. Prevents clutter from accumulating, ensuring sustained performance. | Maintaining a consistently clean and fast Mac with minimal ongoing effort. |
While a manual cleanup provides immediate satisfaction, it's the automated systems that deliver lasting results. By taking a few minutes to set up smart workflows, you invest in your Mac's long-term health and your own peace of mind.
Common Questions About Cleaning Your Mac Hard Drive
Even with a solid plan, questions always come up when you start to clean up your Mac hard drive. Following a guide is one thing, but dealing with the specific quirks and warnings your own system throws at you is another. This section tackles the most frequent concerns we hear from Mac users.
We'll give you clear, direct answers to help you push past common hurdles and finish your cleanup with confidence. Think of this as your quick-reference guide for those "wait, what about this?" moments.
What Is System Data And Can I Delete It?
"System Data" is easily one of the most frustrating categories in macOS Storage Management. It's a mysterious catch-all for everything that doesn't fit neatly into another bucket, like application caches, temporary files, and other random data your system generates.
While you can't just drag the entire "System Data" folder to the Trash, you can definitely shrink it. Many of the cache files we talked about earlier—like the ones in ~/Library/Caches—are part of this total. Clearing them out is one of the safest ways to bring this number down.
Another huge contributor is Time Machine snapshots. These are local backups your Mac keeps on its internal drive, even when your external backup drive isn't connected. macOS is supposed to delete them automatically when space gets low, but sometimes it needs a little nudge.
You don't have to hunt down snapshots and delete them manually. A simple trick is to connect your external drive and start a new Time Machine backup. This process often clears out the old local snapshots automatically, freeing up gigabytes of "System Data" in just a few minutes.
How Often Should I Clean My Mac?
The honest answer? It completely depends on how you use your Mac. There’s no single right answer, but here are a few good rules of thumb to go by:
- For Heavy Users: If you're a video editor, designer, or developer constantly juggling large files, a quick cleanup once a month is a smart habit to get into.
- For Average Users: If your Mac is mostly for browsing the web, sending emails, and working with documents, a more thorough cleaning every three to six months is usually plenty.
- When You See The Signs: The most important indicator is your Mac itself. If you start seeing "Your disk is almost full" warnings or notice your machine getting sluggish, it’s time for a cleanup, no matter when you last did one.
Setting up a few automated maintenance tasks, like having the Trash empty itself automatically, can really extend the time between manual deep cleans.
Will Deleting Files Speed Up My Mac?
Yes, in many cases, it absolutely will. When your hard drive (especially an SSD) gets close to full, its performance can take a nosedive. The operating system needs free space to work its magic with virtual memory (swap files) and other temporary data.
When there isn't enough room, your Mac has to work much harder to juggle data, which leads to that frustrating slowdown you feel. Freeing up at least 15-20% of your total disk space gives macOS the breathing room it needs to operate at peak performance.
Getting rid of large, unnecessary files and clearing out old caches are two of the most effective ways to not only reclaim space but also restore your Mac's snappiness. It’s a direct and impactful way to improve your day-to-day experience.
Ready to reclaim your disk space without deleting precious files? Compresto offers powerful, local compression for videos, images, and documents with a simple drag-and-drop interface. Try it today and see how much space you can save. Learn more about Compresto.