A Practical Guide to Video Compression on Mac
Trying to email a massive 4K video from your Mac can feel like fitting a square peg in a round hole. Between email size limits and painfully slow uploads, it’s often a non-starter. This is where mastering video compression on Mac comes in—it’s the key to shrinking your files for easy sharing while clawing back precious storage space. For anyone who works with video, this isn't just a nice-to-have skill; it's essential.
Why Mastering Video Compression on Your Mac Matters
If you've ever been defeated by a "file too large" error, you already know the frustration. High-quality video, especially 4K footage, creates gigantic files that are a nightmare to share or archive. Learning to compress these files isn't just a technical chore—it’s a workflow superpower that unlocks speed and efficiency.

This problem is anything but new. Apple has been chipping away at it for decades. When QuickTime first launched back in 1991, the average Mac had a hard drive of about 40 MB, yet uncompressed video needed gigabytes. The only way to make video feasible on personal computers was through aggressive compression—a concept that’s just as critical today.
The Modern Need for Compression
Fast forward to today, and the stakes are just as high. Whether you're a content creator, a marketer, or just trying to send a video of your kid’s first steps, effective compression is a game-changer.
- Faster Sharing and Delivery: A 200 MB file uploads in a fraction of the time it takes for a 5 GB behemoth. This is a lifesaver when you're on a tight deadline with a client or just want to get a video up on social media.
- Saving Precious Storage: MacBook SSDs are fast, but they fill up in a hurry. Compressing your video library can free up hundreds of gigabytes, extending the life of your machine and saving you from buying yet another external drive.
- Optimizing for Web and Mobile: Videos on websites need to load fast to keep people from bouncing. Compressed files ensure a smooth playback experience, even for viewers on spotty connections.
Effective video compression is also a huge deal for businesses, especially when it comes to producing and delivering explainer videos efficiently across different platforms. Smaller files mean quicker load times and a much better experience for potential customers.
The goal isn't just to make files smaller. It’s to find that perfect sweet spot between file size, visual quality, and compatibility. A well-compressed video should look virtually identical to the original for most viewers, but at a fraction of the size.
This balance is where the real skill comes in. Once you get a handle on concepts like codecs (like the classic H.264 vs. the newer HEVC) and bitrates, you can start making smarter decisions. Instead of just hitting "compress" and hoping for the best, you can tailor your settings to what your project actually needs.
For a deeper dive, our guide on the benefits of file compression breaks it all down. This knowledge transforms compression from a frustrating roadblock into one of the most powerful tools in your creative arsenal.
To help you get started, here's a quick look at some common situations and the best tools for the job.
Quick Guide to Common Mac Video Compression Scenarios
| Scenario | Recommended Tool | Key Goal |
|---|---|---|
| Quickly emailing a short clip | QuickTime Player (Export) | Speed and convenience |
| Compressing a large 4K project | Compresto or HandBrake | Maximum quality at the smallest size |
| Sharing a video to social media | iMovie (Share) | Pre-optimized settings for platforms |
| Archiving old video footage | Compresto or HandBrake | Significant size reduction for storage |
Each tool has its place, and knowing which one to reach for in a given situation is the first step toward a smoother, more efficient workflow.
Using Your Mac's Built-In Tools for Quick Compression
Before you go hunting for a new app, it’s worth checking out the powerful compression tools already built into your Mac. For those quick jobs where you just need a smaller file now without fussing over settings, these native options are surprisingly capable. They're often the perfect first stop for everyday video compression on Mac.

You probably think of QuickTime Player as just your Mac’s default video player, but it doubles as a simple and effective compression tool. It’s my go-to when I need to shrink a video to slip into an email or post on a site with a tight upload limit.
Getting it done is simple: open your video, then head to File > Export As. You’ll see a list of common resolutions like 4K, 1080p, 720p, and 480p. Just choosing a lower resolution is one of the quickest ways to slash a file's size.
Mastering QuickTime Player's Export Options
When you export from QuickTime, you're doing more than just changing the resolution—you're re-encoding the entire file. I’ve seen a 15-second, 55MB clip shrink down to around 23MB just by exporting it at 1080p. That’s a 50% reduction in size, and honestly, the quality loss is barely noticeable on most screens.
The real magic, though, is in the "Use HEVC" checkbox. HEVC (H.265) is a much more efficient, modern codec than the old H.264 standard that’s been around for ages.
- When to Use HEVC: Check this box for maximum file size reduction. It can shrink a file by up to 40% more than H.264 without a major hit to quality.
- When to Avoid HEVC: Leave this unchecked if you’re sharing the video with someone on an older device or uploading to a web platform that might not play nice with the newer codec.
The biggest trade-off with QuickTime is its simplicity. You can’t fine-tune settings like bitrate, which means you get less control over that delicate balance between final quality and file size compared to a dedicated app.
The Hidden Finder Compression Trick
Looking for an even faster method? macOS has a nifty feature tucked away right in Finder. Just right-click on any video file, go down to Quick Actions, and choose Encode Selected Video Files.
This pops up a dead-simple dialog box letting you choose your output. The "Greater Compatibility" setting uses H.264, while "Higher Quality" goes with HEVC. It’s a fantastic shortcut for processing a file without even launching an application.
But let's be realistic—both of these built-in methods are best for one-off jobs. If you're trying to compress a whole batch of videos or need precise control over the final output, you’ll hit their limits pretty fast. They are excellent first-line tools, but more demanding workflows will quickly have you looking for a specialized solution.
When the built-in Mac tools just don't cut it, you'll eventually need a dedicated app for video compression on Mac. This is where tools like Compresto come in. They're built to give you the fine-tuned control that professional projects demand, letting you find that perfect sweet spot between file size and visual quality without needing a degree in video engineering.
Instead of just picking a resolution and crossing your fingers, you get to directly control the guts of the compression process. This is absolutely essential when you have specific goals, like shrinking a massive 4K video down for your web portfolio.
Navigating the Compresto Interface
The first thing you’ll notice about Compresto is its clean, drag-and-drop interface. It’s designed to be straightforward, avoiding the cryptic, jargon-filled menus that plague so many other video tools.
Once you drop your video in, you’re greeted with a simple set of controls that directly affect the final output. This is where you graduate from basic compression to truly strategic optimization. The key settings—codec and quality—are front and center, ready for you to tailor the compression to your exact needs.
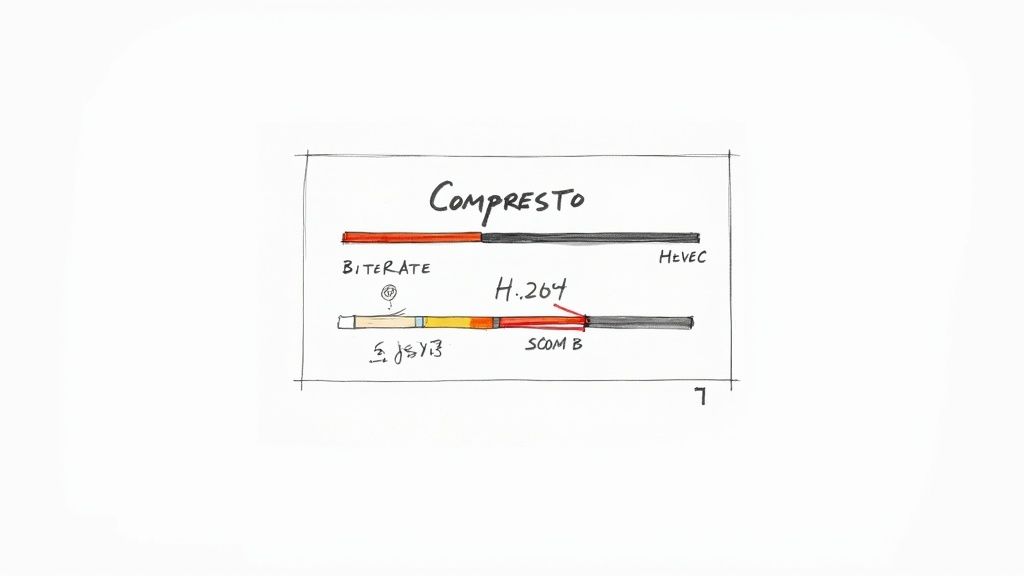
This diagram gets to the heart of the matter: a more advanced codec like HEVC can deliver the same visual quality as H.264 but at a much lower bitrate, which means a smaller file. It's all about working smarter, not harder.
Choosing the Right Codec and Bitrate
In almost any compression software, your two main choices for codecs will be H.264 and HEVC (H.265). Knowing when to use which is the secret to getting great results every time.
- H.264 (AVC): Think of this as the old reliable. It’s the universal standard, compatible with pretty much every device, browser, and platform you can imagine. If your number one priority is making sure your video plays everywhere without a hitch, H.264 is your go-to.
- HEVC (H.265): This is the modern, high-efficiency powerhouse. It can slash file sizes by up to 40% compared to H.264 without any noticeable drop in quality. That’s a game-changer. Use HEVC for your 4K content or any time you need the smallest possible file and you're confident your audience is on reasonably modern devices.
The bitrate setting is the codec's partner in crime. I like to think of bitrate as the video's "data budget." A higher bitrate gives the video more data to work with each second, resulting in better quality but a larger file. Lowering the bitrate shrinks the file size, but if you push it too far, you'll start seeing ugly compression artifacts.
Compresto makes this easy with a simple quality slider, turning a complex calculation into an intuitive adjustment.
My personal rule of thumb is to start with a medium-quality setting and run a quick test export. It usually takes less than a minute and is the fastest way to see if you can push the bitrate lower without wrecking the image.
A Real-World Compression Scenario
Let's walk through a common situation. You have a beautiful 5 GB, 4K video of a product you want to feature on your web portfolio. That file size is a non-starter for web loading. Your goal is to get it under 500 MB while making sure it still looks crisp on a desktop monitor.
Here’s my step-by-step process in Compresto:
- Import the Video: Just drag that 5 GB behemoth right into the Compresto window.
- Set the Codec: I’d choose HEVC. It’s perfect for this since modern web browsers and desktops handle it beautifully, and we need all the efficiency we can get.
- Adjust Resolution: Knock the resolution down from 4K (3840x2160) to 1080p (1920x1080). Honestly, displaying true 4K on a website is often overkill and just chews through bandwidth for no real benefit.
- Fine-Tune the Quality: Start the quality slider in the middle. Compresto gives you a handy estimated file size, so you can see the impact in real-time. Nudge the slider down bit by bit until that estimate lands comfortably under your 500 MB target.
With just a few clicks, you’ve turned a massive source file into a lean, web-ready asset. This level of simple, direct control is exactly why so many people are choosing Compresto for compressing large digital files. It transforms a tedious technical chore into a quick and repeatable part of any creative workflow.
How to Optimize Settings and Preserve Video Quality
The biggest fear when compressing video is turning a beautiful, crisp file into a pixelated mess. Avoiding that isn't about luck; it's about making smart choices with your settings. Once you get the hang of a few key concepts, you can make sure your final video looks sharp, professional, and just as good as the original.
This is especially important because compression is always a trade-off. You're intentionally throwing away data to shrink the file size. The real trick is to toss out the right data—the kind your eyes are less likely to notice—while preserving the details that truly matter.
Bitrate: The Key to Quality Control
The single most powerful setting you can tweak is the bitrate. Think of it as the video's "data budget" for each second of playback. A higher bitrate means more data is used, which gives you better quality but a larger file. A lower bitrate uses less data, creating a smaller file but potentially sacrificing some quality.
You’ll usually see two ways to handle bitrate:
- Constant Bitrate (CBR): This method locks in the same data budget for every single second of the video, no matter what’s happening on screen. It’s predictable but pretty inefficient, giving a simple talking-head shot the same data as a chaotic action scene.
- Variable Bitrate (VBR): This is the much smarter approach. VBR analyzes your video and allocates more data to complex, high-motion scenes while dialing it back for simpler, static moments. This flexibility gives you a much better balance of quality and file size.
For most video compression you'll do on a Mac, VBR is your best friend. It intelligently optimizes how data is used, giving you a high-quality result in a much smaller package.
The goal isn't just to slash the bitrate—it's to find the sweet spot. For a 1080p video you plan to put online, a bitrate between 2,000 and 5,000 kbps is often a great starting point. Run a quick test on a short clip to see how it looks before you commit to exporting the whole thing.
Resolution: Downscaling Done Right
Sometimes, the most effective way to compress a video has nothing to do with bitrate at all—it's about resolution. If your source video is 4K but you're only sharing it on social media or a website, exporting it at 1080p is a huge win. We cover this more in our deep dive on MP4 file compression strategies.
Here's a pro tip: downscaling from a higher resolution often produces a sharper-looking image than footage shot natively at the lower resolution. So, a 4K video crunched down to 1080p will usually look better and have a much smaller file size than if you just aggressively crushed the bitrate of the original 4K file.
Know Your Content
Finally, the content of your video should guide your compression strategy. A fast-paced sports highlight reel with constant motion needs a higher bitrate to keep everything looking clean and avoiding ugly artifacts. On the other hand, a simple talking-head interview with a static background can get away with a much lower bitrate without anyone noticing a drop in quality.
Modern Mac hardware has also completely changed the game here. The introduction of Apple Silicon, especially since the M1 chip, has dramatically sped up video encoding. This was built on earlier breakthroughs, like when macOS High Sierra introduced the HEVC codec, which cut 4K storage needs by up to 40%. You can read this TechCrunch article to learn more about how these foundational macOS updates transformed video handling.
Always take a moment to look at your source video first. A thoughtful approach tailored to your specific content will always give you better results than just slapping on a generic preset.
Choosing the Right Mac Compression Tool for Your Needs
Picking the right video compression tool on a Mac can feel a bit like choosing a car. Do you need something simple that just gets you from A to B, or are you looking for a high-performance machine with manual controls? The best choice really depends on what you're trying to accomplish.
Let's break down the main contenders on macOS. We’ll look at the tools that come built-in, a focused app like Compresto, and the professional powerhouse, Apple Compressor. The real differences boil down to ease of use, speed, and just how much control you want over the final video.
Quick and Simple vs. Focused Control
For those quick, one-off jobs, your Mac’s built-in tools are tough to beat. Using QuickTime Player or the Finder’s “Encode” action is perfect when you just need a smaller file fast and aren't worried about the nitty-gritty settings. It’s the “automatic transmission” of video compression—it gets the job done with almost no effort on your part.
No matter which tool you use, one of the biggest decisions you'll make is choosing the right bitrate for your video's content. This is where a little knowledge goes a long way.

As you can see, a video with lots of fast motion needs more data (a higher bitrate) to stay crisp, while a simple screen recording or slideshow can get by with much less.
This is where a dedicated app like Compresto really shines. It finds that sweet spot between dead-simple and overly complex. It gives you an intuitive interface but still lets you control the important stuff, like the codec (H.264 vs. HEVC) and the final quality. It’s the ideal balance for most of us who need consistent, great-looking results without a steep learning curve.
Professional-Grade Power with Apple Compressor
Then you have the heavy hitter: Apple's Compressor. Originally part of the Final Cut Studio suite, it’s a standalone app built for video pros who need absolute control.
Compressor is the king of complex batch processing, creating custom export presets, and integrating seamlessly with Final Cut Pro. Recent updates have even supercharged its performance on Apple Silicon Macs, slashing export times for HEVC and H.264 by processing video segments at the same time. You can read up on its history and deep feature set on the Compressor software Wikipedia page).
When it comes to picking the right tool, seeing how they stack up side-by-side can make the decision much clearer.
Feature Comparison of Mac Video Compression Tools
| Feature | QuickTime Player | Compresto | Apple Compressor |
|---|---|---|---|
| Ease of Use | Very Easy (point-and-click) | Easy (intuitive interface) | Complex (professional-oriented) |
| Control Over Settings | Minimal (preset resolutions only) | Good (codec, quality, resolution) | Extensive (bitrate, frame rate, etc.) |
| Batch Processing | No | Yes (drag-and-drop multiple files) | Yes (advanced, with custom presets) |
| Codec Options | HEVC (H.265) only | H.264 & HEVC | H.264, HEVC, ProRes, & many more |
| Target User | Casual, one-off tasks | Content creators, marketers, general use | Video professionals, editors |
| Cost | Free (built-in) | Paid (one-time) | Paid (one-time) |
This table highlights the trade-offs. QuickTime is free and simple but inflexible. Compressor offers ultimate control but comes with a higher price and a steeper learning curve. Compresto sits right in the middle, offering the key features most users need in a much more approachable package.
For most content creators, marketers, and everyday users, a tool like Compresto strikes the ideal balance. It provides the essential controls needed to optimize video for web, social media, or email without the complexity of a full-fledged professional encoding suite.
Ultimately, it comes down to matching the tool to the task at hand.
- QuickTime/Finder: Best for single-file, quick compressions where speed is the only thing that matters.
- Compresto: Ideal for anyone who needs consistent quality, batch processing, and control over key settings in an easy-to-use package.
- Apple Compressor: The go-to choice for video professionals who require deep customization and integration with pro editing software.
By picking the right tool for the job, you can make sure every video you compress on your Mac is both efficient and looks fantastic.
Stumped? Let’s Tackle Common Mac Video Compression Questions
Even with the best tools, you’re bound to run into a few head-scratchers when compressing video on a Mac. Let's walk through some of the most common questions I hear, so you can clear up any confusion and get great results every time.
A big one is always about social media. Every platform—Instagram, X (formerly Twitter), Facebook—has its own secret sauce for processing uploads. But if you want a universally safe bet, stick with an MP4 file using the H.264 codec. It’s the gold standard for a reason, offering the best mix of compatibility and reasonable file sizes. You can’t go wrong with it.
Why Does My Compressed Video Look Blurry?
There's nothing more frustrating than spending time compressing a video only to find it looks blurry or pixelated. This almost always boils down to one culprit: an overly aggressive bitrate reduction. When you slash the bitrate too much, the software has no choice but to throw away huge chunks of visual data, and quality tanks.
Think of it this way: your original video is a high-resolution photograph. The bitrate is the amount of ink you have to print it. If you’re too stingy with the ink, you lose all the fine details and smooth color transitions, and you end up with a muddy, blocky mess.
The fix is to find a smarter balance. Instead of just crushing the bitrate on a 4K file, try downscaling the resolution to 1080p first. This simple step often lets you use a more moderate bitrate, preserving sharpness while still dramatically cutting the file size.
How Can I Compress a Bunch of Videos at Once?
Doing videos one-by-one is fine if you only have a couple, but what if you just got back from a trip with a memory card full of clips? This is where batch processing becomes your best friend. Apple's built-in tools like QuickTime just weren't made for this kind of workload, but this is where dedicated apps really shine.
With the right tool, you can just drag an entire folder of videos into the app, dial in your compression settings once, and let it rip through the whole queue. For anyone who works with video regularly, this is a massive time-saver. It turns what would be a tedious, click-heavy task into a simple, set-it-and-forget-it process.
Ready to stop wrestling with huge files and start compressing smarter? Compresto gives you the power of batch processing, intelligent quality controls, and a dead-simple interface, all built for macOS. Try it today and see how much time and space you can save. https://compresto.app