Reduce Video File Size Without Losing Quality in 2024
Why Some Videos Compress Beautifully While Others Don't

Let me tell you something about video compression: the software you use is only part of the story. What really matters is understanding your source video. After years of working with video, I've learned that successful compression depends on knowing your content. Compressing a simple talking-head video is totally different from a fast-paced action scene or a detailed product demo.
For example, imagine compressing a video of a slide presentation versus a Formula 1 race. The presentation will shrink much easier. Why? Because the visuals change less between frames, which gives compression algorithms more to work with.
Understanding the Science of Compression
This difference comes down to how compression algorithms actually work. They hunt for redundancies – parts of the video data that can be removed without noticeably affecting the quality. Static scenes, like that talking-head video, have tons of redundancy. The background stays put, the person barely moves, and the overall picture changes slowly. This makes it easy for the algorithm to ditch redundant data and shrink the file size.
But videos with lots of movement, fine details, or quick scene changes are a different beast. Every frame is packed with unique information, leaving the algorithm with fewer chances to discard data without creating weird artifacts or blur. It's like summarizing a dense novel compared to a simple children's book. The novel is full of unique details, making it hard to condense without losing important stuff. The children's book, with its simpler structure and repetition, is way easier to summarize. This is exactly how high-motion and static videos react to compression.
Predicting Compression Friendliness
The foundation of video compression actually goes way back to 1972, when Nasir Ahmed came up with the Discrete Cosine Transform (DCT). This technique breaks down images into different frequencies, prioritizing the visually important ones. This allows for big file size reductions without sacrificing much quality. Learn more about the history of video compression. Even back then, understanding the visual data was key to effective compression.
Knowing your video's characteristics can also help you predict how well it will compress. A video with a single, unchanging background and minimal movement is a compression dream. Videos with rapid cuts, complex visual effects, or high-motion scenes, however, always need more data to look good. Recognizing these factors upfront helps you set realistic expectations for the final file size and choose the right compression settings. This saves you from the frustration of endless re-encoding and helps you get the best results every time. Later, we'll talk more about choosing the right codec for your specific needs.
Picking the Perfect Codec for Your Actual Needs
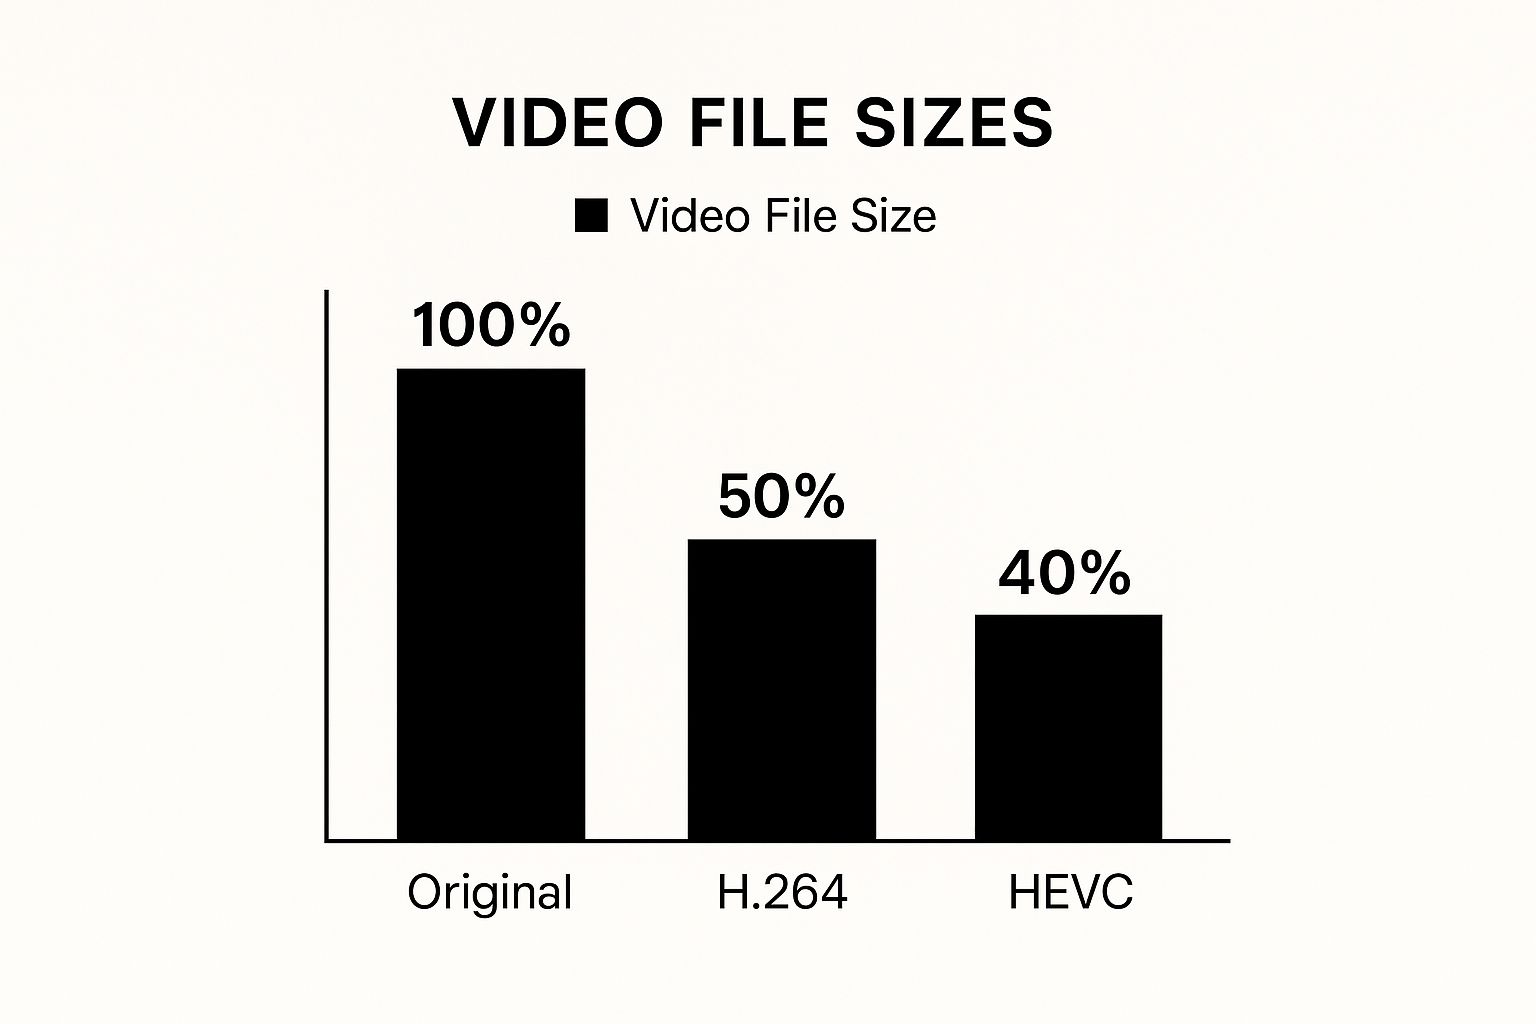
The infographic above shows how much smaller your video files can get with different codecs, comparing the original size to H.264 and HEVC. Switching to H.264 can cut your file size in half, while HEVC shrinks it even more! This really highlights how important picking the right codec is for smaller files without sacrificing quality.
Choosing a codec can seem confusing, but it really doesn't have to be. You don't need to be a video expert, just understand the practical impact of codecs. I've seen so many people get excited about the newest codecs, only to run into problems with compatibility or see tiny improvements. Let's break down the common codecs and when they actually matter.
H.264: The Reliable Workhorse
H.264 (AVC) is the trusted, go-to codec in the video world. It provides a great balance between compression and compatibility. Think of it like a reliable car – gets you where you need to go without any fuss. For most online videos, like social media or website content, H.264 is your best bet. By the early 2000s, video compression had advanced significantly, and H.264/AVC emerged in 2003. This standard was a major step forward, compressing about twice as efficiently as older codecs like H.263. Learn more about the history of video codecs.
H.265 (HEVC): The Power User's Choice
H.265 (HEVC) is the high-performance codec. Like a sports car, it's powerful but requires more. It compresses even better than H.264, giving you smaller files for the same quality. But, not every device can handle it smoothly. Consider your viewers – are they using newer devices? If you're sharing 4K or higher resolution videos where file size is a big deal, and your audience has the tech, H.265 is excellent. For instance, high-res training videos for internal use on up-to-date company devices would be a perfect fit for HEVC.
Choosing Wisely Based on Your Audience and Platform
The best codec comes down to who your viewers are and where they're watching. Are they using older phones, or do they have the newest gadgets? Are you uploading to YouTube or Vimeo, or hosting on your own site? This is how you make the decision. For a deeper dive into file compression, check out our guide on reducing file size. Don't pick something just because it's new. Find the codec that best balances file size, quality, and compatibility for your specific needs. This makes sure your videos play smoothly for everyone, while keeping your files manageable.
To help you choose, here's a handy comparison:
Codec Performance Across Real-World Scenarios Practical codec comparison showing actual performance differences for common video types, helping you choose the right format for your specific needs
| Codec | File Size Reduction | Quality Score | Platform Support | Ideal Content Type |
|---|---|---|---|---|
| H.264 (AVC) | Excellent | Very Good | Extremely Wide | General web videos, social media, older devices |
| H.265 (HEVC) | Superior | Excellent | Good (improving) | 4K/High-res video, newer devices, streaming services |
This table summarizes the key differences between the codecs. H.264 is the reliable all-rounder, while H.265 excels for high-resolution content on modern devices. Remember, the "best" choice always depends on your particular audience and how they'll be watching your videos. You might also find this professional guide on file compression helpful for managing your video files effectively.
Mastering Resolution and Bitrate Like a Pro
This is where things get tricky when you’re trying to shrink video files without sacrificing quality. People often obsess over every single setting or just pick random numbers—neither approach really works. And those generic bitrate charts you see online? Let's be honest, they’re pretty much useless in real-life situations. In my experience, what works for one video can totally wreck another.
The key is finding the lowest possible bitrate that still keeps your specific video looking good. A screen recording with small text has completely different needs than, say, a nature video with lots of motion, or a presentation with mostly static slides. For additional insights on video optimization, consider exploring the Videoqi Guide.
Why Platform Recommendations Often Fall Short
Sites like YouTube and Vimeo offer recommended bitrate settings, but they’re usually way too high. They're designed to handle anything, so they play it safe. The result? Bigger files than you need. For example, I recently compressed some training videos. YouTube’s recommended setting produced files over 1GB each! I got them down to under 300MB without any visible quality drop just by experimenting a bit.
Developing Your Own Testing Methodology
The best method is to just test it out. Begin with a lower bitrate than recommended and gradually increase it until you hit the sweet spot. This is where increasing the bitrate further doesn't really improve how the video looks. It’s like seasoning food—at some point, adding more salt doesn't enhance the flavor, it just makes it salty.
Resolution: Bigger Isn't Always Better
Here's something surprising: higher resolution can sometimes hurt the final quality, particularly after compression. If you start with a huge 4K file but your final video will be 1080p, downscaling before you compress can actually improve the results. Why? Downscaling gets rid of detail that compression would remove anyway, letting the codec focus on what really matters.
Motion Complexity: The Bitrate Driver
Motion is the biggest factor affecting your bitrate. A static talking-head video needs a much lower bitrate than a fast-paced action scene. Think of it like internet bandwidth – a video call needs less than streaming a 4K movie. The more visual activity, the more data required to maintain quality.
Over time, I've learned to judge motion complexity pretty intuitively. Lots of movement or fine detail? Higher bitrate. Relatively static image? I can go lower. This has saved me tons of time and frustration. Balancing file size and visual quality is like tuning a musical instrument – it takes practice to find the perfect harmony, but it's worth the effort.
To illustrate this further, here's a table I've put together based on my own compression testing:
Bitrate Sweet Spots for Different Video Types Evidence-based bitrate recommendations based on actual compression testing, showing optimal settings for various content types and quality goals.
| Resolution | High Motion (Mbps) | Medium Motion (Mbps) | Low Motion (Mbps) | Expected File Size |
|---|---|---|---|---|
| 1080p | 8-12 | 5-8 | 3-5 | Varies depending on video length and content |
| 720p | 5-8 | 3-5 | 2-3 | Varies depending on video length and content |
| 480p | 2-3 | 1-2 | 0.5-1 | Varies depending on video length and content |
As you can see, even within a single resolution, the required bitrate can vary significantly depending on the level of motion. Remember, these are just starting points—testing is still the best way to find the perfect balance for your particular video.
Getting Amazing Results With Modern Compression Tools
So, you want to shrink those video files without sacrificing quality? Let's talk tools. For me, Compresto has been a real game-changer. It's a smart blend of powerful analysis and easy-to-use controls. But just like any good tool, knowing how to use it properly is the key.
Leveraging Compresto's Intelligent Features
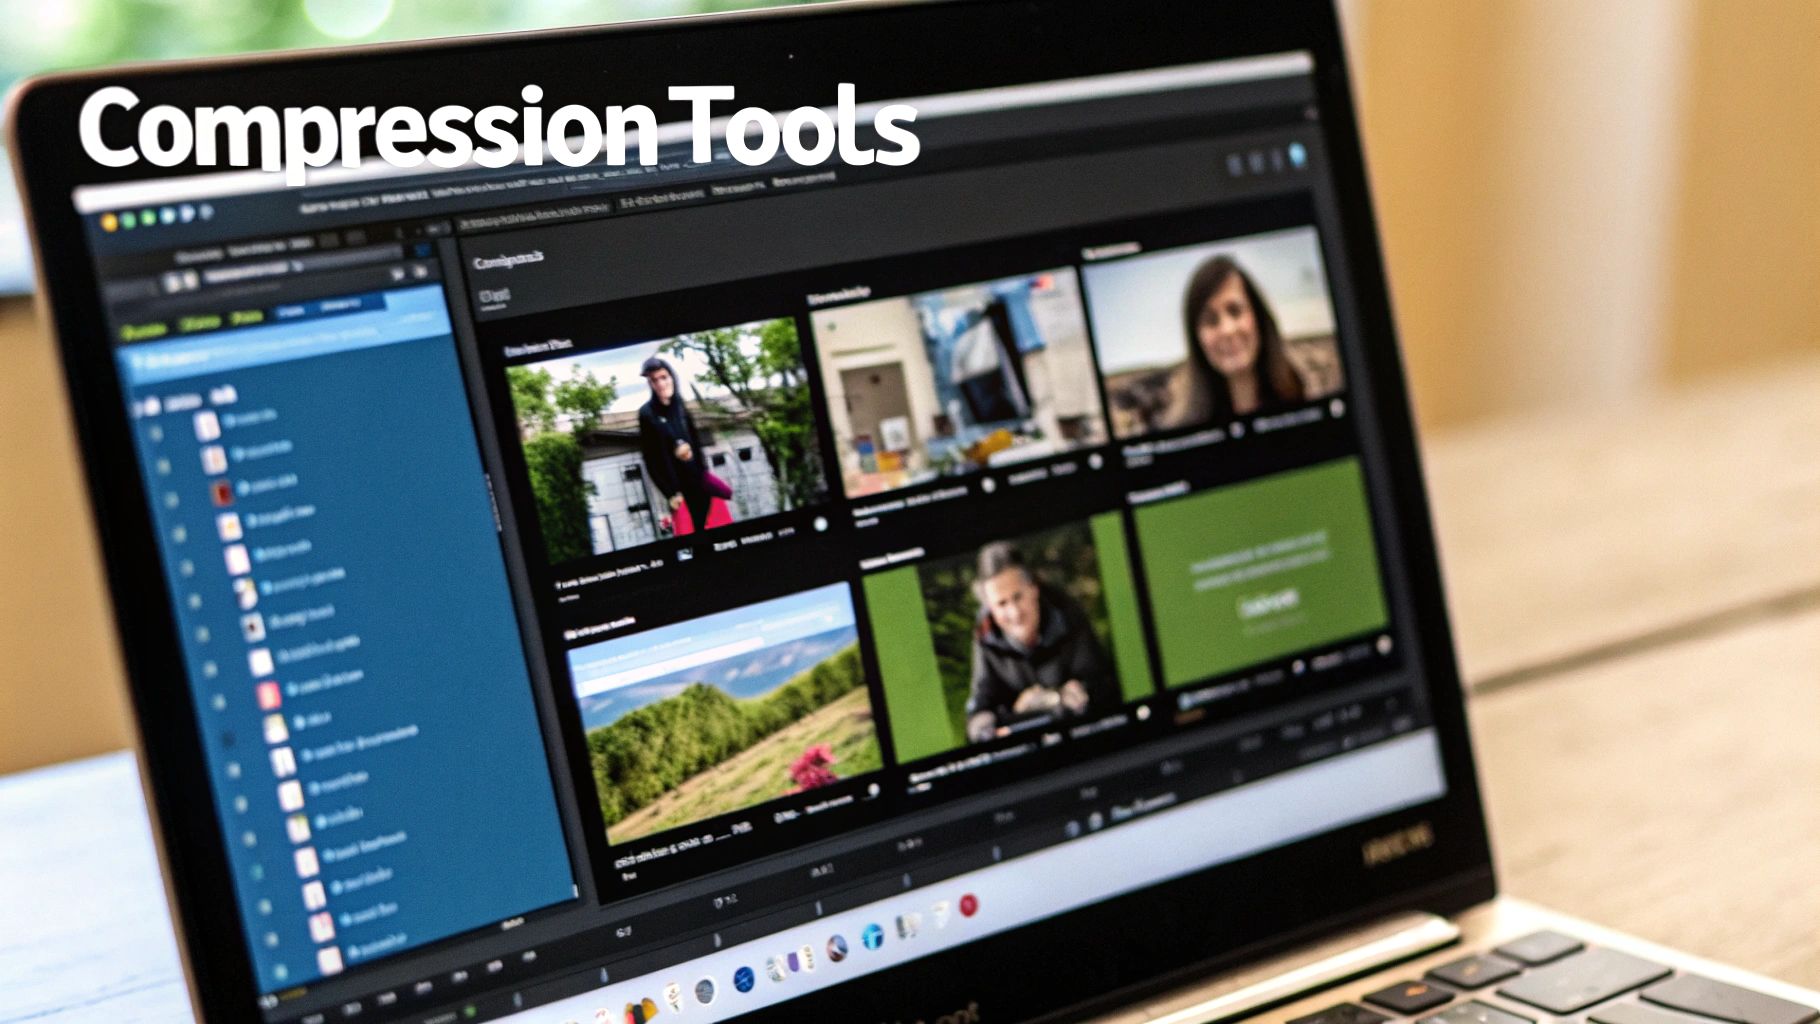
Here's a peek at Compresto's interface: Clean, right? You can see the core features right there: batch processing, format selection, and quality controls. Managing multiple video compressions at the same time becomes a breeze. And that level of control means you can really fine-tune things to get the perfect balance between file size and how good the video actually looks. It's not just about making files smaller – it's about doing it intelligently. Speaking of which, you might find this guide on video compression software helpful.
I especially love the batch processing. I can literally drop a whole folder of videos into Compresto overnight, and wake up to perfectly optimized files. No more babysitting the compression process! This frees me up to, you know, actually get other things done.
Optimizing Your Workflow With Compresto
From my experience, tweaking the quality slider and format options is where the real magic happens. For videos going online, H.264 is usually the sweet spot. But if file size is absolutely critical and I know my viewers have newer devices, H.265 becomes a serious contender. It's all about tailoring the approach to each video's specific needs. Just like optimizing video resolution and bitrate, you can optimize other site metrics, like speed, and you can read more about it in this article about website performance metrics.
The folder monitoring feature is also a lifesaver. Set up a designated folder, drop your videos in, and Compresto just starts compressing them automatically using your pre-defined settings. This kind of automation is pure gold for a smooth, consistent workflow.
Exploring Complementary Compression Tools
Compresto is my go-to, but I use a few other tools to round things out. For quick conversions, HandBrake is a solid, open-source option that's been in my toolkit for ages. It's simple and gets the job done without a lot of fuss.
When I need really granular control, FFmpeg is the king. It's command-line based, so there's a bit of a learning curve. But the sheer flexibility is unmatched. It’s my secret weapon for those really tricky compression challenges. And for simple stuff like trimming and cropping, QuickTime Player is my quick fix.
Avoiding Common Compression Mistakes
One mistake I see a lot is blindly trusting generic bitrate charts online. They often prioritize broad compatibility over optimal file size, leading to unnecessarily large files. My advice? Experiment. Try slightly lower bitrates and see how the quality looks. You’ll be surprised how often you can save space without any noticeable impact.
Another pitfall is forgetting about device compatibility. I’ve definitely learned this the hard way. A video that looks perfect on my desktop can look awful on an older phone or certain platforms. Always test your compressed videos on a few different devices and browsers. It’s a simple check that can save you a lot of headaches later.
Conquering Difficult Videos That Fight Back
Some videos are just plain stubborn when you try to compress them. They either balloon back up in size or end up looking like a pixelated mess. These are the videos, though, that have taught me the most about truly shrinking video file size without sacrificing quality. I'm talking about the tough ones: high-motion gaming, detailed architectural walkthroughs, screen recordings packed with tiny text, and complex animated explainers.
Pre-Processing for a Smoother Ride
One of the biggest game-changers for me has been pre-processing. Take screen recordings, for instance. I've found that reducing the color depth before even starting compression makes a world of difference. Think of it like tidying up before packing – it just makes the whole process smoother and more efficient. This simple step can dramatically reduce file size without affecting the readability of any text, which is vital for tutorials and presentations.
Another pre-processing trick for motion-heavy videos is a subtle noise reduction filter. This removes unnecessary visual clutter that the compression algorithm might otherwise get hung up on. It's like smoothing out a rough surface before applying a fresh coat of paint—it provides a better base for the final result.
Strategic Sacrifices for Quality Gains
Knowing which details you can afford to lose without impacting the overall viewing experience is another crucial skill. In architectural walkthroughs, those tiny details in the textures might not be as critical as preserving the overall structure, lighting, and feel of the space. By focusing your compression efforts on the most important elements, you can maintain the core visual information while still shaving off file size. It's about working smarter, not harder.
Animated explainers offer a similar opportunity. The sharpness of the linework is generally far more important than subtle color gradations. Tweaking your compression settings to prioritize preserving those crisp lines can have a huge impact. It's about choosing the right tool for the job; you wouldn’t use a hammer to tighten a screw, right? You need the right compression approach for each video type. Modern tools can be incredibly helpful throughout the video editing process. For example, annotating video can make communication crystal clear.
Working Within Constraints Without Compromising Quality
Sometimes, you’re faced with strict file size limits. That's when things get really interesting. I’ve had to get creative with resolution and bitrate, constantly experimenting until I find the sweet spot. One surprisingly effective trick is adjusting the frame rate. You'd be amazed how often you can go from 60fps down to 30fps without a noticeable loss of smoothness, especially in videos with less motion. This can save a ton of space without a major impact on perceived quality. It’s a testament to how far video compression has come. Did you know one of the earliest practical standards, H.261, was introduced back in 1988? Essential for video conferencing, it paved the way for later standards like MPEG-1. You can discover more about the history of video compression if you’re interested. It's fascinating how these early innovations shaped the tools we use today.
Finally, never underestimate the power of trying different encoding methods. A different codec or even entirely different compression software can sometimes produce drastically better results, especially for those truly stubborn videos. It's all about exploring different options and finding what works best for each unique video.
Actually Testing Your Results the Right Way
Let's be honest, judging compressed video quality by file size alone is a rookie mistake. I learned that the hard way. I once spent ages tweaking settings, thinking I’d nailed it, only to find the video looked terrible on my phone. Squinting at your computer screen just doesn't cut it either. Real quality testing means seeing how your video performs under real-world conditions – the same way your audience will see it.
Beyond Personal Preference: Objective Quality Evaluation
Your personal preferences aren't enough here. What looks great to you might look awful on another screen, with a different internet connection, or on a different platform. You need an objective approach. Side-by-side comparisons are key. Play the original and compressed videos at the same time, flipping between them. You'll be surprised at the subtle flaws you might otherwise miss. It's like comparing audio files with good headphones; the nuances become crystal clear.
Meaningful Metrics vs. Vanity Numbers
Some metrics look great on paper but don’t reflect real-world viewing. File size reduction is important, sure, but it’s just one piece of the puzzle. Focus on metrics that actually connect to viewer satisfaction, like Visual Information Fidelity (VIF) or Peak Signal-to-Noise Ratio (PSNR). These give you a more objective measure of how the video looks. They tell you how much visual information is actually lost, not just how many megabytes you shaved off. For a deeper dive into this, check out our guide on how to reduce video file size without losing quality.
Real-World Testing Scenarios
To really get a feel for your video’s performance, test it on a variety of devices and internet speeds. Does it hold up on a mobile phone with a spotty connection? How does it look on a big-screen TV? Does it play smoothly on different platforms like YouTube or Vimeo? I personally use a mix of my own devices and online emulators to simulate different viewing experiences. This helps me catch potential issues before my audience ever sees them.
Establishing Practical Benchmarks
Different projects have different needs. A corporate training video won’t have the same quality requirements as a quick social media clip. Set clear standards for what you consider acceptable in terms of compression artifacts, blurring, or other quality dips. This ensures consistent quality across all your videos, no matter what they are.
Building a Quality Assessment Workflow
Make quality assessment a regular part of your process. Don't just compress a video and assume it’s good to go. Schedule time for proper testing. Maybe use a checklist of devices and platforms, or a structured A/B comparison process. The key is to make testing a habit. It might seem like extra effort up front, but it saves you the headache of releasing a video that looks subpar. Trust me, I've been there, and it's not fun. Catching problems early is always better than dealing with complaints later.
Building Your Personal Compression System
So, you've learned the basics, but how do you actually do this? Building a personal compression system isn’t about following strict rules. It’s about finding a workflow that fits your needs. Think of it like setting up your ideal workshop – you pick the tools and techniques that work best for your projects.
Documenting Your Successes for Future Wins
I actually started a simple spreadsheet to keep track of my compression settings. I list the codec, resolution, bitrate, and any pre-processing steps I used for different types of videos. It’s like my personal compression cookbook. When I have a similar project, I don't have to reinvent the wheel. I just look up my tried-and-true settings. This saves me tons of time and helps me maintain consistency.
Time-Saving Templates for Quality Control
Once you discover settings that consistently deliver good results for specific video types, build templates in your compression software. I’m a fan of Compresto, and I have templates for everything – screen recordings, talking-head videos, even action-packed footage. These templates work like presets, instantly applying my preferred settings. This is a huge time-saver, and it ensures my videos always look their best.
Quality Control Checkpoints: Preventing Problems Before They Happen
Even with the best system, sometimes things can still slip through the cracks. I’ve learned to incorporate quality checks throughout the process. Before I finish compressing a video, I always do a quick playback test on a few different devices. This catches any unexpected glitches before they reach my viewers.
Staying Current (Without Going Crazy)
Compression technology is always changing, but you don’t have to chase every new trend. Subscribe to a few practical blogs or forums. I like to skim these updates for anything that might actually improve my workflow – and ignore the rest.
Smart Decisions About Upgrades
Knowing when to upgrade your tools versus optimizing what you already have is a balancing act. Sometimes a simple tweak to your workflow can make a bigger difference than new software. I always try to get the most out of my current tools before jumping to something new. Think of it like upgrading your kitchen – a new chef's knife might be more impactful than a fancy new oven.
Ready to take charge of your video compression and start seeing better results? Try Compresto today and see what a difference the right tools can make. Compress your videos now with Compresto!