How to Reduce PDF Size on Mac Without Losing Quality
We've all been there: you try to email a PDF, only to be met with a "file size too large" error. It's a common headache, but thankfully, if you're on a Mac, you already have the tools to fix it.
Why Your PDFs Are So Big (And How to Fix It Fast)
So, what makes a seemingly simple PDF balloon in size? The usual suspects are high-resolution images, embedded fonts that aren't subsetted, and layers of hidden metadata that accumulate during the editing process. Each of these elements adds weight, turning a straightforward document into a digital brick.
This isn't just a minor annoyance. With over 2.5 trillion PDFs created every year, bloated file sizes are a huge drag on storage and workflows for everyone. The good news is that your Mac has a couple of quick, built-in tricks to slim down those chunky files without needing any extra software. If you're curious, you can find more insights about PDF usage statistics and see just how central this format has become.

There are two go-to methods baked right into macOS, each with its own strengths and weaknesses.
Use the Quartz Filter in Preview
For the absolute fastest, no-fuss solution, the Quartz Filter is your best bet. Think of it as the "blunt instrument" of PDF compression. It aggressively shrinks the entire document, often with dramatic results.
Just open your PDF in the Preview app, head to File > Export, and from the Quartz Filter dropdown menu, choose "Reduce File Size." It’s that simple. But be warned, this simplicity comes at a cost. The filter can hammer your image quality, so it’s best reserved for text-heavy documents where crisp visuals aren't a priority.
This method is perfect for when you're in a pinch. Got a 50 MB presentation that needs to be under 5 MB right now? The Quartz Filter will get it done, but don't be surprised if your images look a bit rough around the edges.
Export with Specific Settings
If you need to shrink a file but can't afford to turn your images into pixelated mush, there's a slightly more refined approach: using File > Export as PDF. It sounds almost identical to the first method, but it works differently under the hood.
This process essentially rebuilds the PDF from scratch, stripping out a lot of the junk data and re-compressing images more intelligently than the heavy-handed Quartz Filter. It's an excellent middle ground. This trick works especially well on PDFs that have been saved over and over, as it cleans out all the redundant data that builds up with each revision.
Quick PDF Reduction Methods on macOS
Here’s a quick breakdown to help you decide which built-in tool is right for the job.
| Method | Best For | Quality Impact | Speed |
|---|---|---|---|
| Quartz Filter | Text-heavy documents, presentations, or when speed is the only priority. | High. Images can become heavily pixelated or blurry. | Very Fast. Just a few clicks. |
| Export as PDF | Documents with mixed text and images where quality is still important. | Low to Medium. Noticeably better than the Quartz Filter. | Fast. A single export process. |
Both of these built-in macOS tools are fantastic for quick fixes. They handle most everyday compression needs without any fuss.
However, if you find yourself constantly wrestling with PDFs and need more consistent, powerful results—especially for batch processing—you might eventually want a more specialized tool. An app like Compresto can be a great next step, offering presets and batch workflows that let you compress dozens of files with one click, all locally on your Mac. But for one-off jobs, the tools you already have are more than capable.
Getting Serious About Image Optimization in Your PDFs
Images are almost always the biggest culprit when it-comes to bloated PDF files, often eating up the vast majority of a document's total size. While the quick compression tricks are great in a pinch, truly mastering your PDFs means getting your hands dirty with the images inside them. This goes way beyond a simple "reduce quality" button—it’s about making deliberate choices about how your visuals are stored.
A good starting point is knowing what you're working with. To really shrink those PDFs, you have to understand the difference between vector vs. raster images and how each one impacts your final file size. Vector graphics are defined by math and are incredibly lightweight, whereas raster images are pixel-based and can get huge, fast.

Downsampling and Compression: The Heavy Lifters
The single most effective way to cut down the size of raster images is through downsampling. This process simply reduces the number of pixels in an image, which is measured in dots per inch (DPI). For instance, a photo destined for a glossy magazine might be 300 DPI, but for someone viewing it on a screen in a PDF, 150 DPI or even 96 DPI is almost always perfectly fine.
You also have a say in the compression algorithms. JPEG is a "lossy" format that's perfect for photographs because it can dramatically shrink the file size with very little noticeable drop in quality. For graphics with flat colors, like logos and charts, PNG or GIF compression can be more efficient, though they aren't as common inside PDFs.
Just how big of a deal is image optimization? A lot. Compressing images alone can slash file sizes by up to 70%. In design-heavy documents, visuals can easily take up 80% of a PDF's total bulk, so the savings add up quickly.
Don’t Forget the Color Space
Here's another powerful trick: adjust the color space. A full-color RGB image stores way more data than a grayscale one. If your document is a technical manual or a report that doesn’t rely on color photography, converting all images to grayscale can be a game-changer for file size.
You can tweak these settings directly in tools like Adobe Acrobat's "Optimize PDF" feature. It gives you incredibly granular control, letting you set different downsampling thresholds and compression levels for color, grayscale, and monochrome images separately.
A Pro Workflow Tip
For the absolute best results, optimize your images before you even add them to your document. Let's say you're a photographer putting together a portfolio PDF. Instead of dropping massive, full-resolution TIFFs or JPEGs into your layout app, prep them first.
- Export for Purpose: Save a version of each photo specifically for the PDF, maybe at that sweet spot of 150 DPI.
- Use an Image Optimizer: Run those images through a dedicated tool to strip out unnecessary metadata and apply the most efficient compression possible.
- Place the Optimized Images: Now, use these smaller, pre-optimized files in your InDesign, Pages, or Word document.
This proactive approach means you’re building a lean PDF from the ground up, not trying to fix a bloated one after the fact. If you want to dive deeper, we have a whole guide on how to compress an image without losing quality that covers more advanced strategies. This method gives you maximum control and is a cornerstone of any professional publishing workflow.
Stripping Out Hidden Data That Bloats Your Files
Beyond the obvious culprits like images, a ton of a PDF's weight can come from data you can't even see. Think of it like a suitcase packed with extra stuff you never wear—it takes up space for no good reason. This hidden bloat is often a mix of old annotations, metadata, and leftover objects from design software.
These elements just pile up over the life of a document. Every comment, every saved version, and every interactive form field can add a little bit of weight. While tiny on their own, they can collectively turn a lean document into a heavy one. Cleaning house is crucial.
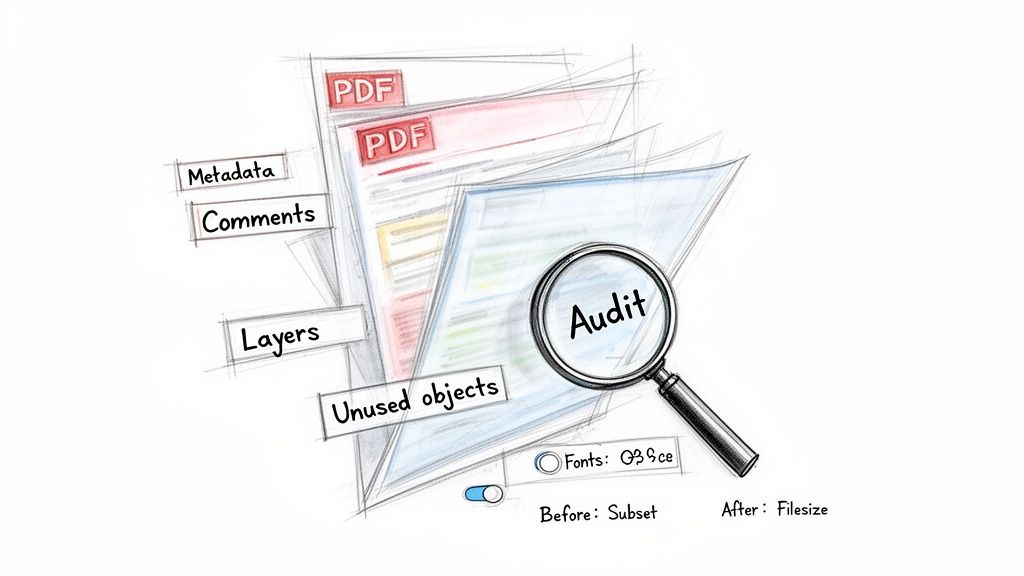
Performing a PDF Audit
To figure out what's really taking up space, you need to look under the hood. If you have Adobe Acrobat, the "PDF Optimizer" tool has a fantastic feature called "Audit Space Usage." It gives you a detailed breakdown of your file's guts, showing the exact percentage of space being hogged by images, fonts, comments, and other data.
This audit is your roadmap. If you see that 90% of the file is images, you know exactly where to focus your efforts. But if you find that things like "Document Overhead" or "User Data" are surprisingly high, that’s a clear signal that it's time for a deep clean.
Tackling Metadata and Unused Objects
Once you’ve spotted the junk data, you can start removing it. Metadata—which includes info like the author, creation date, and keywords—is a common source of bloat. While it can be useful for organization, it's often totally unnecessary for the final, shared version of a file.
Similarly, design files from apps like Adobe InDesign can leave behind hidden layers or unused objects that aren't visible but still take up space. Professional PDF editors let you target and remove these specific items:
- Discard User Data: This option typically gets rid of comments, file attachments, and form fields. It's also a good idea to flatten form fields, which makes them part of the static document and much smaller than keeping them interactive.
- Discard Document Information and Metadata: This strips out all that background file info, like the title, author, and keywords.
- Discard All JavaScript Actions: If your PDF has interactive elements powered by scripts, removing them can save a surprising amount of space.
It’s worth noting that some metadata, like EXIF data in images, can contain sensitive location or device information. Removing it not only shrinks the file but also boosts privacy. Tools that specifically handle this, like an EXIF data remover, are great for making sure your files are clean before you embed them in a PDF.
Font Embedding vs. Subsetting
Fonts are another sneaky source of file bloat. When you embed a font, you're essentially tucking the entire font file—every single character, style, and weight—inside your PDF. This guarantees it will look perfect on any computer, but it can add megabytes to your file size, especially if you're using custom or ornate fonts.
The much smarter solution is font subsetting. Subsetting only embeds the characters that are actually used in your document. So, if your file only uses the letters A, B, and C from a particular font, only the data for those three characters gets included. This gives you the same visual consistency with a tiny fraction of the file size and is one of the most effective ways to shrink text-heavy documents.
Automating Your Workflow with Batch Processing
Compressing PDFs one by one is fine when you only have a couple of files, but it quickly becomes a massive time-sink when you're dealing with dozens at a time. This is where batch processing comes in—it’s how you learn to reduce PDF size at scale, saving a ton of time while keeping your results consistent. For professionals, this isn't just a nice-to-have; it's a necessity.
Think about a designer who needs to send out a campaign with 50+ product spec sheets, or a marketing team preparing a whole library of case studies for a website launch. Compressing each file manually is out of the question. The goal is to create a system where you can process an entire folder of documents in one go, applying the exact same optimization settings to every single file.
Getting Started with macOS Automator
Believe it or not, your Mac has a surprisingly capable tool for this called Automator. You can whip up a "Quick Action" that lets you right-click a folder full of PDFs and apply a compression filter to all of them at once. It uses the same basic Quartz Filter we talked about earlier, so it doesn't offer a lot of fine-tuned control, but it’s a fantastic first step into automation without installing any extra software.
It’s a perfect way to get a taste of what’s possible, especially for quickly shrinking a batch of text-heavy reports or internal drafts where perfect image quality isn't the top priority.
When You Need More Power and Precision
Automator is handy, but professional workflows often demand more control, better speed, and rock-solid reliability. This is where dedicated, local-first tools really shine. An app like Compresto, for example, lets you create and save your own custom compression presets. Once they’re set up, you can just drag an entire folder onto the app to process hundreds of files with perfect consistency.
This approach is incredibly valuable. The PDF format is packed with features, but that complexity is often what bloats file sizes. Tools that offer simple drag-and-drop batch processing on your Mac can deliver huge size reductions in seconds, all while keeping your files safe and secure on your own device.
This kind of workflow scales beautifully. For those dealing with high volumes of documents, learning how to extract data from PDF pitch decks automatically shows just how powerful automation can be for overall efficiency, moving beyond just file size reduction.
For the power users out there, you can take it even a step further. Some apps offer folder monitoring, a feature that automatically compresses any new file you drop into a specific folder. To see this in action, check out our guide on using a Mac app to monitor a folder for automatic compression. This "set it and forget it" system is the ultimate productivity boost for anyone who regularly needs to shrink PDFs.
Finding the Right Balance: Quality vs. File Size
Knowing the technical steps to shrink a PDF is one thing, but the real art lies in striking the perfect balance between a small file and a high-quality document. The goal isn't just to make the file smaller for the sake of it; it's to create the smallest possible file that still looks fantastic for its intended purpose. A PDF that’s been squashed into oblivion can be just as useless as one that’s too big to send.
This is a judgment call you'll make every single time. A design portfolio destined for a high-end print shop needs pristine, high-resolution images. On the other hand, a simple invoice you’re attaching to an email can be compressed far more aggressively without anyone noticing. The key is to match your compression strategy to where the PDF is headed.
Matching Quality to Your Use Case
Different scenarios demand different levels of visual fidelity. Sending a document for on-screen review is a world away from preparing a file for professional printing, where every single pixel matters. As the stakes change, so should your compression settings.
Here’s a practical look at how I approach this:
- Email Attachments: The main objective here is to create a tiny file that won’t get bounced by email servers. Aggressive compression is usually fine.
- Web Viewing (Website Downloads): You need something that loads quickly without making visitors wait. Quality is important, but file size is the bigger priority for a good user experience.
- Internal Drafts: When you're just sharing work with colleagues for feedback, clarity is what counts. You don't need maximum image resolution for an internal review.
- Professional Printing: This is the one scenario where quality is completely non-negotiable. Files must be high-resolution to avoid a final product that looks blurry or pixelated.
The most common metric for this is DPI (Dots Per Inch). A setting of 300 DPI is the gold standard for anything meant for print, guaranteeing sharp, professional results. For anything viewed on a screen, I've found 150 DPI is often the perfect sweet spot—it offers excellent clarity while cutting file size dramatically.
Visualizing Your Compression Strategy
Deciding on your workflow often boils down to a simple question: how many files are you dealing with? This little decision tree maps out a straightforward strategy for picking the right tool for the job.
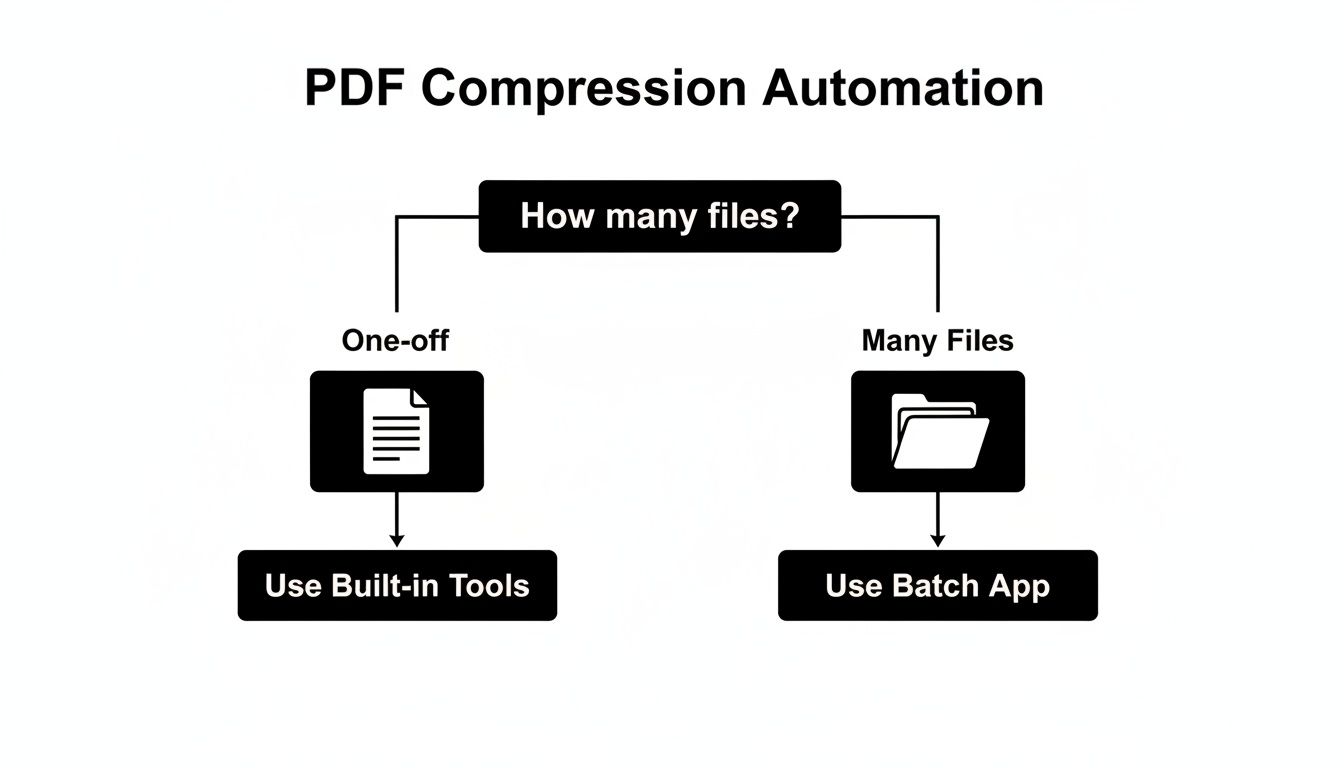
The takeaway here is simple. For the occasional, one-off file shrink, the tools already on your Mac are more than enough. But the moment you find yourself compressing multiple files regularly, switching to a dedicated batch processing app will save you a massive amount of time and keep your results consistent. For that, an app like Compresto is great because you can set up presets and just drag-and-drop folders for fast, repeatable compression.
Compression Settings Quality vs Size Trade-Off
To make this trade-off crystal clear, let's break down how different settings directly impact both file size and visual quality. This table gives a good sense of what to expect.
| DPI Setting | Typical Size Reduction | Best Use Case | Visual Quality |
|---|---|---|---|
| 300 DPI | Minimal | Professional printing, high-end portfolios, and archiving originals. | Excellent. Retains maximum detail and clarity, perfect for physical print. |
| 150 DPI | 50-70% | On-screen viewing, website downloads, presentations, general sharing. | Great. Looks crisp on most screens; you'll only see quality loss if you zoom way in. |
| 96 DPI | 70-90% | Email attachments, internal drafts, or when size is everything. | Good. Perfectly readable, but images will appear noticeably softer or less detailed. |
By consciously choosing your settings based on the PDF's final destination, you can compress with confidence. You’ll know you’ve struck that perfect balance every single time.
Common Questions About Reducing PDF Size
Even with the best techniques in your back pocket, a few tricky questions always seem to come up. Let's tackle some of the most common sticking points to help you shrink your PDFs with a bit more confidence.
Does Reducing PDF Size Lower Its Quality?
In most cases, yes, it does. The majority of compression methods you'll use are "lossy," which is a technical way of saying they permanently throw out some data to make the file smaller. When you downsample images or apply heavy JPEG compression, you'll notice visuals get a little softer. For most on-screen uses, like email attachments or web downloads, the difference is often impossible to spot.
However, some methods are "lossless." Things like removing hidden metadata, stripping out unused objects, or subsetting fonts can trim the file size without touching the visual quality of your content. The real trick is to match the compression method to what you need the PDF for, ensuring the quality is still perfect for its final destination.
Can I Compress a Password-Protected PDF?
It really depends on how it's protected. If the PDF requires an "open password" just to view it, you’ll have to enter that password before any compression tool can even read the file to start working on it.
If it only has a "permissions password" that restricts things like editing or printing, most compression tools will work just fine. They typically operate by creating a brand-new, optimized copy of the file rather than trying to edit the original. The new, smaller PDF usually won't have the old password protection unless your software has a specific feature to re-apply it.
Why Did My PDF Get Bigger After Editing?
This is a surprisingly common headache. Some PDF editors use what's called an "incremental save" feature. Instead of rewriting the entire file from scratch every time you save, they just tack your changes onto the end of the original data. It's a faster way to save, but it creates a lot of redundant information and can seriously bloat your file over time.
The fix is simple: always use the "Save As" or "Export" command when you're done editing. This forces the application to build a fresh, clean, and optimized version of the file, which is almost always smaller than one that's been saved incrementally.
Should I Use an Online Tool or a Desktop App?
This choice really boils down to a trade-off between security, convenience, and power. Online tools are great for a quick, one-off compression job when you're in a pinch. The big catch? You have to upload your document to a third-party server, which can be a major security risk for any sensitive or confidential files.
Desktop apps, on the other hand, do all the work locally on your Mac, so your data never leaves your machine. They are far better for batch processing a bunch of files at once, give you much more control over the compression settings, and work offline. If you’re a professional or anyone who regularly needs to shrink PDFs, a dedicated desktop app is easily the safer and more efficient way to go.
Ready to take control of your file sizes with a powerful, secure desktop app? Compresto offers advanced batch processing, custom presets, and local-first compression for PDFs, images, and videos, all in a simple drag-and-drop interface. Learn more at https://compresto.app.