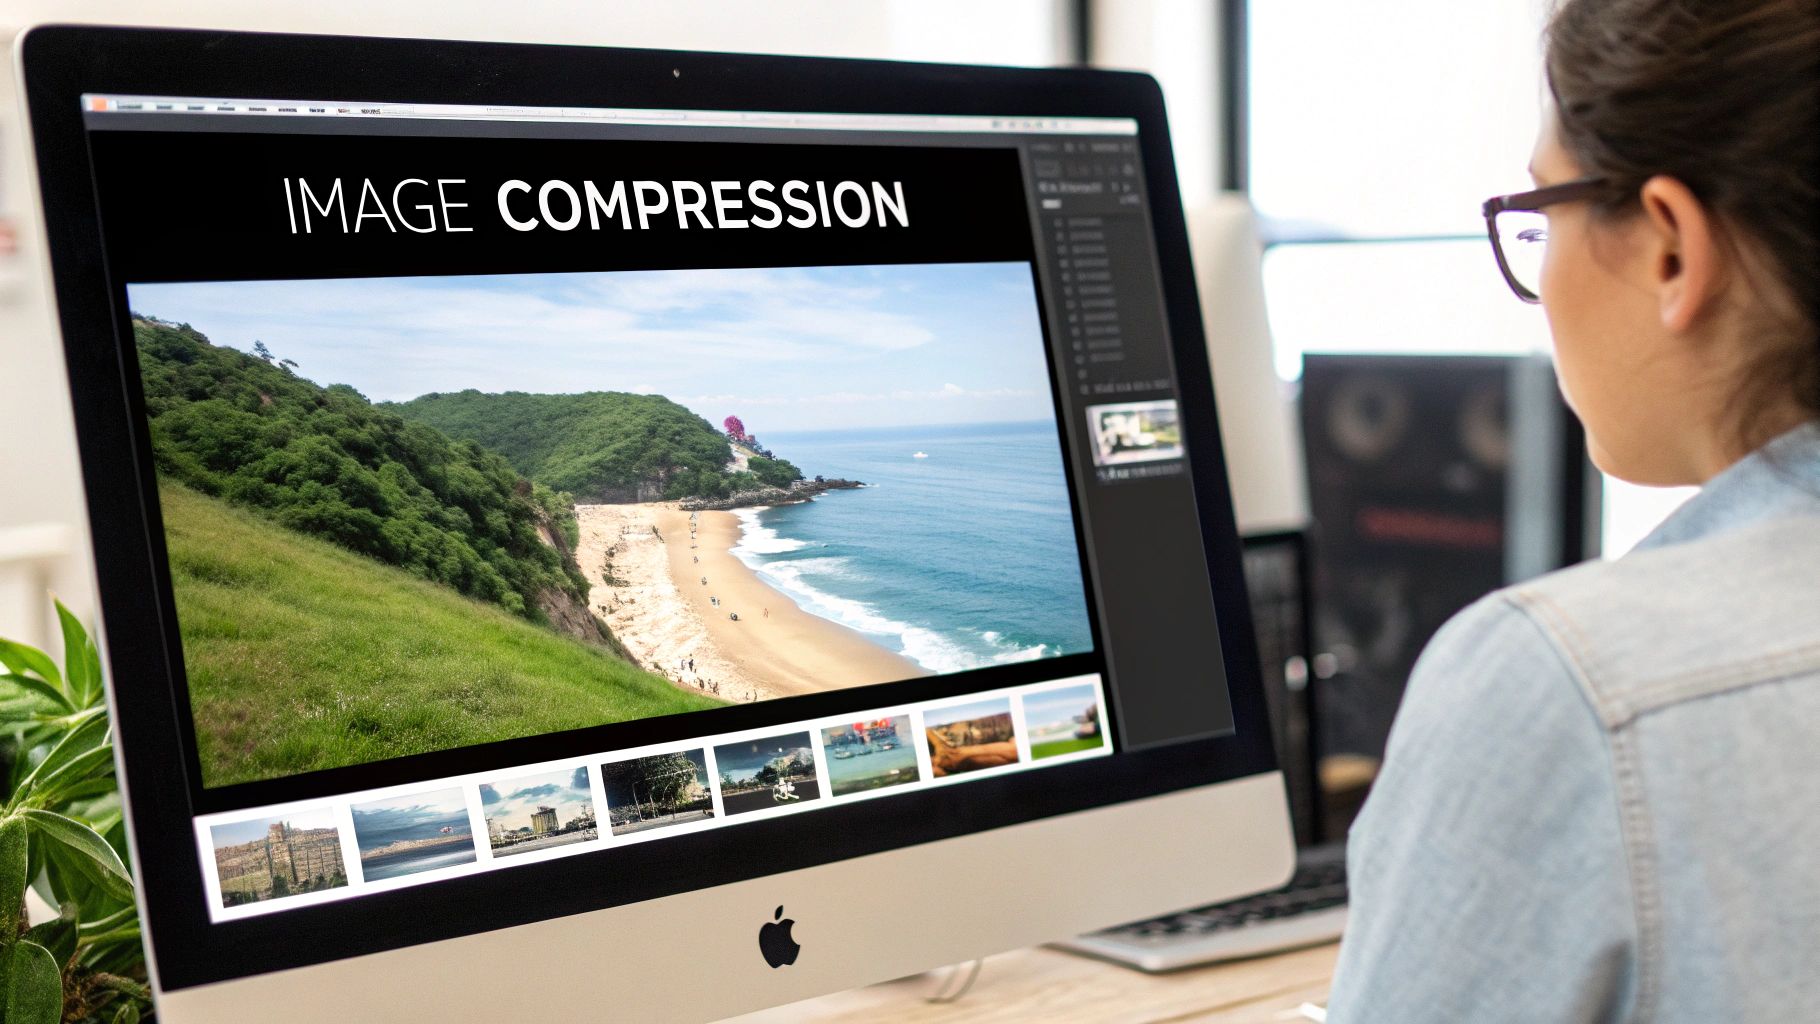
How to Compress an Image Without Losing Quality (2026 Guide)
You want a smaller file. You don't want a worse image. Those two goals are not in conflict — but the wrong tool or the wrong setting turns "compress" into "destroy."
The trick to compress an image without losing quality is understanding three things: the format you're starting from, the format you're saving to, and the quality slider you're moving. Get those right and you can routinely cut a JPEG by 60-80% with zero visible difference. Get them wrong and you get the dreaded Minecraft-face effect.
This guide covers the science, the formats, and the tools — plus quick links to size-specific recipes when you need to hit an exact target.
Need to hit a specific file size?
If your form, email, or upload portal has a hard ceiling, jump straight to the right guide:
- Compress JPEG to 100KB — government forms, passport photos
- Compress JPEG to 200KB — visa and ID portals
- Compress JPEG to 500KB — email attachments, listings
- Compress JPEG to 1MB — LinkedIn, WordPress, generous limits
- Compress images to 50KB — aggressive web optimization
- Compress images for web — site-wide bulk optimization
Understanding the Science Behind Quality-Preserving Compression
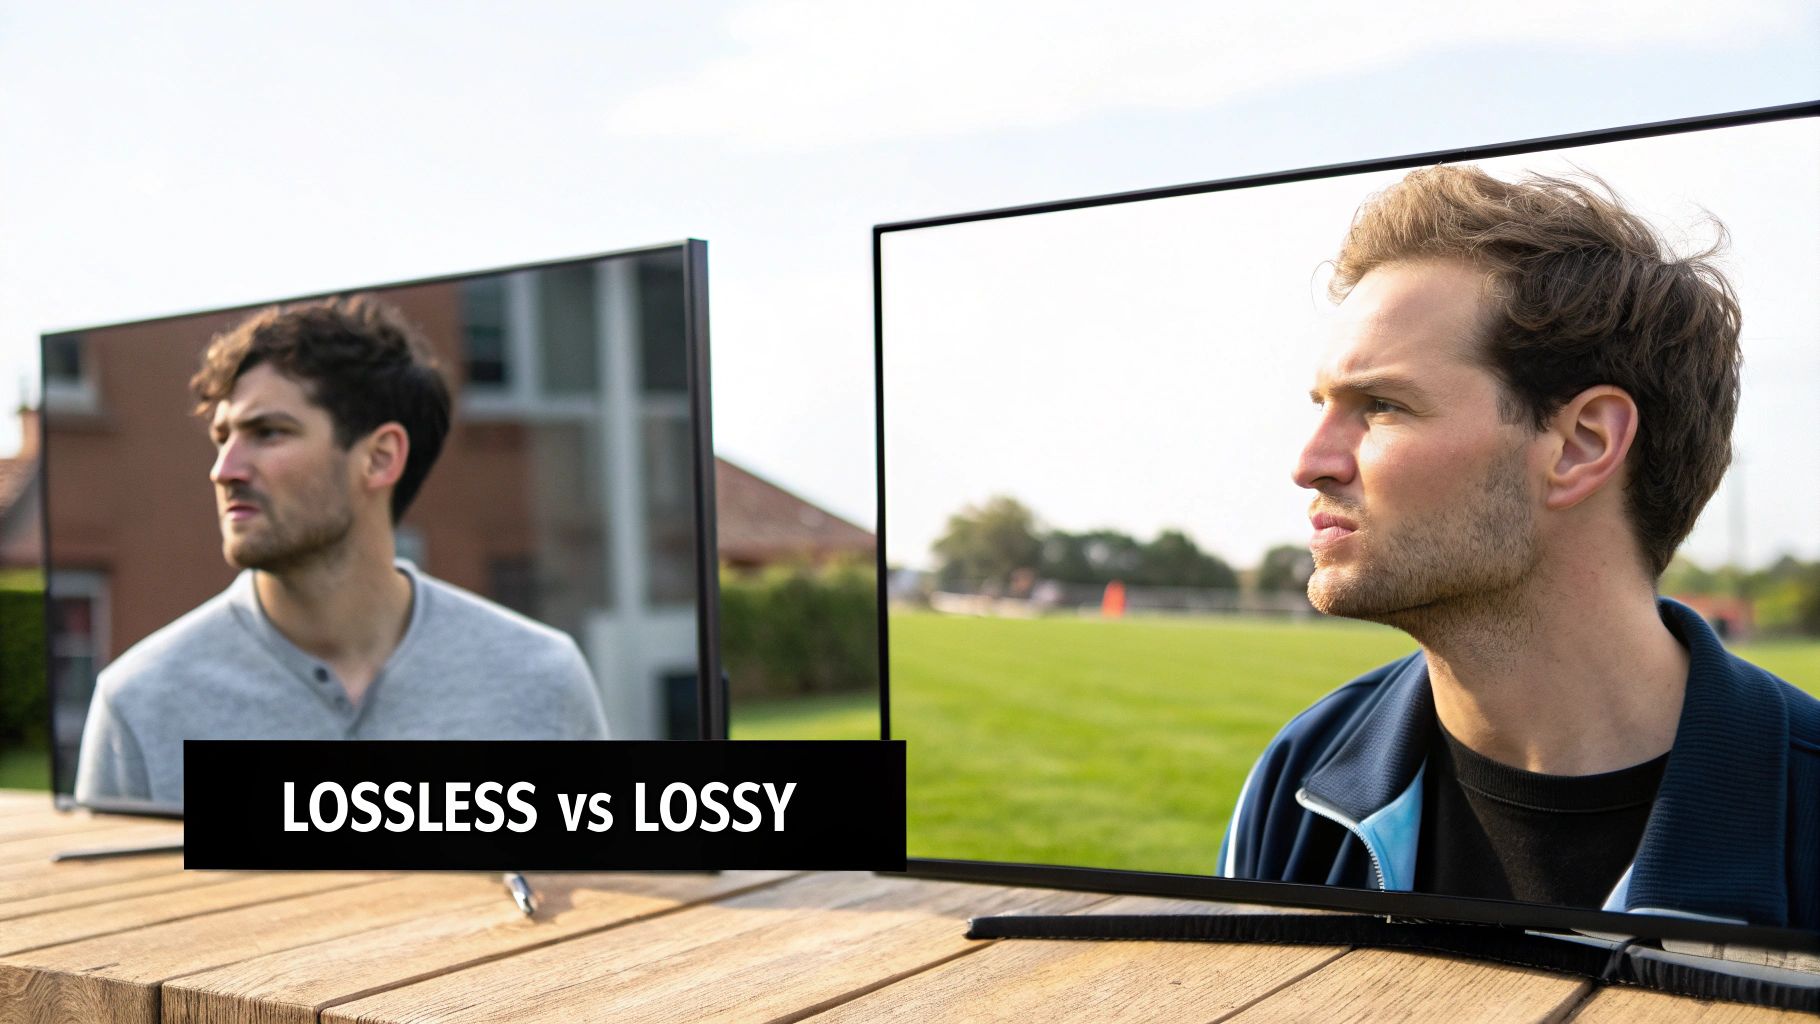
Compressing an image without sacrificing quality might seem impossible, but it's actually based on sophisticated mathematical algorithms. These algorithms shrink file sizes while preserving the visual details our eyes perceive as "quality." This balance is achieved through two main compression types: lossy and lossless.
Lossy Compression: Strategic Data Discarding
Lossy compression, true to its name, removes some image data. This might sound harmful, but the trick is which data gets removed. Lossy compression algorithms target redundant or less visually important information. It's like tidying up – you discard unnecessary items while keeping the essentials.
For example, slight color variations imperceptible to the human eye are often removed. This significantly reduces file size without a noticeable impact on overall image quality. JPEG is the most common example of lossy compression.
Lossless Compression: Perfect Reconstruction
Lossless compression, conversely, keeps all original image data. It uses efficient encoding to represent the data in less space, like packing a suitcase neatly – everything is there, just organized efficiently.
Lossless compression is perfect for images with sharp lines, text, or where detail is crucial, like logos or graphics. PNG is a popular lossless format. The original image can be perfectly recreated because no data is lost.
The Math Behind the Magic: DCT and Beyond
Quality-preserving compression often relies on complex mathematical transforms. The Discrete Cosine Transform (DCT) is one such transform, crucial for achieving high compression ratios while maintaining acceptable image quality. The DCT separates an image into different frequency components, enabling the algorithm to discard higher, less noticeable frequencies.
This technique underpins the JPEG format. The DCT's introduction was a milestone in balancing image quality and file size. Proposed in 1973, the DCT became the foundation for the 1992 JPEG standard. JPEG’s lossy compression allows for efficient high-quality image transmission. By removing less noticeable data, JPEG can compress images by up to 80% without much quality loss. As of 2015, billions of JPEG images are created daily, highlighting its global impact. Learn more about image compression here. You can also explore image optimization for the web here.
Modern compression continues to evolve, with formats like WebP and HEIF using even more advanced algorithms. These offer better compression and support for features like high dynamic range (HDR) and wider color gamuts. Understanding these principles helps you choose the best compression method and format for your specific needs.
Choosing the Right Format for Maximum Quality Retention
Not all image formats are created equal when it comes to compression. Selecting the incorrect format can significantly impact your visual quality, undermining your efforts to compress images effectively. This section explores the strengths and weaknesses of popular formats like JPEG, PNG, WebP, and HEIF, highlighting which ones excel at preserving different image types.
Understanding Format Strengths and Weaknesses
Photographs, with their subtle color gradations and complex details, require different handling than graphics with sharp text and solid colors. Choosing the right format is crucial for finding the optimal balance.
-
JPEG (JPG): This format excels at compressing photographs and images with complex color gradients. It achieves high compression ratios through lossy compression, meaning some data is discarded. However, this loss is often imperceptible at moderate compression levels.
-
PNG: PNG employs lossless compression, preserving all image data. This makes it ideal for graphics with sharp lines, text, and areas where detail is paramount, such as logos or illustrations. However, PNG files are generally larger than JPEGs.
-
GIF: While limited to 256 colors, GIF is the go-to choice for simple animations. Its lossless compression is suitable for graphics with limited color palettes but isn't ideal for photographs.
To illustrate the differences in file size reduction, let's take a look at the following comparison:
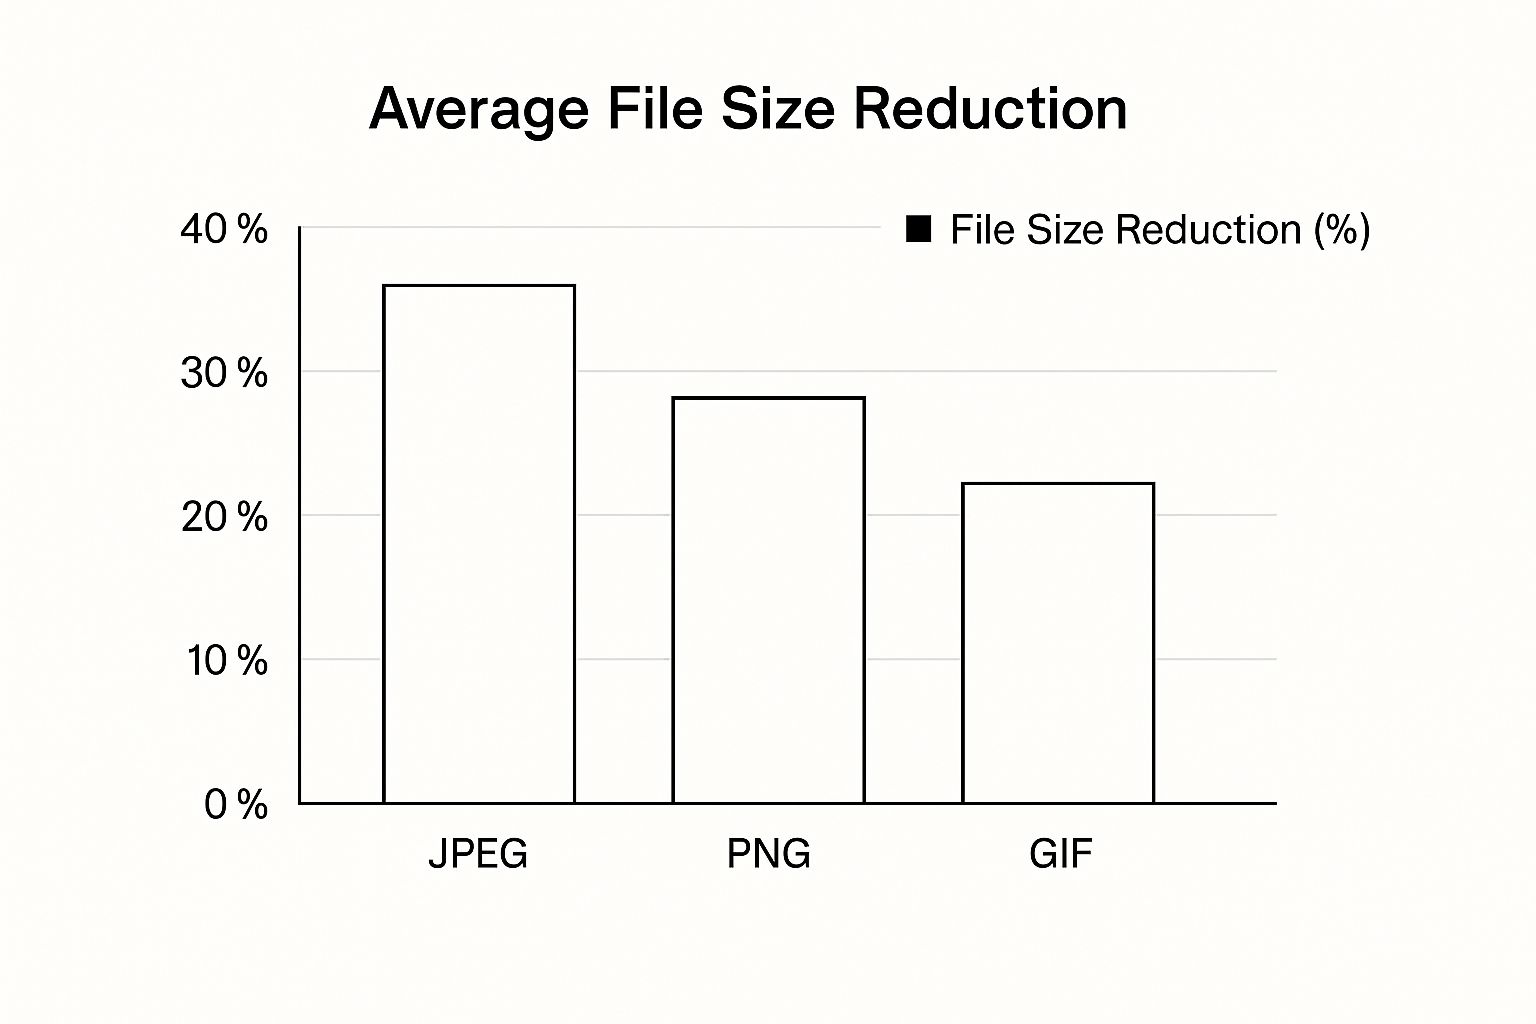
As the infographic shows, JPEG offers the highest average file size reduction, around 40%. PNG follows at approximately 30%, and GIF comes in at about 25%. This highlights the inherent trade-off between compression and preserving quality. JPEG’s higher compression comes at the expense of some data loss, while PNG and GIF maintain all original data, resulting in larger files.
To further understand these differences, consider the table below:
Image Format Comparison for Quality Compression A detailed comparison of different image formats showing their compression capabilities, file size reduction percentages, and quality preservation features.
| Format | Compression Type | Average File Size Reduction | Quality Preservation | Best Use Case |
|---|---|---|---|---|
| JPEG | Lossy | ~40% | High (some loss acceptable for photos) | Photographs, complex images |
| PNG | Lossless | ~30% | Perfect | Logos, illustrations, graphics with text |
| GIF | Lossless | ~25% | Perfect (limited color palette) | Simple animations, graphics with few colors |
| WebP | Lossy and Lossless | ~26-34% (Lossy), ~10-20% (Lossless) | High (lossy), perfect (lossless) | Versatile, suitable for both photos and graphics |
| HEIF | Lossy | ~50% | High | Photos, images with wide color gamuts |
This table summarizes the key differences between these formats, helping you choose the best one for your specific image compression needs.
Next-Generation Formats: WebP and HEIF
Beyond these established formats, newer options like WebP and HEIF offer significant advancements. These formats address the increasing demand for efficient image storage and transmission, especially for high-resolution displays and mobile devices.
-
WebP: Developed by Google, WebP provides superior compression compared to both JPEG and PNG. Supporting both lossy and lossless modes, its versatility makes it suitable for a wide range of images.
-
HEIF: Used by Apple, HEIF (High Efficiency Image Format) supports 16-bit color and can store multiple images within a single file. This makes it ideal for live photos and image sequences. Learn more about the history of image formats here.
Choosing the Right Format for Your Needs
Matching your image format to your content and distribution platform is essential.
-
Image Type: Use JPEG for photographs and WebP for a balance of quality and file size. Choose PNG for graphics and logos that need sharp details. Opt for GIF for simple animations.
-
Compatibility: While WebP and HEIF offer superior performance, ensure compatibility with your target browsers and devices. JPEG and PNG remain widely supported fallback options.
By understanding the characteristics of each format, you can make informed decisions that optimize images for both quality and file size. This knowledge empowers you to compress images effectively, regardless of the image type.
Professional Tools That Deliver Exceptional Results
Choosing the right tools significantly impacts your ability to compress images without losing quality. Fortunately, many options exist, from free online tools to professional software, each with unique features. Let's explore some of the most effective solutions.
Free Online Tools: Quick and Convenient Compression
For quick and easy image compression, online tools like TinyPNG and Squoosh are excellent choices. These platforms use clever algorithms to reduce file sizes while preserving visual quality. TinyPNG specializes in PNG and JPEG compression, ideal for web graphics. Squoosh, developed by Google, supports more formats and offers advanced controls for fine-tuning compression. These tools are often enough for basic image optimization, especially for bloggers and casual users.
Professional Software: Advanced Control and Features
For more demanding projects, professional image editing software like Adobe Photoshop offers robust compression. Photoshop provides precise control over compression settings, letting you fine-tune the balance between file size and quality. This level of control is crucial for photographers, graphic designers, and other professionals who need pixel-perfect results. Photoshop also integrates seamlessly with other Adobe Creative Cloud applications, streamlining complex project workflows.
Specialized Utilities: Unlocking Expert-Level Compression
Beyond mainstream software, specialized utilities address specific compression needs. JPEGmini, for example, uses proprietary algorithms to achieve impressive file size reductions for JPEGs while maintaining visual quality. Tools like ImageOptim (Mac) and Trimage (Windows) automate optimization, making it easy to compress many images at once. These specialized tools are popular with web developers and SEO professionals seeking maximum performance gains.
For format-specific quality-preserving recipes, see compress JPG without losing quality (MozJPEG, chroma subsampling, dimension-first resizing) and compress WebP (lossless vs near-lossless modes for screenshots and UI assets).
Achieving Exceptional Results: Balancing Quality and Size
Professional image compression tools use advanced algorithms to achieve remarkable results. They can achieve compression ratios of 60-80% while maintaining visually lossless quality. Discover more insights about professional compression tools here. AI-powered tools, especially those using neural networks, can outperform traditional methods by 25-40% in quality retention at equivalent file sizes. This means smaller file sizes without sacrificing visual quality. Choosing the right tool and settings depends on your needs and desired quality.
Batch Processing and Automation: Streamlining Your Workflow
Many professional tools offer batch processing, letting you compress many images simultaneously. This saves significant time, especially for large projects. Some tools also offer automation, like folder monitoring, which automatically compresses new images added to a specific folder. This streamlines workflows and ensures consistent image optimization.
Mastering Compression Techniques That Preserve Visual Excellence
Achieving superior image compression involves understanding and applying the right techniques. It's about more than just shrinking file size; it's about maintaining visual fidelity. This section will explore effective workflows and optimization strategies to compress images without sacrificing quality, whether for web or print.
Intelligent Resizing: Laying the Foundation
Before diving into compression algorithms, strategic resizing is key. It's like tailoring a suit – you adjust it to the proper proportions instead of just shrinking it down. Resizing images to the dimensions actually used on your website or in your documents eliminates excess data before compression. This initial step helps improve compression effectiveness and preserve visual quality.
Preprocessing for Peak Performance
Preprocessing further enhances compression. Think of it as prepping ingredients before cooking: optimizing the image before compressing it. This might involve noise reduction to remove unwanted artifacts, color space optimization for efficient color representation, and selective sharpening for areas needing emphasis. Research suggests preprocessing can boost compression efficiency by up to 35% without extra quality loss. Techniques like noise reduction, color space optimization, and selective sharpening before compression can significantly enhance the final result. Learn more about preprocessing techniques here. These steps help achieve maximum size reduction without sacrificing visual excellence.
Fine-Tuning Compression Parameters: A Balancing Act
Mastering compression means understanding quality parameters. These parameters control the balance between file size and visual quality. Different situations call for different settings. Web use often prioritizes smaller file sizes for faster loading, while print projects require higher quality for optimal detail. Experimenting with these parameters helps you find the ideal balance between minimal file size and excellent visual quality.
Tailoring Techniques to Image Types
Different images benefit from different compression strategies. Consider these examples:
- Portraits: Focus on preserving skin tones and facial details with moderate compression.
- Landscapes: Prioritize detail in textures and intricate areas, accepting some compression in smoother skies or water.
- Product Photos: Maintain sharp edges and accurate color reproduction, optimizing for web display.
- Screenshots: Use lossless compression to ensure crisp, clear text and UI elements.
Adapting your approach to the specific content of each image maximizes both file size reduction and visual quality.
Demonstrating the Power of Proper Technique
Comparing before-and-after examples clearly shows the power of these techniques. These comparisons highlight the significant improvements achievable with the right methods. By implementing these professional techniques, you can transform bulky image files into optimized assets ready for any platform or purpose.
Advanced Optimization Strategies for Web Performance
When it comes to compressing images without sacrificing quality, especially on a large scale, simply resizing isn't enough. High-performing websites use a combination of responsive design, smart loading techniques, and network-aware compression to ensure images load quickly on any device.
Responsive Image Techniques
Responsive images are key to adapting your visuals to different screen sizes and resolutions.
- Use the
srcsetattribute to provide multiple image resolutions. - Define the
sizesattribute to help browsers choose the most appropriate file. - Generate different image versions with build tools like Webpack or Gulp.
This ensures users download only the image data they need. By tailoring image dimensions, you reduce file sizes and maintain sharp visuals on high-resolution displays, paving the way for faster initial page loads.
Lazy Loading and Progressive Enhancement
Lazy loading is a powerful technique that defers the loading of off-screen images until they are about to scroll into view, preventing them from blocking the initial page render.
- Add
loading="lazy"to your<img>tags. - Utilize the Intersection Observer API for more customized loading triggers.
- Combine lazy loading with placeholder techniques like blur-up effects or low-quality image previews.
This allows above-the-fold content to load instantly, dramatically improving perceived performance and user engagement.
Adaptive Compression and Device-Specific Optimization
Modern browsers and mobile apps provide insights into network conditions through the Network Information API.
- Detect connection speed (2G, 3G, 4G, etc.).
- Serve higher-compression images to users on slower connections.
- Deliver near-lossless quality assets to users on Wi-Fi or fiber connections.
This strategy allows you to prioritize image quality on strong connections while optimizing for speed on slower networks.
CDN Integration For Faster Delivery
Integrating a Content Delivery Network (CDN) caches optimized images closer to your users, reducing latency. Here are some best practices:
- Automatically purge and invalidate outdated assets.
- Utilize origin shields to minimize the load on your server.
- Configure edge rules to serve next-gen formats like WebP or AVIF based on browser compatibility.
By leveraging edge infrastructure, you can significantly improve loading times and ensure reliability, even during peak traffic.
Case Study Comparisons
Websites that implement these advanced image optimization strategies typically see page load time improvements of 40-60%. Mobile users on slower connections can experience improvements of up to 75%. This can lead to a 25% increase in conversion rates and significantly better user engagement. Read the full research here.
The following table illustrates the impact of different compression levels:
Web Performance Impact of Image Compression: Statistics showing how different compression levels affect website loading speeds, user engagement, and conversion rates
| Compression Level | File Size Reduction | Page Load Time Improvement | User Engagement Impact | SEO Benefit |
|---|---|---|---|---|
| Moderate (80% quality) | ~50% | ~45% faster | +18% clicks | Better Core Web Vitals |
| Aggressive (60% quality) | ~65% | ~55% faster | +22% clicks | Improved Crawl Rate |
| Smart (adaptive) | ~40–60% | ~40–60% faster | +25% conversion | Higher Rankings |
As the data shows, even moderate compression yields substantial performance gains.
Implementation Guides for Popular Platforms
Regardless of your platform—whether it's React, WordPress, or a custom CMS—libraries and plugins like gatsby-plugin-image and lazysizes can automate many of these optimization strategies. For detailed platform-specific guidance, check out our guide on How to master compressing images for faster website load times.
By combining responsive images, lazy loading, adaptive compression, and a properly configured CDN, you can achieve stunning visuals that load incredibly fast. Fast, high-quality images are achievable with consistent application of these advanced techniques.
Key Takeaways: Your Roadmap to Compression Success
Successfully compressing images without losing quality requires a balanced approach. It involves understanding different file formats, using appropriate tools, and applying effective optimization techniques. This guide offers a practical path to achieving consistent, high-quality results. Organizations using systematic image compression report 67% faster content production and 89% fewer quality revisions. They also achieve average file size reductions of 70% without noticeable quality loss. Find more detailed information here.
Essential Checklists for Compression Success
Here’s a step-by-step guide for various image compression scenarios:
-
For Web Graphics:
- Select the appropriate format: JPEG for photos, PNG for graphics with transparency, and WebP for an optimal balance.
- Resize images to their actual display size on your website.
- Use online tools like TinyPNG or Squoosh for quick and easy compression.
- Consider using plugins for automated compression within your Content Management System (CMS).
-
For Print Projects:
- Prioritize image quality over minimizing file size.
- Use lossless compression whenever possible to retain all image data.
- Adjust quality settings within professional image editing software like Adobe Photoshop.
- Calibrate your monitor for accurate color representation to ensure your edits translate well to print.
-
For Archiving and Storage:
- Find a balance between compression level and preserving image quality over time.
- Consider lossless formats for images that are irreplaceable.
- Keep a record of your compression settings for future reference and consistency.
Realistic Benchmarks for Measuring Success
Setting achievable goals and tracking progress is essential. Consider the following metrics:
- File Size Reduction: A 50-70% reduction for web images is a good target without sacrificing visible quality.
- Page Load Time: Optimized images should improve page load speed, aiming for under two seconds.
- User Experience: Compressed images should not negatively impact the overall visual appeal or website usability.
Troubleshooting Common Compression Challenges
Occasionally, issues may arise despite using the best techniques. Here’s a troubleshooting guide:
- Blurry Images: Try lowering the compression level, using a different file format, or resizing the image before compressing.
- Color Distortion: Double-check your color profiles and maintain consistent color management throughout your workflow.
- File Size Still Too Large: Consider advanced techniques like adaptive compression or next-gen formats. You can also use an online Image Resizer to further optimize your images for web performance.
Establishing Quality Control in Your Workflow
Maintaining consistent quality is key for long-term success. These strategies can help:
- Document Your Settings: Create templates with predefined settings for different image compression scenarios.
- Visual Comparison: Always visually compare compressed images to the originals to confirm acceptable quality.
- Automated Testing: Use tools to check image quality and file size automatically after compression. For more information, see How to compress files without losing quality.
By consistently applying these principles to your image optimization process, your visuals will be optimized for quality and performance. Mastering image compression offers a strategic advantage, improving your content and enhancing user experience.
Want format-specific guides? See how to compress JPEG for the JPEG playbook or how to make image file size smaller for a platform-by-platform walkthrough across Mac, Windows, mobile, and online.
Looking for a way to streamline your image and file compression? Compresto is efficient macOS software designed to simplify and optimize file compression. It supports a variety of formats, allowing you to maintain quality while reducing file sizes. Check out Compresto today!