How to Compress MOV Files on Mac Without Losing Quality
Ever tried to email a video from your Mac, only to get that dreaded "file too large" error? You're definitely not alone. MOV files, the native video format for Apple's world, are fantastic for their high quality. The problem is, that quality comes with a hefty file size, creating roadblocks when you need to share, upload, or even just store them.
Figuring out how to compress a MOV file isn't just a technical skill—it's a practical solution to a super common digital headache.
Why Large MOV Files Are a Problem
A massive MOV file is more than just an inconvenience; it's a genuine bottleneck. Picture a graphic designer trying to send a project preview to a client for feedback. A multi-gigabyte MOV is way too big for email, forcing them onto clunky, slow file-transfer services and delaying the whole project.
Or think about families sharing vacation videos. What should be a simple click-and-send moment turns into an all-day upload ordeal. These scenarios highlight a challenge pretty much everyone faces eventually. Knowing how to shrink a video file without wrecking its quality is an essential skill for anyone creating or sharing content today.

The Balance Between Size and Quality
Compression is all about finding that sweet spot between file size and how good the video looks. When you compress a video, you’re basically telling an algorithm to throw out data it thinks is non-essential. Go too aggressive, and you might save a ton of space but end up with a video that’s pixelated and blurry.
The goal of effective compression is to make the reduction in file size dramatic while making the drop in visual quality completely unnoticeable to the viewer. It's a trade-off, but with the right tools, you control the outcome.
The demand for better video management tools is exploding. The global video compressor market was valued at USD 1.2 billion and is on track to hit USD 2.7 billion by 2033, which shows just how many people are looking for a solution.
Simple Fixes Beyond Compression
Before diving into the technical side of compression, remember that sometimes the easiest fix is just to make the video shorter. Trimming out a few seconds here and there can significantly cut down the final file size.
For some practical tips on trimming footage, check out this guide on cutting out parts of a video. Understanding this balance between size, quality, and length will help you choose the right tools and settings to get your videos looking great and ready to share.
Compressing Videos with Built-In Mac Tools
You don't always need to download fancy software to shrink your videos. Believe it or not, your Mac already has a couple of powerful, easy-to-use tools that are perfect for quick compression jobs. These built-in options are my go-to when I need to quickly knock down a MOV file's size for an email or a social media post without a bunch of complicated steps.
The most obvious tool is QuickTime Player, which is probably your default video player anyway. It does more than just play media; it has a surprisingly good export feature that handles all the compression for you. It's the most straightforward way to get a smaller MOV file in just a few clicks.
Using QuickTime Player for Fast Exports
Once you have your MOV file open in QuickTime Player, the process is dead simple. Just head up to the menu bar and choose File > Export As. This will pop up a menu with several resolution options, usually including 1080p, 720p, and 480p. Choosing a lower resolution is the fastest way to get a much smaller file.
For example, I recently exported a one-minute 4K video clip at 1080p, and it easily reduced the file size by over 75%. Dropping it down to 720p shrinks it even more, which is perfect for a quick preview you need to send through a messaging app.
Here’s the standard "Export As" menu you'll see in QuickTime Player.
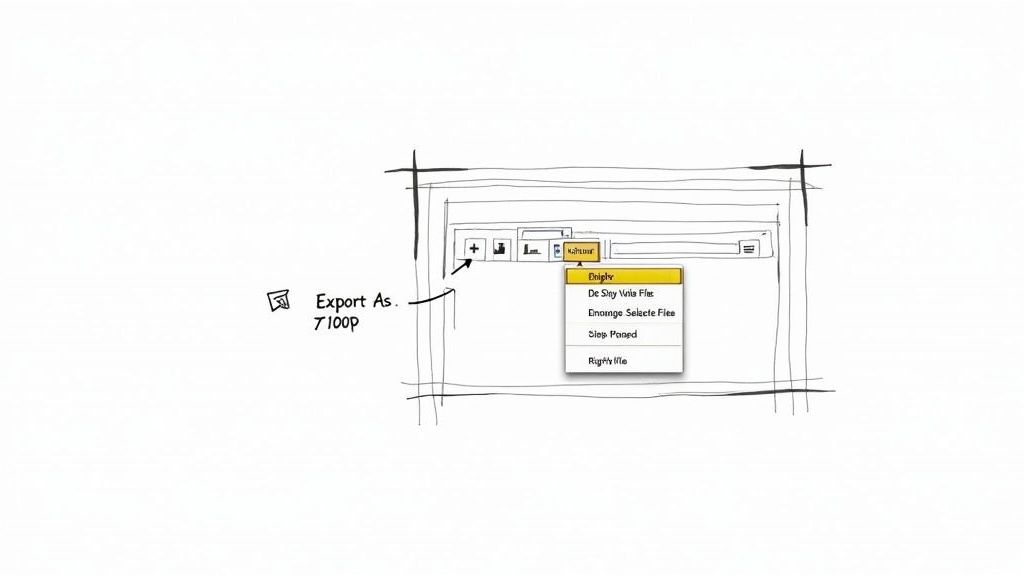
What's great is that this little dialog box shows you the estimated file size for each resolution, so you can make an informed choice. Take a look at the "Greater compatibility (H.264)" option—this is checked by default and ensures your compressed video will play on just about any device out there.
The Hidden Finder Compression Trick
There’s another built-in method that’s even faster, though a lot of people don't know it exists. You can compress a MOV file right from Finder without ever opening an app. It's a fantastic shortcut for when you're in a hurry.
Here’s how you find it:
- Locate your MOV file in Finder.
- Right-click (or Control-click) on the file.
- Hover over Services (or Quick Actions on newer macOS versions).
- Select Encode Selected Video Files.
This brings up a simple dialog where you can choose your output quality and resolution. It uses a set of smart presets to handle the compression in the background, spitting out a new, smaller file right in the same folder.
This Finder method is my personal go-to for compressing batches of screen recordings. It’s incredibly fast for turning large tutorial videos into manageable files for sharing with my team on Slack.
While these built-in tools don’t give you the fine-tuned control of more advanced software, they absolutely nail it on speed and convenience. For a complete QuickTime compression walkthrough, see our dedicated compress video with QuickTime guide. For the vast majority of everyday compression tasks, QuickTime and Finder have more than enough power to get the job done right.
Advanced Compression with HandBrake and FFmpeg
When the built-in Mac tools feel too restrictive, it's time to bring in the heavy hitters. For anyone serious about figuring out how to compress a MOV file with precision, HandBrake and FFmpeg are the ultimate solutions. They offer granular control over every aspect of the compression process, letting you perfectly balance file size and visual quality.
We'll start with HandBrake, a free and open-source tool beloved by video professionals and hobbyists alike. It wraps a powerful compression engine in a user-friendly graphical interface, making advanced settings accessible to everyone.
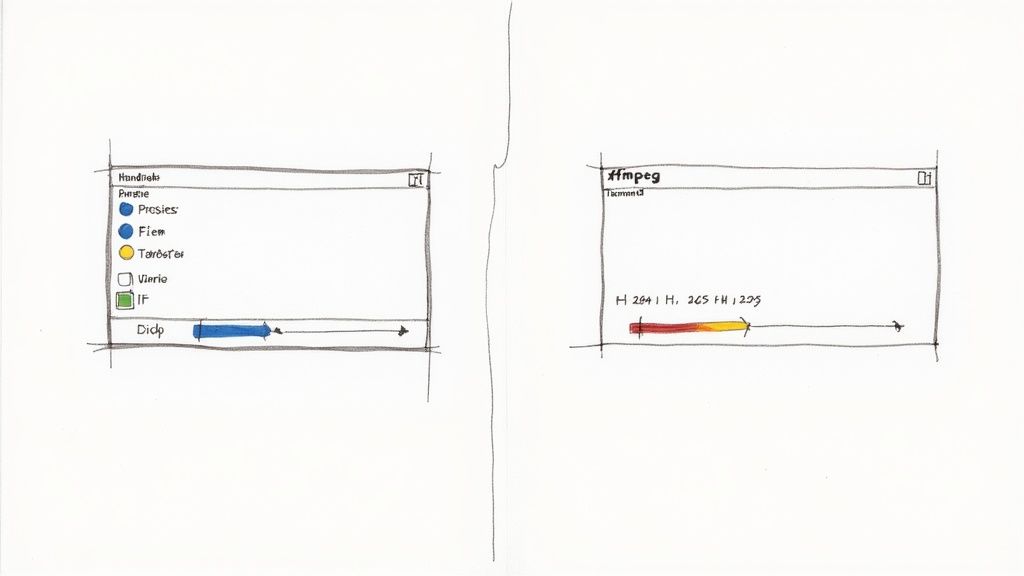
This interface is your command center for detailed compression, allowing you to tweak everything from video codecs to audio tracks.
Getting Started with HandBrake
HandBrake’s real strength lies in its presets. You can quickly select settings optimized for the web, specific devices like an Apple TV, or even platforms like Discord and Vimeo. These presets are a fantastic starting point, but the real power comes from customizing them. For a deeper dive, you can find a complete guide on how to use HandBrake for various tasks.
One of the most critical settings you'll find is the video codec, located under the "Video" tab. You'll typically choose between two main options:
- H.264 (x264): This has been the industry standard for years. It offers excellent compatibility with nearly every device and platform out there.
- H.265 (x265 or HEVC): A more modern and efficient codec. It can achieve the same visual quality as H.264 at a significantly smaller file size—often 25-50% smaller. The trade-off is that it requires more processing power to encode and isn't yet universally supported by older devices.
To help you decide, here’s a quick rundown of how the two codecs stack up against each other.
H.264 vs H.265 (HEVC) Codec Comparison
| Feature | H.264 (AVC) | H.265 (HEVC) |
|---|---|---|
| Compression Efficiency | Good | Excellent (up to 50% smaller files) |
| Device Compatibility | Universal | Very good, but not supported on older devices |
| Encoding Speed | Faster | Slower (requires more processing power) |
| Best For | Maximum compatibility, older devices, web video | 4K/UHD content, archiving, saving storage space |
Ultimately, if your video needs to play everywhere without a hitch, H.264 is the safe bet. But if you're targeting modern devices and want the best possible quality-to-size ratio, H.265 is the clear winner.
For quality control, HandBrake uses a Constant Quality setting, adjusted with a Rate Factor (RF) slider. It’s a bit counterintuitive: a lower RF number means higher quality and a larger file, while a higher RF number means lower quality and a smaller file. A solid starting point for H.264 is an RF value between 20-23.
A personal tip: For web videos, I almost always start with the "Fast 1080p30" preset, switch the codec to H.265, and set the RF slider to 24. This simple adjustment consistently delivers a crisp video at about half the original file size, which is a massive win for website loading speeds.
Mastering Compression with FFmpeg
For those who are comfortable working in the command line, FFmpeg is the undisputed king of video manipulation. It’s a free, open-source framework that powers many video apps, including HandBrake. Using FFmpeg directly gives you unparalleled speed and control, making it perfect for automating repetitive compression tasks.
After installing FFmpeg (Homebrew is the easiest way on a Mac), you can compress a MOV file with a single command. The syntax can look intimidating at first, but it's quite logical once you break it down.
Here’s a practical example to get you started. This command takes an input.mov file and converts it to a smaller output.mp4 using the H.264 codec and a Constant Rate Factor (CRF) of 23.
ffmpeg -i input.mov -c:v libx264 -crf 23 output.mp4
Let's dissect what that command actually does:
-i input.mov: This specifies the input file you want to compress.-c:v libx264: This sets the video codec to H.264.-crf 23: This sets the Constant Rate Factor to 23 (similar to HandBrake's RF slider).output.mp4: And this defines the name of your new, compressed file.
By simply changing these parameters, you can tailor the output to your exact needs. For instance, to resize the video to 720p, you would just add -vf scale=-1:720 to the command. Once you get the hang of it, FFmpeg becomes an indispensable part of any serious video workflow.
How to Choose the Right Compression Settings
Diving into video settings can feel like opening up a whole new world of technical jargon, but figuring out how to compress a MOV file without turning it into a pixelated mess really just comes down to three things: Resolution, Bitrate, and Codec. Think of them as the three legs of a stool—each one is critical, and adjusting one almost always impacts the others.
Getting these settings right is the secret sauce to shrinking your file size while making sure your video still looks sharp. The goal isn't just to make the file smaller; it's to do it intelligently, based on where and how the video will be viewed.
Understanding Resolution and Bitrate
Resolution is probably the setting you're most familiar with. It’s the dimensions of your video, measured in pixels—like 1920x1080, which we all know as 1080p. Higher resolution means a clearer, more detailed picture, but it also creates a much larger file right from the start.
Bitrate, on the other hand, is all about the data. It’s the amount of information used to encode one second of your video, measured in megabits per second (Mbps). This setting directly controls both the video’s quality and its final size. A higher bitrate packs more data into each second, which means better quality and, you guessed it, a bigger file.
Key Takeaway: Resolution is the size of the canvas, but bitrate is the level of detail you paint on it. A 4K video with a rock-bottom bitrate will look blocky and awful, completely wasting the high resolution.
Choosing the Right Codec
The codec (coder-decoder) is the algorithm that does all the heavy lifting, compressing and decompressing your video. For most of us, the decision comes down to two main players: H.264 (AVC) and H.265 (HEVC).
- H.264 (AVC): This is the old reliable. It's been the industry standard for years and will play flawlessly on pretty much any device, browser, or platform you can think of. It strikes a fantastic balance between quality and file size.
- H.265 (HEVC): This is the newer, more efficient kid on the block. It can deliver the same visual quality as H.264 in a file that's often up to 50% smaller. The trade-off? It takes more processing power to encode and might not be supported on older hardware. For a deeper dive, check out this detailed comparison of H.264 vs H.265.
And the technology keeps pushing forward. The latest innovation, VVC (Versatile Video Coding or H.266), manages to be up to 50% more efficient than even H.265. This is a huge deal for streaming ultra-high-definition content, especially for emerging tech like VR and 360-degree videos.
Practical Recommendations for Common Scenarios
Instead of just guessing, it helps to have some solid starting points. These are some battle-tested settings that give you a great balance of quality and file size for the most common uses.
| Use Case | Recommended Resolution | Recommended Bitrate (Mbps) | Recommended Codec |
|---|---|---|---|
| YouTube/Vimeo Upload | 1080p (1920x1080) | 8–15 Mbps | H.264 |
| Social Media (Instagram) | 1080p (1080x1920) | 4–6 Mbps | H.264 |
| Emailing a Preview Clip | 720p (1280x720) | 2–4 Mbps | H.264 |
| Archiving Master Files | Original (e.g., 4K) | 20–40 Mbps | H.265 (HEVC) |
By tailoring your settings to where your video is headed, you can sidestep the classic mistakes: over-compressing and losing too much quality, or under-compressing and ending up with a file that’s still way too big to use. This simple, strategic approach turns a complicated task into a repeatable part of your workflow.
Automating Compression for a Faster Workflow
https://www.youtube.com/embed/kJSPg3jWWGk
Compressing videos one by one is fine for a quick, one-off task, but it becomes a serious time-sink when you're staring down a folder with dozens of files. This is where automation transforms your process from a manual chore into a seamless, hands-off operation. Automating how you compress a MOV file is the key to reclaiming hours of your time and keeping your output consistent across every project.
Instead of feeding files into HandBrake individually, you can use its "Queue" feature for batch processing. Just add an entire folder of MOV files, apply your go-to compression preset to all of them, and click "Start." HandBrake will then dutifully work through the entire list, freeing you up to focus on more important things.
Setting Up a Drop Folder with Folder Actions
For even greater efficiency, you can turn any folder on your Mac into an automated compression machine using a built-in feature called Folder Actions. This powerful tool lets you attach a script to a folder, which then runs automatically on any file you add to it. It’s the perfect set-it-and-forget-it solution.
You could create a simple script using FFmpeg commands and link it to a "Compress Me" folder on your desktop. From that point on, any MOV file you drop into that folder will be automatically compressed to your exact specifications, with the new, smaller file appearing in an "Output" folder. This is a game-changer for anyone who regularly processes large volumes of video. We've got a detailed guide on how you can set up a Mac app to monitor a folder for automatic compression to see this in action.
The infographic below illustrates the three core components you'll be automating—resolution, bitrate, and codec—which are the pillars of any compression setting.
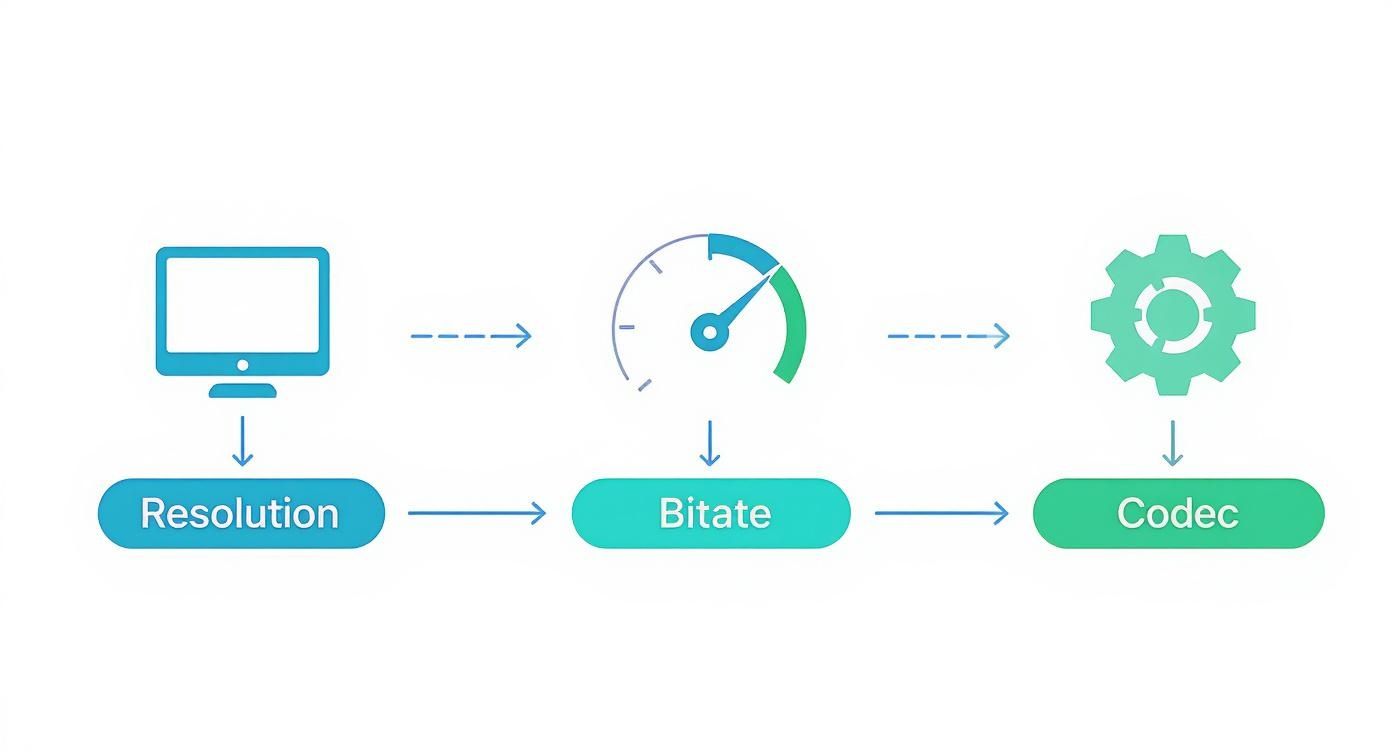
This workflow shows how each setting contributes to the final output, a delicate balance that automation tools can manage consistently for you, every single time.
The Rise of AI in Video Compression
The next frontier in workflow automation is artificial intelligence. Modern tools are moving beyond fixed presets, using AI to analyze the content of each video frame by frame. This allows the software to apply the perfect variable bitrate—using more data for complex, high-action scenes and less for simple, static shots.
AI-driven compression isn't just about making files smaller; it's about making them smarter. It achieves the maximum possible size reduction with virtually zero perceivable loss in quality, tailored to the specific content of your video.
This technology can lead to some pretty significant savings. Research indicates that AI-powered compression can shrink video file sizes by 30-50% without a noticeable drop in quality. For businesses managing large video libraries, this translates to major reductions in storage needs and bandwidth costs.
If you're looking to streamline your video processes even further, exploring modern AI video tools for workflow automation could unlock new possibilities. By embracing these automated methods, you can turn a tedious, repetitive task into an efficient background process.
Common Questions About Compressing MOV Files
When you first start compressing videos, you'll quickly run into a few common questions. Getting these sorted out early on helps you make smarter choices and avoid the usual headaches. Think of this section as a quick-fire Q&A to clear up the most frequent concerns people have about shrinking their MOV files.
It's a handy reference guide to reinforce what you've learned and help you troubleshoot if you get stuck.
Will Compressing My MOV File Ruin Its Quality?
This is the number one fear for most people, and for good reason. Nobody wants to end up with a pixelated mess. While all standard compression is technically "lossy" (meaning some data gets thrown away), it absolutely does not have to ruin your video's quality. When you do it right, the goal is to make any quality reduction completely invisible to the human eye.
By using modern codecs like H.265 and picking the right bitrate for your project, you can get a huge drop in file size with no noticeable loss in visual clarity. The trick is to avoid over-compressing and to match your settings to where the video will ultimately be viewed.
The secret is intelligent compression. You're not just making the file smaller; you're strategically removing redundant data while preserving the details that matter most to the human eye.
What Is the Best Format to Convert My MOV Into?
For universal playback, converting your MOV to an MP4 container is almost always the right call. While MOV files are fantastic for editing, especially inside the Apple ecosystem, MP4 is the undisputed king of sharing and distribution.
An MP4 file encoded with H.264 or H.265 will play on practically any device, platform, or browser you can imagine. This one simple step takes all the guesswork out of wondering if your client or colleague will be able to watch your video.
Can I Compress Multiple MOV Videos at Once?
Yes, and if you're dealing with more than a handful of files, you absolutely should. Batch compression is a massive time-saver, and most decent compression tools are built with this exact scenario in mind.
- In HandBrake: Just use the "Add to Queue" feature to line up a whole folder of videos. You can apply a single preset to all of them and just let it run through the list automatically.
- With FFmpeg: A simple script can loop through a directory and apply the same compression command to every single file inside it.
- Using automation tools: Setting up Folder Actions on your Mac or using apps with monitoring features lets you create a totally hands-off workflow where files get compressed the moment you drop them into a folder.
Getting the hang of batch compression is a game-changer for any large project or repetitive task.
Ready to reclaim your disk space and speed up your workflow? Compresto offers a simple drag-and-drop interface to compress videos, images, and more right on your Mac—no complex settings required. Try it today and see how much time and space you can save. Learn more at https://compresto.app.