How to Compress a PDF File Without Losing Quality
Ever found yourself staring in disbelief at the size of a PDF you just saved? A simple document somehow balloons into a multi-megabyte monster that’s impossible to email. You're not alone. Figuring out what makes these files so bloated is the first step to slimming them down.
The easiest fix is to run your file through a dedicated tool like Compresto for Mac or a good online service. These apps work their magic by optimizing images, stripping out junk data, and re-encoding the file into a much tighter package, often with just a drag-and-drop.
Why Your PDF Is So Large and How to Fix It
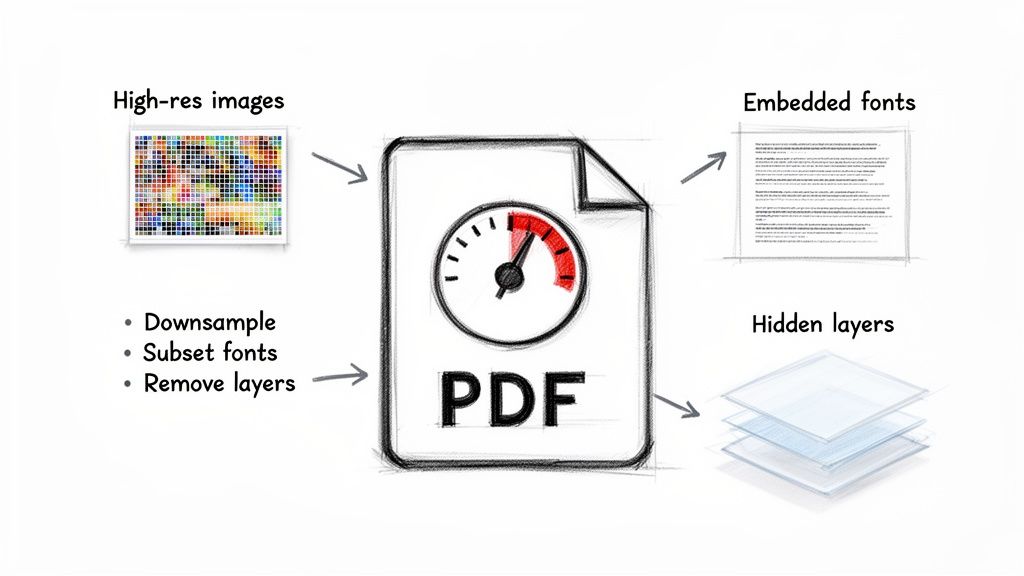
So, what are the usual suspects behind a massive PDF? More often than not, it comes down to high-resolution images and embedded assets. When you drop a beautiful, high-quality photo into your document—even if you shrink it down to fit the page—the PDF often keeps all that original high-res data packed inside.
Another major contributor is embedded fonts. If your document uses several different typefaces, embedding the entire character set for each one can add a surprising amount of weight to the final file.
Common Causes of Bloated PDFs
Beyond the obvious culprits, there are a few other things that can secretly inflate your PDF's size. These are the behind-the-scenes issues that are tough to spot without the right tools.
- Hidden Layers and Objects: If you created your source file in a program like Photoshop or Illustrator, it might bring along hidden layers or objects that are sitting off-page. You can't see them, but they’re definitely taking up space.
- Unoptimized Scans: Scanned documents are really just big images. If they were scanned at a high DPI (dots per inch) without any compression, each page can be a huge, uncompressed picture.
- Excess Metadata: Information about who created the file, when it was edited, and its revision history can pile up over time, adding unnecessary kilobytes.
This flowchart can help you decide on the best approach based on what you need to do and how quickly you need to do it.
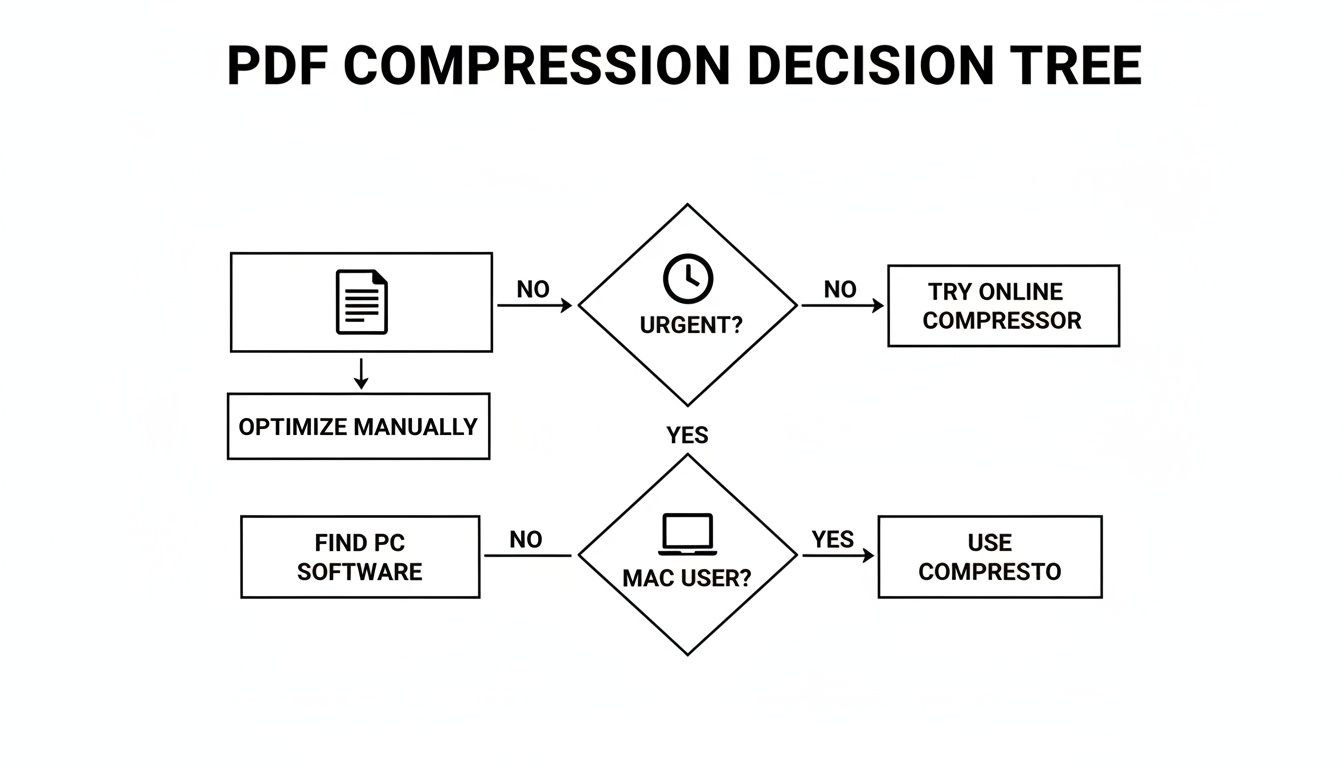
As you can see, the right tool often depends on your specific situation, like your operating system or how much of a hurry you're in.
The Trade-Off Between Size and Quality
At its core, PDF compression is a balancing act between file size and visual quality. This is where you run into the concepts of lossy and lossless compression. Lossless methods shrink the file without throwing away any data, which is great for quality but doesn't save as much space. Lossy methods, on the other hand, achieve much bigger size reductions by intelligently removing bits of information the human eye is unlikely to notice.
Getting a handle on the difference between lossy and lossless compression is crucial for making the right call.
For most professional documents, a tiny, almost imperceptible dip in quality is a perfectly acceptable trade-off for a file that’s 80-90% smaller. Knowing how to strike this balance is key. If you've ever dealt with optimizing image quality for digital display, you'll find the principles are very similar. The end goal is always the same: make your PDF as compact as possible while making sure it still looks sharp and professional.
Effortless PDF Compression on Your Mac
If you're on a Mac, you're in luck. You already have tools built right into the operating system to shrink those monster PDFs. You don't always need to upload sensitive documents to some random website or hunt down clunky software.
Let's walk through the go-to method most Mac users try first, and then I'll show you a much better, more professional alternative for when quality is on the line.
For many, the first stop is the Preview app—it comes standard on every Mac. It's free, it's already there, and it offers a quick fix that works in a pinch. But that simplicity comes with a hefty trade-off that can be a dealbreaker for any kind of professional work.
Using Preview for a Quick (and Dirty) Fix
When you just need to make a PDF smaller, fast, and you aren't too worried about how the images look, Preview gets the job done. The process couldn't be simpler, but it's critical to understand what you're sacrificing before you hit save.
Here’s the standard workflow:
- Open your oversized PDF in the Preview app.
- From the menu bar at the top, head to File > Export.
- In the little window that pops up, find the Quartz Filter dropdown.
- Select Reduce File Size from the list.
- Name your new, smaller file and click Save.
This approach can slash file sizes dramatically. I've seen a 50 MB portfolio shrink down to just 5 MB, which is fantastic for getting it under an email attachment limit. But this aggressive compression comes at a cost. It absolutely hammers the images, downsampling them so heavily that they often end up blurry and pixelated.
Key Takeaway: Preview's "Reduce File Size" filter is a blunt instrument. It's perfect for casual, non-critical documents where size is the only thing that matters. But it gives you zero control and can easily make your work look unprofessional.
When Quality and Control Are Non-Negotiable
So what do you do when you can't afford any quality loss? Imagine you're a graphic designer sending a portfolio to a dream client, or a developer sharing high-fidelity mockups with a team. Blurry images are simply not an option.
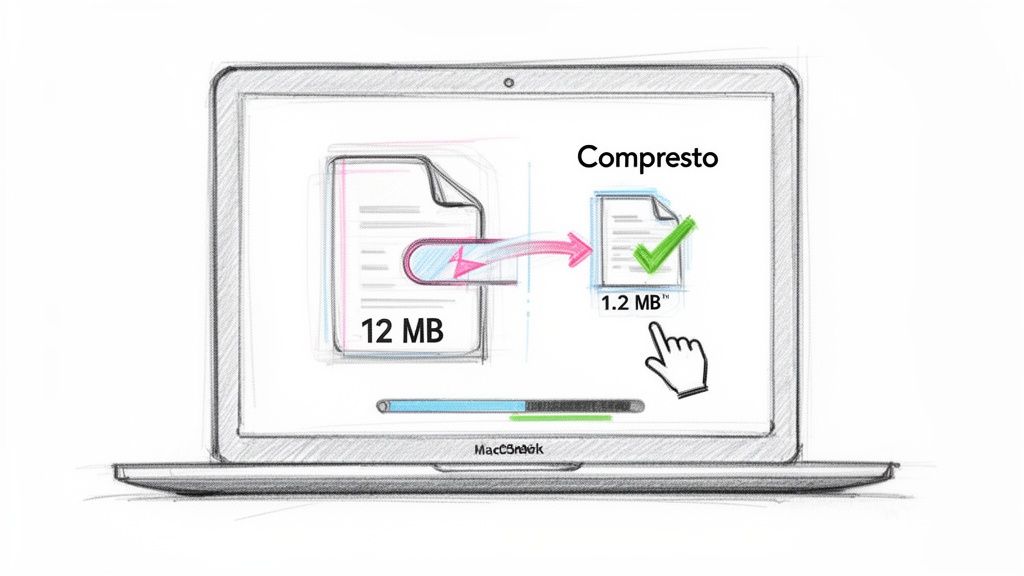
This is where a dedicated PDF compression app built for macOS really shines. A tool like Compresto was designed to solve the exact problem Preview creates: how to shrink a PDF down to a reasonable size while keeping it looking sharp and professional.
Instead of one crude filter, it uses smart algorithms to analyze everything inside the document—images, fonts, vector data—and optimizes each piece individually without wrecking the quality. It’s the difference between a sledgehammer and a scalpel.
The need for tools like this is exploding. The PDF Editor Software market was valued at USD 4.77 billion and is projected to hit an incredible USD 10.01 billion by 2032. We've all been there: a file exported from a design tool balloons to over 100MB, making it impossible to share through services like Gmail with its 25MB cap. You can dig into the numbers in this booming PDF software market report from 360iResearch.
A Practical Workflow with Compresto
Using a tool like Compresto feels less like a chore and more like a natural step in your workflow. The entire process is built around a simple drag-and-drop interface, making it ridiculously fast.
You just drop your files onto the app, pick a preset like "Web & Email," and it does all the heavy lifting for you. Crucially, it all happens locally on your machine, so your sensitive documents never get uploaded to the cloud.
The results are often staggering, with size reductions hitting up to 90% with no visible drop in quality. This makes it perfect for:
- Designers: Sending client proofs that are lightweight but still pixel-perfect.
- Marketers: Optimizing case studies and white papers for fast web downloads.
- Developers: Shrinking technical documentation for easy sharing on platforms like GitHub.
If you want to explore more macOS-specific techniques, check out our in-depth guide on how to compress a PDF on Mac. It dives into a few more tips that build on what we’ve covered here.
At the end of the day, while Preview offers a quick fix, investing in a dedicated app gives you the professional, high-quality results you need for almost any real-world scenario.
Fine-Tuning Compression with Adobe Acrobat Pro
When you need surgical precision over every last kilobyte, Adobe Acrobat Pro is the industry heavyweight. While simpler apps offer fantastic presets, Acrobat’s PDF Optimizer lets you get under the hood and tinker with the engine. It’s a deep dive into the nuts and bolts of your document, giving you manual control over nearly every element that adds to its file size.
This level of control isn't for everyone, but for professionals like prepress specialists, architects, or legal teams, it's non-negotiable. They often work with strict file specifications and can't afford the guesswork of a one-click tool. They need to know exactly how images are being handled and which fonts are being modified.
Diving into the PDF Optimizer
Acrobat’s primary tool for this job is the PDF Optimizer, which you can find under File > Save As Other > Optimized PDF. When you open it, you’re greeted with a panel of options that might look a bit intimidating at first. Think of each setting as a powerful lever you can pull to shrink your file.
Before you touch a single setting, your first move should always be to click the Audit Space Usage button. This feature is pure gold. It generates a detailed breakdown of your PDF, showing the exact percentage of the file's size consumed by images, fonts, form fields, and other data. It’s like getting a diagnostic report that tells you where the bloat is. In my experience, it’s not uncommon to find that over 95% of a file's weight comes from its images.
This audit is your roadmap. If images are the main culprit, you know to head straight to the image settings. If embedded fonts are surprisingly heavy, you know where to look next.
Mastering Image Downsampling and Compression
The Images panel in the PDF Optimizer is where most of the magic happens. Here, you can set specific rules for your color, grayscale, and monochrome images independently. The key is downsampling, a process that reduces an image’s resolution (measured in pixels per inch, or PPI) to shed unnecessary data.
- Average Downsampling: This method averages the pixel colors in a sample area and replaces the whole area with that average color. It's fast, but it can sometimes make images look a bit blocky.
- Subsampling: This one is even faster. It picks a single pixel in the center of a sample area and uses its color for the entire area. The speed comes at a cost, though, as it can produce jagged-looking results.
- Bicubic Downsampling: This is the most sophisticated method and the one I almost always use for photos. It uses a weighted average to determine pixel color, resulting in the smoothest tones and the highest-quality image. It’s a touch slower, but the results are worth it.
For compression, you can choose between ZIP (lossless, great for graphics with large areas of flat color) and JPEG (lossy, perfect for photographs). Setting JPEG quality to Medium or High often strikes an excellent balance between size reduction and visual fidelity. We cover more of these specific settings in our guide on how to reduce file size in Adobe Acrobat.
Unembedding Fonts and Discarding Hidden Data
Fonts can be another sneaky source of file bloat. Acrobat gives you the power to unembed fonts, especially common system fonts like Arial or Times New Roman that your recipient almost certainly has on their computer. The Optimizer lists all embedded fonts, and you can simply move the ones you don't need to an "unembed" list.
Pro Tip: Only unembed fonts you are certain will be available on the recipient's system. For custom or branded fonts, always keep them embedded to ensure the document displays correctly.
Beyond fonts, the "Discard User Data" and "Discard Objects" panels are great for a final cleanup. You can strip out comments, form fields, JavaScript actions, and even flattened layers left over from the source file. Removing all this hidden data can shave off those last few crucial kilobytes.
This granular control is incredibly powerful, but it’s also a more hands-on, time-consuming process compared to the automated workflows of dedicated tools like Compresto. For everyday tasks, speed often wins, but for mission-critical documents where every detail matters, Acrobat's precision is invaluable.
Using Online Tools and Command-Line Utilities
Sometimes you need to shrink a PDF right now, without installing any new software. This is where you have two very different, but equally useful, options: hopping on a website for a quick fix or diving into the command line for surgical precision. One is all about instant results, while the other gives you the ultimate power to automate and control.
Online PDF compressors are incredibly convenient. You find a site, drag your file into the browser, and download the smaller version just moments later. For a non-sensitive document, like a public brochure or a homework assignment, this is often the fastest way to get the job done.
But that speed comes at a price: privacy. When you upload a file, you're handing a copy over to a server you don't control. You have no real say in how that data is stored, who sees it, or when it actually gets deleted.
Staying Safe with Online Compressors
Before you upload anything, you absolutely have to vet the service. I have a simple rule: I never, ever upload documents with personal, financial, or confidential business information. For anything sensitive, an offline tool like Compresto or Adobe Acrobat is the only way to go, because your files never leave your computer.
If you find yourself needing to use an online tool, run through this quick safety checklist first:
- Check the Privacy Policy: Scan for clear language about how your files are handled and, most importantly, how long they're stored. Good services will tell you they delete files within a few hours.
- Look for HTTPS: Make sure the website URL starts with
https://and has a lock icon in your browser's address bar. This confirms your connection is encrypted, protecting the file during upload and download. - Read Reviews: A quick search for user reviews can tell you a lot about a service's reputation for reliability and security.
While compression is about making files smaller, other tools can help manage large documents in different ways. For instance, an AI-powered PDF summarizer can quickly extract key information, showing the growing world of online document tools—each with its own privacy considerations.
Tapping into the Power of the Command Line
For developers, sysadmins, or anyone who feels at home in a terminal, the command line offers a powerful and totally secure way to compress a PDF. It’s perfect for automating tasks, batch-processing files on a server, or baking compression right into a script.
The undisputed champion here is Ghostscript, a powerhouse open-source interpreter for PostScript and PDF files. It’s free, works on every major operating system, and gives you meticulous control over the final output.
On a Mac, you can install it using Homebrew with one simple command: brew install ghostscript.
Once it’s installed, you can compress a document with a command that looks something like this. It seems a bit intimidating at first, but each piece gives you specific control over the result.
gs -sDEVICE=pdfwrite -dCompatibilityLevel=1.4 -dPDFSETTINGS=/ebook
-dNOPAUSE -dQUIET -dBATCH
-sOutputFile=output.pdf input.pdf
A Command-Line Example: This command tells Ghostscript to take
input.pdf, apply a pre-configured set of "ebook" quality settings (a great balance of size and quality), and save the new, smaller file asoutput.pdf.
Breaking Down the Ghostscript Command
Let's quickly pull apart those parameters so you know what's going on. Once you understand them, you can tweak the command to fit your exact needs.
| Parameter | What It Does |
|---|---|
-sDEVICE=pdfwrite | Specifies that the output should be a PDF. |
-dCompatibilityLevel=1.4 | Sets the PDF compatibility, ensuring it can be opened by older readers. |
-dPDFSETTINGS | This is the key to compression. It applies a preset that dictates quality and file size. |
-sOutputFile=output.pdf | Defines the name of your new, compressed PDF file. |
The -dPDFSETTINGS flag is where the magic happens. It accepts several handy presets, each one designed for a different purpose:
- /screen: Lowest quality and smallest size (72 dpi images). Only use this for things that will be viewed on-screen.
- /ebook: A good middle ground between quality and size (150 dpi images). This is usually my go-to starting point.
- /printer: Higher quality output (300 dpi images), ready for physical printing.
- /prepress: The highest quality setting (300 dpi images with full color preservation), meant for professional print jobs.
By picking the right preset, you get to directly control the trade-off between file size and visual quality, making Ghostscript an incredibly precise tool for anyone who needs repeatable, scriptable PDF compression.
Proactive Strategies for Smaller PDFs
The best way to shrink a PDF often starts long before you hit the "Save" or "Export" button. While compression tools are great, they're not magic. They work best on a file that was built efficiently from the ground up. Think of it as a first line of defense against bloated documents.
It’s like packing a suitcase. You can always sit on it to force it shut, but you’ll get a much better result if you fold your clothes neatly in the first place. Taking a few proactive steps while you’re creating the document is the smart way to work, ensuring you don't have to rely on brute-force compression later on.
This whole approach is about optimizing the core components of your document—images, fonts, and hidden data—right at the source. By tackling these elements in programs like Adobe InDesign, Illustrator, or even Microsoft Word, you prevent unnecessary data from ever making its way into your final PDF.
Prepare Your Images Before Placement
Images are almost always the number one culprit behind a massive PDF. In many cases, they account for over 90% of a file's total weight.
A common mistake is dropping a huge, high-resolution photo into your document and just scaling it down visually. This doesn't actually remove any data. The PDF still has to carry the full weight of that original, oversized image.
The real solution is to resize and optimize your images before you even import them into your layout.
- Pre-Size Your Images: Open the image in an editor like Photoshop or a free alternative. If it's only going to appear three inches wide in your document, then resize it to that exact dimension. There's no point in embedding a 4000-pixel-wide photo if it's just going to be displayed at 800 pixels wide.
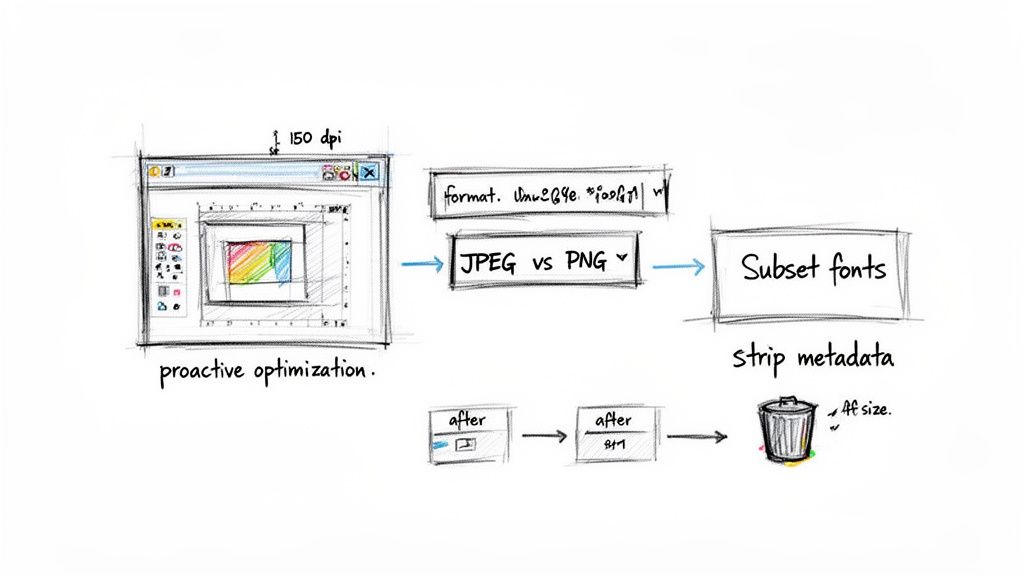
- Choose the Right Format: Use JPEG for photographs and any images with complex color gradients. For logos, charts, or graphics with flat colors and sharp lines, PNG is usually a better choice. Getting the format right from the start avoids unnecessary file size.
- Set the Correct Resolution: For documents meant for on-screen viewing (like web PDFs), a resolution between 72 and 150 PPI (pixels per inch) is plenty. For standard print jobs, 300 PPI is the target. Using a print-quality 300 PPI image in a PDF that will only ever be seen on a screen is one of the most common sources of bloat.
Manage Fonts Intelligently
After images, embedded fonts are the next thing to watch out for. When you embed a font, you’re often including the entire character set, which can add a surprising amount of weight, especially if your design uses multiple typefaces.
The single most effective font strategy is subsetting. Instead of embedding the entire font file, subsetting only includes the specific characters (letters, numbers, symbols) that you actually used in the document. Most modern design software does this by default when exporting to PDF, but it's always a setting worth checking. This simple step can reduce a font's contribution to the file size by over 80%.
For instance, embedding a full OpenType font might add 250 KB to your file. Subsetting that same font could bring its footprint down to just 30 KB. Multiply that by several fonts, and the savings really start to add up.
Clean Up Your Source Document
Over time, your source file in a program like InDesign or Illustrator can accumulate a lot of junk data that isn't essential to the final output. This "junk DNA" often gets carried over into the exported PDF if you're not careful.
Before you export, it’s worth doing a quick audit of your document.
Most of a PDF's weight comes from a few key areas. Understanding where the bulk is coming from helps you focus your optimization efforts where they'll have the biggest impact.
Compression Impact of Different PDF Elements
| PDF Element | Typical Size Contribution | Optimization Strategy | Potential Size Reduction |
|---|---|---|---|
| Images | 60% - 95% | Pre-size, set correct resolution (PPI), use proper format (JPEG/PNG) | 50% - 90% |
| Embedded Fonts | 5% - 25% | Use subsetting, limit the number of font families | 40% - 80% |
| Vector Objects | 1% - 15% | Simplify complex paths, remove redundant points | 10% - 30% |
| Hidden Layers | 1% - 10% | Delete or disable invisible layers before exporting | 100% (of that layer's data) |
| Metadata & Objects | 1% - 5% | Remove unused objects, clean up file metadata | 5% - 20% |
| Off-Page Items | 1% - 5% | Delete all items from the pasteboard/canvas area | 100% (of those items' data) |
As you can see, images are the heavy hitters. But a combination of cleaning up fonts, hidden data, and stray objects in your source file makes a significant difference.
Here’s a quick checklist to run through:
- Hidden Layers: Make sure to delete or at least turn off any layers that aren't meant to be in the final output. Even if they're invisible, they can contain objects and data that add to the file size.
- Off-Page Items: Get rid of any graphics, text boxes, or other elements sitting on the pasteboard outside the document's actual boundaries. These are easy to forget but are often included during the export, needlessly bloating the file.
- Excess Metadata: Sometimes, using the "Save As" command to create a clean copy of your file can strip out unnecessary revision history and other metadata that accumulates over time.
By building these habits into your workflow, you're essentially pre-compressing your document. You’re creating a clean, efficient foundation that ensures when you do use a compression tool, the results will be even more impressive, giving you the smallest possible file without wrecking the quality.
Common Questions About PDF Compression
As you start compressing PDFs, a few questions almost always come up. Getting a handle on these will help you pick the right tool for the job, avoid common headaches, and end up with files that are both small and sharp. Let's dig into some of the most frequent things people wonder about.
Will Compressing a PDF Reduce Its Quality?
This is the big one, and the honest answer is: it really depends on the tool and the settings you use. If you go for a super-aggressive, one-click solution like the “Reduce File Size” filter in macOS Preview, then yes, you’ll almost certainly see a drop in image quality. That method uses heavy-handed "lossy" compression that values small file size above all else.
However, smarter tools like Compresto or Adobe Acrobat Pro's PDF Optimizer are much more nuanced. They use intelligent algorithms to shrink files dramatically with little to no noticeable loss in quality. The key is having control over the compression levels or using presets designed to keep things looking crisp for web, email, or print.
Is It Safe to Use Online PDF Compressors?
While dragging a file into a web browser is tempting, it opens up some serious security risks. When you upload a document to an online tool, you’re sending a copy of your file to a server you don't control. You have no idea who might access it or how securely it’s stored.
For any document containing personal data, financial information, or confidential business details, the answer is simple: do not use online tools. Stick with secure, offline applications like Compresto, Preview, or Adobe Acrobat. They process your files right on your own computer, meaning your sensitive data never leaves your device.
What Is the Best Image Format for a Small PDF?
Picking the right image format before you even create your PDF is one of the single most effective ways to keep its final size in check. The best choice depends entirely on the type of image.
Here's a quick guide:
- For photographs and images with lots of colors and gradients, JPEG is your best bet. You can usually set the quality to a medium or high setting to find a great balance between size and sharpness.
- For graphics with flat colors and sharp lines—think logos, charts, or diagrams—PNG is the better choice. It keeps those crisp edges looking clean, something JPEG struggles with.
Even more importantly, always resize your images to their final dimensions before you put them in your document. Dropping a massive 4K photo into your layout and just scaling it down visually still forces the PDF to carry the data of the huge original file.
Can I Compress a Password-Protected PDF?
In most cases, no. Compression software needs to read and re-encode the file's data, and password protection is specifically designed to block that kind of access and modification. The encryption will stop the tool in its tracks.
The proper workflow is to first remove the password from the original document. Once the file is unsecured, run it through your compression tool of choice. After you have your new, smaller PDF, you can then re-apply any necessary passwords or security settings to protect it before you send it out.
Ready to shrink your PDFs without sacrificing quality or security? Compresto is the macOS app built for fast, easy, and professional results. Drag and drop your files for instant compression that happens entirely on your Mac, keeping your data private. Download Compresto and start reclaiming your disk space today.