MP4 to GIF: How to Convert on Mac (Free & High-Quality)
Converting an MP4 to GIF is a surprisingly quick process on a Mac, especially with the right software. At its core, turning an MP4 video into a GIF is just trimming a video clip down to its most essential moment and converting it into a lightweight, auto-playing animation perfect for grabbing attention online.
This simple act makes your content far more engaging and easier for your audience to digest in just a few seconds.
Why GIFs Are a Modern Content Must-Have
In a world of ever-shrinking attention spans, the humble animated GIF has become a powerhouse communication tool. It occupies a unique sweet spot—more dynamic than a static image but less of a commitment than a full video. It's this versatility that has professionals across different fields creating GIFs from MP4s as a part of their daily workflow.
The Power of Visual Communication
Think about the last time you saw a quick, looping animation that perfectly explained a new software feature or captured a hilarious reaction. That's the magic of a GIF. They are incredibly good at conveying information quickly and effectively, which is why so many different teams rely on them.
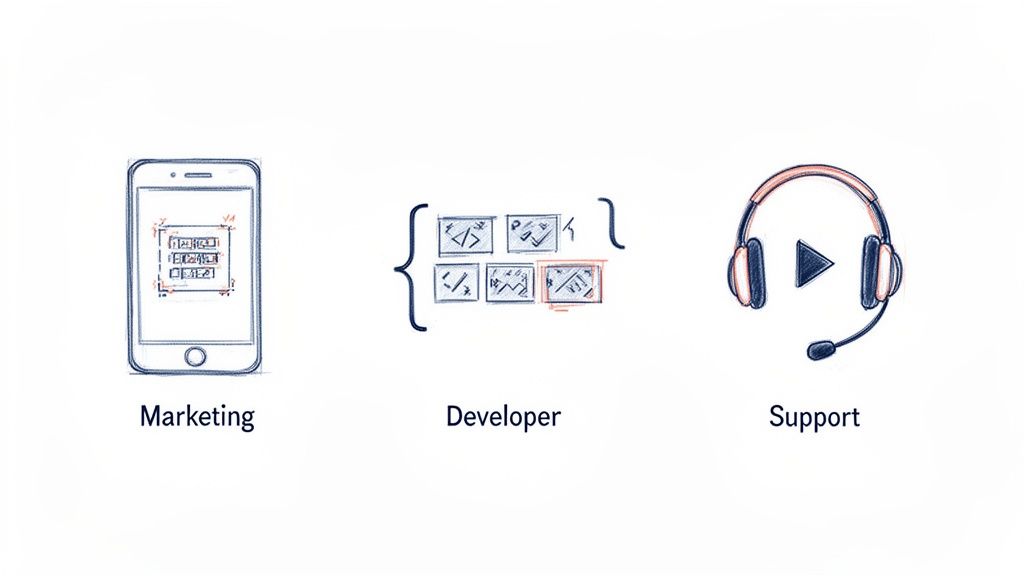
Here’s a snapshot of how professionals are using them:
- Marketers create thumb-stopping social media snippets that cut through the noise in crowded feeds.
- Developers use lightweight animations to nail user onboarding, showing new users exactly how to interact with an application without lengthy tutorials.
- Support Teams embed clear, visual instructions into help articles, which drastically reduces customer confusion and the need for follow-up questions.
GIFs often crush static images when it comes to demonstrating features. Plus, they're way more accessible than full videos in emails or blog posts, where auto-playing video can be seriously disruptive.
Driving Engagement and Efficiency
The insatiable demand for short-form animated content is fueling massive industry growth. The global GIF Converters market, valued at $4,347.05 million in 2021, is on track to hit $5,520.01 million by 2025. This surge is all about the need for quick, engaging visuals that get the point across fast.
A big reason for this trend is that making GIFs is a perfect example of content repurposing. It allows teams to breathe new life into existing video assets by transforming them into new, highly shareable formats. This doesn't just save a ton of time; it also extends the reach and lifespan of your original content.
For those of us on macOS who need to create high-quality GIFs consistently, a dedicated and privacy-focused tool like Compresto is a game-changer. It gives you a reliable workflow without the security risks of uploading potentially sensitive files to random online converters. Your creative process stays secure and, most importantly, efficient.
MP4 vs GIF At a Glance
So, when should you stick with an MP4, and when is a GIF the better call? It really comes down to what you're trying to achieve. This table breaks down the core differences to help you decide.
| Feature | MP4 Video | Animated GIF |
|---|---|---|
| Best For | Longer, high-quality video with audio (tutorials, interviews, demos) | Short, silent, looping animations (reactions, explainers, social media) |
| File Size | Generally larger, but efficient compression keeps it manageable | Typically smaller, but can get large if not optimized |
| Color Support | Millions of colors (16.7 million+) | Limited to a 256-color palette |
| Audio | Yes, supports full audio tracks | No, GIFs are always silent |
| Playback | Requires a user to click "play" | Auto-plays and loops automatically in most environments |
| Use Case Example | A 5-minute product walkthrough video | A 3-second clip showing how to click a button |
Ultimately, both formats have their place. MP4s are unbeatable for detailed video content, while GIFs excel at providing quick, eye-catching visual bites that are easy to share and consume.
Your First MP4 to GIF Conversion with Compresto
Ready to make your first GIF? Getting started with Compresto is about as easy as it gets. The entire app is built around a simple drag-and-drop workflow, which means you can skip the confusing menus and technical headaches that often come with format conversions.
All you have to do is find the MP4 file you want to convert and drag it into the Compresto window. That's it. This single action loads your video and instantly brings up all the tools you'll need to create the perfect animated GIF. Your job is to supply the creative vision; the app handles the heavy lifting.
Setting Up Your Conversion
Once your video is loaded, you'll see a clean interface with a preview on one side and a handful of key settings on the other. This is your command center for turning a video clip into a looping, polished animation. Think of it less as a rigid process and more as making a few smart choices to get the look you're after.
Here's a look at the main workspace in Compresto.
The layout is designed to be visual and intuitive. You can see the impact of your changes in real-time, so you know exactly what you're getting before you hit export.
Your first moves should focus on these core adjustments:
- Trim the Video: Use the timeline editor to pinpoint the exact segment you want to animate. The goal here is to isolate that one perfect moment—a quick reaction, a specific action, or a seamless loop point.
- Choose a Resolution: The output dimensions are a big deal. For a blog post, a width of
600pxor800pxusually hits the sweet spot. If you're designing for a high-density retina display, you might push it to1200px. - Adjust the Frame Rate: This setting is a direct trade-off between smoothness and file size. I've found that 15-20 frames per second (FPS) is the magic number for most GIFs, giving you fluid motion without creating a massive file.
Fine-Tuning for a Polished Result
With the basics locked in, it's time to refine your GIF. This is where you dial in the quality and performance. A common mistake is just exporting with the default settings, which can leave you with a file that's too big or looks a little grainy. A few small tweaks can make a world of difference.
For instance, play around with the playback speed. Sometimes, bumping it up to 125% can make a simple action feel more energetic and engaging. On the flip side, slowing it down can draw attention to a subtle detail. Experiment with this setting to match the vibe of your content.
Pro Tip: Keep a close eye on the estimated file size preview. This little feature is your best friend for balancing quality and performance, helping you avoid that dreaded moment when you realize you've made a GIF that will slow your whole webpage to a crawl.
The color palette is another powerful tool at your disposal. While GIFs are limited to a maximum of 256 colors, Compresto's algorithm is smart enough to pick the best possible palette to keep your animation looking sharp. You usually won't need to mess with this, but understanding this limitation helps explain why GIFs work best for clips without complex color gradients. If you want to dive deeper, we have a detailed guide on how to convert your MP4 to a GIF on a Mac.
Once you're happy with how everything looks in the preview, just click the "Process" button. Compresto does all the work locally on your Mac, so your files stay private. Within seconds, your new, perfectly optimized GIF is ready to be shared with the world.
Nailing GIF Optimization for the Web
Making a GIF is the easy part. Crafting a high-performance GIF that loads in a flash? That’s where the real skill comes in. Optimization is all about turning a basic animation into a professional, web-ready asset that won’t drag your page speed down.
It's a delicate balancing act between visual quality and file size. The goal is to shrink that file as much as possible without turning your beautiful animation into a pixelated mess. Every single kilobyte you shave off contributes to a better user experience, and that's critical for keeping people on your site.
So, let's break down the key levers you can pull to get this balance just right when you're turning an MP4 into a GIF.
This simple decision tree helps visualize the core steps in the conversion process.

As the chart shows, your first choices—picking the right clip and trimming it down—set the foundation for a lightweight final product.
Frame Rate and Dimensions
Two of the biggest factors influencing your GIF's final size are its frame rate and dimensions. Frame rate is simply the number of images, or frames, shown per second. A higher frame rate gives you smoother motion, but it also balloons the file size.
For most GIFs on the web, a frame rate between 15 and 20 FPS (frames per second) looks plenty fluid without being overkill. You can even drop it to 10-12 FPS for simpler animations and see some serious file size savings.
Dimensions—the width and height of your GIF—are just as important. A 1200px wide GIF will always be massive compared to a 600px one. Before you even think about exporting, consider where this GIF is going to live.
- For a blog post content column: A width of 600px to 800px is usually the sweet spot.
- For a small preview or reaction GIF: You can often get away with 300px to 400px wide.
The golden rule here is to always resize your GIF to the exact dimensions it will be displayed at. Never upload a huge GIF and then scale it down with HTML or CSS, because the user’s browser still has to download the full, oversized file. If your clip has dead space around the edges, you can also crop the GIF to trim the frame down before exporting — smaller dimensions mean a smaller file.
Trimming the Color Palette
Unlike modern video formats that can handle millions of colors, the old-school GIF format is limited to a maximum of 256 colors. This sounds like a restriction, but it’s actually one of your most powerful optimization tools.
Reducing the number of colors in the palette is one of the quickest ways to slash file size. For many screen recordings or animations with flat graphics, you can often get away with just 64 or even 32 colors with no noticeable drop in quality. Each color you strip out makes the file that much smaller.
For a deeper look at this, check out our guide on the best way to reduce GIF file size for websites.
The key is to find the lowest color count that still accurately represents your original video. A GIF of a cartoon might look perfect with 32 colors, while a clip from a live-action movie might need closer to 128 or 256 to avoid looking blotchy.
The Magic of Dithering
Now, when you get really aggressive with reducing the color palette, you can run into an ugly side effect called color banding. This is where smooth gradients are replaced with harsh, distinct bands of color. It's not a good look.
This is where dithering saves the day.
Dithering is a clever technique that adds a subtle pattern of noise to the image. This tricks the human eye into seeing more colors than are actually there, smoothing out those gradients and making the animation look much more natural, even with a tiny color palette. Most good conversion tools, including Compresto, will give you dithering options. While it adds a tiny bit back to the file size, the visual improvement is almost always worth it.
Understanding how each of these settings impacts your final GIF is crucial. Here’s a quick breakdown to help you make informed decisions.
GIF Optimization Settings Impact
| Setting | Effect on File Size | Effect on Visual Quality | Best For |
|---|---|---|---|
| Frame Rate | High Impact: Higher FPS drastically increases size. | High Impact: Higher FPS creates smoother motion. | 15-20 FPS for smooth web animations; 10-12 FPS for simple clips or to save space. |
| Dimensions | Very High Impact: Larger dimensions create much larger files. | High Impact: Should match the final display size for clarity. | Sizing the GIF for its exact container, like 600-800px for a blog post. |
| Color Palette | Very High Impact: Fewer colors mean a much smaller file. | Variable Impact: Depends on the source video. | 32-64 colors for simple graphics; 128-256 for complex, photographic video. |
| Dithering | Low Impact: Adds a small amount to the file size. | High Impact: Significantly improves gradients and prevents color banding. | Almost always recommended when reducing the color palette to maintain visual fidelity. |
Mastering these trade-offs is what separates an amateur GIF from a professional one that enhances a webpage instead of slowing it down.
How to Automate Your GIF Creation Workflow
Making a single GIF manually is no big deal. But when you need to convert MP4s to GIFs over and over again, it becomes a serious time sink. For social media managers, creative professionals, or anyone who handles a lot of content, that manual process is a major bottleneck. This is where a little automation can completely change your workflow.
Imagine you're prepping a dozen short video clips for a new marketing campaign. Every single one needs to be turned into a web-optimized GIF with consistent branding. Instead of opening, converting, and saving each file one by one, batch processing lets you knock out the entire job in one go.
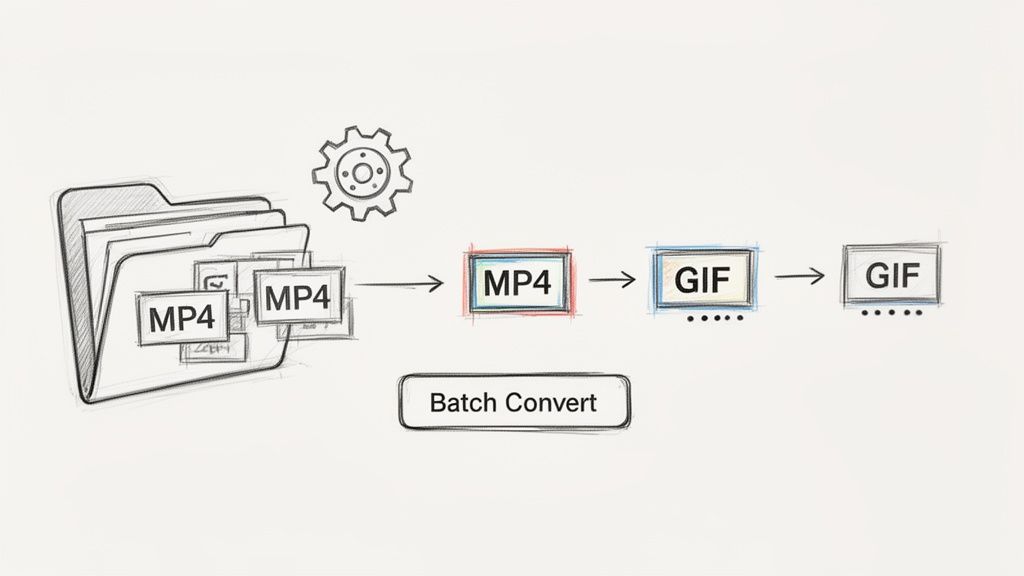
With a tool like Compresto, you just drag the whole folder of videos into the app, pick a saved preset with your optimization settings, and hit "Process." The app then churns through the entire queue, applying the exact same dimensions, frame rate, and color settings to every single file. The result? Perfect consistency across all your assets, with almost no effort.
Take Automation a Step Further with Folder Monitoring
Batch processing is a huge time-saver, but for a truly hands-off setup, Folder Monitoring is the way to go. This feature essentially turns a specific folder on your Mac into a dedicated conversion hot-folder. It's a true set-it-and-forget-it solution.
You just designate a folder, link it to one of your conversion presets, and you're done. From that moment on, any MP4 file you drop into that folder gets automatically converted into a GIF using your predefined settings. Instantly.
This approach is an absolute game-changer for collaborative teams. A video editor can export raw clips to a shared folder, and moments later, the marketing team finds perfectly optimized GIFs ready to use—no manual work required from anyone.
This kind of local automation has huge advantages over most online converters. Online tools usually come with frustrating upload limits, slap watermarks on your work, and force you to send your files to a third-party server, which can be a real privacy risk. Processing locally keeps your content secure on your own machine.
The Power of a Repeatable Process
Building a repeatable, automated system is the mark of a pro. It frees you from the mind-numbing, repetitive tasks and lets you get back to the creative side of your job.
Just think about the benefits:
- Guaranteed Consistency: Every GIF comes out with the exact same specs, which is crucial for maintaining a strong brand identity.
- Massive Time Savings: You can get back hours that you used to spend on manual conversions and file management.
- Total Privacy: Your source videos and finished GIFs never leave your computer, so there are no security concerns.
By setting up these simple systems, you shift from being a manual operator to an efficient workflow architect. If you want more ideas on boosting your creative output, you can learn more about Mac workflow automation and find other ways to streamline your process. A small investment in setting up an automated system pays off big time, making your entire content pipeline faster and more reliable.
Alternative Tools for Creating GIFs on a Mac
While a dedicated macOS app gives you the best of both worlds—simplicity and power—it’s always smart to know what other tools are out there. Trying different methods helps you figure out what really works for your own projects, whether you need raw speed, fine-tuned control, or just plain convenience. Each approach definitely has its own set of pros and cons.
For developers, power users, or anyone comfortable in Terminal, the command-line tool FFmpeg is a beast. It gives you unparalleled control over every single detail of the conversion, from custom color palettes to complex filtergraphs. If you need to script and automate GIF creation as part of a larger workflow, FFmpeg is the most powerful (though least user-friendly) option around.
Exploring Creative and Online Options
Designers who live and breathe the Adobe ecosystem can stick with what they know and use Adobe Photoshop. Its timeline feature lets you manage frame-by-frame animations, making it an excellent choice for creating highly polished, pixel-perfect GIFs from video clips. You can meticulously edit individual frames, slap on visual effects, and juggle layers, giving you a level of creative freedom most other tools just can't touch.
Then, of course, there are the countless online converters. These browser-based tools are undeniably handy for a quick, one-off conversion, especially if you're not on your main machine. You just upload your MP4, tweak a few settings, and download your GIF. Easy. However, that convenience usually comes with a price.
The biggest trade-off with online tools is privacy and quality. You’re uploading your files to someone else’s server, and you’ll often get hit with watermarks, strict file size limits, and sluggish processing speeds.
For example, a review of popular converters highlighted that while online tools are fine for simple tasks, desktop apps are far superior for professional work. They handle batch processing and are up to 50x faster, sidestepping the timeout issues that plague 65% of web users with larger files. While some online services cap MP4s at 50MB, a local app like Compresto can chew through unlimited batches with presets for consistent output—a key reason it’s trusted by thousands of users, including teams at Fortune 500 companies.
Choosing the Right Tool for the Job
So, which tool should you grab? It really boils down to what your project demands.
- For scripted automation: FFmpeg is the undisputed champ for its raw, command-line power.
- For detailed creative work: Photoshop is the go-to for designers needing granular artistic control.
- For one-time convenience: Online tools can get the job done in a pinch, just be aware of their limitations.
- For fast, private, and consistent batch work: A dedicated macOS app is still the most efficient and reliable path.
Beyond just making GIFs, it's also helpful to get familiar with your Mac's other visual capabilities. For instance, knowing how to take a screenshot in Macbook can complement your content creation toolkit. Understanding all the visual tools at your disposal helps you pick the perfect one for any task, so you can work smarter, not harder.
Frequently Asked Questions About Creating GIFs
Even with the best tools, you're bound to run into a few quirks when turning an MP4 into a GIF. Getting a feel for the format's limitations is the last step in really mastering your workflow, so let's clear up some common roadblocks.
How Do I Convert an MP4 to a GIF?
On a Mac, the fastest way to convert an MP4 to a GIF is a drag-and-drop app like Compresto: drop in the MP4, trim to the exact clip you want, set the frame rate (15–20 FPS) and width (600–800px for a blog), then export. You can also convert MP4 to GIF with FFmpeg in the Terminal, Photoshop's timeline, or an online converter — but a local app keeps your files private and processes batches far faster. The step-by-step walkthrough is above.
Why Does My GIF Look Pixelated or Grainy?
The usual suspect behind a pixelated GIF is an overly aggressive color palette reduction. The GIF format is famously limited to just 256 colors. If your source video has complex gradients or a ton of different shades, crunching it all down can create some pretty noticeable visual artifacts.
To clean things up, try these adjustments:
- Increase the number of colors in your palette. Bumping it from 64 up to 128 or even the full 256 can make a huge difference.
- Make sure dithering is turned on. This is a clever trick that mixes existing colors to create the illusion of more shades, smoothing out those harsh transitions.
- Start with a clean source. Videos shot in low light or with a lot of visual noise just don't translate well to the limited GIF format.
Another possibility is that you're just exporting at too low a resolution. Give your output dimensions a quick check to make sure they're big enough for where you plan to display the GIF.
How Can I Create a Perfect Seamless Loop?
Making a seamless loop is part art, part science. It’s what separates a good GIF from a truly mesmerizing one. The whole trick is to find a clip where the very last frame looks identical—or at least very, very similar—to the very first frame. When you pull this off, the transition becomes invisible, creating the illusion of a single, continuous animation.
As you're trimming your MP4, keep an eye out for a repeatable action. Think of a spinning object, a bouncing ball, or a person's recurring gesture. Your goal is to isolate that single cycle, making your cut points right before the action starts and right after it resets.
Some tools offer a "boomerang" or "ping-pong" effect, which is a fantastic shortcut. This simply plays the clip forward and then immediately plays it in reverse, guaranteeing a smooth loop without needing to hunt for that perfect cut.
Can I Add a GIF to Instagram?
In short, no. At least, not directly. Instagram doesn't support the .gif file format for uploads. When you see those short, snappy animations in your feed, they're almost always short, looping .mp4 video files.
To get your animation onto the platform, you'll need to export your creation as an MP4 video instead of a GIF. This is a super common final step for content creators. Most platforms, from your Wix blog to every social media app, have clear guidelines on their supported file types, so it's always a good idea to check their requirements before you hit export.
Ready to create stunning, optimized GIFs without the hassle? Compresto gives you the power to batch-process, automate, and fine-tune your MP4 to GIF conversions locally on your Mac. Download it today and see how fast your workflow can be: https://compresto.app