Reduce Size of MOV File: Complete Guide for Mac Users
Why Your MOV Files Are Storage Monsters (And What That Really Costs You)
Ever recorded a quick video on your iPhone, only to find it’s eating up gigabytes of space? It's a common surprise. MOV files are famously large, and the reason is simple: Apple built them to prioritize video quality above all else. The main cause is often a high-quality codec—the technology used to package video data—like Apple ProRes, which is designed for professional video editing.
If you're creating your own video content, it's helpful to understand the basics from the start. Learning some essential video production strategies can help you manage file sizes before they become a problem.
The Technical Culprits: Bitrate and Codecs
The secret ingredient that makes your MOV files so huge is the bitrate. Think of bitrate as the amount of data packed into every second of video. A higher bitrate means more detail and clarity, but it also means a much, much larger file. For instance, a MOV file using a high-bitrate codec can easily reach 15 GB for just a five-minute clip. That's because Apple's codecs are designed to preserve every bit of information for editors, which is great for a Hollywood production but a real headache for daily storage and sharing.
You can learn more about how different video formats stack up and why it matters when you explore the details of video codecs.
This visual comparison shows why MOV files, while great for quality, often end up much larger than more compressed formats like MP4.
The chart makes it clear: MOV offers excellent quality, but its size can be a big disadvantage when it comes to storage and sharing.
The Hidden Costs of Huge Files
These massive files create real-world problems that go beyond just a full hard drive. The costs can sneak up on you in a few ways:
- Cloud Storage Fees: That "free" 5 GB of iCloud storage vanishes almost instantly. Before you know it, you're paying a monthly subscription just to keep your videos backed up.
- External Drives: You start collecting external hard drives like souvenirs, leading to a messy and confusing backup system where you can never find the clip you need.
- Sharing Frustrations: Have you ever tried to email a video or upload it to social media? Large MOVs frequently blow past upload limits, forcing you to find awkward and time-consuming workarounds. This is a common issue, but there are ways around it. For more ideas, check out our guide on general file size reduction tips.
The need to reduce the size of a MOV file isn't just a technical fix; it’s about taking back control of your storage, saving money, and making your digital life a whole lot easier.
Decoding Your Compression Toolkit Options

When you need to reduce the size of a MOV file, you're faced with a few technical-sounding choices. But don't worry, they're simpler than they seem. Most people end up with poor results because they don't grasp the four main dials they can turn to shrink files: the codec, bitrate, resolution, and frame rate. Understanding these settings is the key to shrinking your video files without destroying their quality.
The Power of Codecs and Bitrate
The biggest impact on your file size comes from the codec. That huge MOV file you have is probably using a professional-grade codec like Apple ProRes, which is great for editing but not for sharing. By switching it to a more efficient codec like H.264 or H.265 (HEVC), you can achieve file size reductions of up to 90%. These codecs are specifically designed for distribution and use clever algorithms to pack video data into a much smaller space.
This setting works directly with bitrate, which is the amount of data your video uses per second. Lowering the bitrate is a direct way to shrink a file, but if you drop it too much, your video will look like a pixelated mess. The real art is finding that "just right" spot where the quality is good enough for your purpose—like sharing a family video online—without using extra data. I once took a 10 GB 4K video and easily turned it into a shareable 500 MB file just by picking the H.264 codec and a sensible bitrate.
To help you choose the right codec for your needs, here’s a quick comparison of the most common options. Each one offers a different balance between file size, quality, and how widely it's supported.
Codec Comparison for MOV File Compression
| Codec | Compression Ratio | Quality Level | Compatibility | Best Use Case |
|---|---|---|---|---|
| H.264 (AVC) | High | Good-Very Good | Excellent (Most devices/browsers) | Web streaming, social media, general use |
| H.265 (HEVC) | Very High | Very Good-Excellent | Good (Newer devices/software) | 4K video, high-efficiency storage |
| Apple ProRes | Low | Excellent (Lossless) | Good (Apple ecosystem, pro software) | Professional video editing, mastering |
| VP9 | High | Very Good | Good (Web browsers, Android) | YouTube streaming, web video |
As you can see, for everyday sharing, H.264 is a reliable choice due to its universal compatibility. If you're working with 4K content and know your audience has modern devices, H.265 offers superior compression without a major quality hit.
Resolution and Frame Rate Adjustments
Next up is resolution. Let's be practical: does that video really need to be in 4K if it's just going to be viewed on a smartphone? Downscaling a 4K video to 1080p, or even 720p, can slash the file size by more than half with almost no noticeable quality drop on smaller screens. It’s a simple change that makes a huge difference.
Similarly, adjusting the frame rate can provide significant savings. Most cinematic video is shot at 24fps, yet many phone videos are 60fps. For most content, reducing the frame rate from 60fps to 30fps is barely perceptible to the average viewer but cuts the data needed nearly in half. While our main focus here is on MOV files, the principles of optimizing media apply elsewhere. For instance, knowing how to use free image resizer tools to prepare pictures for different platforms can give you a better sense of how to tailor media for its final destination.
Fine-Tuning Settings That Actually Deliver Results
Jumping into compression without a clear strategy is a bit like cooking without a recipe—you might end up with something, but it probably won't be what you wanted. To effectively reduce the size of a MOV file, you need to get familiar with a few key settings. It's all about striking that perfect balance between file size and visual quality, not just sliding a quality bar to the left and hoping for the best.
Think of it this way: default export settings are usually cranked up for maximum quality, not for practical sharing or storage. Your job is to dial them back just enough to make the file significantly smaller, without your audience noticing any real difference on their screens.
Resolution: The Easiest Big Win
The fastest way to get a dramatic size reduction is by changing the video's resolution. Ask yourself: where will this video be watched? If it's for someone's phone, they likely won't see the difference between a 1080p (Full HD) and a 720p (HD) video. But your file size will. Following this simple rule can shrink files by over 50%.
My personal rule of thumb is to match the resolution to the most common viewing device. For most web and mobile viewing, 720p is the sweet spot. You can learn more about how to effectively compress MOV files while saving space.
Frame Rate and Bitrate: The Balancing Act
Next up is the frame rate. Many new phones record at 60 frames per second (fps) to get that buttery-smooth look. While great for slow-motion, it's often overkill. For most content, like a product demo or a family vacation clip, 30fps is perfectly acceptable and instantly cuts the data needed in half.
With resolution and frame rate sorted, it's time to tackle the bitrate, which dictates how much data is used per second of video. This is where you can do the most damage if you're not careful.
- Too high: Your file remains unnecessarily large, defeating the purpose of compression.
- Too low: Your video turns into a blocky, pixelated mess that's painful to watch.
For a 1080p video at 30fps, a bitrate between 2,500 and 4,000 kbps is a great starting point for excellent quality and a reasonable size. For 720p, you can often drop it to around 1,500 kbps. I always recommend exporting a short, 5-second clip to test your settings before committing to a full video. This quick check can save you hours of re-compressing a long file.
Choosing Mac Tools That Actually Work
When you need to shrink a MOV file on your Mac, you'll find a ton of tools out there, and it's easy to get overwhelmed. The App Store and the web are crowded with everything from free, no-frills utilities to polished, professional-grade software. The goal is to find a tool that matches your needs and comfort level without a steep learning curve or a high price tag.
The Best Free and Prosumer Options
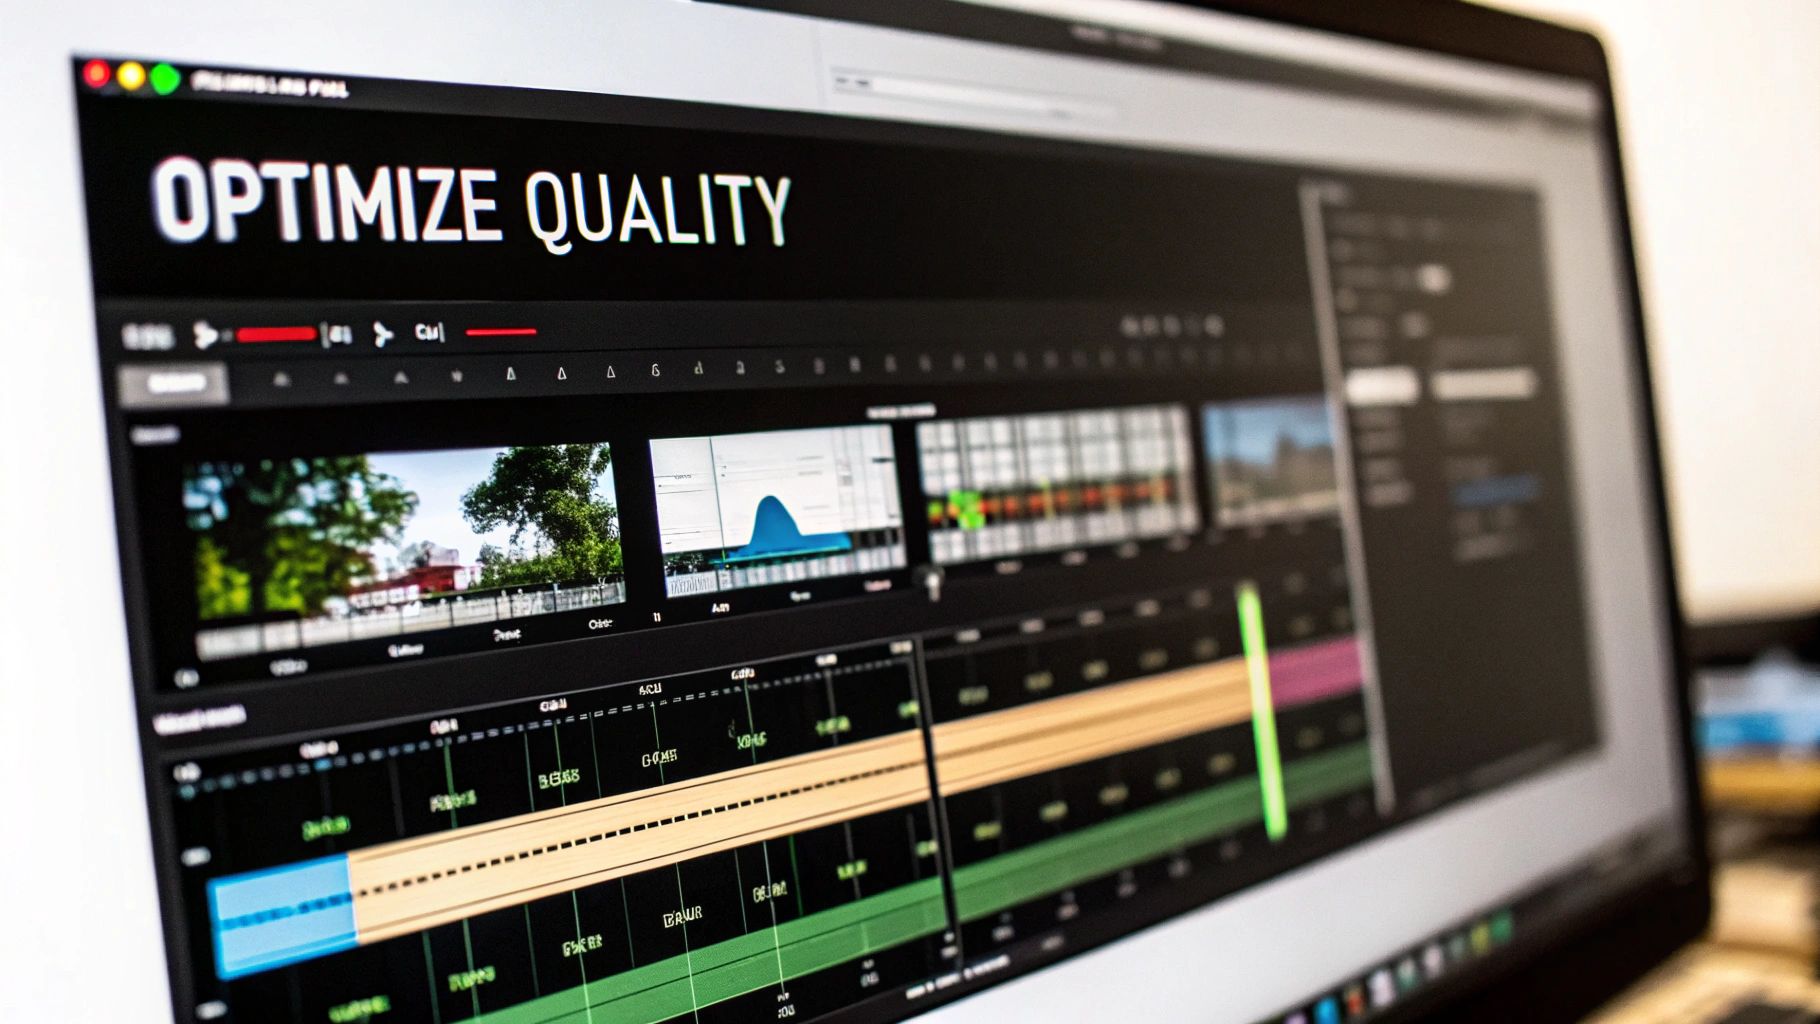
For most everyday tasks, a free tool is often all you need. HandBrake is a fantastic choice here and probably the most powerful free option available. It gives you deep control over every little detail of the compression process. If you're the type who likes to tinker with settings like codecs, bitrates, and resolution to get that perfect balance of quality and file size, you'll feel right at home with it.
As you can see in the screenshot, HandBrake’s interface is packed with options. The presets are a great starting point, but the real power lies in the tabs for Dimensions, Filters, and Video, which offer precise control. This is why it’s been a long-time favorite for technical users who want to get things just right.
Another great tool you might already have is VLC Media Player. While most of us know it as a "play anything" video player, it has a surprisingly capable conversion feature tucked away. It’s perfect for those times when you just need to make a file smaller quickly and aren't too worried about achieving pristine visual quality.
Professional and Advanced Tools
For video professionals, Adobe Media Encoder is the go-to tool. It’s built for heavy-duty work, offering powerful batch processing and seamless integration with other Adobe apps like Premiere Pro. However, it comes with a significant subscription cost and isn't the most straightforward tool for beginners. If you're curious about more advanced methods, you might want to explore how to compress videos using command-line tools and their user-friendly alternatives.
Modern tools like Compresto are designed to fill the gap between simple free utilities and complex professional software. They use smart algorithms to handle the complicated parts of compression for you. This approach gives you a major reduction in file size while keeping the video looking sharp, making it an excellent choice for anyone who wants great results without needing to become a compression expert.
To help you decide, here's a quick comparison of some of the most popular tools available for Mac users.
Mac MOV Compression Tools Comparison
Detailed comparison of popular MOV compression tools showing features, pricing, speed, and quality results
| Tool Name | Price | Compression Speed | Quality Retention | Ease of Use | Best For |
|---|---|---|---|---|---|
| Compresto | Paid (free trial; from $19/yr or $49 lifetime) | Very Fast | Excellent | Very Easy | Users who want fast, high-quality results without complex settings. |
| HandBrake | Free | Moderate | Very Good | Moderate | Tech-savvy users who want deep control over compression settings. |
| VLC Media Player | Free | Fast | Good | Easy | Quick, simple compressions where top quality isn't critical. |
| Adobe Media Encoder | Subscription | Fast | Excellent | Difficult | Professionals needing batch processing and Adobe Suite integration. |
This table shows that the "best" tool really depends on what you're trying to do. For quick and simple jobs, VLC is a great free option. For those who love to fine-tune every setting, HandBrake is the classic choice. But for most people who just want a smaller file that still looks great, a modern tool like Compresto offers the best balance of simplicity, speed, and quality.
Your Complete Compression Workflow
Turning a huge MOV file into a more manageable size is about more than just hitting a “compress” button. Having a go-to workflow is a real time-saver, preventing headaches and making sure you get the results you expect every time. This is about creating a process you can repeat, whether you're shrinking a single wedding video for family or batch-processing dozens of screen recordings for a work project.
Setting Up for Success
Before you even launch a compression tool, a little organization goes a long way. My number one rule is simple: always work with a copy. I always create a dedicated folder for my original, high-quality MOV files and a separate one for the compressed versions. This small step is a lifesaver, as it stops you from accidentally overwriting a precious original file.
Next, aim for consistency. If you're compressing multiple videos for the same project—like a series of tutorials—it's smart to create a custom preset in your software. This ensures every video ends up with the same resolution, bitrate, and quality, giving your project a polished and uniform look. For anyone creating videos for an online business, efficient file sizes are key to good web performance. You can find more tips in guides on ecommerce video production strategies.
The Core Compression Process
The actual steps to reduce the size of a MOV file can be boiled down to a few key actions. This infographic breaks down the simple, three-stage flow that is at the heart of any compression task.
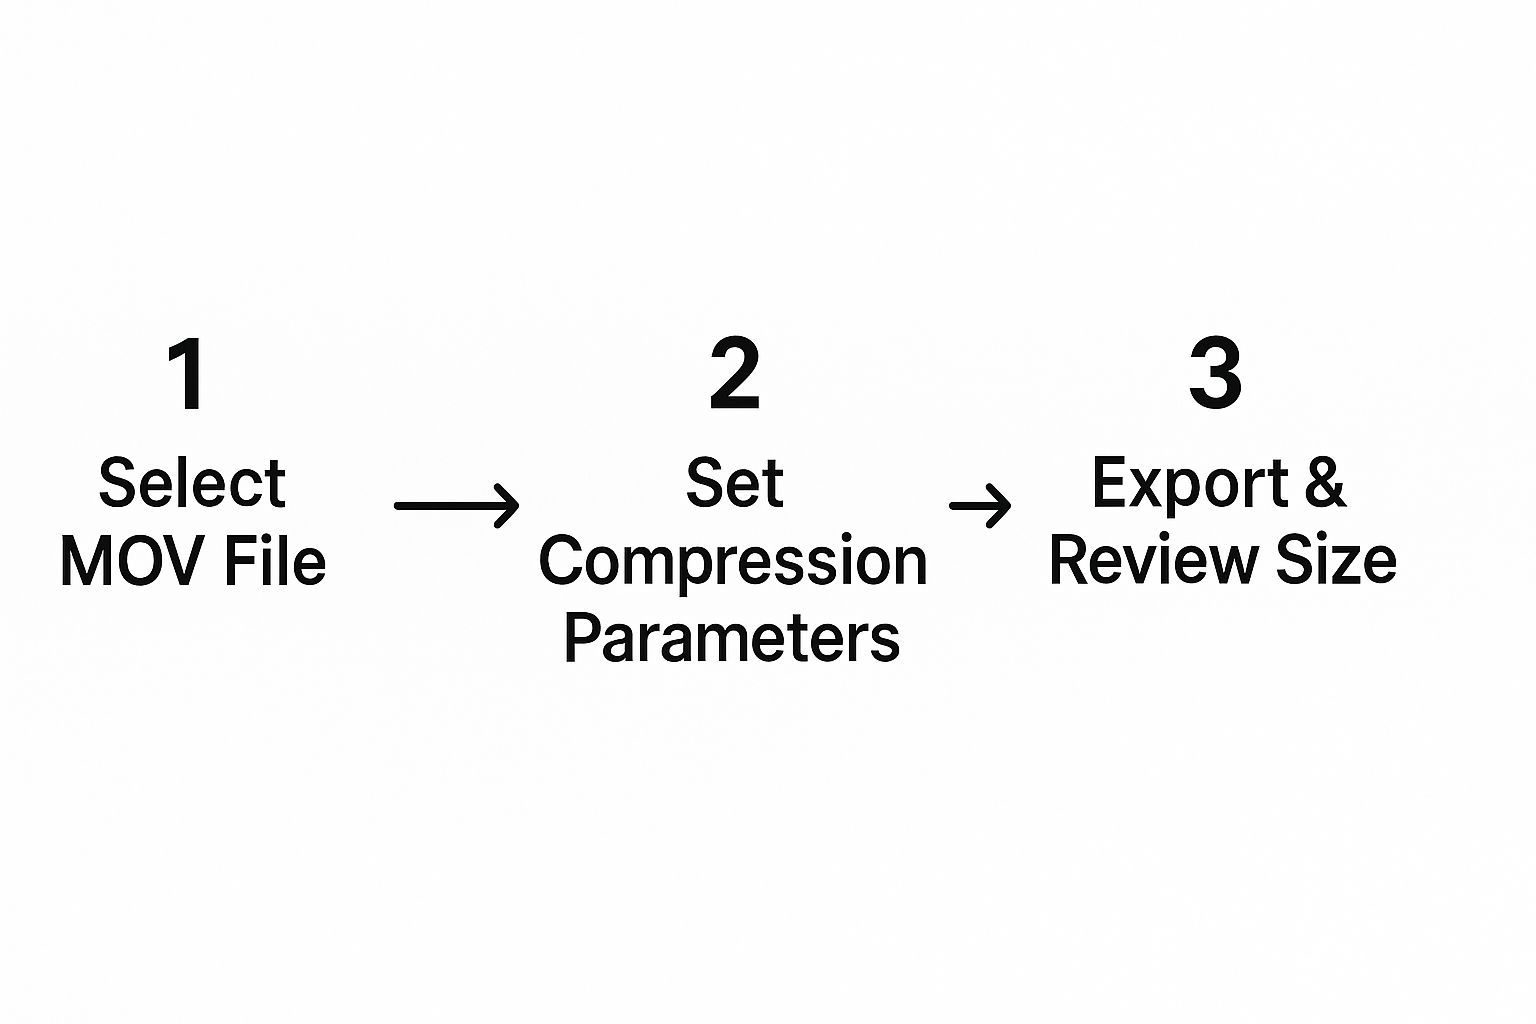
As you can see, success comes from making deliberate choices at each point, from selecting the right source file to carefully checking the final output. The most important insight here is the preview step. Before committing to processing a large file, always run a short, 10-second test clip with your chosen settings. This lets you spot any quality problems—like pixelation in fast-moving scenes—without wasting an hour on a full export only to discover it looks terrible. This quick quality check is the single best way to avoid frustrating rework and achieve predictable, high-quality results.
Advanced Compression Strategies and Modern Solutions
When the usual compression settings don't quite cut it, it's time to look at more powerful, modern methods. If you need to seriously reduce the size of a MOV file, today's intelligent tools are your best option. Forget spending hours manually tweaking every single setting. Smart software can now analyze your video's content and automatically apply the best compression settings for you. This is a game-changer for tricky footage, like clips with lots of fast motion or detailed graphics that typically don't compress well with basic adjustments.
The progress in video compression is making a real difference. It’s now possible to get file size reductions of up to 90% with almost no noticeable drop in quality, all thanks to AI-powered optimization. This technology finds the perfect balance between file size and visual sharpness, which is a huge help whether you're a professional creator or just trying to save space on your hard drive. You can read more about these impressive compression results to see the technology in action.
Next-Generation Codecs and Cloud Power
For those who like to stay ahead of the curve, newer codecs like AV1 are pushing the limits even further. While it’s not supported everywhere just yet, AV1 provides much better compression than older standards like H.264 or H.265. This means you get smaller files at the same quality level, making it an excellent choice for archiving footage or future-proofing your video library.
Another smart approach is to use cloud-based compression services. These are perfect if you're working with a huge amount of video or if your Mac struggles with processor-intensive tasks. You just upload your file, and their powerful servers do all the heavy lifting, sending back a perfectly compressed video without slowing down your own machine.
Tools like Compresto bring these advanced concepts together, using smart algorithms to produce great results without requiring you to be a video expert. To see how these intelligent tools compare, you can check out our post on why Compresto often outperforms other compression tools.
Key Takeaways
When you're trying to shrink a MOV file, the real goal is finding that sweet spot between file size and video quality. It's not just about making the file smaller; it's about making it small enough while keeping it looking good for its intended purpose, whether that's a quick share, long-term storage, or part of a professional project. Getting this right consistently comes down to having a smart workflow.
Your Compression Game Plan
- Always work on copies: This is my number one rule. Never, ever compress your original, high-quality video files. I always create a "Compressed" folder and work from copies. This has saved me from irreversible mistakes more times than I can count.
- Match settings to your audience: Think about where your video will end up. Is it for a tiny phone screen or a big monitor? Downscaling a 4K video to 1080p or even 720p is a fantastic move for web and mobile viewing. It’s a simple change that can easily cut file size by over 50% without a noticeable drop in quality on smaller screens.
- Test before you commit: Don't waste time compressing a 30-minute video only to find it looks pixelated. Export a quick 10-second clip with your chosen settings first. This little test run lets you check for any weird artifacts and saves a ton of time and frustration.
Choosing the Right Approach
The tools and settings you pick should directly match what you need for your project. For most people, most of the time, converting your MOV to the MP4 format with an H.264 codec is the best bet. It offers a great mix of wide compatibility and solid compression. If top-tier quality is your main concern and you know your viewers are using modern devices, H.265 is an even better, more efficient choice.
Remember, what looks "good" is often subjective. A bitrate that's perfect for a simple talking-head video might make a fast-paced action scene look like a blurry mess. My advice is to start with some recommended settings, but always trust your own eyes and make adjustments based on what you see.
Ready to put these strategies into practice with a tool that does the heavy lifting for you? Try Compresto today and see how easy high-quality compression on your Mac can be.