Enhance Your Business: Improve Workflow Efficiency Today
That simple "Compress" command you use every day? It’s a bigger productivity killer than you probably realize. Each of those little manual steps—compressing, renaming, moving, and then finally sharing—are small, repetitive tasks that quietly eat away at your focus and your time. It's time to rethink that whole process. Getting it right is key to reclaiming those lost hours and making your workday smoother.
Why Your File Compression Workflow Is Leaking Time

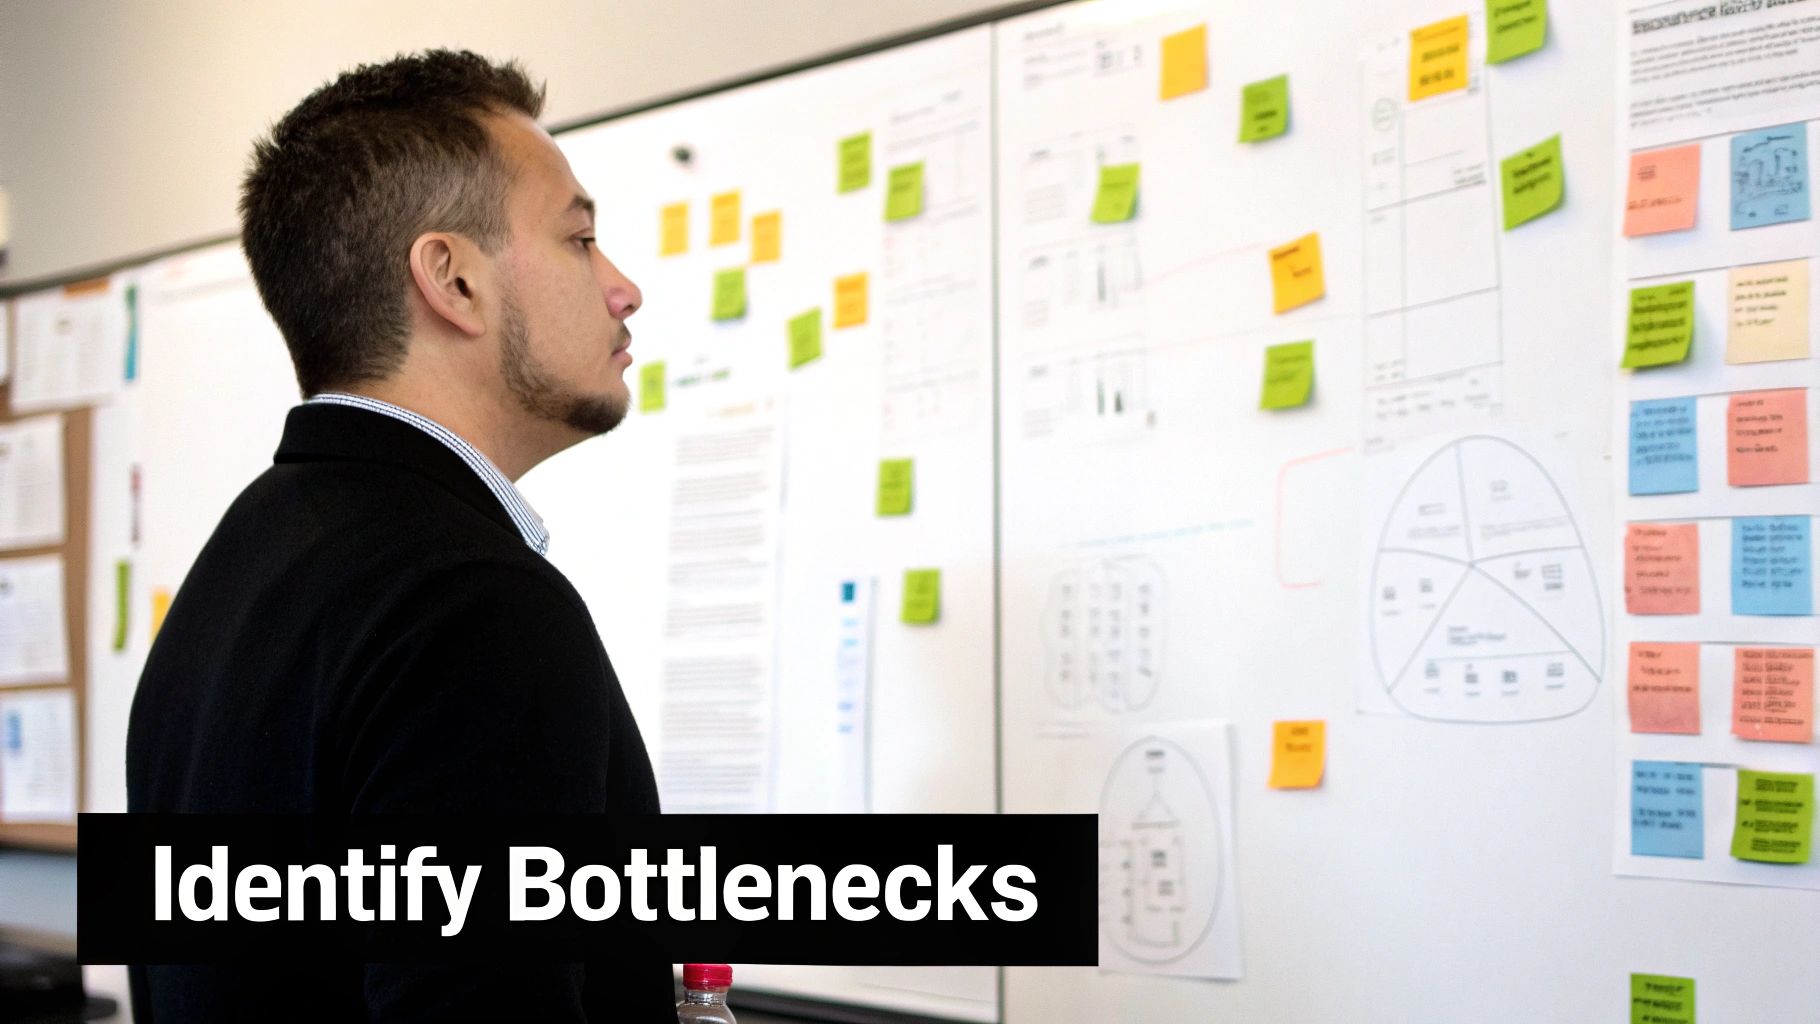
It’s easy to write off the time spent on routine digital tasks. A few clicks here, a drag-and-drop there... it never feels like a big deal in the moment. But when you do this dozens of times a week, those minutes stack up into a serious productivity leak. This manual approach creates hidden bottlenecks that constantly break your concentration and slow down entire projects.
For designers, video editors, and project managers, these tiny frictions quickly become major headaches. Think about the time you’ve wasted hunting for the right version of a project archive because of sloppy, inconsistent naming. Or the sheer frustration of zipping up a huge file, only to find it's still too big to email, forcing you to start all over again with different settings.
The Hidden Costs of Manual Compression
The problem is bigger than just wasted minutes. Manual workflows are a breeding ground for human error and create absolute organizational chaos. Without a system, you end up with a desktop littered with files named Final_Project_v2_compressed.zip, making it nearly impossible to track an asset's history. It’s a common source of stress and a huge time-sink.
The real issue is that manual file handling forces you to make the same tiny decisions over and over. A smarter workflow embeds those decisions into the process itself, so your tools do the repetitive thinking for you.
This is exactly why so many companies are finally embracing automation. Nearly half of all businesses (48%) are now using automation to replace manual work, largely because 68% of employees feel swamped by their daily tasks. Automating repetitive chores is a direct line to improving workflow efficiency and reducing burnout. You can dig into more workflow automation statistics and trends to see just how big this shift is.
Common Pain Points in File Management
This inefficient cycle creates a handful of recurring problems that most creative professionals know all too well:
- Inconsistent Naming: Archives are named differently every time, turning any search into a frustrating scavenger hunt.
- Disorganized Archives: Files get dumped onto the Desktop or into the Downloads folder, creating digital clutter and chaos.
- Repetitive Steps: You find yourself repeating the exact same sequence—compress, rename, move—for every single project delivery.
- Inefficient Sharing: You’re constantly fighting email size limits or having to manually upload archives to cloud services one by one.
By spotting these specific bottlenecks in your own work, you can start building a much smarter system that saves you time and, just as importantly, mental energy.
Setting Up Compresto for Smart Automation
This is where the real magic happens. Moving beyond macOS’s default "Compress" command is how you truly improve workflow efficiency. It’s time to stop treating Compresto like a simple utility and start turning it into an automated partner that anticipates your needs.
How? By creating custom presets that handle your most common, repetitive tasks.
Instead of fiddling with settings every single time, you design a one-click solution. Imagine dedicated presets like ‘Web Graphics,’ ‘Video Dailies,’ or ‘Client Archives,’ each with its own pre-defined rules. This isn't just a technical tweak; it's a strategy for embedding your best decisions directly into the tool, eliminating the mental drag of those small, repeated choices.
Designing Your First Smart Preset
The best place to start is by identifying a task you do over and over. For a photographer, this might be creating low-res JPEGs for a client preview gallery. If you're an office manager, it could be archiving monthly reports into a specific server folder.
Got one? Good. Now, open Compresto's preferences and create a new preset. This is where you translate your manual steps into an automated recipe.
- Define Compression Levels: For web graphics, you’ll want higher compression for faster load times. For archival purposes, you might choose lossless compression to preserve every bit of data.
- Establish Naming Conventions: Stop naming files
Final_Archive_v3_new.zip. It's time to bring order to the chaos. A smart naming rule like{Date} - {ProjectName} - {Version}does the work for you. - Set Default Save Locations: Automatically send archives right where they belong. ‘Client Archives’ can go straight to your Dropbox folder, while ‘Web Graphics’ land in a project’s
assetsfolder.
This approach transforms your process. The principles here can be applied more broadly as you learn how to automate repetitive tasks for better workflow across all your operations.
Real-World Preset Examples
Let's make this practical. I know a video editor who sends compressed daily footage to their director for review. Their old process involved compressing massive video files, renaming the archive with the date, and moving it to a shared cloud drive—a 5-minute task, repeated every single day.
Their Automated Workflow: They created a Compresto preset called "Dailies for Review." It’s configured to use a fast compression algorithm, automatically rename the archive to
YYYY-MM-DD_Dailies, and save it directly into the team’s Google Drive sync folder. The entire task now takes one click.
This kind of intelligent automation is a powerful business strategy. In fact, 38% of businesses report it frees up employees for higher-value work. And when companies adopt these kinds of smart workflows, 55% see a significant productivity boost by embedding technology right into their daily processes.
By building these smart presets, you’re not just saving a few minutes; you’re fundamentally redesigning your workday for maximum focus and output. For a deeper look at what sets these automated tools apart, check out our breakdown of 10 reasons Compresto outperforms other compression tools.
Building Powerful One-Click Compression Workflows
Setting up custom presets is a fantastic first step. But if you want to reach true workflow mastery, you need to integrate those presets directly into your macOS environment. This is where you graduate from simply using a tool to building a fully automated system that handles complex, multi-step tasks with a single click.
This is how you get serious about improving workflow efficiency on a project-wide scale. We’re talking about combining Compresto's power with the native tools you already have on your Mac, like Shortcuts or Automator. By chaining actions together, you can create incredibly powerful workflows that save an immense amount of time, especially when you're wrestling with large batches of files day in and day out.
This flow chart gives you a bird's-eye view of how these automated systems come together.
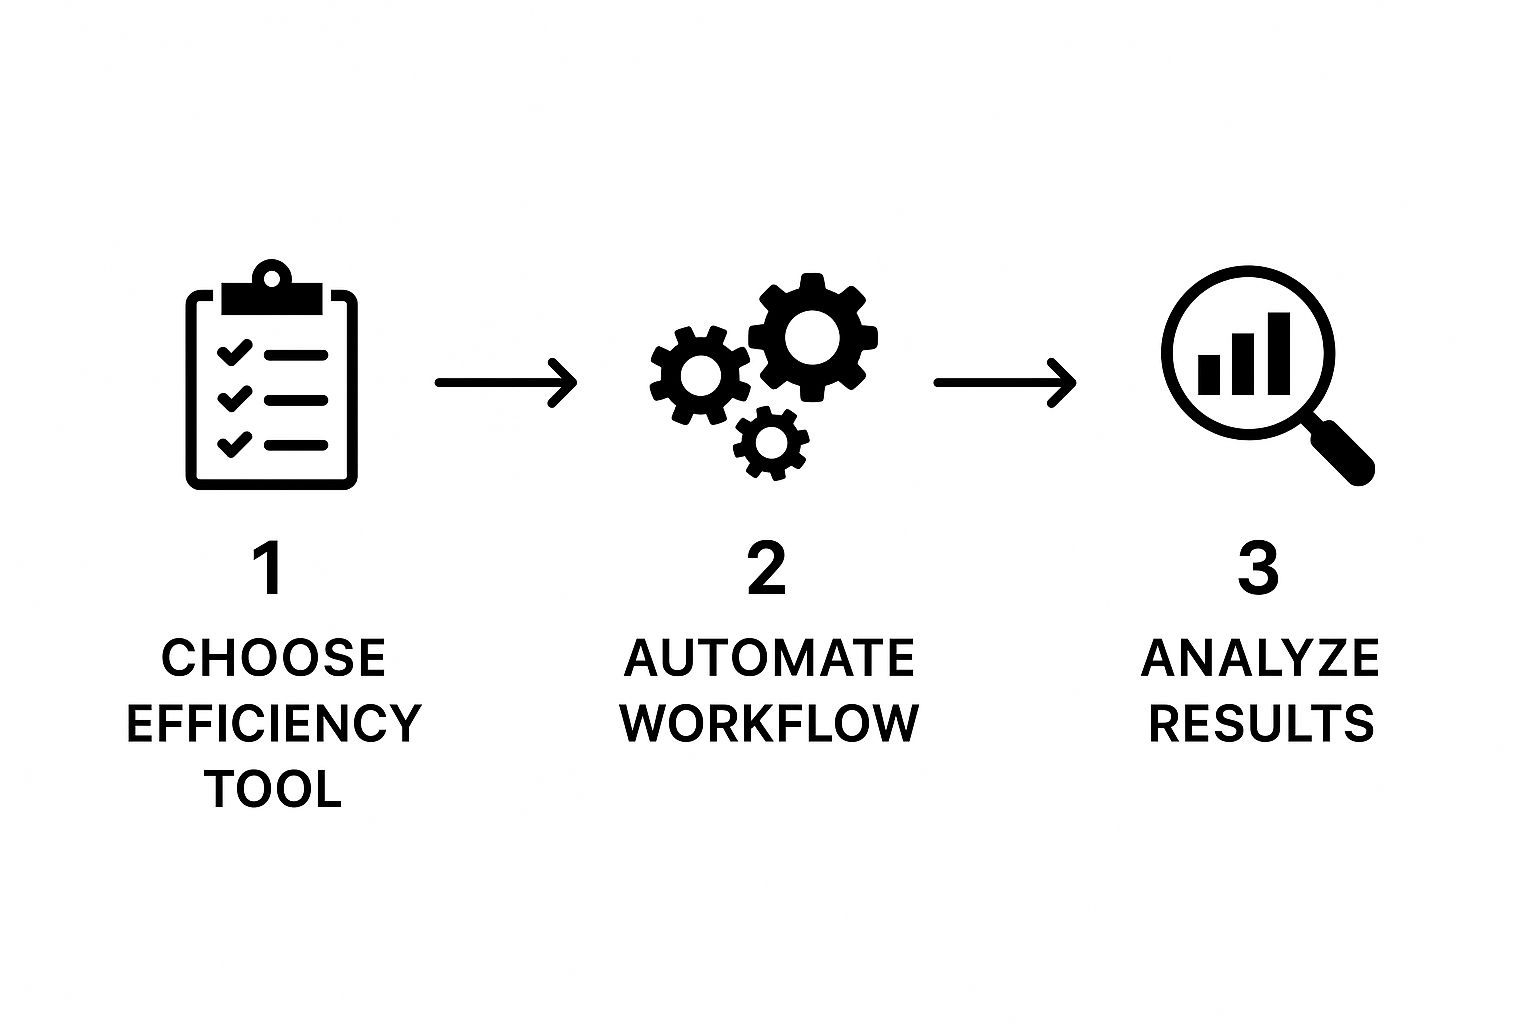
The real takeaway here? Efficiency isn't just about the compression tool itself. It's about automating the entire sequence from start to finish, turning a series of manual chores into a single, effortless action.
Integrating Compresto with macOS Shortcuts
Picture this: you've just wrapped up editing a batch of photos for a client. Your delivery process involves a few tedious steps—compressing them into a ZIP, renaming the archive with the client’s name and today's date, and finally moving it to your shared Google Drive folder. Done manually, it’s a recipe for repetitive strain and silly mistakes.
This is where macOS Shortcuts comes in. You can build a simple automation that triggers Compresto and does all the heavy lifting for you.
Here's how it would look in practice:
- Initiate the Shortcut: You can set this up as a Quick Action, making it available with a simple right-click on any folder in Finder.
- Run Compresto Preset: The Shortcut tells Compresto to use your "Client Delivery" preset, which instantly handles the compression and quality settings you've already defined.
- Rename the Archive: Next, the Shortcut automatically renames the new
.zipfile into a clean, consistent format likeProject-Name_YYYY-MM-DD. No more typos. - Move to Cloud: The final step moves the perfectly named archive straight into your designated cloud sync folder.
That entire multi-step process gets condensed into a single right-click. You've just built a reliable, repeatable system that eliminates manual effort and guarantees consistency every single time.
By connecting different applications through automation, you are creating a workflow that is greater than the sum of its parts. This is how you move from task-based work to a process-oriented mindset, which is the foundation of high-level efficiency.
The rise of cloud-based platforms has made this kind of power more accessible than ever, often using no-code or low-code solutions anyone can pick up. This allows a much wider range of people to automate their own routine tasks. It's no wonder that around 70% of business owners see workflow automation as a critical way to slash manual workloads. You can dig deeper into 2025 workflow automation trends and key insights to see just how big its impact is becoming.
Let's look at how this plays out in a real-world scenario. The following table breaks down just how much time and effort you can save.
Manual vs Automated Compresto Workflow Comparison
| Task | Manual Workflow (Steps & Time) | Automated Compresto Workflow (Steps & Time) |
|---|---|---|
| Compressing Files | Select files, right-click, "Compress," wait. (2-3 steps, ~30-60 seconds) | Right-click folder, select Quick Action. (1 step, ~5 seconds) |
| Renaming Archive | Find archive, click to rename, type new name carefully. (2-3 steps, ~15-20 seconds) | Happens automatically in the background. (0 steps, 0 seconds) |
| Moving to Cloud | Drag and drop the archive to the correct cloud folder. (1 step, ~5-10 seconds) | Happens automatically in the background. (0 steps, 0 seconds) |
| Total Time & Effort | ~5-7 steps, ~50-90 seconds per batch, plus risk of error. | 1 step, ~5 seconds, with perfect consistency every time. |
The difference is night and day. What was once a minute-and-a-half of clicking and typing becomes a single, thoughtless action. When you're processing dozens of batches a week, those saved minutes add up to hours.
A Practical Scenario for Batch Processing
Let's take a web developer who needs to package an entire project for deployment. This folder is a mix of everything: code, images, documents, and other assets. Using Compresto’s batch processing, they can simply drop the entire project folder onto a specific preset.
That preset can be configured to do several things at once:
- Use the most efficient ZIP algorithm for maximum space savings.
- Automatically exclude unnecessary folders like
.gitornode_modulesthat bloat the archive. - Append a version number to the final archive name, like
Project-v1.2.zip.
This one, simple action replaces the chore of manually selecting files, zipping them, and then tediously cleaning up the archive. It's a perfect example of how to make your tools work for you—not the other way around.
Everyday Habits for a Faster Workflow
Real, lasting efficiency doesn’t come from some complex, one-time automation setup. It’s built from the small, smart habits you practice every day until they become second nature. These are the little tweaks that add up, turning minutes saved here and there into hours of reclaimed time each week.
One of the best habits you can build is taking full advantage of Compresto's direct Finder integration. Forget opening another app. Just right-click any file or folder, and all your compression presets are right there. It’s perfect for those quick, one-off tasks like zipping up a document to email. You stay in your groove without breaking your focus.
Another game-changer is creating a dedicated "staging" folder. I like to keep one on my Desktop or pinned in the Finder sidebar and think of it as a digital inbox for anything that needs processing. As I finish up with files throughout the day, I just drag them into this folder. Then, at the end of the day, I can compress the entire batch at once instead of dealing with each file individually. Simple.
Organize for Future You
I see this all the time: people get so focused on the immediate task of compressing a file that they completely forget they'll need to find it again later. An archive is useless if it's lost in a sea of poorly named files. This is where using metadata becomes a non-negotiable habit.
By building dates, project names, or client IDs right into your preset naming conventions, you’re making your archives instantly searchable with Spotlight. You’re not just saving a file; you’re leaving a breadcrumb trail for your future self.
The most productive habits are the ones that eliminate future friction. Taking two extra seconds to apply a smart naming convention today can save you ten minutes of frustrating searching next month. It’s an investment in your own efficiency.
Avoid Common Pitfalls
Building good habits also means ditching the bad ones. A few common mistakes can easily sabotage your efforts to create a faster workflow. Keep an eye out for these so your process stays sharp.
- Re-compressing the Compressed: Trying to zip a file that's already highly compressed—like a JPEG, an MP4, or another ZIP file—is a waste of time. It barely reduces the size and just adds a needless step. Focus on uncompressed formats where you'll see a real difference. For more on this, our guide on 10 ways to optimize your files without losing quality has some great insights.
- Choosing the Wrong Format: Don’t just default to ZIP for everything. If you're archiving for your own long-term storage, a format like 7z might give you much better compression. But if you’re sending something to a Windows user, ZIP is your most compatible bet. Always match the format to the job.
- Ignoring Other Efficiency Tools: A great workflow is a whole system. Optimizing your file compression is huge, but don't forget about other digital habits that boost your productivity. For instance, learning how to use speech-to-text in your daily workflow to increase productivity can radically speed up writing tasks.
By weaving these simple, strategic habits into your routine, you can turn file compression from a chore you have to do into a seamless, almost invisible part of your professional life.
Even with the best tools and automations, you're bound to hit a snag every now and then. We've all been there. Knowing how to quickly troubleshoot common compression issues is what separates a minor hiccup from a major project delay. Instead of letting a roadblock derail your day, you can learn to spot the problem, fix it, and get right back to work.
One of the most frustrating things that can happen is a corrupted archive that just won't open. This is almost always the result of an incomplete file transfer or a system crash that happened right in the middle of the compression process. The best way to avoid this is to be patient—always make sure any transfer is 100% complete before you disconnect a drive or close your network connection. If a file does get corrupted, the only real fix is to go back to the source and re-compress the original files.
Another classic headache is compatibility. You compress a folder, send it over to a client, and get an email back saying they can't open it on their Windows PC. This is a tell-tale sign of a format issue. While formats like 7z or RAR can sometimes give you slightly better compression, the good old ZIP format is the universal language of archives. It just works, everywhere.
Diagnosing Inefficient Compression
But what about when you compress a file and it barely shrinks? You run a huge folder through your go-to preset, and the final archive is almost the same size as the original. What gives?
Nine times out of ten, this happens because the files you're trying to compress are already compressed. Think about the most common file types we work with every day:
- Images: JPEGs and PNGs use their own sophisticated compression.
- Video: Formats like MP4 and MOV are highly compressed to make them manageable.
- Documents: Even PDFs are a compressed format.
Trying to compress these files again is like trying to squeeze the air out of something that's already been vacuum-sealed—there's just not much left to remove. In these scenarios, the main benefit of creating an archive is organization and bundling, not significant size reduction. It's also worth noting that efficient compression has a positive environmental impact. You can learn more about how file compression reduces digital waste on our blog.
The Compresto interface makes it easy to manage your formats and presets, so you can choose the right tool for the job.
From my own experience, having presets for different use cases is a game-changer. I use an "Archive (7z)" preset for internal storage where I want maximum compression, and a "Share (ZIP)" preset for sending files to clients to avoid any compatibility drama.
Pro Tip: If you absolutely need to make a video or image file smaller, an archive utility isn't the right tool. Archiving bundles files; it doesn't transcode media. You'll need to use a dedicated media tool to lower the resolution or bitrate before you add it to your archive.
By understanding these common issues, you can build a more resilient and efficient workflow that anticipates problems before they happen.
Got Questions? We’ve Got Answers.
Even with a perfectly tuned system, you'll eventually run into specific questions as you start pushing the limits of what’s possible. To help you fine-tune your process and really improve workflow efficiency, I’ve gathered answers to some of the most common queries we hear from Compresto users.
Think of this as a quick-reference guide for those "what if" scenarios. You'll find short, practical answers to help you get the most out of your automated compression setup.
Can I Automate Compressing Files to Different Cloud Folders?
Absolutely, and this is where you can unlock some serious time savings. The trick is to pair Compresto with macOS’s built-in Shortcuts or Automator apps. This lets you chain commands together into a custom, multi-step workflow.
For example, you could build a Shortcut that first tells Compresto to run a specific preset on a folder. Then, as a second step, that same Shortcut can move the finished archive into a designated cloud folder—whether it's in Dropbox, Google Drive, or iCloud. It’s a powerful way to automate your entire delivery and backup process with just one click.
What’s the Best Format for Cross-Platform Compatibility?
When you absolutely need to guarantee that anyone can open your files—whether they're on a Mac or a Windows PC—the standard ZIP format is always your safest bet. While other formats like 7z might squeeze out a slightly better compression ratio, ZIP is natively supported on virtually every operating system out there, no third-party tools required.
A great best practice is to set ZIP as the default format in any Compresto preset designed for sharing files with external clients, collaborators, or anyone whose system you don't control. This simple choice prevents frustrating compatibility issues down the line.
I personally have a preset named "Client Delivery (ZIP)" for this exact purpose. It removes the guesswork and ensures a smooth handoff every single time. Thinking ahead like this is a cornerstone of an efficient workflow.
How Do I Choose the Right Compression Level?
This decision always comes down to a trade-off between two things: speed and final file size. There's no single "best" setting; it all depends on what you need to accomplish right now.
Think of it this way:
- When you need speed: Just zipping a few documents to fire off in an email? A lower compression level is perfect. The process will be almost instant, and the tiny difference in file size won't matter.
- When you need size: For long-term archiving or when you’re wrangling massive files (like raw video footage or a huge folder of design assets), crank it up to the highest compression level. It'll take longer to process, but the space savings can be massive.
A practical tip is to create two core presets in Compresto. I call mine "Fast Zip" for quick jobs and "Max Archive" for those serious space-saving tasks.
Will Compressing JPEGs or MP4s Save Much Space?
Generally, no. File formats like JPEG, PNG, and MP4 are already highly compressed using their own specialized algorithms. Trying to zip them won't yield much of a size reduction—you might only see a 1-5% decrease, if you're lucky.
The real benefit of compressing these types of files isn't about saving space. It’s about bundling them into a single, organized archive. This makes them far easier to manage, transfer, and keep together as a neat package, which is a workflow improvement in its own right. You'll see the biggest space-saving wins when compressing uncompressed file types like TIFFs, WAVs, or raw text documents.
Ready to stop wasting time on repetitive tasks and build a smarter, faster workflow? With Compresto, you can create powerful presets and one-click automations that transform how you manage files. Download Compresto today and experience a new level of productivity.