How to Reduce GIF File Size Without Losing Quality
To shrink a GIF, you really only need to worry about three things: the color palette, the number of frames, and the image dimensions. Get a handle on those three, and you're well on your way to creating smaller, faster GIFs that still look great.
Why Large GIFs Are Slowing You Down
That oversized GIF you just dropped onto your landing page? It's more than just a file—it's a bottleneck actively hurting your site's performance. It's easy to think of big images as a simple "slow loading" problem, but the real-world impact cuts much deeper.
For instance, a heavy GIF in an email campaign can get the whole message flagged as spam or just fail to load for your subscribers, killing your open rates. On a website, every extra megabyte adds to your bounce rate. People just won't wait for a sluggish page to load.
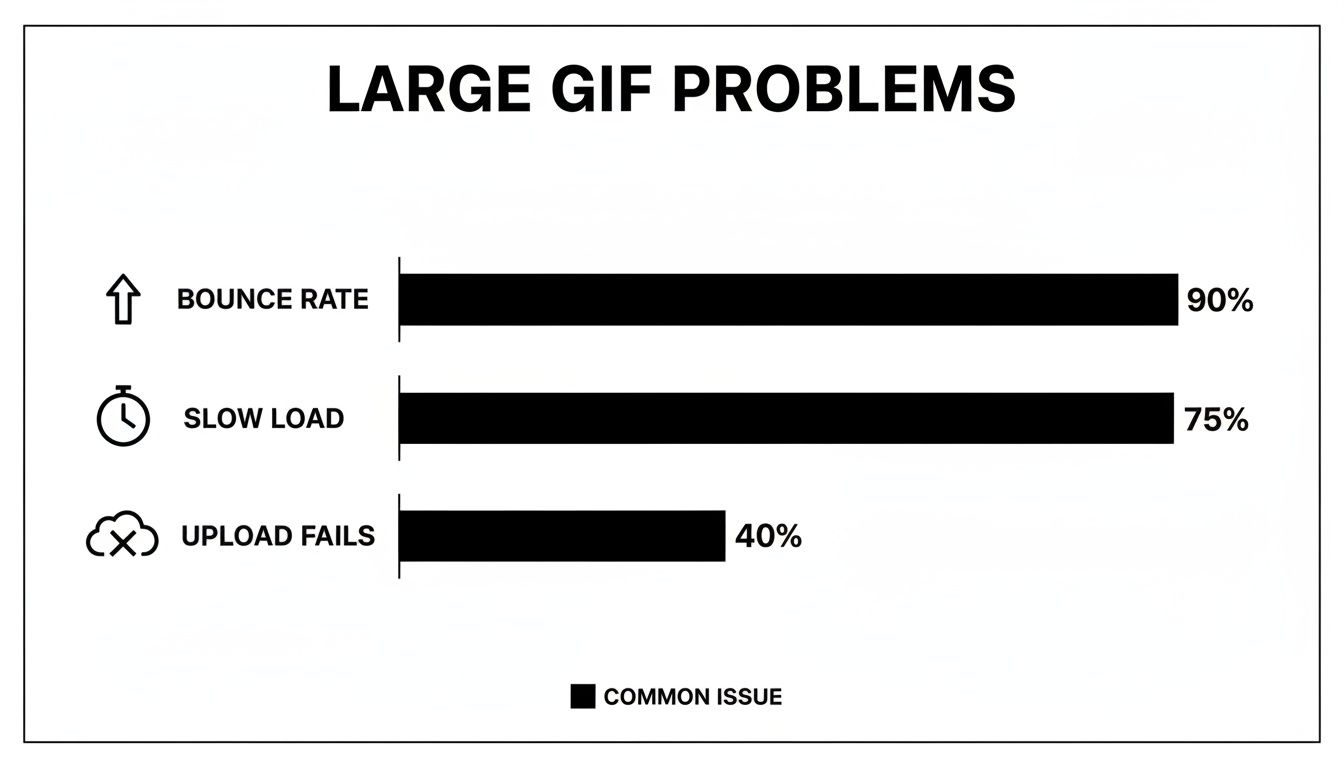
This isn't just a technical headache; it’s a user experience and business problem. Large GIFs are notorious for causing:
- Failed Social Media Uploads: Platforms like Twitter and Discord are strict, often capping files around 15MB. If your GIF is too big, it gets rejected flat out. Back to the drawing board.
- Increased Bounce Rates: Page speed is a massive ranking factor for search engines and a cornerstone of a good user experience. Slow-loading visuals are one of the fastest ways to frustrate visitors and send them packing.
- Poor Email Performance: Heavy images can get your marketing emails clipped by services like Gmail or blocked entirely by corporate firewalls. Your perfectly crafted message never even makes it to your audience.
The Core Principles of Smart GIF Optimization
To really tackle a GIF's file size, you have to focus on the three things that make it heavy: colors, frames, and dimensions. Think of it like packing a suitcase for a trip. You can't just toss everything in and hope for the best; you have to be selective about what you bring. Optimizing a GIF is all about making smart trade-offs to get the smallest file possible while keeping the quality you need.
A dedicated tool like Compresto makes this whole process way easier, especially if you're on a Mac. It pulls all the essential controls you need into one clean interface.
The screenshot above shows just how simple it is. You just drag your file in and get straight to adjusting the settings. It turns what used to be a complicated, multi-step chore into a quick part of your everyday workflow.
Beyond just making things faster, good optimization is also about making your content accessible and discoverable. That means writing effective alt text for your images. Smart optimization isn't just about file size; it's about creating better, more effective digital assets.
If you want to go deeper on how image compression impacts your entire site, check out our guide on how to speed up your website by compressing images.
Shrink GIFs by Mastering Color Palette Reduction
If there's one silver bullet for slashing GIF file size, it's this: the color palette. This is where you'll get the most bang for your buck, every single time.
The GIF format has a hard cap of 256 colors, and that limitation is your biggest opportunity. Every single pixel in a GIF is mapped to a color in its palette. Fewer colors mean less data is needed to describe the image, which translates directly into a smaller file. It's that simple.
A huge number of GIFs, especially the ones you see for UI demos, simple logos, or basic screen recordings, don't need anywhere near 256 colors. You can often drop the palette down to 64 or even 32 colors with almost no noticeable change in quality. The real trick is finding that sweet spot where the file size is low, but the visuals still pop.
Finding the Right Color Count
So, how do you figure out the ideal color count? My advice: start low and work your way up.
Instead of beginning at 256 and slowly chipping away, get aggressive. Try setting the palette to just 32 colors right off the bat and see what happens. Preview the result. Does it look sharp, or are you seeing ugly color banding where there should be smooth gradients?
If it looks good, you've just made a massive cut to your file size. If it looks a little rough, just bump it up to 64 colors and check again. This back-and-forth process is the fastest way to find the lowest possible color count that doesn't wreck your animation.
Reducing a GIF’s palette from 256 to 128 colors usually cuts the file size by 10–30%. Dropping it to 64 colors can give you a 20–50% reduction. For teams optimizing a ton of content, those numbers add up fast. Saving 50% on hundreds of GIFs can mean saving gigabytes of data.
Why does this matter so much? Because big, bloated GIFs are a user experience nightmare.
The data doesn't lie. Chunky GIFs are a direct cause of higher bounce rates, slow load times that frustrate visitors, and even upload failures on platforms with tight file size limits.
To give you a clearer idea of what to expect, here’s a breakdown of how reducing the color count typically impacts file size.
Color Palette Reduction Impact on File Size
This table shows the estimated file size reduction when decreasing the number of colors in a GIF palette, helping you balance quality and size.
| Number of Colors | Estimated File Size Reduction | Best For |
|---|---|---|
| 128 | 10-30% | Complex animations, gradients, photo-realism |
| 64 | 20-50% | UI demos, screencasts, most general animations |
| 32 | 40-70% | Simple logos, flat design, minimal color schemes |
| 16 | 60-80%+ | Black & white, line art, very basic animations |
These are just estimates, of course, but they provide a solid starting point for your optimization efforts. Always preview your GIF to ensure the visual quality remains acceptable.
To Dither or Not to Dither
When you get aggressive with color reduction, you might notice some harsh lines or "banding" where smooth color transitions used to be. That's where a technique called dithering comes into play.
Dithering adds a subtle pattern of noise to create the illusion of more colors than are actually present, which helps smooth out those gradients.
The catch? That extra noise also adds to the file size. Here's a quick way to decide:
- Turn Dithering On: Use it for GIFs with complex gradients, like photos or video clips, where color banding is really obvious and distracting.
- Turn Dithering Off: For animations with flat colors, like most UI mockups and logos, leave it off. You'll get a cleaner look and a smaller file.
Dithering is a trade-off. It can save a GIF from ugly color bands, but you'll pay for it in kilobytes. Always preview your GIF with dithering enabled and disabled to see which version gives you the best balance of quality and size.
At its core, color reduction is a form of lossy compression because you're permanently altering the original visual data. If you want to dive deeper into the technical side, check out our guide on the difference between lossy and lossless compression. Once you get the hang of it, you'll have incredible control over your GIF's final size and quality.
Optimizing Frames and Dimensions for Big Wins
Beyond the color palette, the next big levers you can pull to dramatically shrink your GIF file size are its frames and dimensions. Every single frame in a GIF is basically its own little image, so the more frames you have, the bigger the file. It's a simple, direct relationship that gives us a huge opportunity for optimization.
A common mistake I see is people thinking they need a silky-smooth 30 frames per second (fps) for a GIF to look good. Truth be told, for most uses—like a quick UI demo or a simple reaction GIF—this is complete overkill. You can often chop the frame rate in half, down to 15 fps, and the motion will still look perfectly fluid to the human eye. This one adjustment can instantly slice your file size by nearly half.
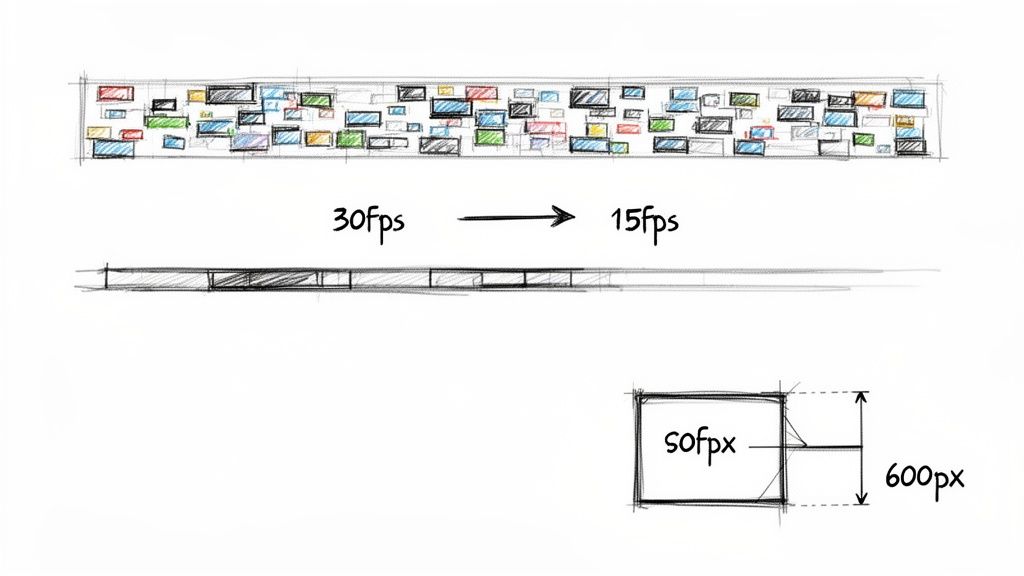
This isn’t just a tiny tweak; it’s a foundational technique. Halving the frame count, say from a 30 fps source down to 15 fps, usually cuts the file size by a whopping 40–60%. When you start stacking this with other adjustments like smart cropping, it’s not unusual to see file-size reductions in the 60–85% range.
Get Smart with Dimensions and Cropping
The physical size—or dimensions—of your GIF plays an equally massive role. A GIF that’s 1200px wide is always going to be heavier than one that’s 600px wide. The trick is to resize your GIF to the exact dimensions it will be displayed at. Don't just upload a huge animation and let HTML or CSS shrink it down, because the user still has to download the full-sized, bloated file first.
For example, if you're making a GIF for an email campaign where the content area is only 600px wide, there is absolutely no reason for that GIF to be any larger. Resizing it beforehand is just good practice and ensures you're only delivering the pixels that people will actually see.
Smart cropping is another powerful, yet often overlooked, strategy. Take a hard look at your animation. Is there a lot of static, empty space around the main action?
Think about a screen recording of a button click. If the only thing moving is the mouse cursor and the button in a small corner of the screen, you don't need to show the entire desktop. Crop the GIF to focus only on the essential area of action.
This simple move gets rid of wasted pixels that add unnecessary weight to every single frame.
A Real-World Scenario
Let's walk through a common example. Imagine you're a designer creating a GIF to show off a new feature in your app—let's say it's an animated "like" button. Here’s how you could combine these techniques for maximum impact:
- Initial Recording: You record your screen at a high resolution (1920x1080) and a smooth 30 fps. The initial GIF is a hefty 8 MB. Ouch.
- Smart Cropping: You realize the only important action is happening in a small 400x300 pixel area around the button. You crop the GIF down, instantly removing over 90% of the unnecessary pixels. The file size plummets to 750 KB.
- Frame Rate Reduction: The animation is simple, so 30 fps is just showing off. You drop the frame rate to a perfectly acceptable 15 fps, instantly halving the remaining file size. Now you're at 375 KB.
- Final Polish: After a quick color palette optimization (like we talked about earlier), the final GIF lands at a lean 250 KB. That’s a 97% reduction from the original, with no meaningful loss in quality.
Mastering the correct aspect ratios and resolutions goes way beyond just GIFs; it's essential for all modern short-form visual content. You can gain more insights from this comprehensive guide to vertical video dimensions for platforms like TikTok and Reels. By thinking critically about frames and dimensions, you can make enormous strides in optimizing your GIFs.
Alright, theory is one thing, but actually putting it into practice is what gets you results. If you're on a Mac, this is where a dedicated tool like Compresto really shines. It rolls all those complex optimization steps into a single, clean workflow.
Let's walk through how to wrangle a massive GIF into shape using its slick interface.
The whole thing kicks off with a simple drag-and-drop. Just grab your GIF and pull it into the Compresto window. Right away, you’ve got all the key controls we've been talking about—colors, frame rate, and dimensions—all in one spot. No more juggling different tools or fumbling with clunky online editors.
Adjusting Your Core Settings
The first thing I always tackle is the color palette. Use the slider to dial the color count down from the default of 256. A great starting point is 64 colors. For most screen recordings or UI animations, this chops down the file size dramatically with almost no noticeable drop in quality.
Next up, take a look at the frame rate. If you converted a smooth video that started at 30 fps, try cutting it down to 15 fps. You’d be surprised how often this one tweak can slice the file size nearly in half without making the motion look jerky. For simpler animations, you can probably even get away with 10 or 12 fps.
Last, check the dimensions. Is your GIF going into a blog post where the content area is only 800px wide? Then there’s absolutely no reason for it to be 1920px. Resize it to fit where it’s actually going to live.
Pro Tip: Make one change at a time and keep an eye on the live preview. This lets you see exactly which setting gives you the biggest bang for your buck, so you can find that perfect sweet spot between a tiny file and a great-looking animation.
Leveraging Professional Features
For anyone who deals with a lot of GIFs, Compresto’s real power goes beyond just one-off compressions. Let's say you've got a whole folder of GIFs ready for a big marketing campaign. Instead of the soul-crushing task of optimizing them one by one, you can lean on the batch processing feature.
This screenshot shows the batch processing interface in action, with a whole queue of files ready to be compressed.
Here, you can apply the exact same settings across dozens of files at once. It’s a massive time-saver and keeps everything consistent. You can also use the built-in Video-to-GIF converter, which lets you apply all these optimizations right from the start. Trust me, it’s way more efficient than converting a video first and then trying to shrink a huge, bloated GIF.
And if you want to take automation even further, check out the Auto-Compress feature. You can learn more about how to set up Folder Actions with the Auto-Compress feature to have Compresto automatically optimize any file you drop into a specific folder. By combining these tools, you can build a seriously efficient system for managing all your animated assets.
Diving Deeper: Advanced Tricks for Maximum Compression
Alright, you've trimmed the colors, cut the frames, and shrunk the dimensions, but that file size is still stubbornly high. Now it's time to roll up our sleeves and get into the real power-user strategies. These are the advanced methods that push the limits of GIF compression and can solve even the most demanding optimization puzzles.
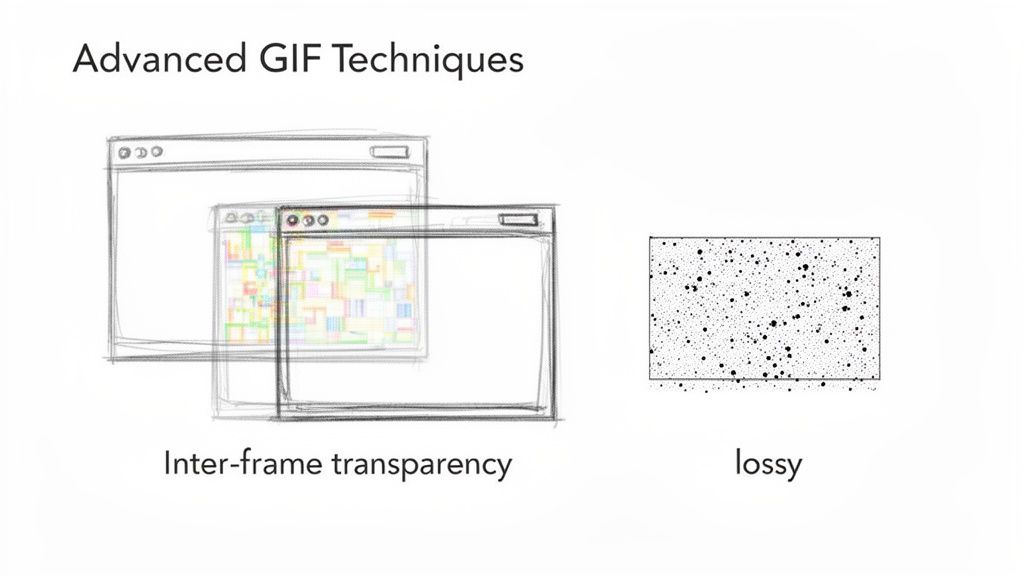
One of the most powerful tools in this advanced arsenal is lossy compression. Unlike the "lossless" methods we've covered so far, this technique intentionally throws away a tiny bit of image data. The result? A dramatic drop in file size. It does introduce some subtle visual noise or imperfections, but honestly, a lot of the time, that trade-off is more than worth it.
Think about it: for a busy, fast-moving animation, a little bit of lossiness is practically invisible to the naked eye. It's a fantastic move when every single kilobyte counts, like trying to meet the strict size limits for a banner ad. On the flip side, if you're working with a GIF that has crisp lines and flat colors—like a company logo—lossy compression might soften the edges a bit too much. You have to know when to use it.
Leveraging Transparency and Frame Disposal
Here's another expert-level technique that can be a total game-changer: optimizing with inter-frame transparency. This method is pure magic for GIFs with static backgrounds, like a screen recording where only the cursor and a menu are moving.
Instead of saving the entire image for every single frame, this approach only saves the pixels that have actually changed from the previous frame. Everything else is made transparent, letting the static background from earlier frames show right through. The file size savings can be massive because you stop storing the same redundant background data over and over again.
This technique is often called "frame disposal." You're essentially telling the GIF viewer not to dispose of (or clear) the previous frame. This allows you to layer the new, changed pixels on top, which is far more efficient than redrawing the whole scene from scratch each time.
Getting Surgical with Frame Dropping
Going beyond simply lowering the overall frame rate, you can get much more precise with tactical frame dropping. Let's say you have a super-smooth 30 fps animation. In many cases, you can remove every second or third frame without anyone noticing a difference in the motion.
This isn't the same as just converting to a lower frame rate. Here, you can selectively pull out frames that are less critical to the perceived motion, preserving the most important ones. While a lot of basic tools don't offer this level of granular control, it’s a powerful concept to grasp if you're serious about learning how to reduce GIF file size to its absolute minimum.
When you start combining these advanced methods, you gain ultimate control, turning a bulky animation into a lean, fast-loading asset that's ready for the web.
Answering Your Top Questions About GIF Size
Even after you get the hang of the core techniques, a few questions always seem to pop up. Let's clear the air on some of the most common sticking points I see people run into. Getting these details right is the key to creating perfectly optimized GIFs every single time.
Does Converting a Video to a GIF Increase Its Size?
Yes, almost always. And usually by a massive amount.
Modern video formats like MP4 are masterpieces of compression.## Answering Your Top Questions About GIF Size
Even after you get the hang of the core techniques, a few questions always seem to pop up. Let's clear the air on some of the most common sticking points I see people run into. Getting these details right is the key to creating perfectly optimized GIFs every single time.
Does Converting a Video to a GIF Increase Its Size?
Yes, almost always. And usually by a massive amount.
Modern video formats like MP4 are masterpieces of compression. They use incredibly sophisticated algorithms that the much, much older GIF format just can't touch. When you convert that sleek video file, you're essentially time-traveling backward to a less efficient technology, and the file size balloons as a result.
This is exactly why optimizing during the conversion process is a non-negotiable step. Using a tool like Compresto that gives you control over colors, frame rate, and dimensions from the very start is a game-changer. It means your GIF is born optimized, not bloated.
Optimizing as you convert is a proactive move. You avoid the headache of wrangling a huge, clunky GIF file after the fact, saving you time and giving you a much leaner result from the get-go.
What Is the Best Color Depth for a GIF?
There's no magic number here—the right color depth is completely dependent on what's in your GIF. A clean UI animation with a few flat brand colors might look flawless with just 16 or 32 colors. On the other hand, a short clip from a video with smooth gradients will probably need 64 or even 128 colors to avoid looking like a pixelated mess.
My advice? Start low and go up.
- Kick things off with an aggressive setting, like 32 colors, and see how it looks.
- If the quality holds up, you've found your sweet spot. You're done.
- If you spot some nasty color banding or artifacting, bump it up to 64 colors and check again.
This trial-and-error approach is the fastest way to find the absolute minimum number of colors your animation needs, striking that perfect balance between quality and file size.
Will Reducing the Frame Rate Make My GIF Choppy?
Not necessarily. Whether a lower frame rate looks "choppy" has everything to do with the type of motion in your GIF. For something with fast, frantic action, dropping from 30 frames per second (fps) down to 15 fps is going to be pretty obvious.
But for the vast majority of GIFs you see on the web—think software tutorials, simple product demos, or UI interactions—a frame rate of 12-15 fps looks perfectly smooth. The human eye is surprisingly forgiving. You can often even dip down to 10 fps before things start looking janky, which is a fantastic trick for when you need to shed every last kilobyte.
Ready to stop guessing and start creating perfectly optimized GIFs in seconds? Compresto is a powerful macOS app built to make this whole process dead simple. Just drag, drop, and dial in your settings to get the smallest file size possible without trashing the quality.