How to Compress MOV Files on Mac Without Sacrificing Quality
Ever find yourself staring at a video clip, wondering how a few minutes can eat up gigabytes of space? You're not alone. The culprit is often the MOV file format, especially when it’s packed with a high-quality editing codec like Apple ProRes.
These files are built for professional editing, preserving every last drop of visual data. That’s great for color grading, but terrible for storage and sharing. The fix? Re-encoding them with modern, efficient codecs like H.264 or HEVC. This simple step can shrink your files by up to 90% without a noticeable drop in quality for most everyday uses.
Why Your MOV Files Are So Big (And How to Fix It)
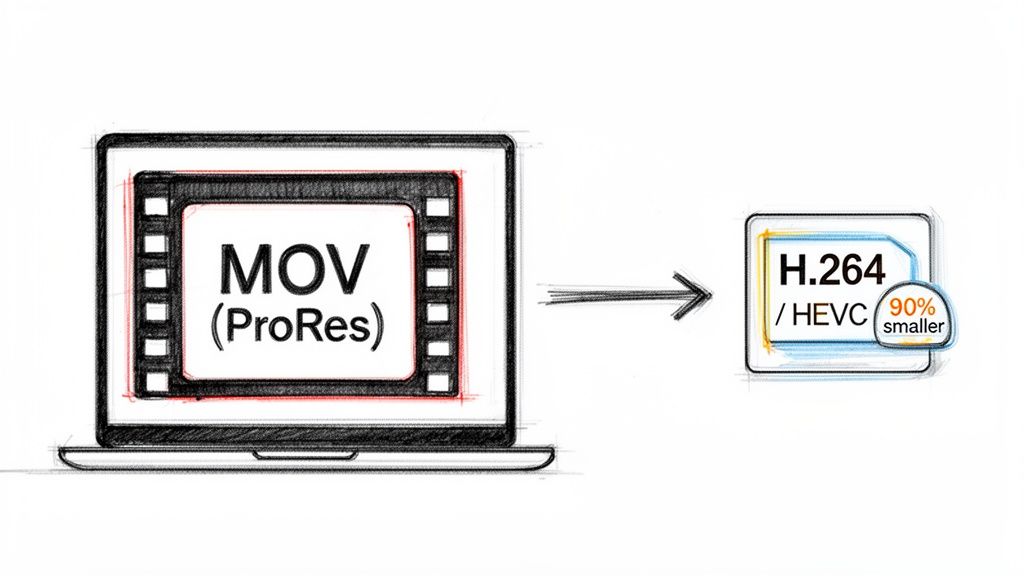
If you've ever been shocked by a MOV file’s size, it’s by design. The MOV format is just a container; the real story is the codec inside, and for many Mac-based workflows, that codec is Apple ProRes.
ProRes is fantastic because it prioritizes image data above all else, which is perfect when you’re deep in an edit, pushing colors and adding effects. The trade-off, however, is massive file sizes. It’s not unusual for a few minutes of 4K ProRes footage to balloon into several gigabytes. Quality comes at the cost of efficiency.
The Shift to Modern Compression
This isn't a new problem. When Apple rolled out QuickTime 7 way back in 2005, MOV files became the go-to for Mac video editors, but they quickly earned a reputation for being enormous. A single minute of 4K footage shot in the popular ProRes 422 codec can easily top 500 MB. That means a simple 5-minute clip could swell past 5 GB.
This forced creators to get smart about compression, usually by converting their finished edits to the much leaner H.264 codec to make them web-ready. When it's time to share, upload, or archive your video, all that extra data in a ProRes file just gets in the way. This is where knowing how to properly compress a MOV file becomes an essential skill.
Finding the Right Balance
The goal isn't just to make the file smaller; it's to do it intelligently. Compressing a MOV file is all about finding that sweet spot between a manageable file size and crisp visual quality. For most situations, this comes down to a few key decisions:
- Choose the right codec: H.264 is the undisputed king of compatibility, playing nicely just about everywhere. HEVC (H.265) offers even better compression and is perfect for newer devices.
- Adjust the resolution: Do you really need a massive 4K file for an Instagram story? Probably not. Downscaling to 1080p can slash the file size by 75% or more on its own.
- Lower the bitrate: This is the setting that directly controls how much data is used for each second of video. Nudging it down reduces the file size, but be careful—get too aggressive, and you'll start to see a drop in quality.
Understanding these basic principles elevates you from someone who just clicks "compress" to a creator making smart, informed decisions. You end up with a file that's perfectly optimized for its final destination, whether that’s a website, a social media feed, or a long-term digital archive.
Beyond just compressing your main video, creating short cutdowns is another great way to produce smaller, shareable clips for social media or promotional content. If you want to go deeper on containers and codecs, check out our complete guide to Mac video file formats.
The Easiest Way to Compress a MOV File on Your Mac
When you need to shrink a MOV file, the last thing you want is to get bogged down in a confusing interface packed with technical jargon. You have a simple goal—maybe getting a product demo on a landing page or sending a family video through email—and you just need it done. Fast. This is where a focused, straightforward tool really shines.
For Mac users who need to move quickly, the whole process can be as simple as dragging a file from your desktop into an app. Let's walk through a common scenario. Say you’ve just put the finishing touches on a 500 MB product demo. It looks fantastic, but it’s way too big for your website, where it would absolutely kill your page load times and send visitors clicking away.
A Drag-and-Drop Workflow
Instead of digging through complex menus, the ideal workflow is visual and direct. You can literally just grab that 500 MB MOV file and drop it right into an application like Compresto. No hunting for an "Import" button or navigating endless folder trees. It’s a clean, intuitive way to get started.
This screenshot shows just how simple that first step is—a clean slate, ready for you to drop your MOV file right in.
The whole point is to remove the guesswork. The moment your file is added, clear options pop up, giving you immediate feedback so you can move forward with confidence.
Once your video is loaded, the next step is deciding how you want it compressed. Rather than forcing you to decode concepts like bitrates or codecs, a preset-based system gives you choices based on what you actually plan to do with the file.
- Web Optimized: This is perfect for our landing page demo. It strikes a great balance between quality and size, ensuring the video loads quickly without looking like a blurry mess.
- Social Media: Tailored for platforms like Instagram or TikTok, this makes sure your file meets their specific size and format requirements.
- Email Attachment: This one gets aggressive, shrinking the file down to fit within common attachment limits so you can share it directly.
- Archive: A lighter compression that frees up a ton of space while keeping quality high enough for long-term storage.
For our 500 MB demo, "Web Optimized" is the obvious pick. With one click, you've told the app exactly what it needs to do.
Seeing Results Before You Commit
One of the biggest headaches with video compression is the fear of ending up with a pixelated, unusable mess. A live preview feature is a game-changer here. Before you even click "Compress," you get a side-by-side look at the original file versus the potential compressed version.
You can scrub through the video and instantly see how the compression will affect different scenes—from fast-moving action to detailed close-ups. This visual confirmation gives you the confidence that you’re not sacrificing necessary quality for a smaller file size.
This completely eliminates that frustrating cycle of compress, check, delete, and try again. You make an informed choice right from the start.
Once you confirm the preview looks good, you just hit compress. The entire process happens locally on your Mac, which means your files stay private and secure. They're never uploaded to some random cloud server, which is a critical point for anyone working with sensitive or confidential content.
Understanding Your Savings
After the compression finishes—which usually only takes a few moments—the results are laid out clearly. A savings report might show that your 500 MB file is now a lean 50 MB. That’s a 90% reduction. Seeing that tangible result makes the whole process feel worthwhile. You've successfully reclaimed hundreds of megabytes of storage and created a file that’s perfectly suited for the web.
This whole approach is about efficiency. It strips away the technical barriers that often make video compression feel like a chore reserved for video pros. Of course, for those who want to dive deep into the settings, tools like HandBrake offer incredible control, and you can learn more about its powerful features in our guide on how to use HandBrake. But for the vast majority of everyday tasks, a simple, preset-driven method isn't just easier—it’s smarter. It respects your time and lets you focus on creating and sharing, not wrestling with software.
Getting Perfect Results: Understanding Codecs and Quality Settings
Going beyond the standard presets is where you gain incredible control over your video compression. It’s what turns a confusing process into a predictable one. The secret really comes down to just a few core concepts: the codec, resolution, frame rate, and bitrate.
Think of these as the ingredients for your final video file. Tweaking each one changes the flavor of the final product.
At the heart of every video file is a codec (which is just short for coder-decoder). This is the specific "language" the computer uses to store all the visual information. Some codecs, like H.264, are like a universal language—they're incredibly compatible and will play on just about any device, old or new. Others, like HEVC (H.265), are more modern and efficient, giving you the same visual quality at a much smaller file size. This makes them perfect for 4K video and archiving.
This flowchart breaks down the basic compression workflow into three simple actions.
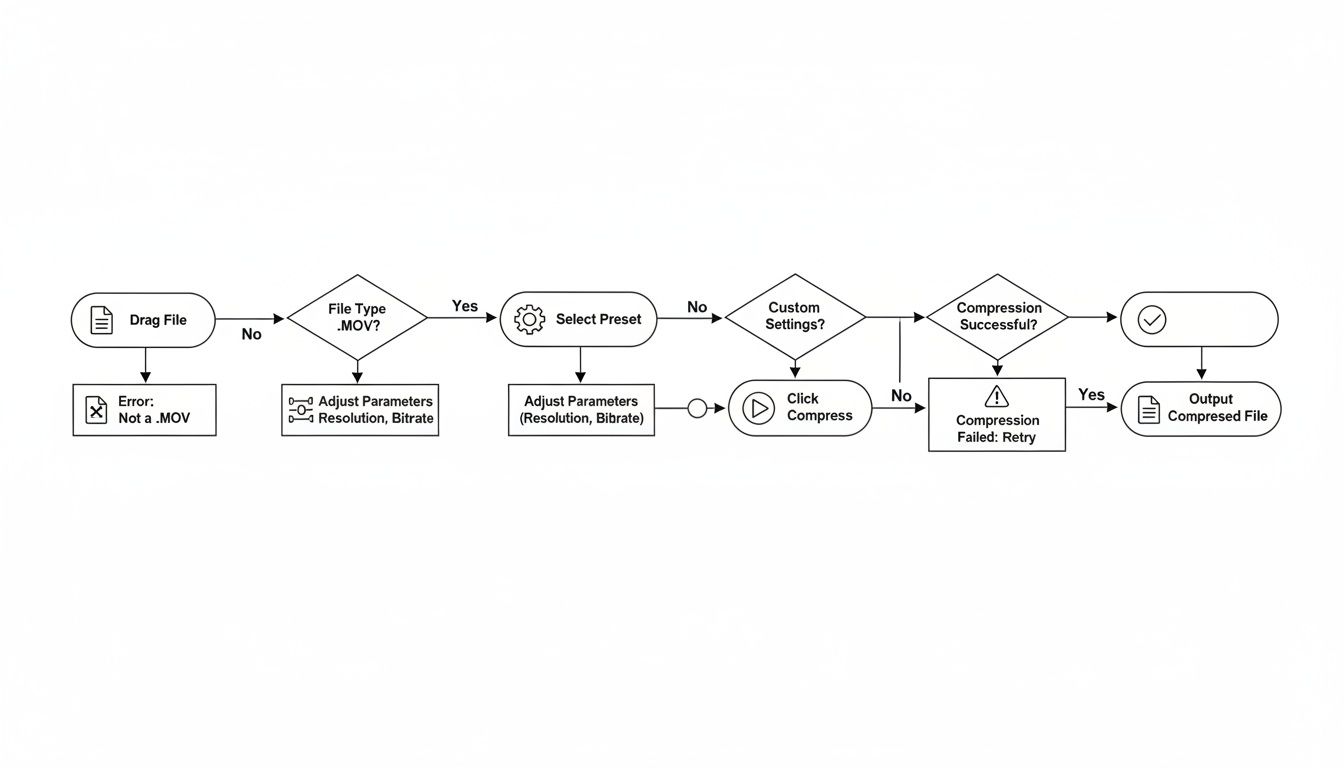
The main takeaway here is that effective compression doesn't need to be some complicated, technical nightmare. Modern tools have turned it into a simple drag, select, and click process.
H.264 vs. HEVC: Which Codec Should You Choose?
So, which one is right for your project? Honestly, it depends entirely on your goal.
-
H.264 (AVC): This is your go-to for maximum compatibility. If you're creating a video that needs to be shared widely—on a website, in an email, or with clients who might have older computers—H.264 is the safest bet. It's the industry standard for a reason.
-
HEVC (H.265): Choose this one for efficiency and future-proofing. If you're compressing 4K footage or archiving a bunch of personal videos to save hard drive space, HEVC is the clear winner. It can deliver up to 50% better compression than H.264, but just be aware that older devices might struggle to play it back smoothly.
The push for even greater efficiency isn't stopping, either. By 2026, the newer AV1 codec is expected to create files that are 60-70% smaller than H.264 at the same quality. For the thousands of professionals using tools like Compresto, these advancements are already making a huge difference. They're batch processing 4K MOVs from 1.2 GB down to a tidy 90 MB for social media, slashing upload times by over 90%.
Resolution and Frame Rate: The Heavy Hitters
Resolution and frame rate are two of the biggest factors that will bloat your file size.
Resolution is just the number of pixels in your video (like 1920x1080 for 1080p). Here's a surprising fact: halving the resolution doesn't just halve the file size—it can actually reduce it by up to 75%. Ask yourself if your audience will truly see the benefit of 4K. For a TikTok or Instagram Reel, 1080p is more than enough. When you're trying to get perfect compression for social media, mastering the specific vertical video dimensions is a key part of the puzzle.
Frame Rate (fps) is simply how many individual images flash on the screen per second. The standard for a cinematic look is 24fps, while broadcast TV is often 30fps and super-smooth gaming footage is 60fps. Dropping a file from 60fps to 30fps can nearly cut its size in half, and for most content, your viewers will barely notice the difference.
Pro Tip: Don't just default to the highest settings your camera can shoot. Always match your compression settings to where the video will actually be watched. A 4K, 60fps video is massive overkill for an email attachment but might be exactly what you want for a high-quality YouTube upload.
Decoding Bitrate: The Final Piece of the Puzzle
Finally, we have bitrate. This measures how much data is used to encode one second of video, usually in megabits per second (Mbps). This setting has a direct, one-to-one relationship with both file size and quality.
A higher bitrate means more data, which gives you better quality but also a larger file. A lower bitrate creates a smaller file but can introduce nasty visual artifacts like blockiness or blurriness if you push it too low.
There's no single "best" bitrate; it's always a balancing act. For a crisp 1080p video for the web, a bitrate somewhere between 5-10 Mbps is a great starting point. For 4K, you might aim for something in the 35-45 Mbps range. The best approach is to take a short clip from your video and experiment. Find the lowest bitrate you can get away with that still maintains the visual integrity you need. Once you get the hang of these settings, you have total control over your final output.
How to Batch Compress Multiple MOV Files at Once
Compressing files one by one is a complete workflow killer. If you're a social media manager, video editor, or content creator, you know the pain of dealing with a high volume of media.
Picture this: you've just finished a week's worth of short video clips for Instagram. You have a folder with 15 MOV files, and every single one needs to be optimized for the platform. The thought of processing them individually is enough to make anyone want to put it off until tomorrow.
This is where batch processing comes in, turning a tedious, hour-long chore into a quick, set-it-and-forget-it operation. It’s all about working smarter.
With a tool like Compresto, you can grab that entire folder of 15 MOV files and just drag it straight into the app. From there, you apply a single "Social Media" preset to all of them at once. The app queues them up and crunches through the files, freeing you up to get back to more creative work.
Setting Up a Batch Compression Workflow
The whole process is designed to be as intuitive as possible, getting rid of the usual friction that comes with video compression. There's no need to create separate projects or mess with individual export settings for every single file.
Instead, you just configure your compression settings once and apply them across the entire batch.
This approach is also a lifesaver for maintaining consistency. When you apply the same preset to every file, you guarantee that all your videos have uniform specs—the same codec, resolution, and bitrate. This is absolutely crucial for branding and delivering a professional, cohesive look across all your content.
For video editors and marketers on macOS, this method saves a ton of time and storage space. Teams have found that batch-processing folders can help them save 90% on storage, with clear reports showing exactly how many gigabytes were reclaimed. Files meant for enterprise sharing can shrink from over 500MB to under 100MB, which is perfect for hitting social media limits like Instagram's 100MB cap. It's a massive workflow boost for creators handling hundreds of assets weekly. Find out more about how these efficiencies impact modern workflows.
Automating Compression with Folder Monitoring
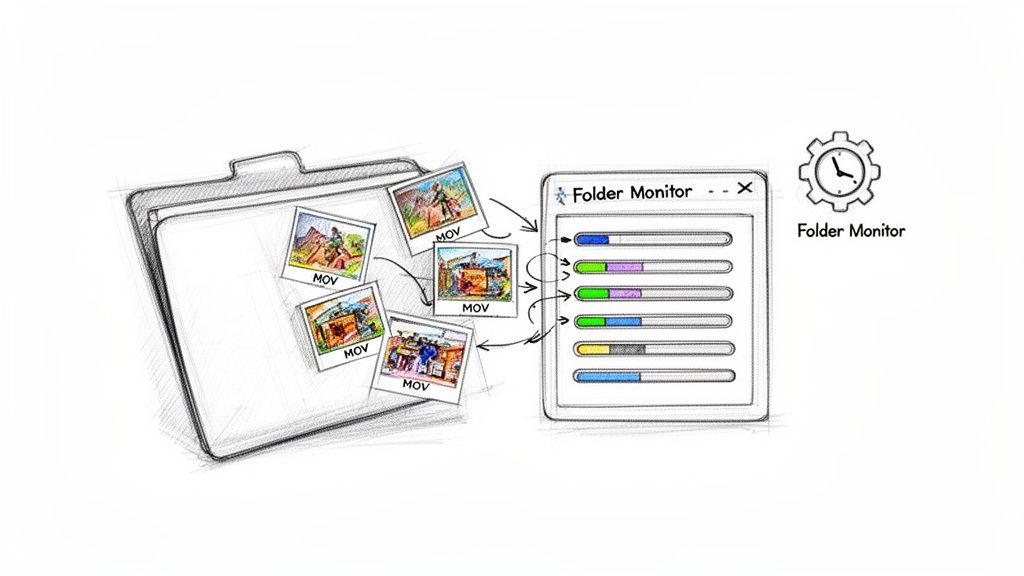
For power users who want the ultimate hands-off setup, Folder Monitoring is a total game-changer. This feature lets you designate a specific folder on your Mac as a "hot folder." Any new MOV file you drop into this folder gets automatically compressed using your predefined settings.
Think about how this could work in the real world:
- Video Editors: Set your main "Exports" folder to be monitored. The second Final Cut Pro or Premiere Pro finishes rendering a MOV file, it’s automatically compressed and ready for client review.
- Social Media Managers: Create a "Ready for Instagram" folder. Just drop all your approved clips in there, and they're instantly optimized and ready to upload without a single extra click.
- Design Teams: A shared "Assets for Web" folder on a server can automatically compress any new product videos, making them immediately ready for the e-commerce team to use.
This level of automation completely removes the compression step from your mental to-do list. It just becomes a seamless background process that works for you.
Key Takeaway: Batch compression and folder monitoring are more than just conveniences; they are strategic workflow enhancements. They slash manual labor, enforce consistency, and reclaim valuable time, allowing creators to produce and share content faster than ever. It shifts your focus from tedious file management back to creating great content.
Exploring Free Alternatives for MOV Compression
While a dedicated compression tool makes life easier, you don't always need one to get the job done. macOS is packed with powerful, and completely free, alternatives for anyone on a tight budget or who just enjoys a more hands-on approach.
These tools can absolutely shrink your MOV files, but it’s good to know the trade-offs. They often require a bit more technical patience and know-how. Let's break down the most popular free options, looking at where they shine and where they might slow you down.
QuickTime Player: Your Mac’s Built-In Solution
Most Mac users don't realize they already have a capable video compressor built right into the operating system. QuickTime Player, your default video viewer, has a surprisingly useful "Export As" feature that can quickly downsize a MOV file.
This is the perfect method for simple, one-off tasks where you don't need a ton of control. Say you have a huge screen recording you need to email to a colleague—QuickTime is often the fastest way to shrink it.
Here’s how you do it:
- Open Your MOV File: Just double-click your MOV to open it in QuickTime Player.
- Find the Export Menu: Head up to the menu bar and click
File > Export As. - Pick a Resolution: You'll see a list of options like 1080p, 720p, and 480p. Choosing a lower resolution than your source file will massively reduce its size. For instance, exporting a 4K video as 1080p can cut the file size by 75% or more.
- Save Your New File: QuickTime handles the rest, re-encoding the video with standard H.264 settings and saving it as a new, much smaller file.
The main benefit here is pure convenience—it's already on your Mac, ready to go. The downside? A serious lack of options. You can't adjust the bitrate, switch the codec to something more modern like HEVC, or tweak any other advanced settings. It's a blunt instrument, but a very effective one for quick jobs.
HandBrake: The Power User’s Choice
When you need more control, HandBrake is the undisputed champion of free video transcoding software. It's an open-source powerhouse packed with an almost overwhelming number of settings, letting you fine-tune every single aspect of your video compression.
HandBrake is perfect for anyone who wants to create custom presets for specific workflows. Maybe you need to optimize a whole batch of videos for a YouTube channel or archive family movies with very specific quality targets. The interface can look a little intimidating at first, but once you find your way around, it's incredibly powerful.
Expert Tip: Don't start from scratch. Use HandBrake's built-in presets. The "Fast 1080p30" or "Vimeo YouTube HQ 1080p60" are fantastic starting points. From there, you can start tweaking individual settings in the "Video" tab to see how they affect your file size and quality.
Where HandBrake really shines:
- Granular Control: You can adjust everything—codecs (H.264, HEVC), frame rates, constant quality vs. average bitrate, and so much more.
- Batch Processing: Its queue system is a lifesaver, making it easy to line up a whole folder of files and let it run.
- Advanced Features: It also supports subtitles, chapter markers, and even video filters.
The learning curve is its biggest drawback. Dialing in the perfect balance of settings often involves some trial and error, which can be time-consuming. If HandBrake feels like a bit much, you can check out our list of the 10 best free video compression tools for other great options.
FFmpeg: For Command-Line Aficionados
For developers, system administrators, or anyone who lives in the macOS Terminal, FFmpeg is the ultimate tool. It's not an "app" with a pretty interface; it's a command-line utility that can handle virtually any video or audio task you can dream up, including MOV compression.
FFmpeg offers truly unparalleled power and flexibility. You can write complex scripts to automate your entire compression workflow from start to finish. For instance, you could create a script that watches a folder and automatically converts any new MOV file into a web-optimized MP4 with specific dimensions and a target bitrate.
A basic compression command might look like this:
ffmpeg -i input.mov -vcodec libx264 -crf 23 output.mp4
This simple line tells FFmpeg to take input.mov, re-encode it using the H.264 codec at a decent quality level (CRF 23 is a great starting point), and save the result as output.mp4.
The main drawback is obvious: there is no graphical user interface. Every single action requires typing precise commands, which makes it totally inaccessible for most casual users. But for automated, server-side, and high-volume tasks, nothing beats its efficiency and raw power.
Feature Comparison: Compresto vs. Free Alternatives
To make sense of all these options, it helps to see how they stack up side-by-side. Each tool has its place, whether you prioritize speed, control, or automation.
| Feature | Compresto | QuickTime Player | HandBrake | FFmpeg |
|---|---|---|---|---|
| Ease of Use | ✅ Very High | ✅ High | 🟠 Medium | 🔴 Low |
| Batch Processing | ✅ Yes | ❌ No | ✅ Yes | ✅ Yes |
| Codec Choice (H.264/HEVC) | ✅ Yes | ❌ Limited | ✅ Yes | ✅ Yes |
| Advanced Quality Control | ✅ Yes | ❌ No | ✅ Yes | ✅ Yes |
| Graphical Interface (GUI) | ✅ Yes | ✅ Yes | ✅ Yes | ❌ No |
| Automation & Scripting | ✅ Yes | ❌ No | 🟠 Limited | ✅ Yes |
| Cost | Paid | Free | Free | Free |
Ultimately, the best tool depends entirely on your needs. For a quick and dirty size reduction, QuickTime is perfect. For deep customization and batch work, HandBrake is your best bet. And for scripting and automation, FFmpeg is king.
Troubleshooting Common Compression Problems
Even with the best tools, video compression can sometimes throw a curveball. We've all been there: you click compress, wait for the process to finish, and the result just isn't what you expected.
Don't worry, this is a normal part of the process. Nearly every common issue has a pretty straightforward fix. Let's walk through some of the most frequent frustrations and what you can do to solve them. Most problems boil down to a simple setting adjustment.
Why Does My Compressed Video Look Blurry or Pixelated?
This is, by far, the most common complaint. You wanted a smaller file, but you didn't want it to look like it was filmed on a potato cam from 2005. A blurry or blocky video is almost always a sign that the compression settings were just too aggressive for your specific footage.
The main culprit is usually the bitrate. A lower bitrate means less data is used for each second of video, and if you set it too low, the encoder has no choice but to start throwing away visual information. Scenes with fast motion, detailed textures, or complex camera movements are the first to suffer.
Here’s how to fix it:
- Bump Up the Bitrate: If you're setting the bitrate manually, try increasing it by 20-30% and re-compressing a short clip. The goal is to find the sweet spot—the lowest value that still gives you acceptable quality.
- Use a Quality-Based Setting: Tools like HandBrake and FFmpeg have a much smarter approach called "Constant Quality" (CQ) or "Constant Rate Factor" (CRF). This lets the bitrate fluctuate as needed to maintain a consistent level of visual quality throughout the video. It's often a much better way to go.
- Check the Resolution: Did you drastically downscale the video, like going from 4K down to 480p? If so, a major loss in detail is unavoidable. Make sure your output resolution is appropriate for where the video will be watched.
Fixing Audio That Is Out of Sync
You press play, the video looks great, but the audio is a frustrating half-second ahead or behind the action. This audio drift, or desynchronization, almost always points to an issue with the frame rate.
This often happens when your original .MOV file was recorded with a variable frame rate (VFR), which is common for videos shot on smartphones. Some compression tools get confused by the fluctuating frame rate during the re-encoding process, causing a mismatch with the audio track.
The simplest fix is to force a constant frame rate (CFR) during compression. In your tool's settings, find the frame rate option and explicitly set it to a standard value like 29.97 or 30 fps. This ensures the video and audio tracks march in perfect lockstep.
Why Won’t My Video Play on Other Devices?
It’s a classic problem. You compress a .MOV file on your Mac, and it plays perfectly in QuickTime Player. But when you send it to a colleague on a Windows PC or try to upload it to an older website, it just won't play.
This is a textbook codec compatibility issue. While your Mac has native support for a wide range of codecs, other systems might not be so forgiving. For instance, if you compressed your video using the highly efficient HEVC (H.265) codec, older Windows machines or web browsers might not have the decoder needed to play it back.
The universal solution? Stick with the H.264 codec. It is, without a doubt, the most widely supported video codec on the planet and will play on virtually any device or platform made in the last decade. When in doubt, H.264 is always the safest bet for maximum compatibility.
Ready to skip the troubleshooting and get perfect results every time? Compresto streamlines the entire process with smart presets and a simple drag-and-drop interface, ensuring your MOV files are perfectly compressed for any destination. Try it today and see how easy video compression can be. Learn more at https://compresto.app.