Compress Videos Mac: Easy Guide to Reduce File Sizes
So, you need to shrink a video file on your Mac. You've got options, from built-in tools like QuickTime Player for quick and dirty jobs to powerful free software like HandBrake when you need more control. The right method really comes down to your specific needs, but the goal is always the same: reduce the file size so you can email it, upload it, or just reclaim some storage space.
Why You Need to Compress Videos on Your Mac
Ever tried to email a video from your iPhone, only to get that dreaded "file is too large" error? Or maybe you've stared at a progress bar for what feels like an eternity, waiting for a short clip to upload to YouTube. These are classic symptoms of a modern problem: massive video file sizes.
Even the camera in your pocket shoots incredible high-resolution footage like 4K. While it looks amazing, the files it creates are gigantic, eating up disk space and bandwidth like crazy. Learning how to compress videos on your Mac isn't just some techie skill—it’s a practical necessity for anyone creating or sharing digital content today.
Everyday Scenarios for Video Compression
Compression isn't just for professional videographers. It comes in handy in all sorts of real-world situations. Think of a student who needs to submit a video project; a massive file could fail to upload to the university portal right before the deadline. Or a freelancer sending a draft to a client for review—a smaller file gets there faster and is easier for the client to download and watch.
Here are a few more times when shrinking a video is a lifesaver:
- Saving Storage: Freeing up that precious space on your Mac’s internal drive or your external hard drives.
- Faster Uploads: Drastically cutting down the time it takes to post on Instagram, TikTok, or YouTube.
- Efficient Sharing: Getting files small enough to send through email, Slack, or other messaging apps without hitting those frustrating attachment limits.
- Website Performance: Making sure videos embedded on your website load quickly, which keeps visitors happy.
Beyond just saving space, knowing how to compress your videos is crucial for smart strategies for repurposing video content effectively across different platforms, each with its own file size quirks.
The real art of compression is finding that perfect sweet spot between file size and visual quality. You want a file that’s small enough to be practical without turning into a pixelated, unwatchable mess.
Choosing the right tool is your first step in getting this balance right. While the built-in apps are convenient, dedicated software can give you far better results. You can check out this breakdown of 10 reasons Compresto outperforms other compression tools to see how a specialized app can really make a difference. In this guide, we'll walk through the best methods for any scenario.
To get started, it helps to know which tool is the best fit for your job. Here’s a quick rundown of the options we’ll cover to help you decide where to begin.
Choosing Your Mac Video Compression Tool
| Tool | Best For | Ease of Use | Key Feature |
|---|---|---|---|
| QuickTime Player | Quick, simple exports and trimming | Very Easy | Built directly into macOS |
| HandBrake | Advanced control and batch processing | Moderate | Huge range of presets and custom settings |
| Compresto | Balancing quality and file size automatically | Easy | AI-powered optimization for the best results |
Each of these tools has its place, from the no-fuss approach of QuickTime to the granular control of HandBrake and the smart automation of Compresto. Now, let's dive into how to use each one.
Using QuickTime Player for Fast Compression
Sometimes you don’t need a complex app with a million settings. You just need to make a file smaller, and you need it done now. For moments like these, your Mac has a secret weapon hiding in plain sight: QuickTime Player. It’s more than just the default video player on macOS—it also has a simple and surprisingly effective compression tool baked right in.
QuickTime is the perfect choice when speed and convenience are all that matter. There’s nothing to download or install. You can pop open a video, export it to a smaller size, and be done in just a few clicks. It’s ideal for shrinking a screen recording you just finished or a video you quickly AirDropped from your iPhone before sending it off.
The whole process is incredibly straightforward. Just open your video, head up to the menu bar and click File > Export As, and you'll get a clean list of resolution options like 1080p, 720p, and 480p.
Decoding QuickTime's Export Options
Knowing what these resolution options actually do is the key to getting the file you want. Each one is a simple trade-off between file size and how clear the video looks.
- 1080p (Full HD): This gives you the best quality but the least compression. You’d pick this if you shot something in 4K and need to keep it looking crisp for a larger screen, but still want to trim down the file size.
- 720p (HD): This is often the sweet spot. It dramatically cuts down the file size but keeps the quality high enough for most laptops and mobile devices. It's a fantastic choice for web uploads or sharing with colleagues.
- 480p (Standard Definition): Go with this for maximum compression. The video quality will take a noticeable hit, but the file will be tiny—perfect for email attachments or situations where visual detail just isn't a priority.
This kind of simple, built-in tool is part of a massive global ecosystem. In fact, the video compressor market was valued at around USD 2.45 billion and is expected to nearly double. This explosive growth shows just how vital efficient video management has become for everyone. If you're curious, you can explore more data on the global video compressor market to see the trends behind this demand.
Pro Tip: When you export from QuickTime, look for a format dropdown that offers "Greater Compatibility" (H.264) or "Smaller File Size" (HEVC/H.265). If you know your audience is using modern devices, always choose HEVC. It's a much more efficient codec and will give you a smaller file at the same quality level.
Of course, QuickTime's simplicity is also its biggest weakness. You have zero control over the finer details. You can't tweak the bitrate, adjust the audio quality, or compress a batch of files at once. It’s a one-and-done tool for basic jobs. If you find yourself needing more granular control, that’s your cue to graduate to a more advanced tool like HandBrake.
When QuickTime's simple approach just won't cut it, it's time to call in the specialist. For a huge number of Mac users who need to compress videos with real precision, HandBrake is the undisputed champ. It’s free, open-source, and absolutely packed with features that give you total command over your final video file.
At first glance, the interface can look a bit technical. But don't let that intimidate you. You only need to get a handle on a few key settings to start producing professional-grade results.
The real magic of HandBrake is its blend of ready-made presets and deep customization. If you're just starting out, the presets are your best friend. These are pre-configured settings optimized for common uses, like "Fast 1080p30" for web videos or specific presets for an Apple TV. They completely remove the guesswork and give you a fantastic starting point.
This infographic breaks down the basic workflow to get you going.
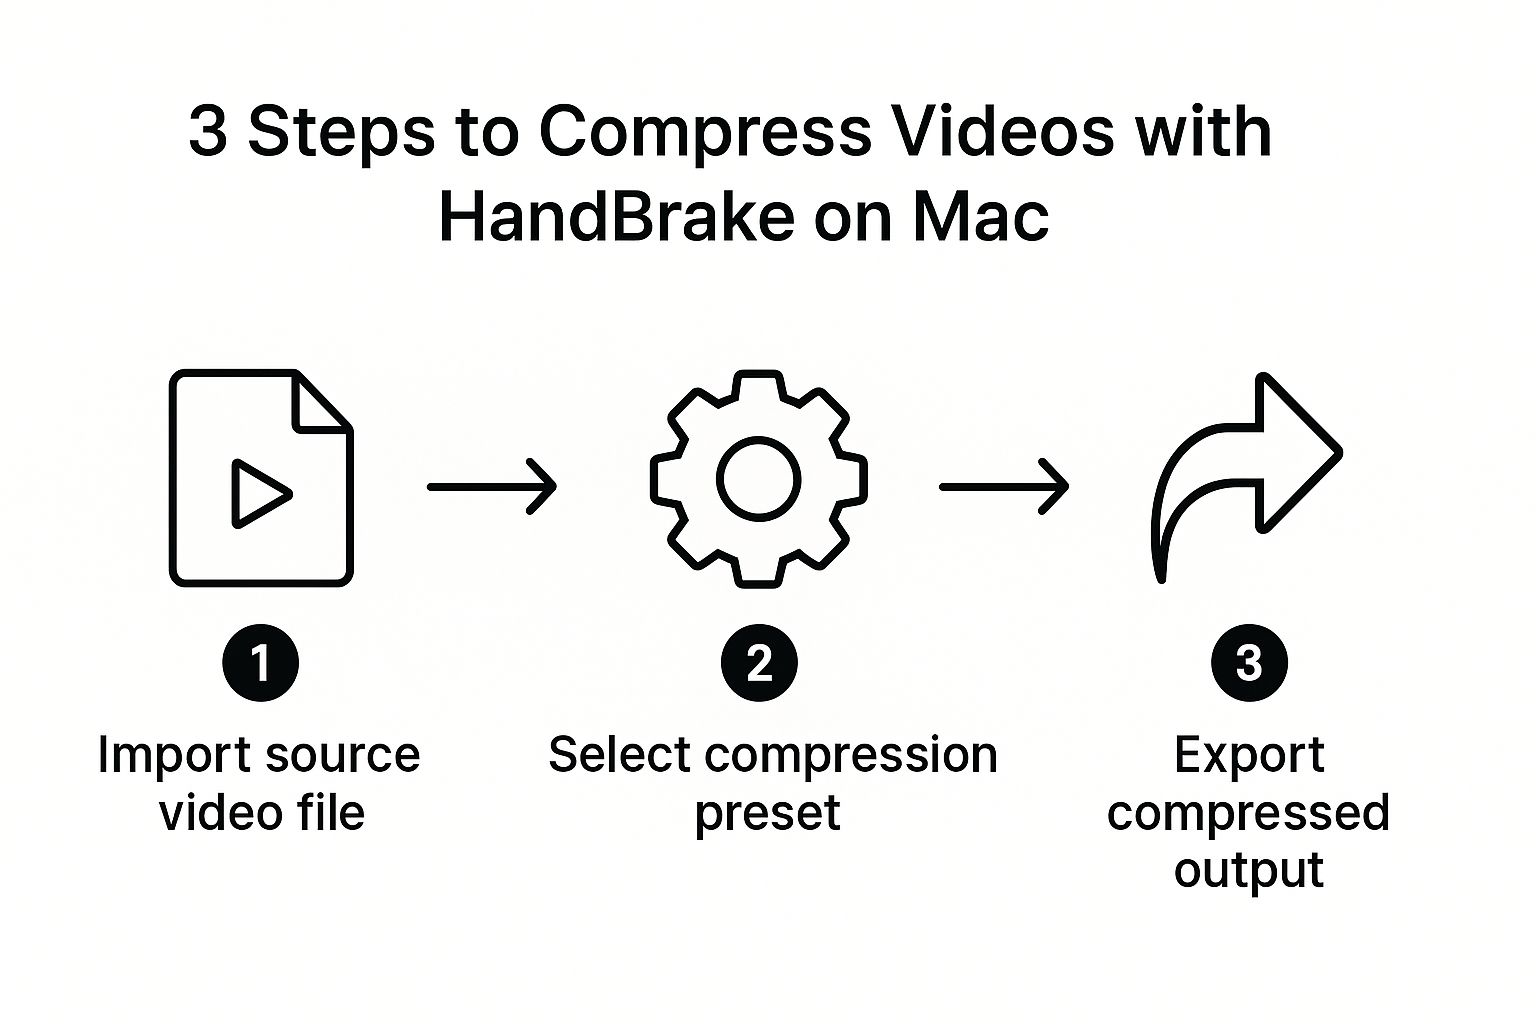
As you can see, even a powerful tool like this can be boiled down to a simple import-select-export routine for quick jobs.
Going Beyond the Presets
Once you feel comfortable, you can start dipping your toes into the manual settings. This is where you unlock the power to find that perfect sweet spot between file size and video quality for your specific project. For instance, you might want to skip the presets and manually tweak the codec for a massive 4K GoPro video you're trying to get online.
Here are the settings that matter most:
- Format: Just stick with MP4. It gives you the widest compatibility across pretty much every device and platform out there.
- Video Encoder: You have a choice here. H.264 (x264) offers fantastic compatibility, while H.265 (x265) delivers far better compression. An H.265 file can be up to 50% smaller than an H.264 file at the same visual quality, but it does take a bit longer to process.
- Constant Quality: This is the big one. The RF (Rate Factor) slider is where you control the final quality. A lower number means higher quality (and a bigger file), while a higher number means lower quality (and a smaller file). For most HD video using H.264, an RF between 20-24 is a great sweet spot.
Don't be afraid to experiment with that Constant Quality slider. A tiny adjustment can make a massive difference in your final file size. For a 1-minute 4K clip, bumping the RF from 20 to 23 could easily slash the file size by a third with almost no noticeable drop in clarity.
A Practical Example Compressing GoPro Footage
Let's say you have a 5-minute, 4K video from your GoPro, and the original file is a whopping 4 GB. You need to send it to a client for a quick review, but that file size is a non-starter.
Inside HandBrake, you could start with the "Fast 1080p30" preset as your base.
Then, you'd click over to the "Video" tab. Since quality is important but the file needs to be much smaller, you could switch the encoder to H.265 and slide the Constant Quality RF to around 22. You could also pop over to the "Audio" tab and drop the bitrate from 160 to 128 kbps, since crystal-clear audio probably isn't critical for a preview.
After you hit export, your new file might be just 400 MB—a staggering 90% reduction—while still looking perfectly sharp on a laptop screen.
This kind of granular control is exactly why HandBrake maintains a significant 16% market share in its software category. Its open-source DNA means it adapts quickly, adopting new tech like GPU acceleration to speed up encoding—a massive win for Mac users wrestling with high-res footage. You can read the full market analysis on video compressor tools to see how it stacks up. This adaptability makes it an essential tool when you need to compress videos on a Mac without making compromises.
Optimizing Settings for Maximum Quality
Knowing how to use the tools is a great start, but really understanding what you're doing during compression is what separates good results from great ones. Once you peek under the hood, you can make smarter decisions to slash file sizes while keeping your videos looking sharp. These concepts hold true whether you’re using HandBrake, Compresto, or any other tool to compress videos on your Mac.
Let's break down some of the technical jargon you'll run into. Imagine a video file is a package. The container (like .MP4 or .MOV) is just the box. Inside that box are two different things: a compressed video stream and a compressed audio stream. The method used to shrink each of these is called a codec.
Getting a handle on codecs is the first real step toward mastering compression. For video, the two you’ll see most often are H.264 (sometimes called AVC) and the newer H.265 (also known as HEVC).
Choosing the Right Video Codec
The codec you pick has the single biggest impact on your final file size. H.264 has been the go-to standard for years, and it works on just about everything. But H.265 is the modern, more efficient option. It delivers the same visual quality as H.264 but in a file that can be up to 50% smaller. That’s a massive difference.
To make the choice easier, here's a quick rundown of how they stack up.
Codec Comparison H.264 vs H.265 (HEVC)
Understanding the key differences between the two most common codecs for video compression.
| Feature | H.264 (AVC) | H.265 (HEVC) |
|---|---|---|
| Efficiency | Good compression, industry standard | Excellent compression, up to 50% smaller files |
| Compatibility | Universal, works on almost any device | Supported by modern devices and software |
| Encoding Speed | Faster | Slower, requires more processing power |
| Best For | Maximum compatibility, older devices | High-quality web video, 4K footage, saving space |
The takeaway here is pretty straightforward: if you know your audience is using modern phones, computers, and TVs, always choose H.265 (HEVC). The file size savings are just too good to pass up. Only stick with H.264 if you absolutely need to support older devices.
Constant Quality vs Bitrate
Next, you'll need to decide how to set the quality itself. You generally have two choices: Average Bitrate and Constant Quality (CQ). Setting an average bitrate—say, 2,000 kbps—gives you a predictable file size, but it's not very smart. It assigns the same amount of data to a simple, static shot as it does to a complex action scene, which is incredibly wasteful.
Constant Quality (often called Constant Rate Factor or RF) is a much better approach. It allows the bitrate to go up and down as needed, dedicating more data to complex scenes and less to simple ones. The result is a far more efficient use of data and much better visual quality for a given file size.
For almost every situation, using a CQ or RF setting will give you a superior-looking video.
Do Not Forget the Audio
It's easy to get tunnel-vision on the video, but the audio track can be a silent-but-deadly contributor to file bloat. Most videos, especially those destined for the web or social media, simply don't need pristine, uncompressed audio.
Here are a few quick tips to trim down the audio track:
- Codec: Stick with AAC (Advanced Audio Coding). It’s the universal standard for a reason—it offers a great balance of quality and file size.
- Bitrate: For anything voice-focused, like a tutorial or a presentation, 128 kbps is plenty. If your video has a rich music track, 160 kbps is a solid choice. You almost never need to go higher for web content.
- Channels: Unless you’re a pro who specifically mixed your audio for surround sound, just choose Stereo.
Making these small tweaks to the audio can easily shave off precious megabytes, and it’s unlikely anyone will ever notice the difference. To really nail your export settings, you can optimize videos for social media in our detailed guide. Integrating these steps into your overall video creation workflow will ensure you’re always producing the best possible output.
Common Compression Mistakes to Avoid
Compressing videos can feel like a bit of a dark art. You can save yourself a lot of frustration, though, by steering clear of a few common pitfalls. Honestly, learning what not to do is just as important as mastering the right settings. When you compress videos on Mac, a few simple missteps can easily turn your crisp footage into a pixelated mess or leave you with a file that’s still way too big.
One of the most frequent errors is over-compressing a file. It's so tempting to drag that quality slider all the way down to get the smallest size possible, but this almost always leaves you with a video that's basically unwatchable. The real goal is finding that sweet spot, not completely obliterating the quality. My advice? Start with a more conservative setting and run a quick test export on a short clip. See how it looks before you commit to rendering the whole thing.
Ignoring the Power of Presets
Another classic mistake is overlooking the built-in presets that tools like HandBrake provide. These aren't just for beginners—they're expertly configured settings designed for specific needs, like creating a web-friendly video or a file optimized for a particular device. Jumping straight into manual tweaking without understanding what each setting does is a recipe for a bad time.
Instead, find a relevant preset and use it as your starting point. From there, you can make small, careful adjustments to just one or two settings at a time, like the Constant Quality slider, to fine-tune the final result. This approach is way more efficient and gives you much better, more predictable outcomes.
The single biggest mistake you can make is re-compressing an already compressed video. Every time a video is compressed, it loses data. Compressing a file that has already been through the process will exponentially degrade its quality, a phenomenon known as generational loss.
The Problem with Re-Compression
Imagine making a photocopy of a photocopy. That second copy always looks significantly worse than the first, right? The same principle applies here. If you need to make edits or re-export a video for any reason, always go back to the original, high-quality source file. Working from the master copy ensures you're starting with the maximum amount of visual data, which gives you the best possible chance of preserving quality through the compression process.
Failing to do this is what leads to those ugly compression artifacts, blockiness, and color banding that are impossible to fix later. For more on keeping your files looking sharp, check out these excellent file size reduction tips to optimize your files. It's a great resource for developing a smarter workflow.
A Few Common Questions About Video Compression
When you start compressing videos, a few questions almost always pop up. I’ve seen these come up time and time again in forums and from users, so let’s get you some quick, practical answers.
How Can I Compress a Video on My Mac for Free?
Good news—your Mac already has a great free tool built right in: QuickTime Player. For simple, no-fuss compression, it's the fastest option without downloading a thing. Just open your video, navigate to File > Export As, and pick a smaller resolution like 1080p or 720p. It instantly creates a smaller file.
If you need more control, your best bet is HandBrake. It's a powerful, open-source app that's also completely free. Unlike QuickTime, HandBrake gives you a ton of settings and presets for web, devices, and more, letting you fine-tune the final result.
Will Compressing a Video Reduce Its Quality?
Yes, technically speaking, compression always removes some data, which means a loss in quality. But here’s the thing: modern compression is designed to be so smart that you'll barely notice, if at all. The goal is to get rid of visual information the human eye can't easily see anyway.
With the right settings, the quality loss can be virtually invisible. By using a modern codec like H.265 (HEVC) and a Constant Quality setting (like an RF value between 20-24 in HandBrake), you can slash the file size dramatically while the video still looks fantastic for its purpose.
What Is the Best Format for Compressing Videos?
For the ultimate sweet spot between quality, file size, and compatibility, you can't go wrong with an MP4 container, the H.265 (HEVC) video codec, and the AAC audio codec. MP4 files play nicely on just about everything—websites, social media, phones, you name it.
But the real magic comes from the H.265 codec. It delivers around 50% better compression than its older sibling, H.264. That means you get a video that looks just as good but is only half the size. For anyone serious about shrinking videos on their Mac today, this combination is the clear winner.
Tired of fiddling with settings? Compresto uses smart tech to automatically find that perfect balance of quality and size for you. Give Compresto a try and see just how simple it is to get smaller files without the headache.