Compress Images Without Losing Quality Like a Pro
What Actually Happens When You Compress Your Images
Here's the honest truth about image compression: it doesn't have to mean sacrificing image quality. After working with countless images over the years, I've realized most folks misunderstand the process. Think of it like packing a suitcase. Sometimes you leave stuff behind (lossy compression), and sometimes you just pack smarter (lossless compression). The real trick is knowing which method to use.
Lossy compression is like removing those "just in case" items from your suitcase—you probably won't miss them, and your bag is much lighter. Algorithms cleverly discard data your eyes are unlikely to notice. This is the secret behind formats like JPEG, making them perfect for photos where a tiny bit of data loss is invisible.
Lossless compression, on the other hand, is like meticulously rolling your clothes—everything fits, and nothing gets left behind. Every single bit of data is preserved. Formats like PNG are masters of this, keeping sharp lines and details crisp, ideal for logos and graphics.
The groundwork for how we compress images today was actually laid down decades ago. The Discrete Cosine Transform (DCT), developed back in 1973, was a game-changer. This transform was the key to creating the JPEG format, which completely changed digital photography. It made it possible to compress images significantly without a noticeable drop in quality. Learn more about Image Compression. This allowed us to store and share images efficiently, leading to the explosion of digital images we see everywhere now.
Understanding how compression affects various image types is vital for compressing images effectively. The screenshot below visualizes different compression techniques:
This shows how different algorithms handle data reduction. Some simplify color palettes, while others look for patterns and redundancies to remove less important information. Want to dive deeper? Check out this helpful guide: How to Compress Image Without Losing Quality. It's packed with practical tips and steps for optimizing your images without ruining how they look.
Finding the right balance between file size and quality is crucial. That standard advice about using an 80% JPEG quality setting? It might be completely wrong for your specific images. Trust your eyes, not generic recommendations, to get the best results. Experiment and see what works best for your images.
Picking the Perfect Format for Every Situation
Stop guessing! After years of working with images, I've developed a simple framework for choosing the right format. Forget the "one-size-fits-all" approach. Your homepage hero image needs a completely different strategy than, say, a simple product icon or a social media graphic.
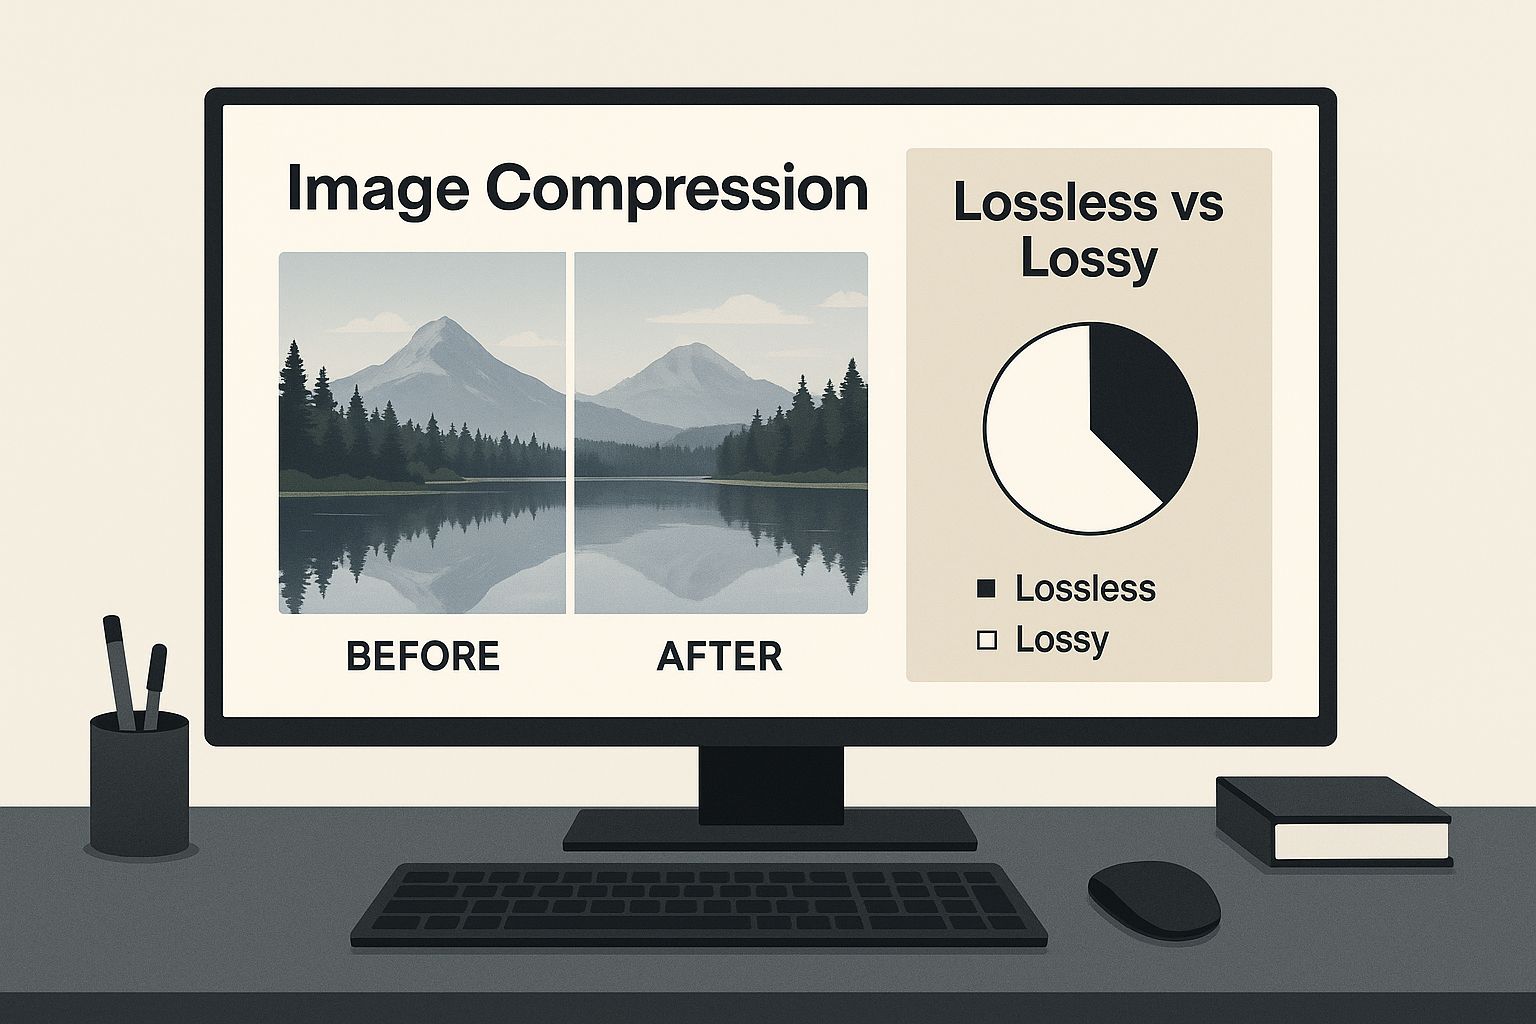
This infographic sums it up: lossy vs. lossless compression. See how you can shrink file size without sacrificing visual quality? Choosing the right compression method is key to keeping those important details crisp and clear.
I've even used PNG for photos (yes, really!) and JPEG for graphics – going against conventional wisdom. Why? Because understanding your specific needs trumps everything else. We'll dive into transparency, color complexity, and browser support – the big three that impact your image choices daily.
Transparency, Color, and Browsers: The Big Three
Need transparency? PNG, with its alpha channel support, is your best friend for logos and graphics with see-through backgrounds. But for photographs bursting with color, JPEG often wins, even though it's lossy. It compresses images (perceptually) more effectively than PNG, especially in areas with smooth color transitions. Dealing with different image dimensions? Check out resources on image resizing for helpful techniques.
New Kids on the Block: WebP and AVIF
And then there are the newer formats like WebP and AVIF. WebP, from Google, offers impressive compression compared to both JPEG and PNG. It supports both lossy and lossless modes, aiming for smaller file sizes without major quality loss – perfect for today's web apps and high-res screens. Learn more about image format evolution. But browser support? That's the catch. WebP adoption is rising, but older browsers might not play along. You'll need fallback options (like serving JPEG or PNG alternatives) to avoid broken images.
To help you quickly assess the right format, I've put together a handy table:
Image Format Comparison for Different Use Cases A practical comparison of image formats showing file sizes, quality retention, and browser support for common scenarios
| Format | Best Use Case | Average Compression | Browser Support | Quality Rating |
|---|---|---|---|---|
| JPEG | Photographs, images with smooth color transitions | High | Excellent | High (lossy) |
| PNG | Logos, graphics requiring transparency, images with sharp lines | Moderate | Excellent | Excellent (lossless) |
| GIF | Simple animations, small icons | Moderate | Excellent | Moderate |
| WebP | Photos, graphics for modern web browsers | High | Good (increasing) | Excellent (lossy/lossless) |
| AVIF | High-quality images with excellent compression | Very High | Fair (growing) | Excellent (lossy/lossless) |
As you can see, each format has its strengths. JPEG remains a workhorse for photos, while PNG excels for transparency. WebP and AVIF offer exciting possibilities for the future, but browser compatibility needs a watchful eye.
The bottom line? Choose the format that best balances file size and quality for your specific image and how you'll use it. It’s about using the right tool for the job, not blindly following outdated rules. You'll gain the confidence to make these calls based on solid criteria, not guesswork.
Online Tools That Actually Work (And Which Ones Don't)
I've tested countless online image compression tools, and honestly, many are disappointing. Let me save you the trouble. From my own experiments with different image types, I've found a few reliable winners: TinyPNG, Squoosh, and naturally, Compresto.
TinyPNG is amazing for optimizing PNG files. It's almost magical how it shrinks file sizes drastically without making images look blurry. I use it constantly for web graphics and icons where sharp lines are crucial. This translates to crisper images and quicker loading times.
Squoosh, created by Google, gives you incredible control. You can fine-tune compression levels and even pick different algorithms. It's my go-to for preserving transparency and managing those tricky image situations. The screenshot below shows the Squoosh interface:
See that side-by-side comparison and those detailed compression settings? That level of control is essential for compressing images without sacrificing quality and making informed choices. For instance, I recently used Squoosh to compress a detailed illustration with subtle gradients. By adjusting the settings, I got a 70% reduction in file size while keeping the image looking great. No other tool I tried could match that.
Compresto is my secret weapon for batch processing. You can compress tons of images at once without losing quality, a true lifesaver when you're dealing with large image libraries. You can even set up automated workflows for increased efficiency. I often use Compresto to optimize hundreds of product images simultaneously, saving me hours of manual work. For more optimization strategies, check out our guide on file size reduction tips.
Not all tools are equal, though. Some advertise "lossless" compression but actually lower your image quality. Watch out for these signs: blurry edges, blotchy textures, and faded colors. Those are warning signs that a tool is doing more harm than good. Always check image quality before downloading. Zoom in, compare versions side-by-side, and rely on your eyes—they're your best quality control.
Advanced Techniques That Separate Pros From Amateurs
Ready to take your image compression skills to the next level? We're going beyond the basics here. I'm sharing some tricks I've learned over years of optimizing images for websites and clients. Let’s talk about selective compression, meaning treating different parts of an image differently.
Selective Compression: Not All Pixels Are Created Equal
Think about a portrait. The face is the key element, right? You want crisp detail there. But the background? You can often compress it more aggressively without anyone noticing. This is where tools with masking or region selection shine. You preserve the crucial details while cutting file size elsewhere.
Tools - Resizer is a great online tool to reduce image size for web use. Resizing itself plays a big part in compression. By strategically reducing dimensions before compressing, you further minimize file size without sacrificing important visual information. This is especially useful when prepping images for specific display sizes online.
I recently optimized some large hero images for a website. Masking the main subject and heavily compressing the background shaved off 60% of the file size without a noticeable drop in quality. The trick is understanding which image areas really need high-fidelity detail.
Progressive JPEGs and Color Sampling
Another pro tip: progressive JPEG encoding. Images load in stages, starting blurry and progressively sharpening. This feels faster, even if the actual file size is unchanged. Users see something quickly, which always improves the experience. Side note: you might also find video compression for Mac useful for other media optimization.
Then there's color sampling. Our eyes are less sensitive to color detail than brightness. This lets us use lower chroma subsampling sometimes, again reducing file size without much visual impact. 4:2:0 subsampling usually works great for photos. But for graphics with sharp color transitions, you might need 4:4:4 to prevent artifacts.
These are just a few of the techniques I use for exceptional results. It's about understanding how we perceive images. Strategic aggressive compression can sometimes improve perceived quality by removing noise and distractions. Train your eye to spot those subtle details. Experiment, and you’ll develop an intuition for what works. Remember, the best compression is invisible to the viewer and achieves the smallest possible file size.
Setting Up Automated Workflows That Scale
Manual image compression is fine for a handful of images. But what happens when you're dealing with hundreds, or even thousands? Trust me, I've been there. So, let me share some of the automation systems I've personally built to keep image quality high at scale, without needing to constantly monitor the process. We'll dive into command-line tools, workflow integrations, and even hybrid approaches that mix automation with a bit of human touch when it's really needed.
This image shows how automated image processing can efficiently handle and optimize multiple images in a streamlined workflow. Imagine your entire image library being processed effortlessly, with consistent quality, freeing you from repetitive tasks.
Command-Line Power: Automating the Basics
Command-line tools are incredibly versatile. I personally use ImageMagick to batch-process images directly within my build scripts. This allows me to compress images without sacrificing quality during deployment. It's like a Swiss Army knife on steroids for image manipulation. You can tailor scripts for specific image types and sizes to ensure optimal compression every time.
Also, tools like cwebp (for WebP) and avifenc (for AVIF) offer granular command-line control over these newer formats. Integrating these into my workflows automates next-gen image generation. This provides a powerful way to achieve excellent compression and deliver the smallest possible file sizes to users with modern browsers.
Workflow Integrations: Connecting the Dots
Workflow automation tools like Zapier and IFTTT can automate your compression across different platforms. For instance, you can set up a Zapier "Zap" that automatically compresses any new image uploaded to your Dropbox using Compresto. This removes manual steps and ensures every image is optimized before it reaches your website.
This means consistent, automatic compression regardless of the image source. No more human error, and a guaranteed standard of quality across all your visuals. It's been a real game-changer for me.
Hybrid Approaches: The Best of Both Worlds
Sometimes, full automation just isn't the answer. I use automation for the bulk of my product images, but I still prefer to manually review hero images where visual quality is paramount. This hybrid method combines efficiency with careful oversight when it truly matters.
To manage any exceptions, I've created a system that flags images falling outside pre-defined quality thresholds after automated compression. These flagged images are then manually reviewed before going live. It's a safety net, catching potential issues before they impact your audience. This gives you peace of mind knowing your critical images always receive that extra level of attention. It also frees you to utilize more aggressive techniques without the risk of ruining an entire batch.
To help you choose the right automation approach, I’ve put together a comparison of some popular batch compression tools.
To help you choose the right automation approach, I’ve put together a comparison of some popular batch compression tools.
Automation Tool Performance Comparison Speed, quality, and ease of use metrics for popular batch compression tools
| Tool | Processing Speed | Quality Score | Setup Difficulty | Cost | Best For |
|---|---|---|---|---|---|
| Compresto | Fast | Excellent | Easy | Paid (from $19/yr) | Web Images |
| ShortPixel | Medium | Good | Easy | Paid | Photographers |
| ImageOptim | Medium | Good | Medium | Free | MacOS Users |
| TinyPNG | Fast | Good | Easy | Paid | Casual Use |
| FileOptimizer | Slow | Excellent | Hard | Free | Advanced Users/Developers |
This table gives you a quick overview of some popular options, highlighting their strengths and weaknesses. Remember to factor in your specific needs when making your decision. Consider the balance between speed, quality, ease of use, and cost.
Choosing the right tool can significantly impact your workflow. While some excel at speed, others prioritize quality or offer advanced features. Select the one that best fits your specific requirements.
Fixing Common Problems When Things Go Wrong
Let's be real, even when you think you've nailed your image compression, sometimes things just don't go as planned. Trust me, I've been there. I've seen weird banding in gradients, strange artifacts cropping up in detailed areas, colors shifting inexplicably, and even crucial details vanishing into thin air. So, let me share some of my hard-earned wisdom on how I troubleshoot these pesky image compression issues.
Diagnosing The Problem: More Than Just a Guess
The first thing I do is figure out exactly what went sideways. Is it banding, where your smooth gradients suddenly look like stripes? This often happens when you’re being a little too enthusiastic with JPEG compression. Maybe you're seeing artifacts, those odd blocky distortions that love to appear in detailed areas when the compression is cranked up too high. Or perhaps it's a color shift, where the overall color palette of the compressed image just looks…off. This can happen when the compression process simplifies the colors a bit too much.
I take a systematic approach. I like to visually compare the original and compressed images side-by-side, zooming in on any problem areas. Sometimes, the differences are subtle, so I use tools that can highlight those changes I might otherwise miss. Difference algorithms, online comparison tools, and even Photoshop plugins can be incredibly helpful for visualizing exactly where data has been lost or altered. It's like having a magnifying glass for your images.
Solutions, Not Band-Aids
Once you've pinpointed the issue, then you can start looking for the right solution. If you're battling banding in gradients, try dialing back the compression setting or consider switching to a format that's friendlier to gradients, like WebP. If unwanted artifacts are your nemesis, lowering the compression or experimenting with a different compression algorithm can often do the trick. For those frustrating color shifts, sometimes converting the image to a different color space before compression can work wonders.
To make your life easier (and who doesn't want that?), consider automating your image compression workflows. Check out this article on image automation to learn more. Automating this process not only saves you time but also ensures consistent results across all your images.
Recovery and Prevention: Learning From Mistakes
Okay, let's talk about worst-case scenarios. You've compressed your image, saved over the original, and then realized something went terribly wrong. Don't panic! While it's not a perfect solution, tools like Topaz Gigapixel AI can sometimes work magic in recovering lost detail. Think of it as your emergency backup plan.
Of course, the best approach is prevention. Always, and I mean always, save a high-quality original of your image before you start messing with compression. This gives you a safety net if things go south. Also, understanding the strengths and weaknesses of different image formats and compression techniques can prevent a lot of headaches down the road. For example, I know from experience that JPEG isn't the best choice for images with sharp text or logos, so I’d opt for PNG instead. A little bit of foresight can save you a lot of frustration later. By understanding how different compression settings impact your images, you'll be able to make informed decisions and avoid those dreaded “oops” moments.
Your Action Plan for Consistent Results
Let's get down to brass tacks. We've covered a lot, so how do you actually use all this information? I'm going to give you a clear system for choosing the right compression method, checklists for different image types, and realistic file size goals you can actually hit.
Workflows for Real-World Situations
Think about how you use images daily. You've got e-commerce product shots that need to be sharp but also load fast. Blog photos can usually handle more compression. Social media needs small, speedy images. And your professional portfolio demands the absolute best quality.
Here’s my personal approach:
-
E-commerce: For product photos, I rely on Compresto for batch processing. I often aim for a 50-70% file size reduction with quality around 80-90 for JPEGs. I always double-check for any compression artifacts, especially around fine details like jewelry or fabric textures.
-
Blog Photography: JPEG is my standard format for blog images. I switch between Compresto and Squoosh depending on how many images I’m working with. My target is a 60-80% reduction, prioritizing loading speed over absolute pixel perfection – a small quality dip is usually fine for web use.
-
Social Media: On social media, speed reigns supreme. I use TinyPNG for PNGs and Compresto for JPEGs, pushing the compression as much as possible while still maintaining a decent image. File size is king here because platforms like Facebook and Instagram often re-compress anyway.
-
Portfolio: For my portfolio, quality is non-negotiable. I stick to lossless compression whenever possible. I only use very light lossy compression if I absolutely have to. The goal is to present my work in the best possible light.
My Quality Assessment Process: Trust Your Eyes
Forget strict rules – I judge quality by actually looking at the image. Zoom in, compare before-and-after versions side-by-side, and ask yourself: Is there a noticeable difference that actually matters? If not, I’m good to go. If so, I tweak the compression settings. It's that simple.
Here’s my quick checklist:
-
Zoom In: Look for artifacts or blurring, especially in areas with intricate details or textures.
-
Compare: Use a visual comparison tool or simply flip between the original and compressed versions. Sometimes a subtle difference isn’t obvious until you compare them directly.
-
Context Matters: Where the image will be used makes a difference. A slight quality loss might be invisible on a small social media post but very noticeable on a large hero image on your website.
A System That Grows With You
This isn't a one-size-fits-all magic bullet. It’s a starting point. Start with the basics and refine your process as you go. You'll learn what works best for you through experience. The aim is to develop a reliable system that consistently gives you great compression without the guesswork.
For a no-install option, our guide to the best free online photo compressors covers top browser-based tools.
Ready to make image compression easier and save yourself some time? Give Compresto a try: Compresto - Simplify your image compression