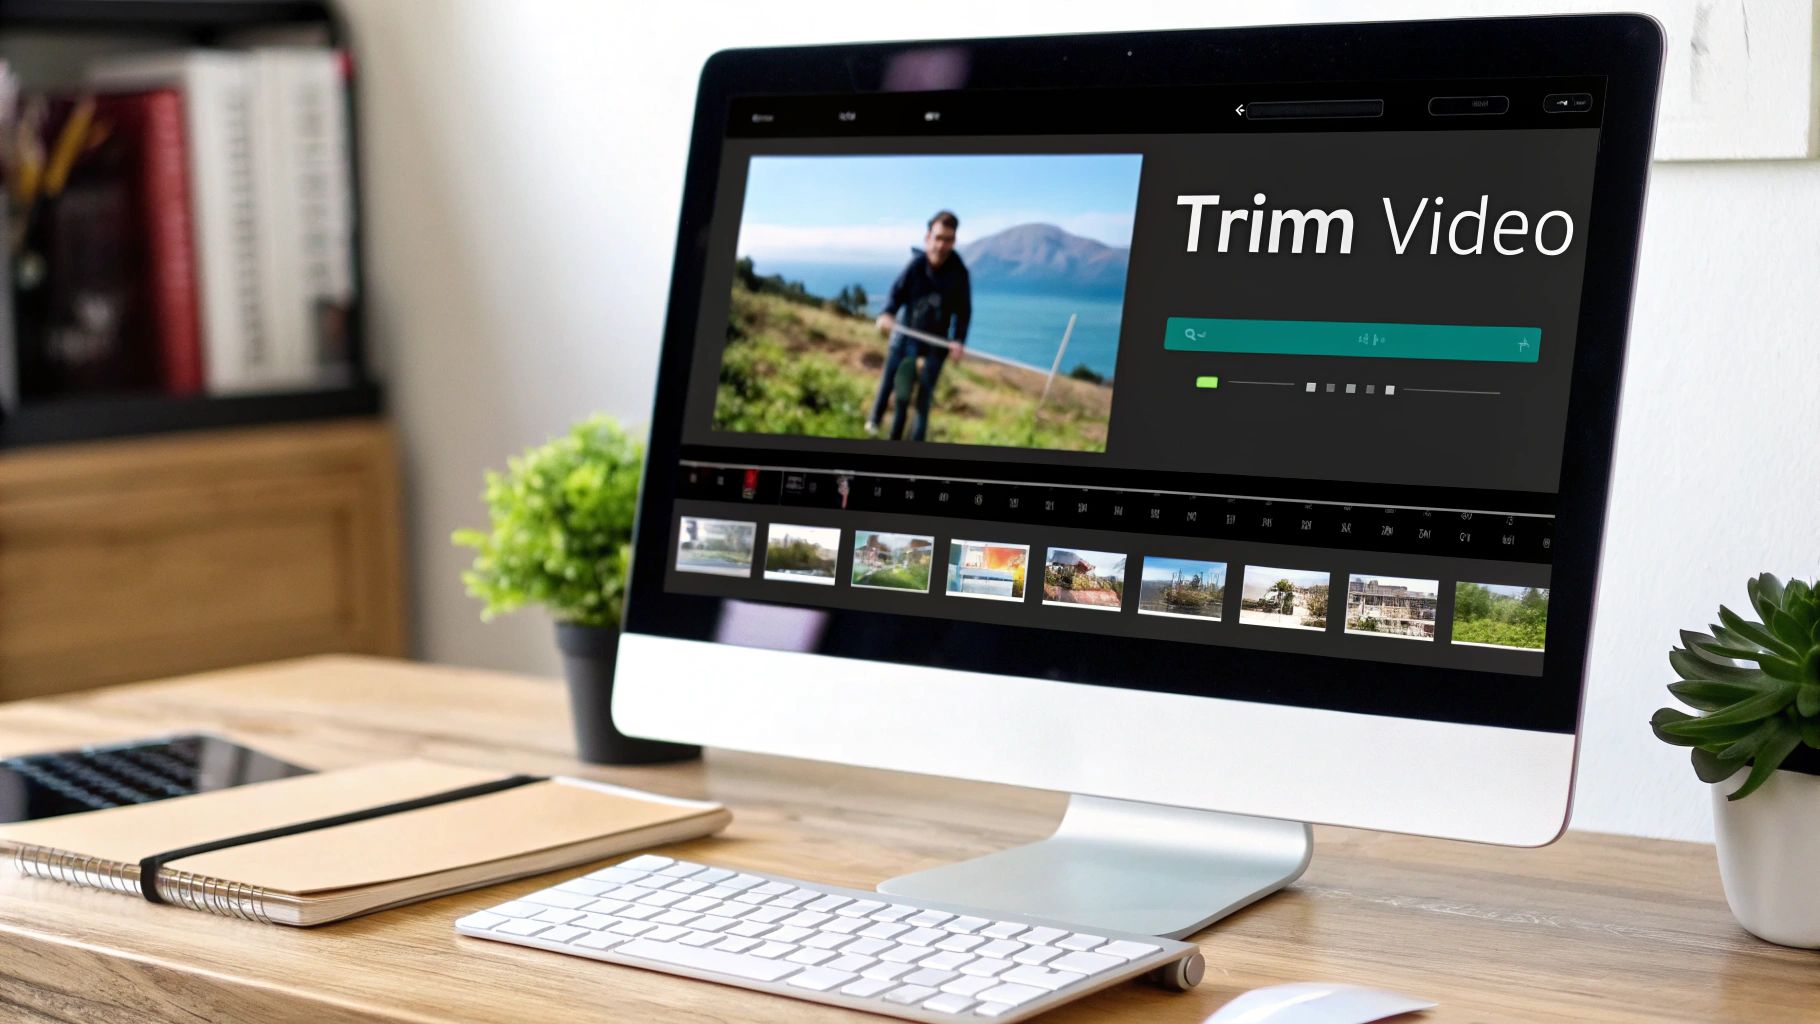
Trim and compress video files: Fast & Efficient Edits
Why Video File Optimization Is No Longer Optional
Video content is everywhere online these days. This huge increase in video consumption makes optimizing video files absolutely essential. Trimming and compressing videos isn't just a nice-to-have anymore—it's a must-do for anyone creating and sharing video content. Knowing how to optimize your videos is key to effectively reaching your audience.
The Costs of Unoptimized Videos
Large, unoptimized video files cause a number of problems. Slow loading times frustrate viewers, leading to higher bounce rates on your website. Oversized videos also eat up valuable storage space, both on your devices and online. This can get expensive fast, especially for businesses and content creators working with many video files. All of this adds up to missed opportunities for engagement and impact.
Many platforms, especially social media sites, have video file size limits. Unoptimized videos may not upload at all. Or, the platform might automatically compress them, which can reduce the quality. This is why it's so important to trim and compress your videos beforehand, making sure they meet platform requirements while still looking good.
The Balancing Act: Size vs. Quality
Video optimization is all about finding the sweet spot: the smallest file size possible without sacrificing visual quality. This balance is crucial. Smaller files mean faster loading and less storage use. However, too much compression makes the video quality noticeably worse. You might see pixelation, blurring, or other visual glitches that ruin the viewing experience. It's a bit like squeezing a sponge—you can remove excess water (file size), but squeeze too hard, and the sponge itself (video quality) deteriorates.
The Growing Importance of Video Compression
Video compression is increasingly important in the world of digital media. The growth of the video compressor market demonstrates this rising demand. The market was valued at roughly USD 2,514.5 million in 2024. It's expected to reach about USD 4,937.2 million by 2032, growing at a CAGR of 8.8%. Explore this topic further. This growth highlights the need for efficient and effective ways to trim and compress videos. As demand for high-quality video continues to rise, mastering video file optimization techniques will become even more critical.
Battle-Tested Tools For Every Skill Level
Finding the right video trimming and compression tools can feel overwhelming. This section simplifies things, revealing effective solutions based on your skill level and what you're working on. We'll look at everything from free apps that deliver surprisingly good results to professional software worth the investment. Using real-world tests and performance data, we'll see which tools maintain quality while shrinking file sizes. You’ll also learn which features are truly useful for your video projects and which are just marketing fluff.
Free And Easy-To-Use Tools For Quick Wins
For basic trimming and compression, free tools are often all you need. These are great for beginners or anyone who wants quick edits without a steep learning curve.
-
QuickTime Player (Mac): Already on your Mac, QuickTime Player offers basic trimming and export options with some compression control. It’s perfect for quick cuts and simple format changes.
-
iMovie (Mac): Another great free Mac app, iMovie provides more advanced trimming features and export presets for different devices. It’s well-suited for making short videos for social media or personal projects.
-
HandBrake (Windows, Mac, Linux): HandBrake is a powerful, open-source video transcoder with a wider range of codecs and settings. It lets you fine-tune compression, giving you greater control.
-
Online Converters: Many online video converters handle basic compression and trimming right in your browser. They're convenient for quick edits without installing software, but often have file size and processing speed limits.
Stepping Up To Professional-Grade Software
For professional video editors and content creators, investing in powerful software unlocks more features and control over trimming and compressing videos.
-
Adobe Premiere Pro: The industry standard, Adobe Premiere Pro provides precise trimming and a wide array of export settings for detailed compression control. Its integration with other Adobe Creative Cloud apps makes it perfect for complex projects.
-
Final Cut Pro (Mac): Popular with Mac users, Final Cut Pro combines intuitive editing with powerful compression tools. Its optimized performance on Mac hardware ensures smooth editing, even with large files.
-
DaVinci Resolve: Known for its advanced color grading, DaVinci Resolve also includes robust trimming and compression features. It's a solid choice for filmmakers and colorists.
You might find this helpful: How to master video compression with FFmpeg and an easier alternative. This guide explores advanced compression techniques.
Choosing The Right Tool For Your Needs
The "best" tool depends on your specific needs. Think about these factors:
-
Skill Level: Beginners can often use free, user-friendly options. Professionals might need the extra features of paid software.
-
Project Complexity: Simple edits can be done with basic tools. Complex projects usually require more advanced capabilities.
-
Platform Compatibility: Make sure the tool works on the platforms you'll use for publishing.
-
Budget: Free tools are available, but professional software typically involves a subscription or one-time purchase.
To help you choose, here's a comparison of some popular video compression tools:
Top Video Compression Tools Comparison
A comprehensive comparison of popular video compression software options across different platforms, highlighting key features, pricing, and performance metrics.
| Tool Name | Platforms | Key Features | Price Range | Compression Efficiency | Ease of Use |
|---|---|---|---|---|---|
| HandBrake | Windows, Mac, Linux | Open-source, various codecs, advanced settings | Free | High | Moderate |
| QuickTime Player | Mac | Basic trimming, export options | Free | Moderate | Easy |
| iMovie | Mac | Advanced trimming, export presets | Free | Moderate | Easy |
| Adobe Premiere Pro | Windows, Mac | Professional editing, precise trimming, integration with Adobe CC | Subscription | High | Professional |
| Final Cut Pro | Mac | Professional editing, powerful compression, optimized for Mac | One-time purchase | High | Professional |
| DaVinci Resolve | Windows, Mac, Linux | Professional editing, color grading, robust compression | Free/Paid | High | Professional |
| Online Converters (various) | Web-based | Basic compression, trimming, no software installation | Free/Paid | Varies | Easy |
This table highlights the diverse range of features and price points available. Free options like HandBrake and iMovie offer surprisingly good compression and are perfect for basic needs. Professional tools like Premiere Pro and Final Cut Pro deliver the highest quality and control, making them essential for serious video work. Online converters offer convenience but vary widely in performance.
For example, if you're managing social media and making quick edits to short videos, iMovie or an online converter could be perfect. A filmmaker working on a 4K movie will probably need the power of Premiere Pro or Final Cut Pro. By carefully considering your needs and trying different tools, you can find the perfect one to trim and compress videos efficiently while maintaining the best quality.
Mastering the Art of Precise Video Trimming

Effective video trimming involves more than just removing extra footage. It's about carefully shaping your video's story while maintaining technical quality. This section offers a practical guide to refining raw video into polished, concise content. You'll discover techniques for clean cuts, smooth transitions, and perfect timing. Selecting the right tools is essential for efficient video trimming and compression. For example, check out the best video editing software to find the perfect fit for your needs.
Achieving Frame-Accurate Edits
Precise trimming requires frame-level accuracy. This guarantees your cuts land exactly where intended, maintaining perfect audio-video synchronization. Imagine cutting a speaker mid-sentence. An inaccurate trim could chop off words or create awkward pauses. Frame-accurate editing avoids this, preserving the natural flow of dialogue and other audio. This precision significantly improves your videos' overall quality.
Most video editing software allows frame-by-frame navigation. Use arrow keys or a jog wheel to move precisely through your footage. Zooming in on the timeline also pinpoints exact trim points.
Streamlining Workflow With Batch Processing
Batch processing is a major time-saver when handling numerous clips. This method applies identical trimming or compression settings to multiple videos simultaneously. If you need to remove the first five seconds from several clips, batch processing eliminates tedious individual edits. This dramatically accelerates your workflow, allowing more time for creative video production.
Troubleshooting Tricky Formats and Issues
Occasionally, you'll encounter issues with specific video formats or codecs. An older codec may be incompatible with your editing software or a target platform. You might also experience audio-video desynchronization after trimming. Understanding these potential problems and their solutions is key to smooth video editing.
Audio drift, where audio gradually falls out of sync with the video, is a common issue. This can happen when trimming disrupts the timing relationship between audio and video tracks. Most editing software offers tools to correct audio drift by realigning waveforms. Another frequent problem involves variable frame rate footage, causing jerky playback. Converting to a constant frame rate before editing usually resolves this.
Optimizing Your Trimming Workflow
An efficient workflow saves hours of editing time. Here are some tips:
-
Organize your footage: Clearly labeled files and folders simplify clip management.
-
Use keyboard shortcuts: Learning shortcuts for your editing software accelerates common trimming tasks.
-
Create templates: Templates automate the process for frequently used trimming settings.
-
Preview your edits regularly: Catching errors early prevents extensive rework later.
By implementing these strategies, video trimming transforms from a tedious task into a precise, efficient part of your workflow. This ensures your final product is both visually appealing and technically sound, distinguishing amateur video from professional content.
Compression Strategies That Actually Preserve Quality
Trimming your video is a good starting point, but real optimization comes from understanding video compression. This section explores advanced techniques to shrink file sizes significantly without sacrificing visual quality. We'll break down complex topics like codecs, bitrate, and other technical details so you can make informed decisions about your video content.
Understanding Codecs: The Key to Efficient Compression
A codec (coder-decoder) is at the heart of video compression. Think of it as the engine that powers how video data is encoded for storage and then decoded for playback. Choosing the right codec is crucial for balancing file size and quality.
-
H.264: This widely adopted codec offers a good balance between compression efficiency and visual quality. It's a reliable choice for general use and compatibility across most devices and platforms.
-
H.265 (HEVC): This codec is more efficient than H.264, delivering similar quality at smaller file sizes, which is especially useful for high-resolution videos. However, it requires more processing power to encode and decode.
-
VP9: Developed by Google, VP9 is a royalty-free codec offering performance comparable to H.265. This makes it a strong contender, especially for web-based video delivery.
The best codec for your needs depends on several factors, including where you'll share the video, your quality goals, and the processing power available.
Bitrate, Resolution, and Frame Rate: The Trifecta of Video Optimization
Along with codecs, bitrate, resolution, and frame rate significantly impact file size and perceived quality.
-
Bitrate: This refers to the amount of data used per second of video. Higher bitrates typically result in better quality, but also larger files.
-
Resolution: This is the number of pixels in each frame. Higher resolutions like 4K look sharper but require substantially more data.
-
Frame Rate: Measured in frames per second (fps), this determines the smoothness of motion. Higher frame rates create smoother motion but increase file size.
These three elements work together to affect the final output. For instance, a 1080p video at 30fps can be compressed at different bitrates, each affecting the file size and quality. For more strategies on managing these factors, check out our guide on further file size reduction tips.
Content-Specific Optimization: Tailoring Your Approach
Different types of videos benefit from different compression strategies. A talking-head interview with minimal movement can handle higher compression than a fast-paced action scene requiring crisp detail and smooth motion.
To help illustrate optimal settings for different scenarios, we've put together a helpful table:
Compression Settings for Different Platforms
Recommended video compression parameters for optimal performance across various platforms and use cases
| Platform/Use Case | Resolution | Bitrate | Codec | File Size Impact | Quality Impact |
|---|---|---|---|---|---|
| Online Courses/Tutorials (Talking Head) | 720p | 2-3 Mbps | H.264 | Low | Minimal |
| Social Media Content (General) | 1080p | 4-5 Mbps | H.264 | Moderate | Low |
| High-Action Videos (Gaming, Sports) | 1080p | 6-8 Mbps | H.265 | High | Minimal |
| 4K Content (Showcase Videos) | 2160p (4K) | 15-20 Mbps | H.265 | Very High | Low |
| Archived Footage (Storage Optimization) | 720p | 1-2 Mbps | H.264 | Very Low | Noticeable |
This table provides initial recommendations. Experimenting with different settings will help you find the ideal balance for your specific content and intended platform. By understanding these technical elements, you gain better control over your video workflow, ultimately delivering the best possible viewing experience.
Finding Your Perfect Quality-Size Sweet Spot

Optimizing video files presents a unique challenge: finding the balance between manageable file size and maintaining good visual quality. It's not about technical expertise, but rather knowing how much you can compress before the image quality suffers. This section explores this core issue, offering practical examples and visual comparisons to help you find that perfect compression point for your projects. You'll learn how to spot compression artifacts before your audience does, and develop strategies to preserve quality where it truly matters. For high-quality footage, efficient methods for sending large videos become crucial.
Recognizing Compression Artifacts: A Key Skill
Compression artifacts are visual glitches that appear when video compression goes too far. Common artifacts include pixelation, blurring, color banding, and blockiness. Think of a smooth color gradient breaking into distinct blocks – that's color banding. Or a fast-moving object becoming a pixelated blur. These glitches are clear indicators of over-compression and can negatively impact the viewer’s experience. Recognizing these artifacts is fundamental to optimizing your videos effectively.
Content-Specific Compression: Not All Videos Are Created Equal
Different video content requires different quality considerations. A simple interview with a static background can tolerate more compression than a dynamic action scene packed with detail and rapid movement. For instance, a talking-head video for an online course can be compressed more aggressively because the focus is on the speaker. On the other hand, a high-action sports video requires a higher bitrate to preserve sharp details and fast motion without introducing noticeable artifacts.
Perceptual Quality: Going Beyond Pixel Counting
Simply comparing videos pixel by pixel doesn’t provide a complete picture of quality. Perceptual quality considers how the video appears to the human eye. This means considering factors like viewing distance, screen size, and the content itself. A slightly blurry video might be perfectly acceptable on a small phone screen, yet the same blur would be distracting on a large 4K TV.
Practical Experiments and Visual Analysis: Training Your Eye
Experimentation is the most effective way to find the sweet spot between quality and file size. Begin with a high-quality export and progressively increase compression until you notice artifacts appearing. Then, decrease the compression slightly to find the point where file size is reduced, but quality remains acceptable. This hands-on method will train your eye to notice subtle changes, enabling you to make informed choices based on your content and viewing environment.
Viewing Context Matters: Optimizing for Different Devices
The viewing environment significantly influences the appropriate level of compression. Videos intended for social media, usually viewed on mobile, can tolerate more compression than those meant for large screen displays. Remember that a low-resolution video might look fine on a phone, but blurry and pixelated on a large monitor. By adjusting your trim and compress video files strategy for specific viewing contexts, you’re ensuring an optimized viewing experience across a range of devices. This approach broadens your audience engagement, regardless of how they choose to view your videos.
Platform-Specific Optimization That Drives Engagement
Each platform has its own unique approach to video success. Simply compressing videos isn't enough to truly boost engagement. This section explores the specific technical requirements and algorithmic preferences of popular platforms like YouTube, TikTok, Instagram, and LinkedIn. We'll use data-driven insights and expert advice to examine how dimensions, bitrates, and formats impact your results on each platform.
YouTube: Balancing Quality and Discoverability
YouTube, the dominant force in online video, values high-quality viewing experiences. However, large file sizes can slow uploads and strain storage. YouTube supports various resolutions, from 360p to 8K. For many creators, 1080p offers the sweet spot between video quality and manageable file sizes. The H.264 codec provides wide compatibility. A bitrate of 6-8 Mbps for 1080p content usually delivers great quality without creating massive files.
Beyond compression, think about YouTube's algorithm. Compelling thumbnails, strategic keywords, and captivating titles are essential for discoverability. Well-crafted metadata makes it easier for viewers to find your videos.
TikTok and Instagram: Mobile-First Optimization
TikTok and Instagram focus on short, engaging content for mobile viewers. Vertical video is paramount. Use vertical dimensions (9:16 aspect ratio) to fill mobile screens. Due to smaller screen sizes, these platforms often tolerate slightly lower bitrates. 4-5 Mbps for 1080p content is typically sufficient. For TikTok, the H.264 codec ensures good device compatibility.
Audio quality is especially important on these music-centric platforms. Clear, well-balanced audio complements your visuals and keeps viewers engaged, directly influencing algorithmic preferences. For deeper insights, explore our article about how to master video optimization for social media.
LinkedIn: Professional Polish and Clarity
LinkedIn’s audience prefers concise, professionally produced videos with excellent audio and video. Easily digestible content is key. Mainly accessed on desktops, LinkedIn typically supports resolutions up to 1080p. The reliable H.264 codec is a good choice. Aim for a bitrate of 5-6 Mbps to balance quality with reasonable file sizes.
Adapting a Single Video for Multiple Platforms
Creating separate videos for each platform is time-consuming. Instead, build an efficient workflow to adapt a single master video. Consider using intermediate codecs like ProRes for editing and then exporting in platform-specific formats. Batch processing tools can automate resizing and adding platform-specific watermarks or branding.
Automating Your Multi-Platform Distribution
Automation tools can further streamline your distribution process. These tools can automatically resize, reformat, and even add platform-specific metadata, saving you significant time and effort. This frees you to concentrate on producing excellent video content while managing distribution across platforms efficiently.
By understanding the specific needs of each platform and using the appropriate tools and techniques, you can strategically trim and compress video files. This optimization boosts engagement and expands your content's reach, helping your videos find a wider audience.
Troubleshooting The Most Frustrating Compression Issues

Even with the best compression techniques, videos can sometimes throw a wrench in the works. This section offers solutions to those common headaches you might encounter when trimming and compressing your video files. We’ll cover how to diagnose and fix problems like video quality taking a nosedive, audio falling out of sync, exports failing, and files refusing to play on different devices. We’ll even decode those cryptic error messages and give you specific fixes for different video editing software. Think of this as your go-to guide for tackling these issues, saving you hours of potential frustration.
Identifying and Resolving Quality Degradation
One of the most frequent compression complaints? Quality degradation. This is when your compressed video looks significantly worse than the original. You’ll notice things like pixelation, blurring, or strange color banding. Imagine a high-octane action scene turning into a blurry mess after compression – that's quality degradation in action.
One way to fix this is by tweaking the bitrate. A higher bitrate generally means better detail but a bigger file. The trick is finding the sweet spot between quality and file size.
Another culprit behind quality loss is the codec you choose. Some codecs shrink files dramatically but sacrifice quality, while others prioritize visual fidelity. Experimenting with different codecs like H.264 and H.265 can help you find the right balance for your specific video.
Fixing Audio Sync Problems
Few things are more distracting than audio-video desynchronization. This is when your audio and video tracks drift apart, creating a mismatch between what you see and hear. This often happens after trimming, which can sometimes disrupt the timing between the two streams.
Luckily, most video editing software includes tools to realign audio and video, effectively correcting this annoying drift.
Dealing With Export Failures and Format Incompatibilities
Export failures can be seriously disheartening, especially after you’ve put in the time to perfect your edits. These failures can stem from software glitches, not enough storage space, or even incorrect export settings. Carefully reviewing these factors can help pinpoint the problem.
Then there’s the issue of format incompatibilities. This is when your video simply won't play on certain devices or platforms because it uses a codec they don't support. Converting your video to a widely compatible format like MP4 with H.264 usually solves this.
Preventative Workflows and Expert Salvage Techniques
Instead of just reacting to problems, a preventative workflow can minimize compression headaches from the start. This begins with keeping your footage organized. Clearly labeled files and folders make your project more manageable and less prone to errors. Regular previews during editing can also help catch potential issues early.
Sometimes, you might need to rescue an already over-compressed video, especially if the original footage is gone. Specialized software and techniques can help. Some tools can minimize those annoying compression artifacts and bring back some detail, improving the overall viewing experience even with limited source material.
Streamline your video compression and avoid these frustrating issues with Compresto, a powerful file compression tool designed for macOS. Compresto balances quality and file size, offering advanced settings and a user-friendly interface. Download Compresto today and experience the difference: https://compresto.app