How to Join Audio Files on macOS Like a Pro
If you've ever found yourself with a handful of separate audio clips, you know that joining them together is a must-have skill. Whether you're working on a Mac with built-in tools like QuickTime Player or free software like GarageBand, the right method really depends on what you're trying to accomplish. A simple drag-and-drop merge might be perfect for a podcast, while a musician will need multi-track editing to layer different takes.
Why Joining Audio Files Matters
Knowing how to combine audio files is one of those fundamental skills that can turn a technical chore into a real creative advantage. It’s the secret sauce behind a podcaster seamlessly weaving an interview, narration, and theme music into a single, compelling story. For musicians, it's how they layer multiple vocal takes or stitch together different song sections to build the perfect arrangement.
This isn’t just a skill for pros in high-end studios anymore. With the explosion of home recording and content creation, audio editing is more accessible than ever. Whether you're making a simple audio montage for a presentation or producing a polished track, merging your files correctly is what makes your work sound intentional and professional.
The Growing Demand for Audio Skills
The digital content boom has put a huge premium on quality audio production, and the market for the tools reflects this. The global audio editing software market was valued at approximately $2.5 billion in 2023 and is projected to more than double to about $5.4 billion by 2032.
This growth is being fueled by the nonstop demand from podcasting, independent music, and the gaming industry.
Knowing how to properly merge audio files is no longer a niche technical skill—it's a core competency for modern creators. It's the difference between a project that sounds patched together and one that feels like a cohesive, professional production.
Practical Scenarios for Merging Audio
Understanding the real-world applications helps clarify why this process is so essential. Think about these common situations:
- Podcast Production: You need to combine a pre-recorded intro, a main interview segment, and an outro with background music.
- Music Composition: You've recorded a verse, chorus, and bridge separately and now need to assemble them into a full song.
- Voiceover Work: You've done several takes of a narration and want to merge the best parts to create a single, flawless track for a video or ad.
In every one of these cases, learning how to join audio files cleanly is the key to a polished final product. This guide will give you the practical, hands-on solutions you need to elevate your audio work.
Your Go-To Method for Quick Merges with QuickTime
Sometimes, the best tool for the job is the one you already have. Every Mac comes with QuickTime Player, and it’s more than just a simple video viewer. It's a surprisingly handy tool for stitching audio files together without getting tangled up in a full-blown digital audio workstation. It’s my first choice for simple tasks where all I need to do is combine a few clips.
Think of it as the most direct route for merging audio. For example, if you've recorded a podcast intro and the main segment as two separate files, QuickTime can get them joined up in less than a minute. The whole process is visual and super intuitive.
Arranging and Trimming Your Clips
To get started, just open your first audio file in QuickTime. This one will act as the base for your new, combined track.
From there, find your other audio clips in Finder and simply drag-and-drop them right into the QuickTime window. You'll see little thumbnails for each clip pop up in a timeline at the bottom.
Now you can drag the clips around to get them in the right order. Need to snip a bit of dead air off the beginning or end of a clip? Just click on a clip, head up to the menu bar, and select Edit > Trim. This brings up yellow handles that you can slide to make precise cuts, which helps ensure a clean transition without any awkward pops or clicks.
The drag-and-drop interface is really QuickTime's secret weapon here. It strips away the technical complexity and lets you assemble your audio timeline visually. This makes it perfect for piecing together podcast segments or creating a quick audio montage for a presentation.
The image below gives you a clear idea of how the clips line up in the timeline once you add a new file.
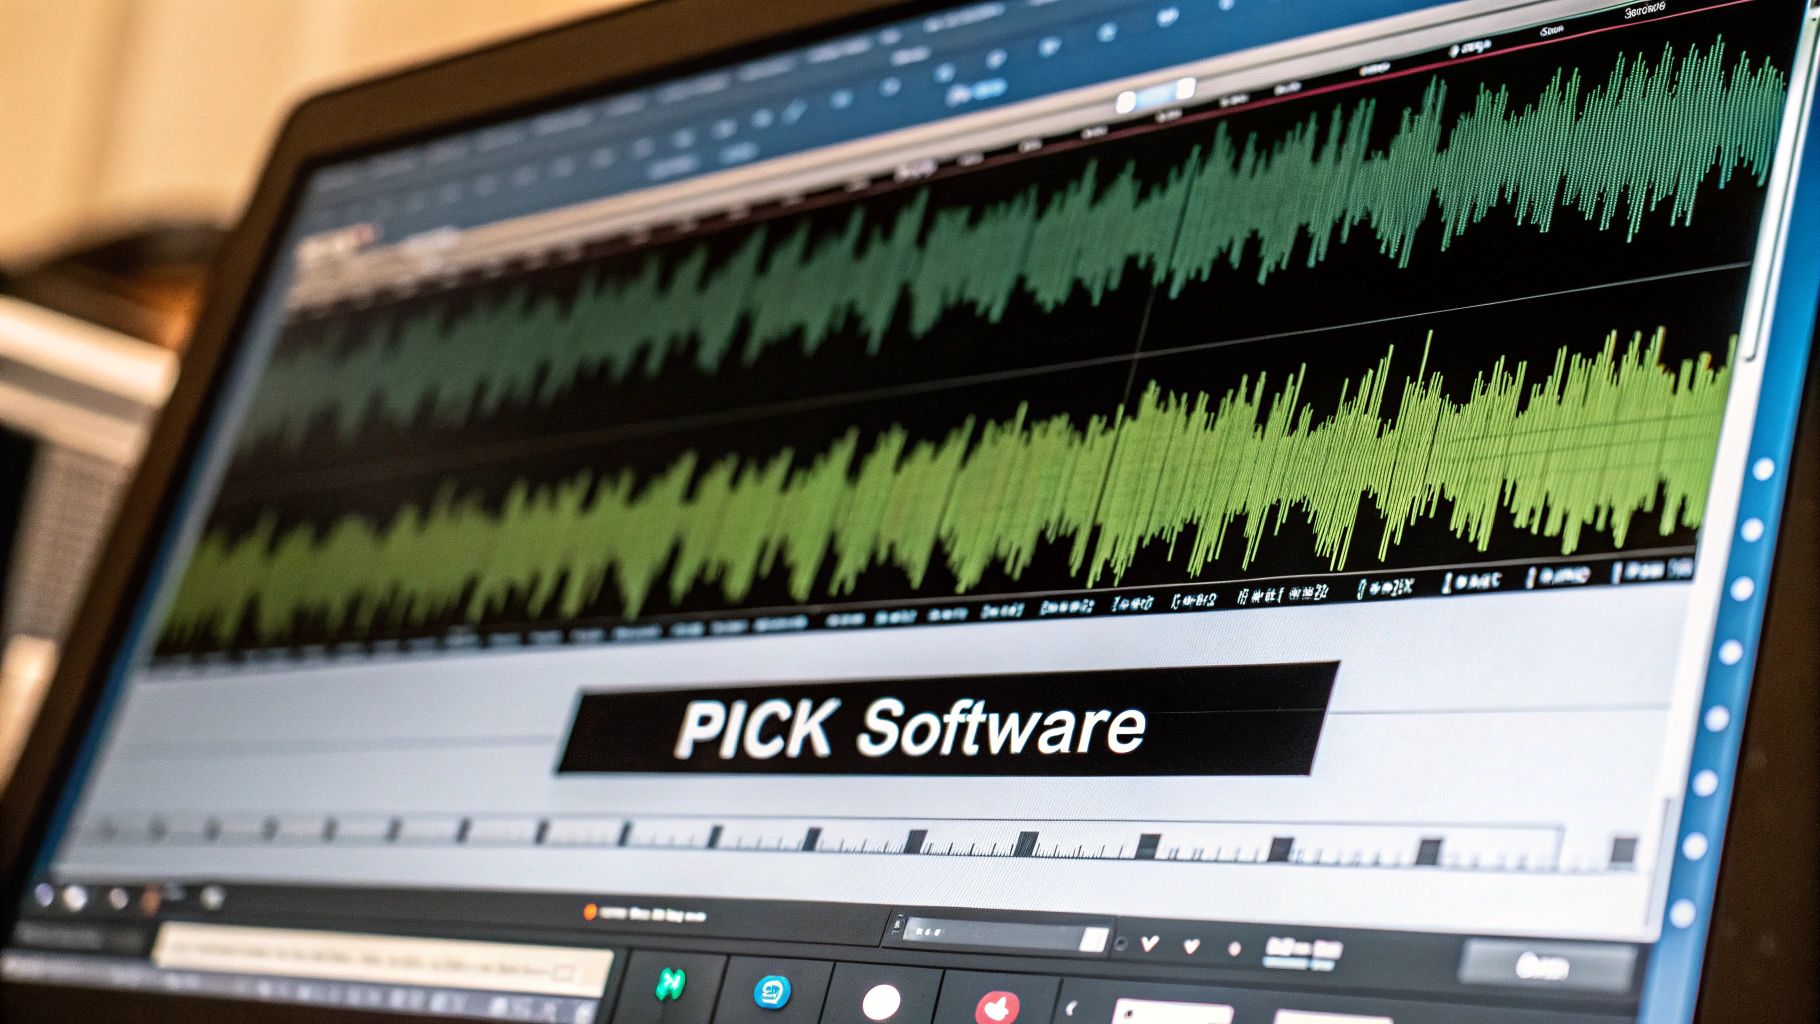
This screenshot really shows off the simple, visual way you can arrange your audio. When you're happy with how it sounds, you can save your combined track without worrying about losing quality.
Of course, when you export, file size might be a concern. While QuickTime does a solid job, dedicated tools are specifically built for optimal compression. If you're looking for more advanced ways to shrink your file size while keeping quality high, learning about how specialized tools outperform others in compression is a great next step.
Gaining More Control with GarageBand
When simply sticking audio files together end-to-end won’t cut it, it's time to bring in a tool with more creative firepower. That's where Apple's GarageBand comes in. It’s a free digital audio workstation (DAW) that comes with every Mac, and it’s the perfect next step for anyone who wants to move beyond basic joining and start truly shaping their sound.
Think about putting together a podcast intro. You probably have a voiceover clip and a separate track for background music. In GarageBand, you can place these on individual tracks, which gives you precise control over each element. You can "duck" the music—lowering its volume just as the narration starts—for that clean, professional sound. This is the kind of granular control that simpler tools just can't offer.
Before you even open the software, getting your files organized is a crucial first step for any audio project. A little prep work here goes a long way.
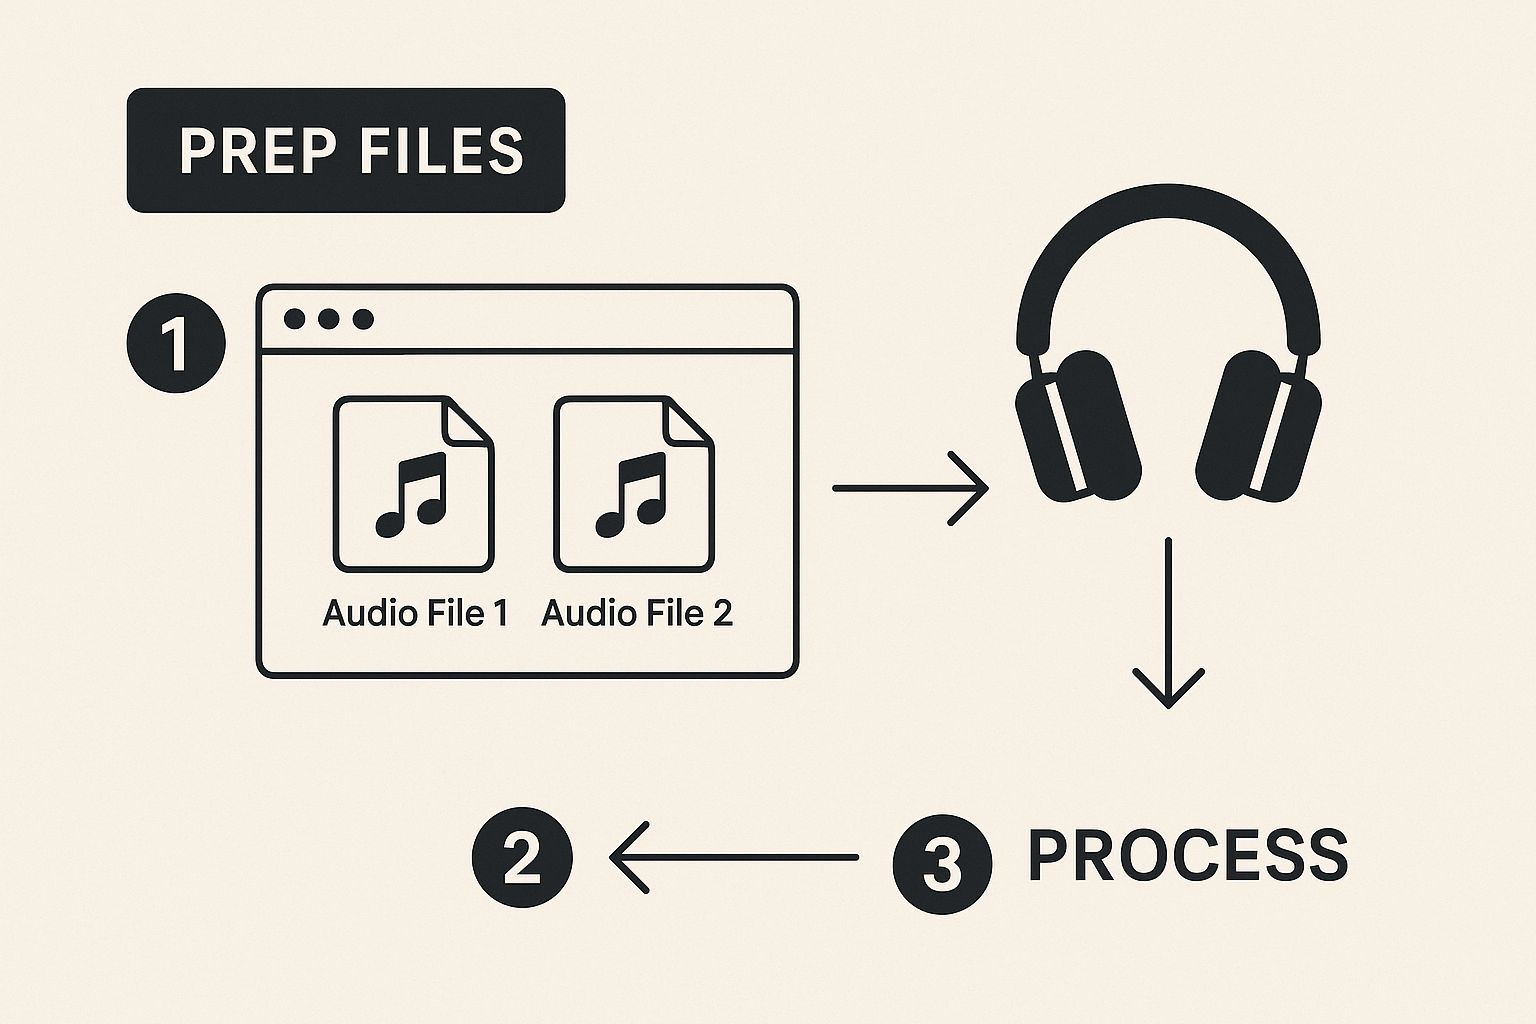
Having your source files ready and clearly named makes the whole process smoother and much more efficient once you're in the editor.
Getting Your Project Set Up
First things first, open GarageBand and select Empty Project. The app will ask you to create a new track; just choose the Audio track option, the one with the microphone icon.
Now, you can simply drag your first audio file from a Finder window right onto this new track. Here’s the key part: when you add your next file, don't drop it on the same track. Drag it into the empty space below the first one. GarageBand is smart enough to create a new, separate track for it automatically.
This multi-track approach is the secret to getting a polished, professional result. By keeping clips on separate tracks, you get complete, non-destructive control over each element’s timing, volume, and even its position in the stereo field (panning).
Creating Smooth and Seamless Transitions
With your clips on separate tracks, you can start blending them together. Try overlapping them slightly to create a crossfade—a gradual fade-out of one clip as the next one fades in. This technique is essential for smoothly mixing two pieces of music or transitioning between different audio environments without any jarring cuts.
The demand for powerful yet user-friendly tools like GarageBand is booming. The digital audio workstation (DAW) market was valued at roughly $4.1 billion in 2024 and is projected to climb to $6.65 billion by 2030. This growth is fueled by creators who need robust tools with features like multi-track editing to produce high-quality content. You can read more about the growing DAW market to see the trends driving this expansion.
Once you have everything positioned, mixed, and faded just right, you can export your entire project. Just head to Share > Export Song to Disk to save your work as a single, cohesive audio file.
Choosing Your macOS Audio Merging Tool
Not sure which tool is right for you? This table breaks down the three methods we've covered to help you pick the best one for your specific project.
| Feature | QuickTime Player | GarageBand | Professional DAWs (e.g., Audacity, Logic Pro) |
|---|---|---|---|
| Best For | Simple, end-to-end file joining | Layering audio, creating intros/outros, basic mixing | Complex mixing, mastering, and audio repair |
| Learning Curve | Very Low | Low to Medium | Medium to High |
| Multi-track Editing | No | Yes | Yes (Advanced) |
| Crossfades | No | Yes (Manual overlap) | Yes (Automated and manual) |
| Cost | Free (Built-in) | Free (Included with macOS) | Free (Audacity) to Paid (Logic Pro) |
| Export Options | Limited (Exports as .m4a) | Good (MP3, AAC, AIFF, WAV) | Extensive (Multiple formats and quality settings) |
Each tool serves a different purpose. QuickTime is fantastic for a quick and dirty merge, GarageBand offers a great middle-ground for creative projects, and professional DAWs provide the deep control needed for serious audio production.
Taking Control with Professional Tools
When quick-and-dirty merges just won’t cut it, it's time to step up to professional-grade tools. This is where Digital Audio Workstations, or DAWs, come into play. Tools like the free, open-source Audacity or Apple’s powerhouse Logic Pro are the industry standard for a reason. They give you a level of control that turns a simple file merge into a truly creative process.
One of the biggest game-changers is non-destructive editing. Imagine you're piecing together a complex podcast or soundscape. With a DAW, any cut, fade, or adjustment you make doesn't permanently change your original audio files. This gives you the freedom to experiment, tweak, and undo anything, knowing your source clips are always safe and sound.
Advanced Features for Complex Projects
For anyone looking to move beyond basic audio joining, exploring the best music production software for beginners opens up a world of professional capabilities. These tools are built from the ground up for serious audio work.
Take batch processing, for example. Let's say you have a hundred short voice memos you need to stitch together for an audiobook chapter. Instead of dragging and dropping each one manually for hours, a DAW can automate the entire workflow. You just set the rules, and the software does the heavy lifting.
And it goes way beyond just joining files. You can use automation lanes to create dynamic, polished mixes. Picture a podcast where the background music swells during intros and then subtly dips whenever someone starts talking. You achieve that professional touch by drawing volume changes directly onto the timeline, giving your final product that broadcast-quality feel.
How AI is Changing the Audio Game
The world of audio editing is also being reshaped by artificial intelligence, especially when it comes to tedious, time-consuming tasks.
The AI audio software market is on a serious growth trajectory, expected to jump from around $3.8 billion in 2023 to an incredible $18 billion by 2033. This surge shows just how much AI is becoming a core part of modern audio workflows.
So what does this mean for you? In practice, modern DAWs are rolling out smart features that make joining and editing audio more intuitive than ever. AI-powered "smart-fades" can analyze two clips and automatically create a perfect, seamless crossfade with a single click—no more manual tweaking to avoid pops and clicks. These tools aren't here to replace your creativity; they're here to get the technical hurdles out of your way so you can focus on what really matters.
Achieving a Seamless Professional Sound

The real magic of joining audio files happens in the details. Moving beyond a simple, clunky merge and into professional territory means paying attention to the subtle elements that create a single, cohesive listening experience.
Before you even think about combining your clips, take a moment to check their properties. Mismatched file formats (like joining a WAV and an MP3) or different sample rates (say, 44.1kHz vs. 48kHz) are a recipe for audio artifacts or import errors. Making sure all your source files share the same format and sample rate from the start is a foundational step for a clean result.
Mastering the Transitions
The transition points are where amateur and professional work truly diverge. Nothing screams "edited" like an abrupt, jarring cut between clips.
- Subtle Crossfades: Instead of a hard cut, a gentle crossfade is your best friend. This technique smoothly fades out the first clip while simultaneously fading in the second, completely masking the transition point for the listener.
- A Touch of Reverb: If you're joining clips recorded in different spaces—like a dry studio voiceover and a live field interview—a tiny amount of shared reverb can act as sonic "glue." It tricks the ear into thinking both sounds are in the same virtual room, making the merge feel natural.
The ultimate goal when you join audio files is to make the final product sound like it was recorded as one continuous piece. Normalization and subtle effects are your best tools for achieving this illusion.
Ensuring Consistent Volume Levels
One of the most vital steps is normalization. This process scans your entire merged track and adjusts the overall volume to a consistent, standard level. It’s what keeps your audience from having to constantly reach for their volume dial as the audio jumps between loud and quiet clips.
This simple step ensures a smooth, enjoyable listening experience from beginning to end. Proper normalization, combined with careful file management, can also impact the final output size. If you find yourself juggling large projects, this professional's guide to file compression has some great tips to help optimize your workflow.
Common Questions About Merging Audio on Mac
When you're first figuring out how to join audio files, a few questions always seem to come up. Let's tackle some of the most common ones I hear from people just getting started.
Can I Join Audio Files Without New Software?
Yes, you absolutely can. Your Mac already has a surprisingly capable tool built right in: QuickTime Player. It’s perfect for simple, sequential merging.
Just open your first audio file in QuickTime, then drag any other audio files you want to add directly into the player window. You'll see a simple timeline appear where you can reorder the clips. Once you're happy with the arrangement, just export the whole thing as a new, single audio file.
What about uneven volume levels? The best way to fix that is with a tool that gives you more control over individual clips, like GarageBand or Audacity. These programs let you manually adjust the volume of each part or apply "normalization" to make the entire track a consistent volume automatically.
What Is the Best Export Format?
The "best" format really depends on what you plan to do with the final file.
- For the highest possible quality, especially if you think you might do more editing later, save your merged file in a lossless format like WAV or AIFF. These formats keep all the original audio data intact.
- If you need a smaller file for sharing online, sending in an email, or just saving space, a high-bitrate MP3 (aim for 320kbps) or an AAC file is an excellent choice. You get a great balance of quality and size.
While merging audio is a specific skill, macOS offers a broad spectrum of integrated tools for enhancing your productivity with sound. For more ways to master audio capabilities on your Mac, including professional dictation tips, consider exploring how to leverage dictation on macOS effectively.
For even more answers to your technical questions, you can always check our comprehensive FAQs.
Ready to manage your files like a pro? Compresto helps you shrink video, image, and document sizes without sacrificing quality, supercharging your workflow. Get started with Compresto today!